


In the case of baseboard installation, the problem of whether to use glue or nails is something that both homeowners and professionals encounter very often. Each method has its pros and cons, but the right method will depend on the trim type, the surface, and your specific project requirements. If you know the best installation technique and adhesive options, it doesn’t matter if you are working with traditional wood trim, vinyl baseboards, or any other material; the durability and appearance of your work will be greatly affected. This article will examine the advantages and disadvantages of glue versus nails, and present the most effective adhesives for securing trim and vinyl baseboards with confidence and precision. Keep reading to choose wisely and to make sure that your next baseboard project will be successful!
Understanding Baseboards and Their Importance
What is a Baseboard?
A baseboard is simply a decorative trim or molding placed at the bottom of an interior wall near the floor. This particular element is significant in the overall interior scheme of the building as it serves both practical and aesthetic purposes. The primary purpose of baseboards is to cover the wall-to-wall and floor-to-floor joints, hiding any imperfections and inconsistencies, such as gaps or uneven edges. Baseboards also provide a neat and smooth transition between the two surfaces while at the same time protecting the walls from the damage that might be caused by the use of tools, movement of furniture, or the daily flow of people.
Baseboards do more than just enhance the room’s decor; they also improve the room’s functionality as they keep the wall clean and intact. Scuff marks, scratches, and other forms of wear that accumulate over time mainly in high-traffic areas are prevented by them. They can also be designed in such a way that they can accommodate wires or cables which are then kept organized and hidden thus creating a safer and more visually pleasing environment.
Apart from the above, baseboards are also one of the most important elements that add character and style to a room. They might be made out of different materials, come in various sizes and profiles to cater to the diverse design preferences ranging from modern minimalism to classical elegance. Baseboards that match the color of the room and the architectural details can play a big role in making a room look cohesive and done up.
Types of Baseboards: Wood, Vinyl, and More
Wood Baseboards
Wood baseboards are ‘the go-to’ option because of their timelessness and versatility. They can be found in the form of solid wood or medium-density fiberboard (MDF), which is a cheaper alternative. Solid wood baseboards made from pine, oak, or maple are extremely durable, can be painted or stained thereby customize, and are more expensive than MDF ones. On the other hand, MDF baseboards are smooth, of uniform texture, and good only for painted finishes. Nevertheless, wood baseboards, particularly solid wood, need persistent care as they tend to react to moisture by warping and thus losing their shape over time.
Vinyl Baseboards
Vinyl baseboards have a reputation for lasting long and resisting water, which makes them the best choice for bathrooms, kitchens, and basements. Generally, these baseboards are lightweight and very easy to install. They are also very durable, which means they can stand the test of scratches and dents. Besides, they come in many different colors and styles which means that they can easily be matched with the décor of any room. The downside is that they do not have the natural beauty of wood but their practicality makes them a good choice for areas with high foot traffic or that are prone to moisture.
Other Materials
Besides wood and vinyl, there exist baseboards of other materials that meet particular needs and desires. For instance, metal baseboards are elegant and contemporary and are a great application in modern design environments. Plastic or PVC baseboards are cheap and water-resistant like vinyl but may offer fewer options in terms of design. Composite materials, which consist of a mixture of wood fibers and plastic, are long-lasting and aesthetically versatile. Every material has its own peculiar advantages, hence, homeowners can be able to choose the one that fits their interior and functional needs the best.
Benefits of Installing Baseboard Trim
Baseboard trim not only serves as a decoration but also as a protector and so it is one of the most important features in the house. First, it protects the walls from being damaged by furniture, footsteps, or cleaning devices. Second, it conceals the gap between the floor and the wall thus providing a neat look in the room. The use of this simple practical method can enhance the life span of your walls and floors while cutting down on maintenance costs in the long run.
Baseboard trim, in the first place, dropped out its aesthetic aspect, as it was even the main reason for the installation of baseboards in the initial stage. The year-round visual appeal of the trim is already projected by the enhanced overall design of the space. The different materials, styles, and finishes available for baseboard trims allow the decorator to use them with a wide range of decor not to mention from modern to traditional. Homeowners have the option to select a trim style that is most appropriate for their personality while at the same time keeping the same level of compatibility with other elements in the room may include as the flooring or cabinetry.
In addition, the trim can really add up to the value of the house. The quality of installation as well as the design can be such that they speak the language of detail and craftsmanship that many buyers would appreciate. By protecting the wall, the baseboard trim not only enhances the aesthetic side of the house but also protects the current and future occupants.
Choosing Between Glue and Nails for Baseboard Installation
Advantages of Using Glue
One of the main advantages of glue over the traditional method of nailing is that the installation is cleaner and less labor-intensive. In fact, glue and nails each have their pluses and minuses, but gluing does offer a stronger adhesion that will hold firmly in place the baseboard without the necessity of creating holes and applying a hammer. This way, even if the walls are made of delicate materials, the risk of damage is significantly reduced since the maker of the holes (nail) is being eliminated.
Another thing going for glue is that it maintains a pure and flawless finish. The absence of adhering nails means no holes to be filled or covered, thus no finishing work would be needed. This can result in a look that is both professional and elegant, and it is achieved in less time and with fewer efforts than the case of nail methods. In fact, glue is a prime choice for applications in work areas with limited space or where precision is paramount.
The last point in support of glue is that it makes the process of fixing baseboards quieter and less intrusive as compared to the nailing method. The absence of hammering and drilling noise makes glue an ideal method for projects in occupied homes or during the hours when noise is to be kept to a minimum. One, however, needs to ensure that the surface to which the glue is to be applied is clean and dry in order to get the best results.
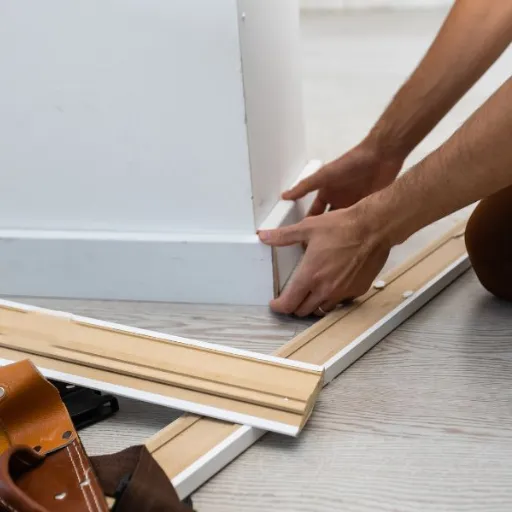
When to Use Nails for Installation
In case durability and long-term stability are the primary concerns, applying nails for baseboard installation would be the preferred method most of the time. The nails are strong and capable of forming mechanical bonds that will not be easily broken even after a long time; this makes them perfect for areas with heavy traffic or spots frequently affected by baseboard movement or forces, e.g., where furniture is often shifted or the walls get bumped against. Moreover, it is better to use nails when attaching baseboards to uneven or textured walls as they can better adjust the fit of the boards against the surface compared to glue.
Another plus of nails is that they are the best option for situations where the baseboards might need to be taken out or replaced in the future. Detaching nails does not entail inflicting much damage to the wall or baseboard, so nails are a good option for spaces that may require adaptations or renovations later on. This flexibility is especially handy in rentals or in homes where styles and layouts change over time.
Again, for certain materials nails are necessary, e.g., heavier wood baseboards that cannot be held well with glue only. Above that, for the DIY enthusiasts or professional projects done in varying environmental conditions, nails offer a secure and reliable attachment, irrespective of humidity or temperature changes. Even though it requires tools like a nail gun or hammer, the accuracy and lasting effect of nails make them suitable for many baseboard installation scenarios.
Durability Comparison: Glue vs. Nails
In the comparison of the durability of glue and nails, it is hard to determine precisely which option is to be preferred since they both are good in their respective situations. The use of nails provides a mechanical bond, hence, nails are considered to be a good and reliable option for the prolonged securing of baseboards to walls even in places where temperature and humidity vary greatly. This method is necessary especially for heavy baseboards or when the surface is uneven or difficult to attach.
However, the glue makes a chemical bond that can be extremely strong if a high-quality adhesive is applied, and also if the surfaces are clean, smooth, and properly prepared. Glue works wonders for lightweight baseboards or when a clean, seamless finish with no visible marks left by nails is required. On the contrary, there are times when glued baseboards might lose their grip in places where environmental conditions (e.g., high humidity) lead to weakening the adhesive or to shortening its life span.
In the end, the decision of whether to use glue or nails depends on the specification of the project requirements. To achieve the longest-lasting and finest results often comes the suggestion to combine both ways—nails are used to give support and glue is applied to enhance stability and to keep it from moving over the period. This way even if the environmental factors have their say, it is ensured that the baseboards are still secured, durable, and good-looking.
Best Adhesives for Installing Baseboard
Top Adhesive Options for Wood Baseboard
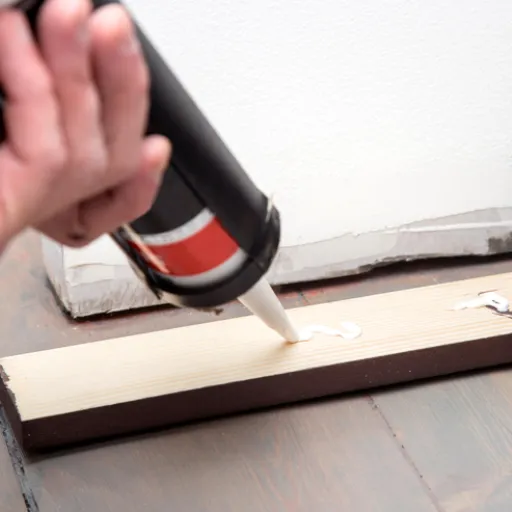
A durable adhesive that is also easy to use should be the top priority when making a choice for wood baseboard installation. The effect of the adhesives that are prepared for woodworking or construction in different ways provides a strong bond and a stable foundation. Expect the adhesives to work well on porous surfaces since some of the adhesive is absorbed by the wood, thus, a secure attachment is assured.
Heavy-duty construction adhesives or wood glues will be the most common types of adhesives used for this particular application. They are made to endure environmental conditions like humidity and temperature changes that may lead to wood expansion or contraction. These adhesives can be very effective if the surfaces are clean and dry, basically, they will give the longest bond if applied properly.
To gain the best results, it is advisable to make sure that both the baseboard and the wall surface are prepared in the right way. Clean off any dust, debris, or grease before applying adhesive. Clamps or temporary supports can be used to keep the baseboard in position while the adhesive cures. This practice of proper adhesive selection along with surface preparation will truly guarantee strong and stable baseboard installation.
Best Glue for Vinyl Baseboard Installation
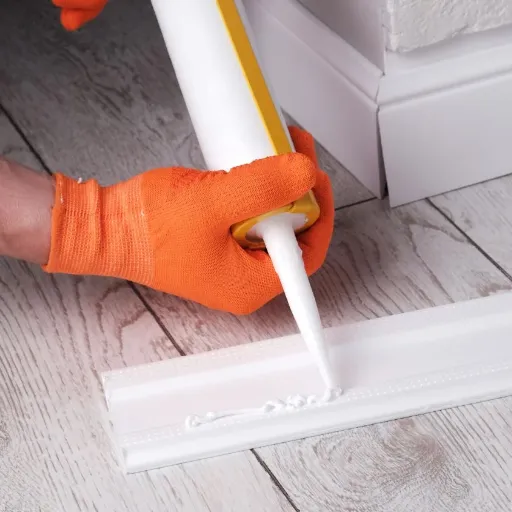
It is really very important to select the right glue for vinyl baseboard installation adhesives which have specific features such as being made for vinyl and having strong bond capabilities. Find a product that has been labeled as a strong construction adhesive or one that has been specialized for vinyl materials. These kinds of adhesives are able to deliver both durability and flexibility, thus the baseboards would not get unglued even when they tolerate the material’s slight movements or shifts over time.
The adhesive’s compatibility with both the vinyl baseboard and the wall surface is quite a significant issue to contemplate. Make sure that the glue works excellently with the wall material, be it drywall, plaster, or wood, depending on your specific wall type. Moreover, many of the adhesives suitable for vinyl are quite versatile and hence can bond to a wide variety of surfaces which makes them perfect for this use. Also, it is recommended to use an adhesive with a fast bonding time in order to cut down on the need for extended clamping or support during the installation process.
Moreover, it is advised to pay close attention to the manufacturer’s instructions as they have the most important information for the best results before applying the glue. The adhesive should be applied uniformly on the back of the baseboard with particular emphasis on the areas that will directly touch the wall. If necessary, continuously press the baseboard down into position and use clamps or temporary supports. Correct product choices and application will give a very long-lasting and professional finish to your vinyl baseboard installation.
Construction Adhesives: When to Use Them
Construction adhesives are mainly for the bond between the materials, which is strong and durable. They are adaptable and can be applied to a wide range of surfaces like wood, metal, concrete, and plastics. Thus, they are perfect for flooring, paneling, and baseboard installations, where probably mechanical fasteners would not be appropriate or effective. Among all adhesive types, construction adhesive is praised for its flexibility, which culminates in the reduction or complete elimination of the use of nails and screws, thereby giving the project a neater look.
These adhesives are of great importance in applications where the combination of structural strength and protection against environmental factors such as moisture and temperature changes is needed. They are likely to be used in kitchens, bathrooms, and outdoors as the most reliable fastening method in cases where humidity, heat, or cold might otherwise spoil the traditional fixing method. More so, construction adhesives are helpful in cases of the irregularities of the surfaces being joined as well as the filling of gaps, thus leading to the formation of strong and even bonds between the materials.
In deciding whether to use construction adhesive, think about the materials, the environment, and the project type. Heavy loads or final installations such as the hanging of drywall or the repair of the subfloor often depend on construction adhesive for their long-lasting nature. Whereas temporary installations might not require such an everlasting solution. Always to get the best bonding and safety, use the manufacturer’s recommendations for use as your guide.
Application Techniques for Baseboard Adhesives
Preparing the Surface for Adhesive
Proper surface preparation plays a crucial role in the bonding of baseboard adhesive. Here are the steps that need to be followed for effective surface preparation:
- Clean the Surface: Dirt, dust, grease, and other debris can actually weaken the adhesive bond. So, first of all, with the help of a damp cloth or a mild cleaning solution, very carefully clean the surface. After cleaning, let the surface dry completely before moving on to the adhesive application, since moisture can negatively affect the adhesion.
- Smooth the Area: Put your hands on the surface and feel for any bumps, cracks, or flaws. With fine-grit sandpaper, gently rub off any rough areas or abnormalities. This will leave an even, smooth area for the adhesive, making it hold better and spread out nicely.
- Remove Old Adhesive or Paint: It must be ensured that any old adhesive, paint, or caulk residue is completely gone from the surface. For tough spots, employ a scraper or adhesive remover. Construction experts say that if the leftover material is not properly removed, it can reduce the effectiveness of the new adhesive by as much as 30%.
- Measure and Mark: Before the adhesive is applied, measuring and marking the areas where the baseboard is going to be placed is necessary. This helps in precise application and less chance of misalignment. As per professionals’ estimations, correct marking can bring down installation errors by almost 25%.
- Prime the Surface (if necessary): Porous wood or some kinds of drywall require priming before applying adhesive. A primer prepares a non-porous surface that is ideal for bonding since it is sealed. The manufacturer’s adhesive guidelines are to be checked to find out if a primer is recommended for your particular project.
Pro Tip: A well-prepared surface means that the performance and the life span of the adhesive are going to be increased. In fact, it is reported that proper preparation can strengthen the adhesive by more than 40%, thereby making this step indispensable for a successful installation.
Applying Adhesive: Step-by-Step Guide
- Choose the Right Adhesive:
Start by picking an adhesive that matches your project. When it comes to baseboard installation, construction adhesives such as Loctite Glue or Gorilla Heavy Duty Construction Adhesive are recommended because of their strength. Industry reviewers say that these adhesives will stick tightly to all kinds of surfaces like drywall, wood, and brick, and so they will last for a long time. - Prepare the Surface:
The wall and back of the baseboard should be clean, dry, and free from dust and dirt. The adhesive performance is higher on a smooth and properly prepared surface. It is highly recommended that you lightly sand the back of the baseboard, then clean it with a damp cloth for maximum adhesion. - Apply the Adhesive:
With a caulking gun, apply a line of adhesive continuously on the back of the baseboard. For the strongest bond, it is better to apply the adhesive in an “S” or zigzag pattern rather than straight lines, as recommended by the manufacturers. Studies show that this method enlarges the area covered by the adhesive, thus creating a stronger grip. - Position the Baseboard:
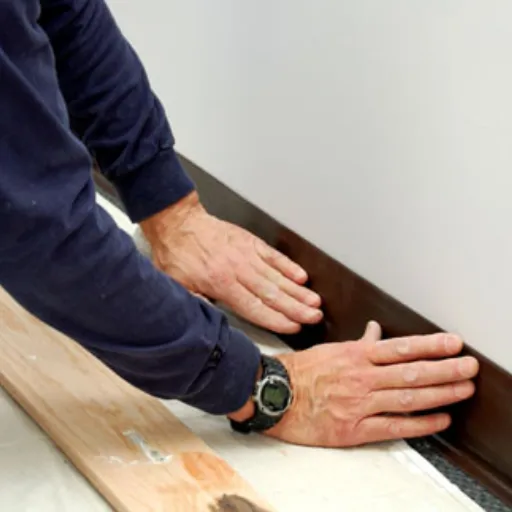
Firmly push the baseboard against the wall. If you can, get someone to help you hold it in place. Make sure that the baseboard is in the right position before the adhesive hardens since most construction adhesives have a window of 5-10 minutes for making adjustments. To check that the baseboard is not tilted or installed unevenly, use a level. - Secure Temporarily with Nails or Tape:
After doing that, while the adhesive dries up, you can finish off with either finishing nails or painter’s tape. The nails offer extra stability but be careful not to drive them in too hard as this may cause damage to the baseboard. For painter’s tape, apply it every 6-12 inches around the baseboard to distribute the pressure evenly. - Allow Proper Curing Time:
Most baseboard glues take 24-48 hours to cure completely based on the environmental conditions such as humidity and temperature. During this period, do not stress or put pressure on the bond to make it strong and lasting. The recommendations of the manufacturers may differ, so always refer to the adhesive’s curing specifications for the right time. - Finish and Touch Up:
After the adhesive has set, take off any visible excess with a utility knife or a damp cloth. Seal cracks or fill nail holes with caulk, sand, and paint the baseboard for a professional, upscale finish.
Applying adhesive methods for the installation of baseboards, these steps and tips will ensure a strong, durable, and professional result.
Tips for Achieving a Strong Bond
- Choose the Right Adhesive: You should know that not all adhesive types perform equally. Therefore, when it comes to choosing a glue for installing baseboards, opt for durable heavy-duty construction adhesives that are made for wood, MDF, or any other baseboard material.
- Prepare the Surface: Clean the wall and the back of the baseboard, make them both dry, and remove all dust and dirt. Adhesives form a better bond with clean, smooth surfaces. If there is new paint on the wall, let the paint dry completely before applying the adhesive.
- Apply the Adhesive Correctly: Always use the manufacturer’s directions for the application. A zigzag or bead pattern along the back of the baseboard is generally recommended for even distribution. For even stronger bonding, apply adhesive dots along critical areas, particularly on uneven surfaces.
- Allow Proper Curing Time: Curing times are different and can depend on the type of adhesive, temperature, and humidity. Be sure to read the specifications very carefully and thoroughly. For most construction adhesives, that means 12 to 24 hours for a really strong bond, and sometimes, it can take up to a week for the entire process of curing.
- Use Temporary Supports: During the setting time of the adhesive, hold the baseboard with painter’s tape or clamps which will apply pressure and that will prevent the baseboard from moving so that there will be no change between the wall and the baseboard.
- Account for Environmental Conditions: Adhesive performance can be influenced by temperature and humidity. Most adhesives used for baseboard are very effective in the temperature range of 40°F to 90°F (5°C to 32°C). Therefore, do not apply adhesives in extremely humid or cold conditions as this will not give you the desired bonding strength.
You can have strong and permanent bonds of your baseboards if you observe these tips and select the proper adhesive according to the needs of your project.
Common Issues and Troubleshooting
Dealing with Gaps in Baseboard Installation
The installation of baseboards is not without problems, as one of the most frequent problems encountered is the occurrence of gaps which may be caused by uneven walls, wrong dimensions, and fluctuations in humidity and temperature. Nevertheless, the necessity of dealing with these gaps cannot be overstated when it comes to giving your project that polished and professional look.
The first thing to do is to determine the size and reason for the gaps. For the case of small gaps, caulking becomes the ideal solution. Along the baseboard edges, apply a paintable acrylic caulk and then use a caulking tool or your finger to smooth it out. Once it has dried, paint the caulk with the same color as the baseboard and wall to achieve the seamless look. This method is effective in the case of gaps that have resulted from only slight irregularities in the walls or during the installation.
In the case of larger gaps, you might resort to using a quarter-round or a shoe molding to cover the space. Molding can be attached using nails or adhesive, being careful to ensure that it is flush with both the baseboard and the floor. However, if the problem is very significant wall unevenness, then you will have to remove the baseboard, level the wall surface, and reinstall it with necessary adjustments. Following these steps will not only guarantee cleanliness and professionalism in appearance but also good bonding with the baseboards for a longer period.
How to Fix Loose or Failing Adhesive
In case the adhesive on baseboards or moldings has become loose or failed, first of all, take the affected piece off gently so as not to damage the wall or the baseboard itself. A putty knife or similar tool can be used to pry the molding away starting at one end and working slowly across it. The wall surface and the back of the molding should be cleaned to remove all the old adhesive, dust, or debris that might prevent proper bonding.
Next, a new layer of high-quality adhesive should be applied to the back of the molding or baseboard. The distribution of the adhesive should be done evenly, especially along the edges and center, in order to create a strong and uniform hold. The molding should then be positioned back onto the wall, aligning it carefully with the adjacent pieces, and pressing firmly to make sure it will stick. Use a level to check alignment if needed so as not to lose a professional appearance.
In case of need, adhesion can be reinforced by temporarily securing the molding with nails, clamps, or painter’s tape while the adhesive is curing. Allow the adhesive enough time to cure completely according to the manufacturer’s instructions. Once the adhesive has dried, inspect the areas for any gaps or rough places and fill them with caulk or another suitable filler for a flawless finish. If you follow these steps, you will renew the strong and lasting bond, plus the baseboards or moldings will have a clean and polished look.
Using Caulk for a Seamless Finish
Caulk is a must-have when it comes to a smooth, professional finish of joints, gaps, and seams around baseboards and moldings. The proper use of caulk starts with a thorough cleaning of the area to be caulked. The cleaning should be so perfect that the dust and debris are completely cleared. The surface to which the caulk is applied needs to be immaculate so that the caulk sticks well and there will be no cracks or peeling of the caulk over time. The surface is now ready for caulking; use painter’s tape to mask off the edges of the joint, thus creating clean edges, and also to protect the adjacent areas from being contaminated with too much caulk.
Then, caulk the seam in one continuous motion by snipping the end of the caulk tube at a 45-degree angle. Keep the tube at a consistent angle and apply gentle pressure, thus filling the gap uniformly. With a caulk smoothing tool or your finger, gently push down the caulk to smooth it out and also for an invisible finish discard the excess material. Control and time for adjustments before the caulk starts to set are maintained by working in small sections.
When done, take off the painter’s tape gently before the caulk is dry to prevent the seal from being disturbed. Let the caulk be cured totally for the time stated in the product instructions as the recommended time. A well-cured caulk will produce a connection that is durable, seamless, and attractive both to the eye and to the working aspect of one’s project. Don’t just take our word for it, see for yourself: if you follow these steps you will have a polished and long-lasting result.
Frequently Asked Questions (FAQ)
Q: What is baseboard glue and what is it used for?
A: Baseboard glue is an adhesive that is also called base adhesive. The application of this glue is very specific because it is primarily used for the fixation of baseboard moldings and trims to walls. It creates a durable bond that not only secures the base molding but also facilitates a neat finish in DIY projects.
Q: Can I use polyurethane glue for installing baseboard molding?
A: Polyurethane glue is suitable for the installation of baseboard molding. Its characteristic of flexibility combined with high bonding strength makes it a versatile glue for different materials. What you need to take care of is that the surfaces are clean and dry so that the adhesive can work best.
Q: What is the difference between base adhesive and trim glue?
A: The base adhesive is the one used specifically for attaching baseboard and cove moldings, on the other hand, trim glue is a term used more generically for different types of trim, including crown molding and chair rails. Both help to make your home improvement projects more long-lasting.
Q: How do I apply wall base adhesive effectively?
A: To apply wall base adhesive most effectively, first, clean the surfaces where the base molding is going to be attached. Next, put a uniform lump of the adhesive on the rear side of the baseboard, and afterward press it against the wall very firmly, taking care that it is parallel to the outside corners or seams.
Q: Is it necessary to use a nailer when installing base molding?
A: A nailer is not an absolute requirement for base molding installation; however, using it can be of great help along with baseboard glue. The use of a nail gun will not only place the molding accurately while the glue is drying but also make it a very close fit.
Q: What type of glue is best for laminate base molding?
A: Laminate base molding is to be partnered with either a premium quality base adhesive or a cove adhesive that has been specially formulated. These adhesives are engineered so that they can create a stronghold even with laminate materials which means that the bond would be durable.
Q: How do I prevent gaps when using adhesive for base molding?
A: The best way to avoid spaces when applying adhesive for base molding is to be sure that the surfaces are properly aligned prior to the setting of the adhesive. Applying pressure throughout the length of the molding, especially in corners, will lead to a perfect fit and no gaps left.
Q: What should I consider when choosing a cove base adhesive?
A: The first thing to consider while selecting a cove base adhesive is the nature of your cove molding and the surface where it will be applied. Find a flexible adhesive with strong initial tack and interior application that can cope with the conditions of your space as the most desirable adhesive.
References
- Home Depot – Glue for Baseboards – Offers a variety of glue products suitable for baseboard installation.
- DoItYourself.com – Best Glue for Vinyl Baseboards – Discusses vinyl cove adhesive and other options for securing vinyl baseboards.
- Windsor Plywood – Titebond Wood Moulding & Trim Glue – Features a fast-drying glue ideal for porous and semi-porous materials like wood trim and baseboards.
- DIY Chatroom – Best Glue for Trim – Provides insights on using Titebond II wood glue and other adhesives for trim work.
- Facebook Group – Woodworking for Beginners – A community discussion on using glue for baseboards and trim, including application tips.


