


When it is a matter of plastic material repairs or creations, the use of an appropriate adhesive is a must. Common glues rarely deliver, and they cannot give a strong and long-lasting bond. Epoxy glue is one of the options used—an ultra-fine adhesive that has great strength as one of its properties and the best versatility as another. It doesn’t matter if you are doing a difficult DIY project, fixing plastic pieces, or dealing with an industrial application; the best epoxy glues have been made to couple plastic together and still be durable over time. This article will be a journey through the uniqueness of epoxy resin, how to pick the perfect product for your needs, and tips for getting the bond just right. Get set to access the entire range of supplies that epoxy glue has to offer and make your plastic projects fly high!
The Importance of Choosing the Right Epoxy for Plastic
Choosing Adhesives Wisely
The most appropriate epoxy adhesive for plastic selection is a must-do if you seek an effective and long-lasting bond. Plastics are of many kinds: polyethylene, polypropylene, ABS, and PVC – each among which is different when it comes to properties that influence adhesion. For instance, some plastics possess low surface energy making it more difficult to adhere unless specially formed epoxies are used. Knowing which plastic you are dealing with is the most fundamental step in the process of selecting the right adhesive.
Then, think about the project’s requirements such as bond strength, environmental factor resistance, and curing time. For projects requiring the highest durability, an epoxy meant for everlasting results and resistance to the elements of moisture, heat, or chemicals should be selected. For situations where quick results are required, quick-curing epoxies might be more appropriate, but they may not always have the same strength as the slower-curing ones.
Last but not least, correct surface preparation plays a vital part in bonding success. Cleaning the plastic surface so that it is free of dirt, grease, or oils will make sure that the epoxy will stick well. Some plastics could use a little bit of sanding to make the surface rougher which in turn would be expected to improve the bonding strength. If you invest the time in preparing your materials and choose an epoxy adhesive that suits your project’s needs, you will achieve the best results possible.
Wrong Adhesive Choices and Their Consequences
In general, the wrong adhesive choice for your project comes with different problems that can jeopardize the bond’s strength and reliability. The primary consequence is bond failure in which the adhesive might not be able to support the materials together efficiently during and after the stress application. The end of this may be the separation of parts which would render the product unusable or unsafe.
The selection of incorrect adhesive materials can also result in damage to the parts that are being glued together. For example, when the glues are the surfaces’ chemical incompatibility, it may result in coloration changes, dimension alterations, and deterioration of the materials. Also, in some cases, the wrong adhesive might not dry out completely thus leaving a weak bond or a sticky spot which could be detrimental to the materials or require a lengthy clean-up and restoration process.
Moreover, the use of the wrong adhesive could prolong the time and increase the costs of your project. When the bond fails, it could mean that the entire process has to be redone, which will include the purchase of new materials and supplies, all of which can be both costly and annoying. On the contrary, taking the right adhesive from the very beginning, doing the required preparation and matching the adhesive’s characteristics to your specific needs can not only help you avoid these expensive errors but also give you successful outcomes.
Overview of Plastic Types
Plastics are diverse materials that are usually classified into two main branches: thermoplastics and thermosetting plastics. Among the thermoplastics, polyethylene and polypropylene are prominent examples, as they can be melted and reshaped repeatedly without any loss of their original properties. Hence, they find extensive use in packaging, automobile parts, and domestic articles due to their adaptability and recycling potential.
The opposite side of this material spectrum is occupied by thermosetting plastics, whose rigidity is achieved through curing, as in the case of epoxy and phenolic resins, which cannot be remolded once set. Such plastics are rated very high in durability and temperature resistance, which makes them an obvious choice for electrical components, adhesives, and coatings where performance over time is critical.
Knowledge of these plastic types and their properties is important when it comes to adhesive selection. Thermoplastics usually get along better with those adhesives that are flexible even after curing so that they can easily accommodate the plastic’s potential for being reshaped repeatedly. On the other hand, thermosetting plastics might require more rigid adhesive solutions that will not only match but also enhance the strength and structural integrity of the plastic. By identifying the specific type of plastic carefully, users can select adhesives that will maximize the performance and avoid the risk of bonding failures.
Types of Epoxy Glue for Plastic
General-Purpose Epoxy
The general-purpose epoxy adhesive is characterized by its high versatility, and it is mainly used for bonding an extensive range of plastics. The chemical reaction of its two-component mixture of resin and hardener leads to the formation of a durable and strong bond in the end. Not only the plastics of different kinds (rigid, soft) are bonded successfully, but also the flexibility of this epoxy offers the possibility to consider it for various general applications requiring dependability.
In the case of applying general-purpose epoxy on plastic, surface cleaning has to be done for perfect results. Once the surface is cleaned of all possible contaminants, the plastic will be ready for adhesive application. Sanding will also help if the problem is with the bonding, as it will create an area with roughness where the epoxy can hold on tightly. These very straightforward and quick preparation stages can almost double the strength of the joint.
General-purpose epoxy is very strong and useful in most cases, but there might be problems with its application on low surface energy plastics like polyethylene or polypropylene. Specialized adhesives or surface treatments may be needed to achieve a reliable bond with those plastics. Thus, it is very important to know the exact properties of the plastic in question to determine if general-purpose epoxy is the right choice.
Specialized Epoxy Formulations
Specialized epoxy formulations are developed with a specific focus on bonding difficulties and thus have superior performance features in comparison to general-purpose epoxies. These formulations can be specially tuned to bond various materials; even the hardest-to-bond plastics, metals, and composites. They frequently comprise additives or modified resin systems to improve properties like flexibility, chemical resistance, or temperature resistance, thus making them suitable for demanding applications.
Specialized epoxies for low surface energy plastics such as polyethylene and polypropylene may contain adhesion promoters or may need pre-treatment of the surface by flame treatment, plasma treatment, or the use of primers. Such procedures markedly improve the adhesive’s bonding strength, which gives a strong and permanent hold even when the substrates are difficult. It is very important to stick to the adhesive manufacturer’s surface preparation instructions to get the best results.
Moreover, some specialized epoxies are custom-made for high-stress or high-temperature environments. For example, structural epoxies used in the aircraft or automotive industries must endure the most extreme conditions without losing their properties. These epoxies can have advanced formulations for thermal stability, vibration resistance, and the ability to last in harsh environments. Selecting the right epoxy formulation is based on understanding the requirements of the application and the physical properties of the materials involved.
2-Part Epoxy vs. Single-Part Epoxy
The main difference between 2-part epoxy and single-part epoxy is their composition and the way they are cured. The chemical composition of 2-part epoxy is a resin and a hardener to be mixed and applied together. The mixture produces a chemical reaction which allows the epoxy to cure and harden subsequently providing excellent strength and durability as a result. On the contrary, single-part epoxy has been mixed beforehand and only needs heat or certain conditions to be cured making it more user-friendly in some applications.
2-part epoxy is perfect for demanding environments where high strength, chemical resistance, and customization are the main considerations. Because of its mix-to-activate nature, it gives better control over curing time and can adapt to different conditions so that it can be used in various industries including aerospace, construction, and marine. Nevertheless, its application process can be more time-consuming and it needs precision during mixing and application.
Single-part epoxy is usually the choice for applications that are simpler and of which ease of use and fast curing times are critical. Its pre-mixed state gets rid of the manual setup thus lowering the margin for error. As a result, it becomes quite a popular option for certain manufacturing processes or repairs that require less demanding performance standards. However, it might not offer the same durability, strength, and adaptability as 2-part epoxy in extreme conditions. The decision between the two options depends on the project-specific requirements as well as performance demands, working environment, and available resources.
Key Factors to Consider when Selecting Epoxy for Plastic
Flexibility and Durability
One of the most important factors when it comes to epoxy for plastics is flexibility and durability. Flexibility means that the epoxy will be able to endure movements, vibrations, or changes in shape so that it will not crack or fail. This is especially true in the case of a material being subjected to stress or heat in which case a more flexible epoxy would be the best choice for bonding those types of plastics that are likely to undergo expansion, contraction, or bending during the course of time.
On the other hand, durability is the term used to describe the epoxy’s wear resistance, environmental conditions, and long-term use. A durable epoxy should be able to withstand exposure to moisture, UV radiation, and temperature changes without breaking down. If the plastic is going to be used outdoors or in areas with high stress, especially, then it is wise to use an epoxy that does not lose its bond strength and integrity under such demanding conditions.
At the end of the day, the right epoxy for your project will depend on your project specifications. If flexibility is a highly needed trait then go for an epoxy that can withstand most stress and movement. If you are more concerned about the longevity of the bond then choose an epoxy that is recognized for its durability even when subjected to harsh conditions. Taking these factors into account will help you get a strong and smooth bond just right for your needs.
Curing Time and Temperature Resistance
The curing time of an epoxy refers to the period necessary for an adhesive to harden fully and attain maximum strength. Depending on its type and the ambient conditions, curing time might go from mere minutes to hours or even days. Epoxies that cure quickly give out good glue for snap fast projects, whereas long curing equates to strength and durability in epoxies. The curing process has to be carried out as instructed.
On the other hand, temperature plays a critical role in curing. Epoxies would mostly reach their optimum level when cured at room temperature; a few can stand high temperatures during and after curing. The higher temperature during the curing process would indeed hasten the cure and improve the strength and heat resistance of the epoxy. At the same time, freezing temperatures might slow the cure or stop it completely, so it would be best to work within the recommended range.
Moreover, many epoxies develop very good temperature resistance once fully cured, thereby providing them with the ability to withstand an array of conditions to varying degrees. Some epoxies are capable of handling temperatures in excess of 200°F (93°C) without compromising on the strength of the epoxy, for instance, in places where heat poses some sort of threat. The epoxy must be very carefully chosen from the point of having curing and temperature resisting ability, so the bonding conditions of your particular project can be applied suitably.
Water and Chemical Resistance
Adhesive materials are far beyond the little things of the moldy attic. Epoxy assumes waterproof quality after curing completely, thus rendering it capable of being an area simply exposed to moisture or water. Useful in sealing, coating, or gluing applications where damp conditions are expected, it blocks water intrusion and surface degradation due to extended exposure to moisture.
While detergents and water are resistant, one could say an epoxy has an unusual resistance to several chemicals. Industrial epoxies, for example, have to resist corrosive substances against acids or alkalis, or else solvents. Hence, they may be employed in chemical processing plants, laboratories, or anywhere else where exposure to potential damage commonly occurs. Since the degree of resistance also might depend on the epoxy formulation, the decision should be made to correlate the type of epoxy being used with that of the operation required.
Hopefully, this will help bring out the best epoxy application for water and chemical resistance. It means preparation has to be made right. The surfaces should then be clean, and the curing has to be done completely for an epoxy to work as a full blanket against any harm. For either highly aggressive duty or reactive paths, special formulations may be required. Therefore analyze the details of the project before committing to a product.
Step-by-Step Application Instructions for Epoxy Glue
Preparing the Surface
Preparing the surface correctly is critical for the glue drying and longevity phases. Here is a detailed procedure for preparing the surface:
- Clean the Surface Thoroughly: All surfaces that will be glued against must be free of dirt, grease, lubricants, or contaminants. Use a degreaser or a cleaning solution like isopropyl alcohol for cleansing oil and grease. Water-type cleaners should be avoided, as they could leave chemicals behind-interfering with adhesion.
- Strip Old Coatings and Debris: Any paint on surfaces, coatings, or adhesives must be stripped away. Use very light sanding with fine-grit sandpaper, 120-180 grit being appropriate, to reveal a clean, bare surface.
- Dry Completely: Moisture affects bonding adversely. Make sure the surface is dry before epoxy application. Testing proved that epoxy bonding becomes skeletal even with small amounts of moisture, more so on wood and metal.
- Roughen the Smooth Surface: When facing smooth materials such as metal, plastic, or glass, sandpaper or a wire brush can come in handy to provide a slight roughening of these surfaces. This considerably increases the surface area and hence provides the epoxy with more grip. Researches prove that creating a surface profile with a depth of between 0.5 and 1.5 mils (0.013 and 0.038 mm) leads to a marked improvement in adhesion.
- Dust Removal: All dust particles must be removed after sanding. Use compressed air or cloths that are clean and dry cloths. Dust left behind will act as an intermediate layer between the epoxy and the opposite surface.
- Temperature: Application area and surfaces must be in optimum working temperatures (usually in between 60°F-80°F or 15°C-27°C, depending on the epoxy). Temperatures outside this range will affect the rate of cure and strength of the epoxy.
Surface preparation goes a long way in supporting deep and permanent bonding. Hence, such an epoxy should be used as required in a variety of applications.
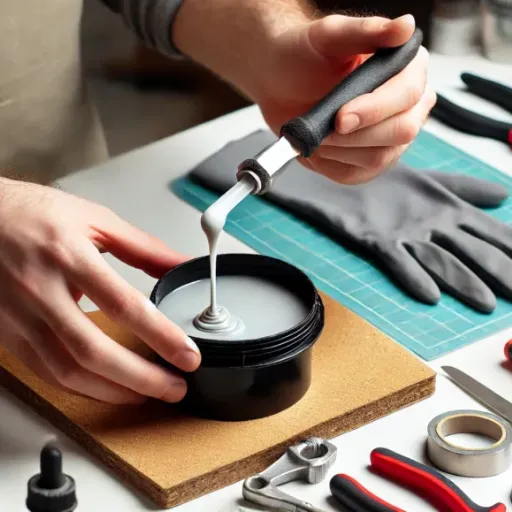
Epoxy Mixing Properly
For the strength and durability of the bond, proper mixing of the epoxy becomes very important. Begin by reading the manufacturer’s instructions on the epoxy packaging since each type may differ in its proper mixing treatments and ratios. Usually, each two-part epoxy consists of resin and hardener that must be mixed in a precise ratio, such as by measure (volume or weight of resin to hardener), like 1:1 or 2:1. At the time of amalgamation, make sure never to contaminate it by using clean containers and tools.
Begin by pouring the resin and hardener into the mixing container based on the correct ratio. Stir very thoroughly but in a gentle manner, keeping air bubbles from entering the mixture. While carrying out the mixing, the sides and bottom of the container should be scraped several times to totally incorporate the components; incomplete mixing leads to weak spots or improper. Monitor the working time or pot life of the epoxy, which is how long the mixture may be worked with before it starts to harden.
As soon as the mixture is combined, it should be applied to the surface being prepared, using the correct tool or applicator. It should never be delayed because the epoxy will start its curing process and might lose its adhesive properties if applied after the pot life is over. Remember: an improper mix equals a very poor bond with compromised strength and durability, so it is best never to skip these steps.
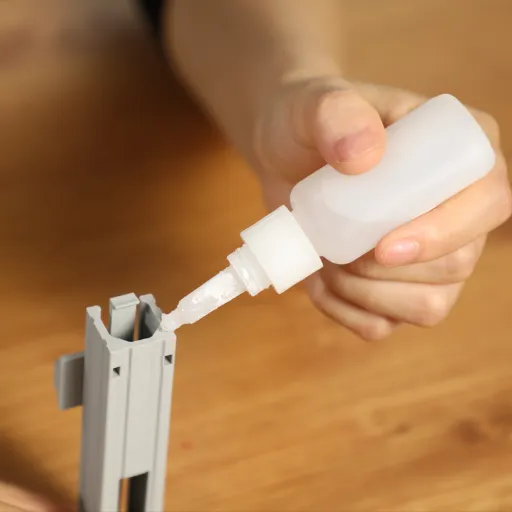
Applying the Adhesive and Curing
Once the adhesive has been mixed, it is important to immediately apply it on the prepared surface. Having even strokes insures that the mixture is fully spread across the bonding area, granting a strong and uniform bond. A brush, spatula, or syringe may be required to control the application precisely, depending on what you are doing. Always follow the manufacturer’s guidelines for correct application methods and thicknesses.
After the adhesive has been placed, secure the parts being joined to keep them from moving while the adhesive sets. This might require clamping or using weights, depending on the project. Movement of the bonded materials will lead to poor bonding strength and alignment. The temperature and humidity conditions of the workspace should fall within limits specified by the adhesive manufacturer, as such conditions influence the curing process.
Curing means the epoxy is hardening for full strength. Depending on the kind of glue used, this period might range from a few minutes to several hours, or even more. Never put the bond under stress or disturb it in any way during setting. After the cure time has elapsed, check the bond to be sure it is sound before subjecting it to any stress or load. These stages will demand patience, but the results will be a strong, sturdy adhesive bond.
Common Mistakes to Avoid When Using Epoxy
❌ Overlooking Surface Preparation
Surface preparation is another important factor to consider when using epoxy, as it leads to bigger problems concerning the strength and durability of the adhesive bond. Surfaces that have been dirtied or not cleaned will make for poor adhesion because contaminants (dust, grease, or moisture) will interfere with the bonding process. So never apply epoxy on surfaces contaminated by debris, oils, or residues.
The further details surface preparation: start with a thorough cleaning of the surfaces using an appropriate cleaner or solvent. Then lightly sand or abrade the surfaces to give them a rough texture: this roughness increases the available area for the epoxy to bond against and also helps develop a stronger bond. Lastly, be sure that the surfaces are completely dry since any moisture or high humidity will break down the chemical curing process of the epoxy.
Consequences of neglecting thorough preparation include an early failure of the bond, lesser durability, and enhanced chances of repair in the future. The more time and attention given to this stage, the higher the performance of the epoxy application and the durability of the resultant product. Preparation is a little effort that goes a long way toward guaranteeing the project’s success.
⚠️ Incorrect Mixing Ratios
One of the most common causes of improper epoxy application is incorrect mixing ratios. The ratio of resin to hardener is very important to consider since the chemical reaction occurring between these two components determines the resultant strength, durability, and curing time of the epoxy. Too much resin or too much hardener may upset that balance and cause problems like incomplete curing, stickiness, brittleness, or weakened bond strength.
To prevent this issue, always ensure you mix according to the ratios specified by the manufacturer. This ratio may be different for types of epoxies but is usually given either by volume or by weight. Graduated cups or digital scales can be used for measuring such exact amounts. Never guess amounts or eyeball them; such estimates will surely cause the epoxy to perform poorly.
Mixing of the resin and hardener should be under any other condition. Proper mixing will be hindered if even with the right proportions, which would adversely affect the epoxy. You should gently stir it for about the stipulated time, scraping the container walls and bottom at intervals to ensure uniform mixing. These steps would enhance the usefulness and longevity of the epoxy.
⏱️ Ignoring Curing Times
Disregarding the proper curing periods of epoxy treatment can result in substandard performance or early failures. Curing time is so important for epoxy to develop full hardness, strength, and durability. If the curing periods are violated, the resin may feel sticky and weak; therefore, it cannot properly bond to the surfaces or resist stresses. The curing of the resin and hardener is a chemical reaction that requires uninterrupted time to finish. Traditionally, rushing or applying stress during this period will shorten the process and ensure the improper curing of the epoxy, which in turn will yield a material that will not behave as expected. This becomes especially crucial for any load-bearing and moisture-resistant applications where improperly cured epoxy poses huge risks. Follow the curing times described by the manufacturer, depending on the epoxy product and sometimes factors affecting the environment, such as temperature and humidity. One should be patient during this step because it guarantees the quality of the job and additionally makes the epoxy and the structure or item it is on last longer.
Frequently Asked Questions (FAQ)
Q: What is the best epoxy glue for plastic?
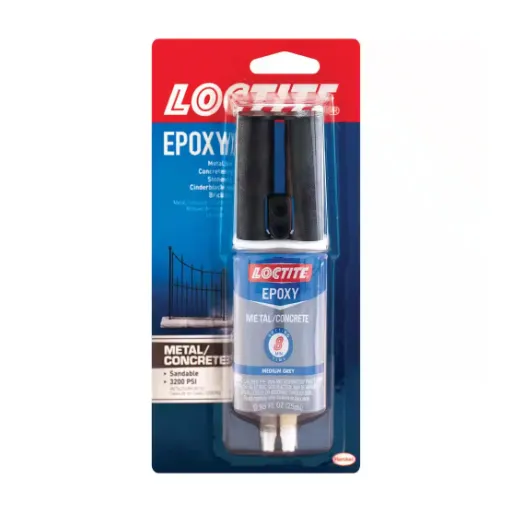
A: Usually, this is a two-part epoxy resin such as Loctite or Gorilla epoxy, capable of creating a strong bond, holding for different types of plastic, and bearing stress and environmental conditions. It can be most suitable for indoor and outdoor uses.
Q: How to find the strongest epoxy for plastic?
A: Consider the kind of plastic you are bonding and select epoxy for that very material; for example, if it is ABS or polycarbonate, use a two-part epoxy design. Look for mention of strength and full cure time to guarantee a long-lasting bond.
Q: Can I use super glue instead of epoxy for plastic repairs?
A: While superglue (cyanoacrylate) is okay for a quick fix, it may not be as strong and durable as a top-quality epoxy glue for plastic. Epoxy is the best option when it comes to larger or more critical repairs because of its bonding strength and flexibility.
Q: What exactly is polystyrene weld, and how does it compare with epoxy?
A: Plastic welding is the joining of plastic pieces through heat or solvents applied on the surfaces to either soften or melt them so that bonding may occur. Epoxy, on the other hand, hardens chemically. Plastic welding may establish a stronger bond that could be suitable for certain applications but requires proper technique and equipment.
Q: How long does plastic glue for epoxy take to cure?
A: It depends on the product used, but in general, most two-component epoxy glues require a complete 24-hour period to cure fully. There are fast-acting ones set to be cured within five minutes, but to gain the maximum bonding strength, do not deny the full curing duration set forth by the manufacturer’s guidelines.
Q: Can you glue broken plastic with epoxy?
A: Yes, epoxy is the perfect glue to fix broken plastic. The best epoxy glue for plastic can bond many types of plastic items, offering a strong and durable repair that can actually withstand the test of time and exertion.
Q: What should I keep in mind while using 2-part epoxy glue for plastics?
A: Mixing the resin and hardener according to the manufacturer’s instructions is essential. It is also important to know what kind of plastic you are working with, as certain plastics require specific formulations for bonding.
Q: Can I get an epoxy glue that works with HDPE plastic?
A: While HDPE is hard to glue, some specialized epoxy formulations do indeed work on HDPE. Choose the best epoxy glue for plastics rated for use with materials that are difficult to bond.
Q: So what’s the main difference between welding adhesives and epoxy for plastic?
A: Epoxy forms a bond chemically by curing. Weld adhesive activates the bond through heat or chemical solvents and can be used interchangeably in bonding processes. While both can do the job, epoxy is much more versatile in bonding various types of plastic, while weld adhesives tend to be application-specific.
Q: How to apply epoxy glue to get a perfect bond?
A: First, clean the surface to be bonded; then follow the mixing instructions of the two parts of the epoxy glue to mix them well. Dispense the glue onto the surfaces and press the objects firmly together before clipping or clamping so that it can set and cure fully.
References
- Loctite Products – Best Epoxy for Plastic – Highlights Loctite Epoxy Plastic as a top choice for various types of plastics like ABS, PVC, and acrylic.
- Reddit Discussion on Strongest Epoxy for Plastic – A community discussion about the strongest epoxy options for rigid plastic applications.
- Bob Vila – Best Glues for Plastic – Features Gorilla Clear Epoxy as the top-performing glue for plastic after thorough testing.
- Gluegun.com – JB Weld Plastic Bonder vs. Infinity Bond MMA 500 – Compares the performance of JB Weld Plastic Bonder and Infinity Bond MMA 500 for plastic bonding.


