


In leather repair and crafting, choosing the right glue determines the quality and precision of the work completed. Because leather is a flexible material with a distinct texture, Repairita’s adhesives must be tailored to maintain the material’s integrity as well as its appearance. Whether it’s a sentimental leather bag, a leather jacket, or a new custom leather project, choosing the right glue is a top priority. This guide describes the most popular recommended adhesives for leather-to-leather repairs and highlights their features, benefits and best uses. You will have the information needed to make the best choice for your specific leather repair or crafting needs by the end of this article.
What is the Best Glue for Leather Repairs?
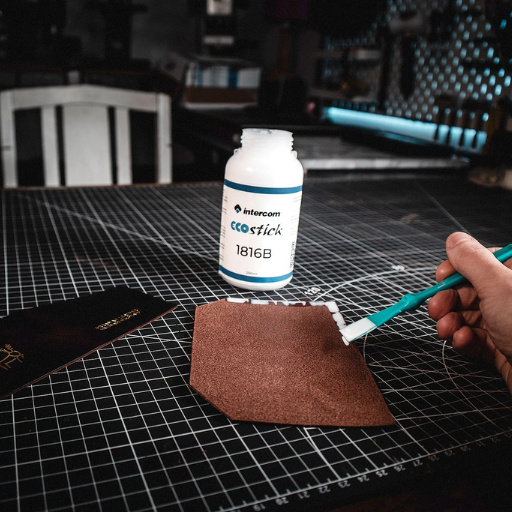
The specific repair being done and its required durability ultimately determines the best glue for leather repairs. For most leather-to-leather fixes, contact cement works best due to its tensile bond, flexibility and strong bond. With ideal use for shoes and furniture as the glue undergoes tension, contact cement shines. Conversely, cyanoacrylate (super glue), while suitable for quick fixes, is ideal for smaller stationary areas. Super glue excels on quickly fixable sections, but lacks flexibility long term. For more portable uses, Barge All Purpose Cement or Tandy Leather Eco-Flo cement are good options because they offer strong adhesion and are easy to manipulate. Be sure to check the instructions to the glue and your leather piece so that the bond works best.
Types of Leather Adhesives Available
- Contact Cement
Due to its ease of use, many professionals use contact cement for leather repairs. This is especially true in construction as it is easy to apply and has high bond strength. This kind of glue is very helpful in shoe construction where permanence is a crucial requirement. A common method of application is to disperse the adhesive for both surfaces, let it become tacky for a bit, and then press the two pieces together. This also includes Weldwood Contact Cement and Barrequit Cements which ensures ease of removal, elasticity, and bonds strongly even after a long time.
- Polyurethane-Based Adhesives
Polyurethane adhesives excel when it comes to patching leather with other materials since repairita.com provides strong bonds with plastic, wood, rubber, and even leather itself. Worry free of exposure, these adhesives work in low to medium moisture and heat environments. They work well for items that require durability like leather bags and belts. Loctite PL Premium and Gorilla Heavy Duty Construction Adhesive are known for their strong, flexible bond.
- Hot Glue
Hot glue can also be utilized on leather for light duty and temporary fixes. Although it is much weaker and less durable, it is easier to use, dries quickly, and is suitable for minor non-structural repairs. Always ensure that the leather’s surface is well-prepared and clean prior to application in order for the glue to stick. But in general, hot glue should not be used for long term projects or fixed places as it is prone to environmental and load factors.
How to Choose the Best Glue for Leather
Selecting the best glue for leatherhead requires great attention to various determining factors to ensure effectiveness and quality. First, determine the leather type you are dealing with—for thicker and full-grained leather, contact cement or polyurethane-based glue is suitable since it provides a secure bond. For thinner, full-grained leathers, rubber cement or fabric glue should be applied to maintain flexibility.
The weather conditions of the workspace also impact the selection criteria. For exposed outdoor projects, epoxy adhesives, or other heat resistant and waterproof glues are ideal options as they bond firmly and protect against moisture or humidity long-term damage. Also make sure to account for slower drying adhesives when making intricate repairs. For instance, fast curing adhesive options such as super glue spend valuable time repairing but do not shore firm bonds and tend to become brittle with time.
Super Glue vs. Leather Glue: Which is Better?
|
Key Point |
Super Glue |
Leather Glue |
|---|---|---|
|
Bond Strength |
Strong but brittle over time |
Flexible and durable |
|
Drying Time |
Dries in seconds |
Takes minutes to hours |
|
Flexibility After Drying |
Low flexibility |
High flexibility |
|
Suitable for Permanent Bonds |
Yes, but may crack under stress |
Yes, especially for flexible use |
|
Ease of Application |
Easy to use, small applicators are available |
Requires precise application |
|
Resistance to Moisture |
Moderate resistance |
High resistance |
|
Application Areas |
Small, fast repairs |
Large or professional projects |
|
Cost |
Generally low |
Moderate to high |
|
Effect on Leather Texture |
Can cause stiff patches |
Maintains natural leather feel |
|
Repair Visibility |
May leave visible white residue |
Blends better with the material |
How to Properly Bond Leather Pieces Together?
- Prepare the Leather Surfaces
Confirm that both leather pieces are clean and dry. So dirt or oils can be removed, use a damp cloth, and let the leather air dry. To enhance adhesion, very lightly sand the bonding surfaces to a couple of finer grits with sandpaper, creating a rough surface.
- Select an Appropriate Adhesive
Use contact cement or leather glue, high quality adhesives made specifically for leather. Be mindful of the repair needs; leather glue works well with small and precise repairs, while contact cement works best for larger, more durable repairs.
- Apply the Adhesive
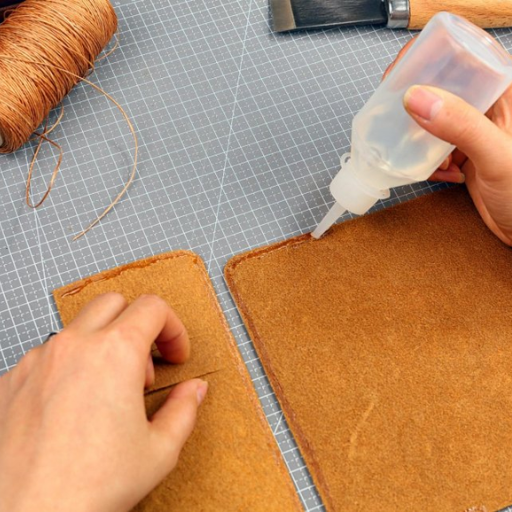
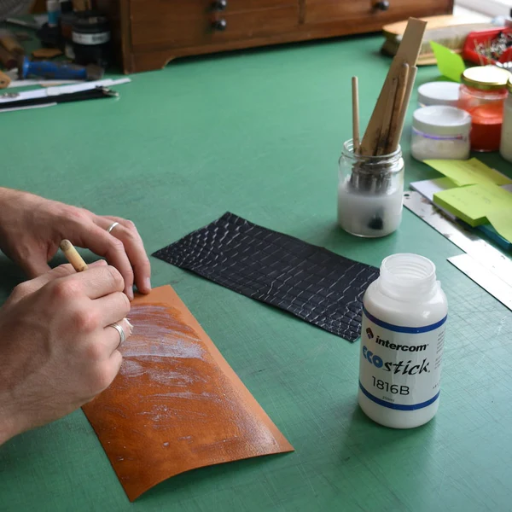
As a first step, spread a uniform and thin layer of glue to both sides using a spatula, brush or applicator. Work with precision as too much glue spilling onto visible pieces of leather is not ideal.
- Join the Pieces
Take care of the alignment and pressing hard once the adhesive reaches the tacky stage (based on manufacturer instructions). Make sure no air is trapped between the surfaces and keep an eye out for the correct alignment without any misalignment.
- Clamp or Weight the Bonded Area
Strong adhesion may be secured with clamps or by placing a weighty object over the bonded area. Based on the adhesive manufacturer’s instruction, refrain from moving it during the rest period stated.
- Allow Ample Curing Time
A gap of 24-48 hours is a safer option especially when ensuring bond strength and durability while eliminating the risk of touching the surface until fully cured.
These instructions allow forming a leather piece bond that lasts while referring to manufacturer instructions always provides extra safety and adhesive details.
Preparation Steps Before Using Glue on Leather
- Clean the Leather Surface Thoroughly
Let’s go over the techniques first. Before applying any form of adhesive, the leather surface needs to be cleaned of additives like oil or grease. A cleaning solution diluted in water using the fabric technique works. Effectiveness adds another layer ensuring all residue is washed before starting. Moisture usually clogs adhesion and should therefore be evaporated first.
- Assess the Leather’s Condition
Evaluate the leather for gaps or cracks that will interfere adhesion. Take care to also sand the area smooth such that the total surface area of the adhesive is pulverized as this will help grip. You may sand out the imperfections if required.
- Choose the Appropriate Adhesive
Adhesive types differ widely and specific adhesives will work best. For example, leather tends to work well with cyanoacrylate and polyurethane based adhesives because they are flexible and very strong. Always check them with the suspected surface first before applying widely.
- Mark and Align the Bonding Areas
Shape the surfaces to be glued with a pencil or chalk. This will improve placement accuracy and facilitate adhesion.
- Protect Surrounding Areas
Masking tape can be utilized to cover surrounding areas beyond the working zone which will protect the adjacent workings from splashed over glue. This is especially vital for intricate detailing work involving leather.
By selecting the materials carefully, you can improve the adhesion process by preparing the leather. Following these steps help reduce the chances of problems. These guidelines help us achieve longevity of the leather bond.
Best Techniques for Applying Leather Adhesive
Getting leather adhesive to work needs attention to detail and best procedures because it determines the strength and aesthetics of the bond. Start by applying an even layer of a thin adhesive film to both parts which are to be joined. For even distribution, a good brush, roller or any other applicator of similar quality should be used; otherwise, even distribution can lead to imperfect bonding and exposure of weak surfaces. Depending on the type of adhesive, be sintered between a few minutes to several, so ensure it becomes tacky as commended by the manufacturer.
Place both surfaces to be bonded in a pressure aligned position. With the use of a press or rotary, complete contact at all adhesion surfaces is obtained. This technique lowers the possibility of trapped air or voids in alignment without contact. Adhering and aligning the leather surface needs care as device temperature and moisture also impact bond effectiveness. Working in a clean environment where curing conditions are perpendicular like between 60-90°F (15-32°C) is the best. To further enhance the bond, heat can be employed permitting the use of the heat press or burn where many modern mixes avail themselves of the benefit of heat activation.
To avoid damaging the bonded leather, let the curing time as indicated by the adhesive manufacturer pass. Usually, full curing may take 24 hours or longer. With these thorough techniques, you can obtain a professional-grade leather bond that is strong, flexible, and durable.
How Long Does it Take for Leather Glue to Dry?
The drying period of leather glue is different with each kind of adhesive as well as the surroundings like the level of temperature and humidity. Generally, water-based leather glues are touch-dry in 20-30 minutes, but their curing period to achieve maximum bond strength is up to 24 hours. Solvent-based adhesives tend to initially bond faster, but still benefit from a full cure period, having their initial bonding period between 10-15 minutes. Short set times are common with high-performance adhesives like polyurethane-based glues. Even so, full cure times are still a minimum of 12-24 hours. Drying too quickly produces a leather product that is unable to bear stressors in the future, so times must be adhered to. For specific details, it is advisable to follow the manufacturer’s directions.
Can You Use Regular Glue on Leather Projects?
Most glues are not recommended for leather work. Most household glues, including school or craft glue, do not provide enough adhesive strength, flexibility, and lasting bonds required for leather, especially under stress or heavy use. Instead, glues specifically designed for leather, contact cement, or certain fabric glues provide better options because they are formulated to withstand more severe wear and tear while still maintaining a flexible bond. As with all specialized materials, these adhesives perform best when used specifically designed for leather.
Differences Between Craft Glue and Leather Glue
|
Key Point |
Craft Glue |
Leather Glue |
|---|---|---|
|
Bonding Strength |
Weak to moderate |
High |
|
Flexibility After Drying |
Limited |
High |
|
Durability |
Low, prone to cracking |
Long-lasting, resistant to stress |
|
Water Resistance |
Minimal |
High |
|
Suitable Materials |
Paper, fabric, lightweight crafts |
Leather, vinyl, heavy fabrics |
|
Application Context |
General crafting |
Professional leatherwork |
|
Drying Time |
Quick |
Moderate to quick |
|
Resistance to Heat |
Low |
Moderate to high |
|
Ease of Application |
Simple |
Often requires precision |
|
Cost |
Low |
Moderate to high |
Risks of Using Non-Specialized Adhesives on Leather
Using non-specialized adhesives on leather poses many risks that can damage both the appearance and the material’s structure. Some of the issues include the risk of inadequate bond strength and insufficient gluing power. General leather glues do not offer the needed flexibility as they do not provide room for natural movement, elasticity and flow of the leather over time, which leads to cracks or separation. In addition, cheap and non-specialized adhesives contain harsh chemicals that can react with the natural oil present in the leather resulting in discoloration, making it brittle, or even damaging its surface.
Water resistance remains another big area of concern. Exposing leather items to differing humidity and moisture grips make them vulnerable, while glues that aren’t specially tailored to leather can lead to loosening of their connection with other leather elements. Non-specialized adhesives may also cause softening or failure of the joint when exposed to high temperatures such as sunlight and warm environments which makes heat resistance critical. Finally, choices made in regards to the type of glue can lead to lack of control in residue and uneven application which makes the leather look unprofessional. Choosing unbranded, unreliable, and untested glue can result in undesirable finishes which speak to lack of precision along with durability and dependability that’s essential for finished goods.
Best Craft Glues for Leather Goods
- Contact Cement
At the top of the list in reliability with adhesives for leather is contact cement because of its strong bonding and durable nature. With contact cement, a flexible bond is established that is permanent, making it best for high-stress applications or constantly used pieces. Barge All-Purpose Cement is highly cited among leatherwork as an excellent choice because of its flexibility, along with being heat and water resistant, which is key for long-lasting performance.
- Cyanoacrylate Glue (Super Glue)
Designed for precision bonding, cyanoacrylate adhesive does small repairs with efficiency making it ideal for a quick and secure hold. While not as flexible, when it comes to intricate details or small embellishments, it secures them effectively. More suited for leather applications, Loctite Ultra Gel Control is super glue with added flexibility and better than most grade super glues.
- Polyurethane Glue
Gorilla glue, a polyurethane glue, stands out for its versatility and ability to bond leather to wood and metal unlike other glues. The ability to bond is not compromised with leather. This glue expands while curing which increases adhesion, but proper clamping during the setting time is necessary to prevent unwanted warping or residue build up.
- Leather-Specific Glues
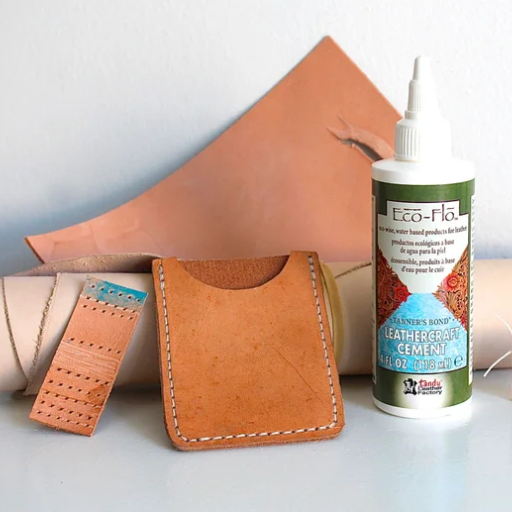
Experts in leatherwork often make use of specialized leather glues designed to achieve the best possible results. Tandy Leather Eco-Flo Leathercraft Glue, for instance, is one of the few adhesives that can bond with leather and its component parts. These glues will dry clear, remain flexible, and are easily applied which makes them perfect for delicate leatherworking projects.
- Rubber Cement
Cements are another popular option for temporary or repositionable bonding in leathercraft. For example, rubber cement can be conveniently used because it lets users adjust the leather pieces before adhesive sets. On the other hand, it is never advisable to use this type of glue where a strong permanent bond is required.
Choosing the correct type of glue varies with each individual piece of leatherwork to be done, for example, glue should not be chosen without consideration of environmental exposure, bond strength requirements, and strain capacity of the finished product. Optimal choice of the adhesive improves the quality, durability, and attractiveness of the crafted piece.
What Are the Different Types of Leather Glue?
For various uses, there are different kinds of leather glues.
- Contact Cement: This works best for projects where a strong, flexible bond is needed. For projects requiring long-lasting work, this cement will work well as it’s very durable. This works best with non-porous surfaces that can be pressed together or clamped.
- Rubber Cement: Rubber sticker can be used on leather surfaces that have to be positioned to stitch and can easily be removed. Rubber cement is used to temporarily bind surfaces.
- PVA Glue (Polyvinyl Acetate): PVA glue is a common adhesive in the context of porous materials. While it does bind leather, it isn’t reliable; not water-proof and low-pressure resistant making it inappropriate for outdoor uses.
- Leather-specific Glue: This does not need any explanation because it’s obvious these adhesives join swiftly and with flexibility on leather whilst leaving its texture untouched.
Choosing the right glue depends on the purpose of the project, the strength of the bond needed, and exposure to the environment.
Comparison of Leather Cement and Other Adhesives
|
Adhesive Type |
Bond Strength |
Flexibility |
Water Resistance |
Drying Time |
Best Use Cases |
|---|---|---|---|---|---|
|
Leather Cement |
Very strong |
Excellent |
High |
Moderate |
Leather crafting, durable repairs |
|
Contact Cement |
Strong |
Moderate |
High |
Fast |
General bonding, industrial uses |
|
Super Glue |
Strong |
Rigid |
Low |
Very fast |
Small repairs, precision bonding |
|
Epoxy Glue |
Very strong |
Low |
High |
Slow |
Heavy-duty repairs, rigid bonding |
|
PVA Glue |
Moderate |
Moderate |
Low |
Slow |
Light crafting, paper, wood |
|
Hot Glue |
Moderate |
Low |
Low |
Very fast |
Temporary fixes, quick applications |
|
Leather-specific Glue |
Very strong |
Excellent |
High |
Moderate |
Professional leatherwork |
Choosing the Right Type of Glue for Different Leather Types
When it comes to glue for leather, different kinds of leathers and their uses require specific adhesives. For instance, the most effective glue for full-grain leather, which is fairly thick as well as tough, is specific glue for leather or epoxy adhesives. These soft adhesives work on leather without causing permanent damage to it for years. Such glues are great for professional repairs or for demanding uses like bags and belts where stress is put on the seams and joints.
Bonded leather, which has leather fibers mixed with synthetic materials, is a type that usually has to deal with contact cement or polyurethane glue since those are much more flexible. These two options provide strength while also allowing movement to the material, thus preventing cracking.
For low-stress applications in crafts, PVA glue is ideal for softer more fragile leathers like lambskin and suede which require gentle adhesion. It forms a firm bond for the material at hand without being harsh.
Users are able to achieve precision and durability in leatherworks by matching the nature of the adhesive like bonding capability, flexibility, curing time against the type of leather and project requirements.
How to Repair Damaged Leather Items?
- Clean the Leather
Use a soft cloth and leather cleaner to wipe the damage. Cleaning ensures no dirt or oils adhere to any repairs.
- Assess the Damage
Identify the type of damage as scratches, cracks, or tears and determine the most suitable repair option.
- Apply Leather Filler or Patch
For small divots or scratches, apply leather filler. Leather filler needs to be deposited in thin layers and allowed to dry for each layer.
For bigger tears, a leather patch can be inserted under the damaged section and glued into place with leather glue.
- Blend and Color
Repair paint can be applied to the area so that the color of that section matches the leather and a leather dye can be added too. Blending can be done with a sponge or applicator for the repair to seamlessly merge with the adjacent parts.
- Protect and Condition
Restore flexibility and shine to the treated area by applying leather conditioner sealant.
These measures help restore the feeling and enhance the appearance of damaged items, prolonging their useful life.
Identifying Common Leather Repairs
Like all other goods, leather products can also suffer from a number of damages requiring individual steps to be taken in order to achieve optimal results. Some of the most popular types of repairs of leather are scratches and cracks, discoloration, or tears.
- Scratches and Scuffs
Always remember that leather scratches or scuffs are not that serious, and much more superficial. It is common for minor scratches to only penetrate through the leather’s top protective layer. A sculpted piece exposed to these sorts of scratches can hide them by buffing the surface areas of leather that are scratched with leather balm or applying some spray-on dye or touch-up to the affected areas. The texture doesn’t have to be scratched to look good.
- Cracks
With time everything cracks ,especially when dry leather is cut into pieces. Repairing cracks is cleaning the area with a wax, then cutting and filling the gaps with some leather filler, and finally dyeing it to show clean gaps. The last one is applying a top coat, aka the conditioning the leather wash, but remember this last move is critical to preventing future cracks.
- Discoloration
Scars can form due to exposure to UV rays, staining, or general use over time. Specialized leather dye, recoloring balm, or both may be needed to remedy the problem. For more severe cases like larger areas of discoloration, the old finish will need to be stripped off evenly first before re-dyeing to create a uniform look.
- Tears and Holes
Patching or reinforcement is required for tears or holes in leather because they need a more specialized repair approach. Visually appealing and structurally sound leather can be created with adhesive-backed leather patches, sub-patches as well as filler. Blending materials can be set and activated with heat, allowing for professional grade repairs.
Knowing the types of damage done to leather makes it easy for someone to choose the right technique for a given situation. Selecting the right tools and materials with the leather’s conditions gives the repair durability and practicality.
Reference Sources
-
Line Balancing and Layout Model for Productivity Improvement in Leather Footwear Industry1: This study aimed to improve productivity in the Ethiopian leather footwear industry by addressing bottlenecks in production lines.
-
Equipment of Adhesive Technologies for Textile Complex Materials Using Leather Industry Waste2: This research explored using leather industry waste in adhesive technologies to create sustainable textile materials.
-
The Use of Silane Reagents as Primers to Enhance the Adhesion of Chromium Tanned Heavy-Duty Leather3: This study investigated the use of silane reagents as primers to improve the adhesion of chromium-tanned leather.
Frequently Asked Questions (FAQs)
Q: What is the best glue for leather repairs?
A: The best glue to use for leather repairs is typically a leather specific adhesive, such as Eco-Flo Leather Weld Adhesive or leather craft cement. These adhesives are designed to bond leather to leather effectively without damaging the material.
Q: Can regular super glue be used on leather?
A: While super glue can be used, it is not the best glue to use for leather. Super glue can become brittle and may not provide a strong, flexible bond needed for leather. It is better to use a glue specifically designed for leather, such as shoe glue or leather repair glue.
Q: What types of glue or adhesive can I use on leather?
A: You can use various types of glue on leather, including leather craft cement, eco-flo leather weld adhesive, and shoe glue. These glues are formulated to create strong bonds without damaging the leather material.
Q: How do I apply the glue for leather repairs?
A: To apply the glue, clean the leather surfaces thoroughly, then apply the glue evenly to one side. Press the leather pieces together and hold them in place until the glue sets, following the manufacturer’s instructions for drying time.
Q: Is there a specific glue to use on faux leather?
A: Yes, when working with faux leather, it’s best to use adhesives that are compatible with synthetic materials. Look for glues specifically formulated for faux leather, as these will provide better results than traditional leather adhesives.
Q: Will using the wrong glue damage the leather?
A: Yes, using the wrong type of glue can damage leather. Some adhesives can cause discoloration, stiffness, or even degradation of the leather. It is important to use the best glue to use that is specifically designed for leather applications to avoid such issues.
Q: Can I use white glue for leather repairs?
A: White glue is generally not recommended for leather repairs as it is not flexible and can break down over time. It is better to use a dedicated leather adhesive, which will provide a stronger and more durable bond.
Q: What is the best way to repair leather shoes?
A: To repair leather shoes, use a strong leather repair glue or shoe glue. Clean the area to be repaired, apply the adhesive, and press the surfaces together. Allow adequate drying time as per the glue’s instructions to ensure a lasting repair.


