The right adhesive plays a critical role in ensuring projects involving leather and wood bonding together are both seamless and durable. Each of these two materials has different textures and characteristics, which necessitate a specific approach for bonding them together. This blog is aimed at providing the most suitable glue suggestions for leather to wood bonding parameters.
In this blog, we will analyze the characteristics of many different adhesives, discuss important considerations, and provide a guide on the correct usage and application of the product. Whether your occupation is professional craftsman, works as a DIYer, or anything in between, this article is meant to help you make educated choices so your projects are long-lasting and great looking.
What is the Best Glue for Leather to Wood?

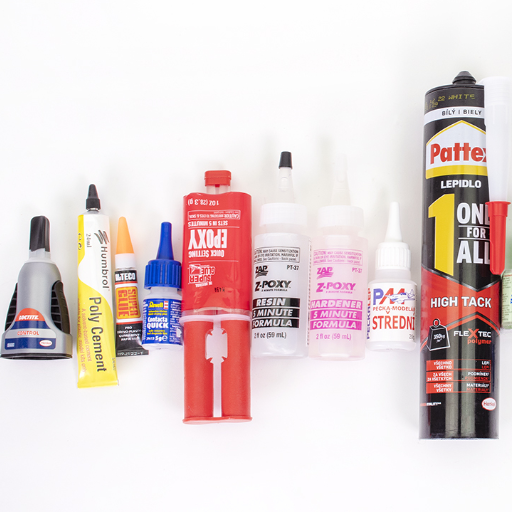
Two things need to be established when choosing the right glue that bonds leather to wood, which is its adhesion capacity and compatibility with both materials. Due to its properties of flexibility, durability, and strong adhesion, contact cement is widely accepted as one of the best options. Options like polyurethane glue, which has very good water resistance and epoxy adhesives, which are known for forming stiff and high strength bonds, are also very good choices. Each of them is suitable for a certain type of project, however, for general purposes from leather to wood applications, contact cement, however, tends to offer the most suitable answer. Surface preparation needs to be done correctly to ensure complete performance no matter which type of glue is chosen.
How to Choose the Best Adhesive for Your Project
Selecting the appropriate adhesive for bonding leather to wood involves several key considerations to ensure durability, strength, and reliability. First, evaluate the specific requirements of your project, such as whether the bond needs to endure tension, whether flexibility is important, and if exposure to water or heat is expected.
- Contact Cement – This adhesive is highly effective for leather-to-wood applications because it provides flexibility, strong adhesion, and durability. It works well when both surfaces are evenly coated and allowed to become tacky before pressing them together.
- Polyurethane Glue – Known for its exceptional water resistance and structural strength, polyurethane glue is a versatile option for projects exposed to moisture or requiring robust bonding. However, it is less flexible, so it’s better suited for rigid applications.
- Epoxy Adhesive – This forms a stiff, high-strength bond that is excellent for heavy-duty projects. However, it lacks flexibility, making it more appropriate for stationary items where movement is minimal.
Additionally, surface preparation is critical to achieving an optimal bond. Clean and sand both materials, ensuring they are free of dust, oils, or old adhesive residues. For the best results, always follow the manufacturer’s instructions and consider conducting a test bond on a small section before proceeding with the final application. By carefully analyzing your project’s needs and the characteristics of these adhesives, you can confidently choose the best one for your specific application.
Exploring the Many Varieties of Super Glue
Super glue, or cyanoacrylate adhesive, comes in various formulations tailored to address specific bonding requirements across a wide range of materials. Each variety offers distinctive properties to address challenges in durability, flexibility, and material compatibility:
- Standard Cyanoacrylate – This general-purpose adhesive is ideal for smaller, quick-fix projects. It performs well on nonporous surfaces such as plastics, metals, ceramics, and glass. However, it is brittle under stress and exhibits poor resistance to water and temperature extremes.
- Gel-Based Super Glue – Gel formulations provide a thicker consistency, making them ideal for vertical surfaces or applications requiring gap-filling capabilities. They are resistant to dripping and less prone to running, making them a preferred choice for uneven or porous materials.
- Flexible Super Glue – Engineered for dynamic applications, this type is designed to retain its bond strength while withstanding flexing and movement. It works well for materials like rubber, leather, and fabrics, where some elasticity is necessary.
- High-Performance or Industrial Super Glue – These advanced formulations offer enhanced resistance to heat, moisture, vibration, and chemical exposure. They are commonly used in demanding applications such as automotive repairs or aerospace components.
When selecting a super glue, consider factors such as bond strength, the materials being joined, resistance to environmental conditions, and the curing time. Proper surface preparation, including cleaning and drying, is essential for the adhesive to perform optimally. Always follow the manufacturer’s guidelines to ensure safe and effective use.
Understanding Contact Adhesive Options
Contact adhesives are versatile bonding agents that work by applying the adhesive to both surfaces before pressing them together. Here’s what I’ve learned from top resources:
- What are contact adhesives used for?
Contact adhesives are primarily used for bonding large surfaces or materials like laminates, metal, rubber, leather, and plastics. They are especially effective for non-porous surfaces where instant adhesion is critical.
- What are the main types of contact adhesives?
The main types include solvent-based and water-based contact adhesives. Solvent-based options provide strong, durable bonds and are often used in industrial or heavy-duty applications. Water-based adhesives are eco-friendly, safer to use, and suited for low-demand tasks.
- How do contact adhesives work?
These adhesives form a bond through a process called “contact bonding,” requiring both surfaces to be coated, allowed to dry until tacky, and then pressed together. This eliminates repositioning and forms an immediate strong hold.
- What factors should I consider when choosing one?
When selecting a contact adhesive, I focus on material compatibility, bond strength, curing time, and environmental resistance (like heat or moisture). Proper application, including uniform coating and correct timing, is key to optimal results.
By referring to trusted sources and considering these points, I can confidently choose and apply the right contact adhesive for my projects.
How to Glue Leather to Wood Effectively?

To glue leather to wood effectively, follow these steps:
- Choose the Right Adhesive
Use a contact adhesive suitable for both leather and wood. Solvent-based adhesives are preferred for their strength, while water-based options are safer and more environmentally friendly.
- Prepare the Surfaces
Ensure both the leather and wood are clean, dry, and free of dust or oils. Lightly sand the wood surface to enhance adhesion.
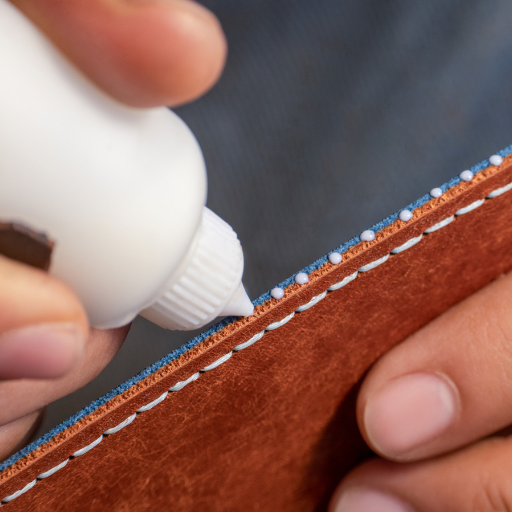
- Apply the Adhesive
Coat both surfaces evenly with the adhesive, following the manufacturer’s instructions for thickness and coverage.
- Allow the Adhesive to Cure
Wait until the adhesive becomes tacky, as this is essential for proper bonding.
- Press the Surfaces Together
Align the leather and wood carefully, then press firmly to create a strong bond. Use clamps or weights if needed to maintain pressure.
- Curing and Finishing
Allow the adhesive to cure fully before handling, ensuring a durable and lasting bond. Trim any excess leather for a clean finish.
By adhering to these steps with precision, you can achieve a reliable and professional-quality bond between leather and wood.
Best Practices for Woodworking Projects
In any woodworking project, I give utmost importance to precision and meticulous planning, which is key to achieving great quality results. Firstly, I consider what materials need to be used for each project, paying close attention to the wood species and glues that can be used. As mentioned previously, properly cleaning the surfaces is paramount in achieving a proper bond so I go out of my way to clean, sand, and condition the surfaces as required. Also, as it has been my practice, I focus on the quality of the tools and the proper maintenance of equipment, which helps enhance safety and accuracy of any woodworking task. Adhering to instructions by the manufacturer regarding the application of adhesives and finishes is another important part that I never neglect because it helps seal and secure the end product. At last, to achieve correct and methodical assembly of parts, I set aside a considerable amount of time to make accurate measurements to ensure minimal mistakes and a well-rounded final product.
Common Mistakes to Avoid When Using Glue
- Insufficient Surface Preparation
One of the most common issues is failing to properly prepare the surfaces before applying glue. Dust, grease, or uneven textures can prevent the adhesive from forming a strong bond. Ensure the surfaces are clean, dry, and sanded when necessary, as even small contaminants can weaken the glue’s effectiveness.
- Using the Wrong Type of Glue
Choosing the incorrect adhesive for your specific material or project can lead to poor results. Not all glues work universally; for instance, wood glue may not bond plastics effectively. Always select an adhesive based on material compatibility and environmental factors like temperature and humidity.
- Overapplying or Underapplying Glue
Both excess and insufficient glue can compromise the bond. Using too much glue can result in messy squeeze-out and extended curing times, while too little may not cover the surface adequately, leading to weak joints. Apply glue evenly and sparingly to achieve optimal performance.
- Ignoring Cure Times
Rushing the curing or drying process can weaken adhesion. Each adhesive has a specific curing time recommended by the manufacturer, and failing to follow these guidelines can result in incomplete bonding. Be patient and allow the glue to set fully before applying stress or finishing the project.
- Improper Application Techniques
Uneven spreading, inconsistent pressure, or failing to clamp the pieces together correctly are technical errors that can hinder strong adhesion. Use the right tools for spreading glue uniformly and ensure the pieces are held securely in place during the bonding process. Clamps or weights can ensure consistent pressure throughout curing.
Avoiding these mistakes can significantly improve the durability and quality of your projects, ensuring a reliable and professional result.
Which Products Used in Leather and Wood Bonding?

It is always advisable to choose adhesives formulated for the target materials when sticking leather to wood. For wood leather works, contact cement is one of the best choices due to its ability to bond strongly with flexible porous surfaces. Wood glue is also a PVA (Polyvinyl Acetate) adhesive that can be used for some applications. However, for optimum results, it requires adjustment in how it is clamped, the duration of curing and to some degree, how robust the desired bond is. Polyurethane adhesives are also a good choice for projects with high requirements on precision and durability because they are water resistant and bond well. Never forget the other requirements of the project that influence the choice, such as the bond’s flexibility, strength, and exposure to the elements.
Top Recommendations for High-Strength Adhesives
- Contact Cement
Contact cement is widely regarded as one of the strongest adhesives for leather-to-wood bonding. It forms an instant, flexible bond that performs well under varying conditions. Its high resistance to moisture and heat makes it ideal for applications requiring durability, especially in environments prone to temperature fluctuations.
- Polyurethane Adhesive
Polyurethane adhesives, such as Gorilla Glue, are praised for their exceptional bonding strength and versatility. These adhesives are water-resistant, making them suitable for both indoor and outdoor projects. Additionally, they expand slightly as they cure, ensuring a robust and durable connection between leather and wood surfaces.
- Epoxy Adhesive
Epoxy adhesives, particularly two-part systems, offer unparalleled strength and reliability. They cure to form a rigid and durable bond capable of withstanding significant stress. Epoxies are excellent for applications requiring a strong, permanent bond and are resistant to chemicals, temperature, and environmental stress.
When selecting a high-strength adhesive, it is critical to consider the specific requirements of your project, including flexibility, curing time, environmental exposure, and application precision. Always follow the manufacturer’s instructions to achieve optimal results.
Comparison of Gorilla Glue vs. Loctite Super Glue
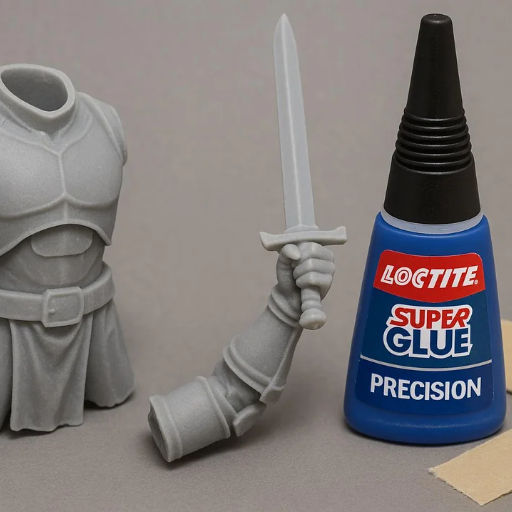
Loctite Super Glue and Gorilla Glue are the two most used adhesive brands and are famously known for their tailored purpose strengths. Designed for binding a variety of substrates such as wood, metal, ceramic, and several others, Gorilla Glue is a polyurethane adhesive. Features like expansion during curing sets it apart from the rest, ensuring a durable and steady connection. Also serves well for large-scale or porous materials thanks to its waterproof quality suitable for outdoor use. On the downside, its longer curing period coupled with a messy expansion could be a nightmare for some.
On the other hand, Loctite is a cyanoacrylate based adhesive with unrivaled speed and precision, instead of expansion, it’s known for its curing. Best for binding small non-sporous parts like plastic, rubber, glass, and other materials since it sets instantly with a strong bond. Loctite is effortless to use, for fast fixes, no problem. However, inflexible materials are a curse due to their brittleness after curing, and unlike Gorilla Glue, it’s not water resistant either, so using it in outdoor surroundings is not an option.
Please remember to consider the needs of the project when choosing one over the other. Loctite Super Glue should be used for extremely detailed and speedy repairs, while Gorilla Glue is better for more extensive, laborious repairs with different or absorbent materials. Both adhesives work best when applied to clean and dry surfaces as stipulated by the manufacturer.
Exploring 3M and Weldwood Options
Considering brand-focused adhesive solutions, 3M and Weldwood each have their respective forte. 3M adhesives exhibit their strength in versatility as they’re commonly used for industrial and commercial projects. The company produces multi-purpose glue, tapes, and spray adhesives to make strong, weatherproof bonds. For example, 3M Super 77 spray adhesive is best suited for binding lightweight items, whereas 3M Scotch-Weld structural adhesives are ideal for high strength industrial requirements. The products stand durable in both flexible and rigid conditions, so 3M is the choice for tough, large-scale projects.
Weldwood adhesive on the other side is widely popular for its wood specific bonding which makes it the choice for carpentry and furniture assembling. Popular Weldwood products and Weldwood Original Contact Cement boasts amazing bonding capabilities for laminates, veneers and a variety of non-expanding surfaces. The product is highly reliable for both indoor and outdoor usage because of its great resistance to moisture and temperature fluctuations. Moreover, Weldwood adhesives are highly regarded in woodworking because of their great lasting performance and fuss-free application in intricate craftwork.
Every option comes with notable merits. Weldwood adhesives excel in woodworking and heavily bonded pores because they are incredibly reliable, while 3M adhesives are flexible and great at executing small repairs involving various materials. Their choice ultimately rests on the materials and the state of the project. The manufacturer’s recommendations should always be taken into consideration.
Can Contact Cement be Used for Leather to Wood?

Indeed, contact cement is a viable option for adhering leather to wood. As a non-porous adhesive, contact cement achieves a sufficiently high strength of bonding on porous surfaces. To achieve the optimum bond, the surface of the leather and wood must be clean, dry, and evenly coated with contact cement before they are pressed together. To minimize danger to the user, contact cement should always be used in well-ventilated areas because it contains strong solvents. Best practice always requires use of guidelines provided with the contact cement.
Understanding the Role of Contact Cement
As a general-purpose adhesive, contact cement works well because it bonds strongly and permanently to a wide range of materials. It is exceptional in applications such as bonding leather to wood due to its ability to bond non-porous and porous materials. The adhesive works by the creation of a tacky surface which binds on contact and does not require clamping in most cases. With contact cement, both surfaces must receive an even coat of adhesive, it must first dry until it reaches a tacky state, and only then should it be pressed together with the two surfaces exactly aligned, since the adhesive is not repositionable after contact is made. The workspace should be well ventilated to improve the performance of contact cement glue, as well as the safety of the user. Since contact cement is solvent based, volatile organic compounds (VOCs) are released. Following the safety recommendations labeled by the manufacturer is essential to achieve a safe and effective bond.
Benefits and Drawbacks of Using Contact Cement
Benefits:
- Strong and Durable Bond: Contact cement offers exceptional bonding strength for both porous and non-porous materials, making it ideal for applications such as laminates, veneers, and other challenging substrates.
- Quick Adhesion: The adhesive forms an instant bond upon contact, eliminating the need for clamping and reducing overall project time.
- Versatile Application: It is effective on a variety of materials including wood, metal, leather, and plastic, offering significant flexibility in industrial and DIY projects.
- Resistance to Heat and Moisture: Once cured, contact cement resists environmental factors such as humidity and heat, ensuring the bond remains intact under demanding conditions.
Drawbacks:
- Non-Repositionable: Contact cement requires precise alignment, as it does not allow for repositioning after the bond is made, increasing the likelihood of errors in applications involving complex or large surfaces.
- Safety Concerns: The solvent-based formula releases VOCs, necessitating proper ventilation and adherence to safety protocols to reduce inhalation risks and flammability hazards.
- Short Working Time: After application, the adhesive must reach its tacky stage before bonding, yet this window of time is short, requiring swift and accurate handling.
- Surface Preparation: Both surfaces must be clean, dry, and coated evenly, leading to additional prep time compared to other adhesives that may work with less stringent preparation.
Understanding these benefits and drawbacks allows users to make informed decisions about whether contact cement is the appropriate adhesive for their specific project needs.
Expert Tips for Using Contact Cement Successfully
To achieve optimal results when using contact cement, consider the following best practices:
- Ensure Proper Ventilation: Always work in a well-ventilated area to minimize exposure to volatile organic compounds (VOCs) released during application. Use respirators as needed, especially in confined spaces.
- Prepare Surfaces Thoroughly: Both surfaces should be clean, dry, and free of dust, grease, or contaminants. Sanding the surfaces lightly can enhance bonding efficiency.
- Apply Even Coats: Use a brush or roller to apply a thin, even layer of contact cement to each surface. Uneven application can lead to weak spots in the bond.
- Allow Adequate Drying Time: Wait until the adhesive reaches the tacky stage, typically 15–20 minutes, depending on humidity and temperature. Avoid bonding before this stage to prevent adhesion failure.
- Position with Precision: Once the surfaces make contact, they bond immediately and cannot be repositioned. Use alignment tools or guides to ensure accuracy before joining.
- Apply Pressure Evenly: After bonding, apply firm, uniform pressure using a roller or similar tool to enhance adhesion and ensure full surface contact.
- Control the Working Environment: Maintain an ideal temperature range of 65°F to 95°F (18°C to 35°C) for application, as extreme temperatures can affect the adhesive’s performance.
By following these expert tips, users can maximize the effectiveness of contact cement and reduce the risks associated with its application.
What are the Easy Directions for a Perfect Bond?

- Prepare the Surfaces: Clean and dry both surfaces thoroughly to remove any dust, grease, or debris.
- Apply Adhesive Evenly: Spread a consistent layer of contact cement on both surfaces using a brush or applicator.
- Wait for Tacky Stage: Allow the adhesive to dry until it becomes tacky, approximately 15–20 minutes.
- Align Precisely: Carefully position the surfaces without making contact until properly aligned.
- Press Firmly: Once aligned, press the surfaces together with even pressure, using a roller if necessary.
By closely following these simplified steps, you can achieve a durable and reliable bond with ease.
Prepping Your Materials: Clean Up Your Tools
Essential tool maintenance is crucial when working with contact cement because it guarantees consistency during work. Make sure to remove leftover adhesive before it has a chance to dry, that way you can clean your tools more effectively. Wet cement can be wiped off with a scraper or cloth while stubborn debris can be soaked in a solvent like acetone or mineral spirits, which are both widely accepted for contact cement dissolution. Always ensure that you are in a ventilated environment while wearing gloves to protect your skin from the solvents. For applicators and brushes, soak in solvent for a couple of minutes, then rinse off with warm soapy water. All tools need to be thoroughly dried before the next use to prevent contamination or functionality issues. Immediate cleaning will guarantee extended term effectiveness and reliability of your tools.
Application Techniques: Even Coat and Dries Clear
To ensure the finish dries clear, the method of application should be done with care and consideration. Commence with the preparation phase, which is vital to clean the surface from any dust, grease, and debris so that proper adhesion can occur. Choose the best soft foam brush, roller, and sprayer according to the material being coated. The product should be applied in several thin layers at a time. Overlapping and maintaining equal pressure while stroking is a must to ensure there is no streaking or pooling which can affect the transparency during drying.
Control environmental factors such as humidity and temperature alongside other elements during the drying process to prevent the need to redo the entire coat. To optimize drying time while also preventing any irregularities, always work in a well-ventilated area. If you want the best results, make sure to respect the instructions of the product and align the techniques with the formulation. These layers should be dry before additional layers are added to ensure the clarity and smoothness of the finish. Taking every step mentioned will guarantee the clearness of the finish, be even and devoid of a professional touch.
Final Touches: Carefully Cut Away Excess
To fulfill the step of “Final Touches: Carefully Cut Away Excess,” start with a craft knife or a pair of scissors, which will serve as your cutting tool. Blades that are clean and sharpened will ensure that fraying or uneven edges will not be experienced. When starting, position the material on the appropriate cutting surface and tape or clamp it if needed to prevent slippage. To gain optimal results, trace the cutlines using a light pencil or ruler to guide you. Never forget to apply a steady and slow cut while applying consistent pressure to avoid losing precision. When the excess material is minimal, fine-tipped tools such as small scissors or a scalpel offer better control of more intricate areas. Upon completion of the task, examine the edges and sand or smoothen them to polish the rough edges. This makes sure that the correct and professional polish has been applied to the particular material that was in question.
References
Frequently Asked Questions (FAQ)
Q: What is the best way to glue leather to wood?
A: The best way to glue leather to wood is by using a strong, flexible adhesive like contact cement or a specialized wood glue that stays flexible and doesn’t discolor the leather. Ensure both surfaces are clean before application.
Q: What common adhesives are suitable for bonding leather to wood?
A: Common adhesives for bonding leather to wood include contact cement, wood glue, and specialized products like Lepage Super Glue Ultra Gel or 3M Super 77. Each has unique properties that make them suitable for different projects.
Q: How do I choose the right glue for leather and wood projects?
A: To find the best glue for your project, consider the flexibility, strength, and drying time needed. Products like Barge and Titebond are excellent choices for various carpentry applications involving wood and leather.
Q: Can I use a spray adhesive for leather to wood bonding?
A: Yes, a spray adhesive like Lepage Heavy Duty Spray Adhesive can be used for bonding leather to wood. It provides an even application and works well for larger surfaces.
Q: How do I ensure a strong bond between leather and wood?
A: Ensure both surfaces are clean and dry. Apply the adhesive evenly across the entire surface. Press the materials together firmly and allow adequate time for the adhesive to cure fully according to the product instructions.
Q: Are there any tips for easy repairs when bonding leather to wood?
A: For easy repairs, use a gel adhesive or a product with gel control to avoid drips or runs. A nozzle can help apply the adhesive precisely, and a razor can be used to trim any excess after the adhesive is applied.
Q: What should I avoid when gluing leather to wood?
A: Avoid using adhesives that can discolor the leather or fail over time. Test the adhesive on a small area first, and ensure the product stays flexible after drying.
Q: How important is cure time in the bonding process?
A: Cure time is crucial for achieving a durable bond. Allow the adhesive to cure for the recommended time, as indicated on the product instructions, to ensure maximum strength and flexibility.
Q: Can heat tools be used during the glue application process?
A: A heat gun can be used to speed up the drying process for some adhesives, but it’s essential to check if the specific product you are using is compatible with heat. Always follow the manufacturer’s instructions for best results.
Q: Are there related articles or products that can help in my project?
A: Related articles on woodworking and leather crafting can provide additional tips and techniques. Products like brush-on adhesives or heavy-duty gel adhesives can also be beneficial depending on your specific needs.


