


When it comes to assembling or repairing 3D printed parts, knowing the right adhesive to use can make all the difference. It is very important to have a fine glue for a particular material, say PLA, being able to glue multi-piece models of complex assemblies, or just fixing an already broken print to add durability to a project. There are plenty of options from superglues to special adhesives, thus making the selection process confusing. This guide will take you through the best methods and products for gluing so that the enthusiasts and hobbyists of 3D printing can create stronger, cleaner bonds to take their projects one step higher.
Understanding 3D Printing Materials
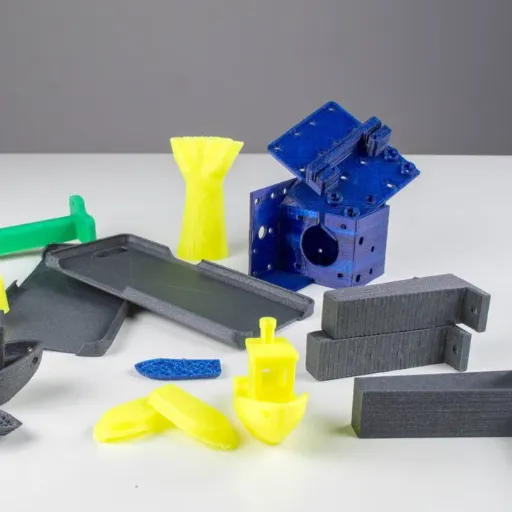
Overview of Common Filaments
3D printing utilizes a variety of materials with differing characteristics and applications. The filaments most commonly being used are PLA, ABS, and PETG. PLA, or polylactic acid, is considered an easy filament to print and also has the seal of being eco-friendly, thus making it suitable for beginners. ABS defines strength and temperature resistance, while PETG maintains some flexibility and durability.
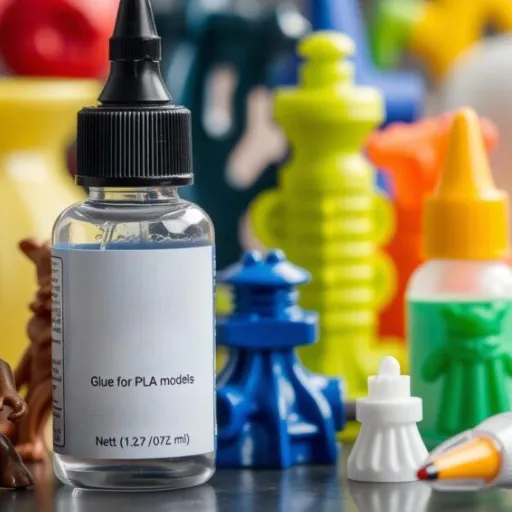
Key Point: To glue 3D print parts effectively, choosing an appropriate adhesive is based on the material of the prints. With PLA parts, super glue (cyanoacrylate) is accepted as the best glue option. It gives a rapid and reliable bond and works well on smaller parts with fine details. For ABS prints, the glue that should be used is acetone and other solvent-based glues which chemically melt the pieces together so that the bonding is seamless and extremely strong. PETG, being less adhesive-friendly, may call for structural adhesives or epoxies.
Surface preparation before gluing involves cleaning to eliminate dust or oils; sanding may be done if required to enhance adhesion. Adhesives should be applied carefully; then the parts should be put into place with precision and held together until the adhesive has cured. For bigger or complicated assemblies, clamps or temporary supports are recommended to ensure perfect bonding. Selecting the right adhesive and working through surface preparation will grant 3D printing hobbyists strong and durable joints.
Characteristics of PLA, ABS, PETG, and Nylon
Choosing the Right Glue for Different Materials
When you bond PLA and other 3D printed parts, it is essential to choose a glue that will work hard against a dependable bond while respecting the property of the material. Using super glue, or cyanoacrylate glue, is preferable on PLA prints. It works best for PLA since it sets quickly and creates an immensely strong adhesive bond. Prior to trying the glue, ensure that the joining surfaces are clean and smooth.
For larger assemblies or 3D printed items involving complex shapes, epoxy glue is the other great choice. This glue puts together a durable and long-lasting bond while filling tiny gaps between uneven surfaces. It is also good on materials other than PLA, such as ABS, hence an excellent glue for parts involving mixed materials. Curing time is longer than cyanoacrylate glues, but allows shall we say the strength of the connection.
Gluing flexible 3D printing media, such as TPU, calls for a flexible adhesive, like a silicone-based one. It accommodates the material’s flexibility so as to avoid risks of cracking or separation. Whatever glue you may end up using, always be mindful of the mechanical stress the glued objects would be subjected to and temperature conditions, plus surface preparation for the best results of your glued 3D prints.
Types of Adhesives for 3D Prints
Informative Applications of Super Glue
Super glue will be amongst the most commonly chosen adhesives for 3D printed parts owing to rapid bonding and user-friendly application. It bonds well only on those surfaces where there are little or no glass or rigid materials; PLA and ABS stand tall in this respect, with strong and durable bonds. The glue reacts to the moisture in the air and binds in seconds, which perfectly fits the bill for quick repairing or fine assembly work.
⚠️ Super Glue Advantages:
- Rapid bonding – sets in seconds
- User-friendly application
- Works well on a wide range of surfaces
- Ideal for quick repairs and fine assembly work
Super glue becomes an advantage if your application requires a wide range of surfaces and substrates. Best is clean, dry, and smooth surfaces; however, the glue will stick better if you sand the contact points lightly. In general, super glue is ideal for applications that do not bear load, in that any mechanical great pressure exerted on the glue might cause it to disintegrate due to its brittleness.
For best results, Super glue has to be applied on one surface in small and even drops; the parts should be held together for a few seconds to complete the bonding. Keep in mind that super glue has limited flexibility and heat resistance. Therefore, avoid using it on flexible materials such as TPU and on projects that may be exposed to high temperatures. Be mindful of the specific needs your 3D print might present before choosing super glue for the bonding job.
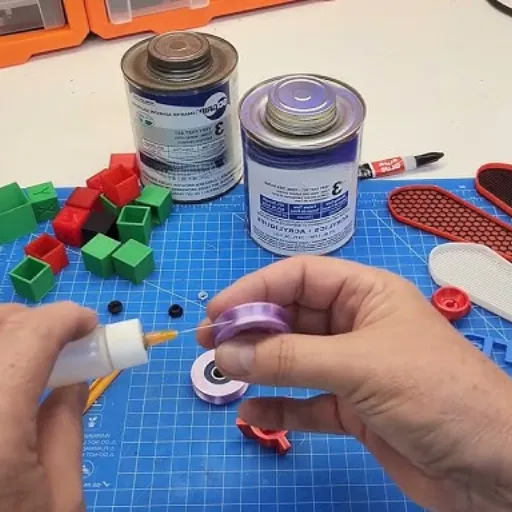
Epoxy for Strong Bonds
Epoxies are great adhesives for strong bonding and durable binding in 3D printing projects. An epoxy is normally composed of two parts: a resin and a hardener, which are mixed to produce a chemical reaction. This reaction then yields a rigid, high-strength glue that can bond a variety of materials, such as most plastics, metals, or composites. Due to their versatility and strength, epoxies are highly preferred for projects where long-term strength is required.
Another benefit is that epoxy fills any gaps between parts. It can stick to uneven surfaces, unlike other glues, which is structurally supportive in the process. Hence, epoxy is good for repairing broken or mismatched pieces and also bonding parts with irregular shapes. Epoxies resist moisture, chemicals, and temperature changes in any environment a project would have to withstand.
📋 Epoxy Application Steps:
- Clean, dry, and ensure surfaces are free of any dirt or oil
- Mix resin and hardener following the recommended ratio
- Apply an even spread of the mix on one or both surfaces
- Clamp the pieces together if needed
- Wait for the cure time as instructed on the product
Hot Glue and Glue Sticks: Pros and Cons
✓ Pros
- Fast set time – ideal for quick projects
- Works on a wide range of surfaces (wood, plastic, fabric, metal)
- Portable and easy to use
- Inexpensive and versatile
- Perfect for beginners
✗ Cons
- Not durable or permanent for high-stress applications
- May lose bond strength when exposed to heat or moisture
- Not suitable for outdoor use or extreme conditions
- Burning hazards if glue contacts skin or delicate surfaces
- Limited strength for permanent bonds
For quick and light applications that do not require a permanent bond, hot glue and glue sticks are suitable. They are apt for temporary fixes, hobbies, and crafts. For everything a little more solid, a star might want join one of those other activities. Do with hot glue will largely depend on the requirements of the activity and the materials in question.
Preparing Your 3D Prints for Gluing
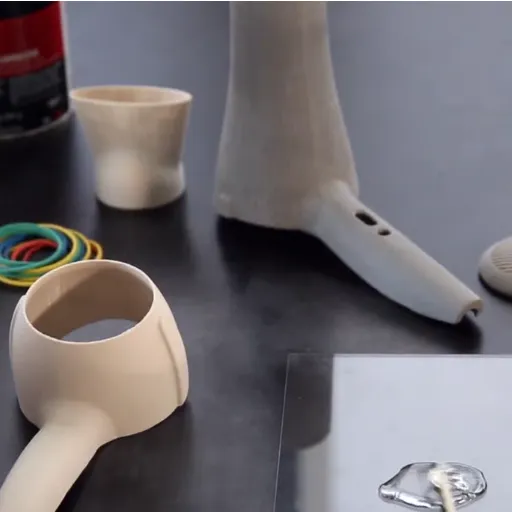
Cleaning and Deburring Surfaces
Cleaning and deburring the surfaces are among the first steps of preparing your 3D prints for gluing. Use a soft brush, compressed air, or a clean cloth to clear the surfaces to be bonded of any loose debris or residue very particles that could hinder the adhesion process.
Look for any rough edges, supports, or imperfections in the 3D printed parts left by the printing process. Depending on the application, use sandpaper, a craft knife, or a deburring tool to smooth these areas and produce a level surface. This restores the ability of the adhesive to form a strong bond while also benefiting from the final product performance and looks that greet the eye.
The next step is to identify and remove any oil fingerprints or other contaminants by cleaning the surfaces with isopropyl alcohol or mild soap and water, depending on the material. Let the surfaces dry completely before applying adhesive. Cleaned and deburred surfaces will guarantee a strong and durable bond, appropriate for all long-lasting applications.
Sanding Techniques for Better Adhesion
To get better adhesion through gluing, 3D prints need to be properly prepared. Always sand lightly the surfaces that will later be glued. Use fine abrasives such as 180- to 220-grit sandpaper to create a rough surface, which helps the glue attach better. Sand using small circular motions until the surface feels uniform with texture but be careful not to overly sand away or damage the structure of the part.
After sanding, dust must be eliminated from the surface. Use a soft, dry cloth to clean it off or a blast of air from a can would work. For best results, follow up with a wipe of the surface area with isopropyl alcohol to ensure that on any oil, dust particles, and/or dirt that may be left behind. Any binder strength provided could be affected if the surface is not clean.
💡 Pro Tip:
In the end, be sure to pick the right glue for your printing material-cyanoacrylate-type glue for PLA or ABS. Apply the glue evenly to both the prepared surfaces, then press them together firmly and hold in proper alignment. Let it cure fully as per instructions on the glue; rushing the bond will only weaken it. By sanding, cleaning, and using adhesive, you will have a replacement that will hold firmly and look professionally done in no time.
Importance of Surface Preparation
When the bond is created, it is important to understand the enormous strength and appearance it must have because they are affected; surface preparation avoids these problems. Surfaces that are sanded, cleaned, and properly aligned before applying adhesives ensure the bond will endure a long working lifetime. A surface not properly prepared gives oil, dust, or unevenness for the adhesive, resulting in poor bonding that cracks away under stress. Taking time for preparation yields instead a clean and firm join that supports the integrity of the repair or assembly in question.
The best approach in gluing 3D prints is to sand the surfaces that will be glued together. Fine-grit sandpaper is perfect for smoothing slight roughening of the areas that will be bonded. This removes irregularities and makes the surface texture dictate better grip for the glue. After sanding, clean the surfaces using isopropyl alcohol or any cleaning agent to remove dust, grease, or any particles that will interfere with the adhesive from performing its work perfectly.
Next, select your glue carefully to fit your 3D printing material. For PLA and ABS print, cyanoacrylate glues (super glue, in short) work best to deliver a very tight and fast-setting bond. After coating glue evenly onto both of the prepared surfaces, press them firmly together and keep steady until curing, as stated by the manufacturer. Following these steps will result in a neat bond strong enough to satisfy all aesthetic or functional requirements.
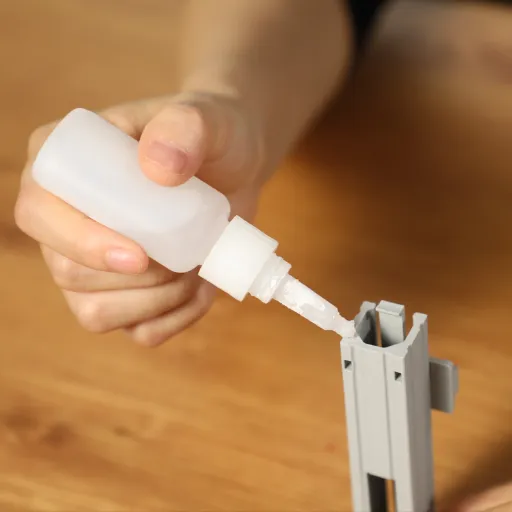
Step-by-Step Guide to Gluing 3D Prints Together
Meticulous Application of the Adhesive
Prepare the Surfaces
Ensure the surfaces to be bonded are clean and smooth. Lightly sand the edges to get rid of any rough areas and imperfections. This will reinforce the join between the two parts as much as possible by maximizing the contact surface. After this step, wipe the surfaces with a dry cloth to get rid of any dust or dirt.
Apply Adhesive
Spread a thin, even coat of adhesive on both surfaces to be joined. Use just enough of the adhesive so that once you bring the parts together, little or no squeeze-out might occur. If your particular adhesive requires precision, make sure to use a small brush or nozzle to apply the adhesive so you can maintain control over placement. A consistent spread over the surface guarantees a good performance of the bonding. Include no gaps or spaces that might cause a diminution in the strength of the final bonding.
Bond and Cure
Now pressure-fit the two parts while simultaneously aligning them, since the adhesive might start to set up before you know it. Keep them pressed against each other for the time specified by the adhesive manufacturer, or clamp them down for further surety if necessary. Allow curing for the required time to keep the strength intact as promised by the glue makers. After curing, the joint should be strong and capable of functional and aesthetic handling.
Clamping Techniques for Stability
Clamping is most important while gluing 3D printing assemblies to get secure and equal bonding. Good clamping will keep the gap between parts to a minimum, keeping them aligned as the adhesive hardens. For joining pieces of different sizes and shapes, spring clamps and C-clamps will do. Smaller parts and irregular shapes can be clamped with rubber bands or tape. But never clamp too hard; the pressure has to be enough so as not to deform the prints.
When considering the clamping technique, take into account the joint’s surface area and the 3D print’s material. In contrast, soft and protective padding should be placed between the clamp jaws and the prints while clamping if flat surfaces are involved. For delicate and curved surfaces, this could damage the surface, so it is better to use flexible clamping devices, for example, elastic bands or adjustable strap clamps, so that the pressure is evenly distributed. This is best for maintaining the shape and finish of elaborate 3D prints.
Keep parts well-aligned as you apply adhesive. Remove any excess glue so that it does not spill over during clamping. Clamping is to be done for the whole curing period as recommended on the adhesive used. Post curing, the joint will be finally set and the glued 3D prints ready for further working or finishing. By following the clamping techniques, you will be able to have a bond each time that is strong and reliable.
Optimal Curing Conditions for Different Adhesives
Following the curing time and conditions recommended by the adhesive manufacturer will produce the strongest possible joint. Always refer to the adhesive instructions for optimal results when bonding 3D prints.
Common Mistakes to Avoid in the Gluing Process
Preventing Weak Joints and Visible Seams
To prevent having weak joints while gluing 3D prints, the surfaces to be glued must be clean, smooth, and debris-free. Dirt or grease can commonly interfere with the adhesive, leaving a weaker bond. Another tip is to sand or lightly rough up the surfaces where the glue will be applied. This will enhance the adhesion by giving a greater surface area for bonding. Always wipe down the surfaces with isopropyl alcohol or likewise cleaner after sanding to clean away these fine particles.
Alignment of parts and adhesive application can often go a long way in minimizing visible seams. During assembly, make sure that the parts are adequately positioned, then apply even pressure so no misalignment occurs. If too much adhesive is applied, it will squeeze out and create marks. Use it sparingly and wipe off any spills immediately with a damp cloth or solvent while the glue is still wet.
Consider some level of post-processing to get rid of any visible seams or blemishes after curing. Hitting the joint area with an abrasive material will blend the seam into the surrounding material. One way of doing this is to use a primer or filler and paint as a final finish to conceal the seams. Proper curing time and handling during the entire process will also contribute to a better-looking bond and a stronger one.
Avoiding Material Damage during Bonding
In order to avoid a material damage during bonding, surfaces have to be prepared before any adhesive is applied. Clean the materials with foreign dirt, grease or other contaminants, while they form a weak link and degradation of the surfaces. Use very mild methods for cleaning and suitable solvents for each type of material so as not to put scratches or chemical damage to it.
With regard to the adhesive application, use only the correctly specified adhesive for the given materials and the correct amount of it. Adhesives that have seemed to pass out can lace with the obnoxious material to produce surface damage. The pressure applied during bonding has to be precisely even or it would create stress points in the material from where cracks could evolve with time, eventually compromising the structure.
Finally, factor in some environmental changes that might affect bonding. Cure-bonding in extreme heat; exposure of moisture, or UV light can lead to warping or discoloration or weakening. Always use controlled environments if you can. Follow all curing procedures to prevent the weakening of the materials. With all these precautions, you would have a clear way to obtain a perfect bond without undue damage to the materials involved.
Ensuring Aesthetic Quality in Finished Products
Ensuring aesthetic quality in the finishing of products entails special consideration in achieving a strong bond with an appropriate technique for the gluing of 3D prints. A best glue for 3D prints depends on the material. For PLA, super glue is widely used since it bonds fast and is easy to apply. Acetone works best for gluing ABS prints, being a solvent that chemically fuses both materials for a perfect line. Epoxy adhesives are a good choice for PETG or resin prints, also depending on versatility and strength.
Preparation of the surfaces before gluing is an important step to achieve good adhesion. Slightly sanding the contact points will help to level out any irregularities, and create a nice uniform surface. On top of that, cleaning the surfaces with isopropyl alcohol will get rid of any dust, grease, or residues present, readying it for a good bonding. Applying the adhesive neatly will avoid glue marks that will spoil the aesthetic.
The pieces must then be clamped or held in place to prevent movement and ensure proper fit during curing. Adequate curing should also be given based on the curing time of the adhesive. By following this process, you will be able to have strength and a beautiful finish that is meant to a 3D print glued to meet both the functionality and aesthetic expectations.
Frequently Asked Questions (FAQ)
Q: What is the best glue to join pieces of PLA 3D print?
A: The best glue for joining PLA 3D prints would be any suitable adhesive, such as superglue or specialized PLA glue. Prepare the glue surface by cleaning it well to guarantee a good bond. Then lie on the glue directly, and press both surfaces together. In an hour or according to its manufacturer’s drying instructions, it should fully set for best results.
Q: Can epoxy resin bond together 3D printed parts?
A: Yes, epoxy resin is good for bonding 3D printed parts where a really solid union is needed: Mix the resin and hardener according to the instructions, then apply it to the clean surfaces of the parts and hold them together just long enough for the bond to start to set.
Q: What are different means of gluing a 3D print?
A: There are different ways to glue 3D prints: super glue, epoxy, or hot glue. Every adhesive has its own pros, so you need to choose the glue depending on the materials you are gluing and the level of strength required.
Q: Will superglue work for bonding 3D prints?
A: Superglue is one of the best glues used to bond 3D prints, especially smaller parts. It dries fairly quickly with a fairly strong bond, and this is the glue of choice for quick fixes. Make sure the two surfaces are clean before applying the glue for best results.
Q: How can I prepare a surface for glue application?
A: The surfaces for glue application could be prepared by cleaning with isopropyl alcohol, sanding the surface lightly with sandpaper, washing with water and soap, etc. This usually helps ensure that any dust or debris present does not get into the glue and cause a poor bond with the gluing materials.
Q: What if excess glue is coming out of the joints?
A: For excess glue coming out of the joint, hit it off with a putty knife while wet. Once it starts to harden but is not yet fully set, use a cloth dampened with acetone to gently wipe the area until smooth with the surface of the glue joint. Avoid damaging the 3D printed objects while doing this.
Q: Are adhesives that work best on different types of plastic created specifically for 3D printers?
A: Yes, adhesives are created specifically for different types of plastic commonly used in 3D printing. For instance, Loctite works great with PLA and ABS, whereas epoxy resin is great for a multitude of gluing applications. Be sure to read the instructions so that you pick an appropriate adhesive, because the best glue for your plastic depends on what type of filament you use.
Q: What is the way of bonding parts to form a large 3D print?
A: One way to bond parts to form larger 3D prints is to have the components printed separately with flat surfaces for added adhesion. Use a strong adhesive such as epoxy or super glue to join the parts together. Be generous with the glue application, pressing the parts together firmly.
Q: What safety procedures should be followed while gluing 3D prints?
A: While gluing 3D prints, you would want to do all the work in a well-ventilated area to avoid inhaling any poisonous fumes from the glues. If the glue requires it, you should wear gloves, always following the instructions that come with every product to handle the glue safely.
Q: How long does it take for the glue to form a complete bond?
A: A glue’s curing time varies depending upon the glue being used, i.e., super glue may set within 10 minutes, torn into complete bonding in a few hours, whereas epoxy resin sets in 24 hours from the beginning; hence, it is always better to refer to the glue manufacturer’s instructions.
References
- All3DP: Gluing 3D Prints: Glues for PLA, PETG & ABS – This article discusses various glues like cyanoacrylate (superglue) and their effectiveness for different materials.
- X3D: 5 Ways to Glue 3D Prints Together – Covers multiple methods including superglue, epoxy, acetone, hot glue, and 3D pens.
- UniBond: How to glue 3D prints quickly and easily – Offers a step-by-step guide for using superglue or epoxy resin effectively.
- JLC3DP: How to Glue 3D Prints: A Complete Guide for Seamless Connections – Provides detailed instructions for preparing and gluing 3D prints with various adhesives.
- Maker Build It: Testing Every Glue for 3D Printed Part! What is Strongest – Tests different glues like JB Weld and 3D Gloop for strength and durability.


