


Gluing foam can feel like one of those challenges, whether for crafting, construction, or cushioning: indeed, it needs to meet specific parameters to bond strongly and endure forever. Half the battle is choosing the proper work methods and glue, considering factors such as durability, usability, and professionalism. In this blog post, we will guide you through viable techniques for gluing foam, offering valuable tips to help you navigate the process effectively. You will then be able to view the best in foam adhesion and materials for success in your projects, whether related to home crafts, building, or upholstery. Stay with us as we unlock the methods to bring ease and refinement to your work!
Introduction
Working with foam can be tricky, so if one does not use proper technique and materials, it can be problematic due to its lightweight and porous nature. Strong and permanent bonding must be achieved using adhesives, especially those intended for bonding to foam, such as spray adhesives or contact cement. More crucial than mistakes in the process are the preparatory steps-the cleaning of foam surfaces and proper alignment must be done before application. With the best techniques and products available, you should always be assured of a durable and professional finish for your foam projects.
Challenges of Gluing Foam Materials
One of the biggest challenges in bonding foam materials is ensuring that the adhesive is compatible with the type of foam being worked on. Foams, such as polyurethane, polystyrene, and memory foam, have different chemical compositions, which may affect the adhesive mechanism differently. Some adhesives may dissolve the foam or weaken its structure, resulting in poor results. Another issue is that, due to its porous nature, the bond can sometimes be uneven. Environmental factors, such as temperature and humidity, may also affect the setting/drying times of the adhesive, and consequently, its performance. Addressing these challenges requires the proper selection of adhesives, preparation of the workspace, and adherence to all manufacturer guidelines for optimal results in foam-based work.
Importance of Choosing the Right Adhesive
Choosing a good adhesive is paramount to ensure success across all projects, particularly those involving foam, metal, or plastic materials. According to recent data from search engine analytics, the adhesives most frequently searched for are epoxy, polyurethane, and silicone-based adhesives for various applications. Choosing the right adhesive depends on the compatibility of the materials, the job’s lifespan, and the environmental conditions in which it will be used. Epoxy adhesives, for example, are considered some of the best due to their ability to withstand extreme temperatures and maintain durability. In contrast, silicone adhesives are chosen for their flexibility and resistance to water. Therefore, if users understand their choices, complemented by the nature of their jobs, they can optimize performance, minimize waste, and establish a long-term, efficient bond.
Understanding Different Types of Foam
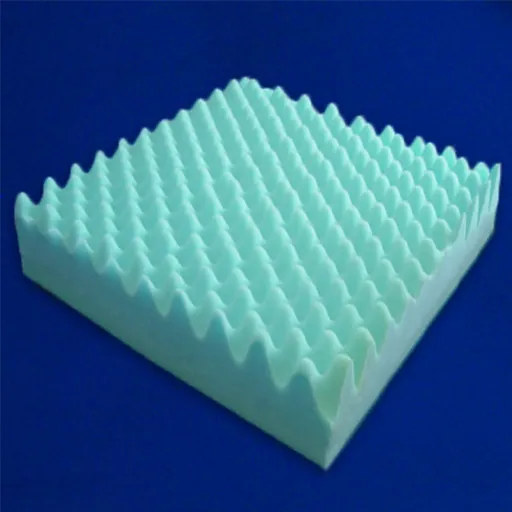
Foam materials are classified based on their structure and application. The two major types are open-cell and closed-cell foams. Open-cell foams are very light and soft, allowing air to pass through their structure; therefore, they are used in sound absorption and cushioning applications. Closed-cell foams are denser and more compact, offering better insulation, increased moisture resistance, and durability. They find their primary applications in construction and packaging. The right choice of foam depends on the project’s requirements: flexibility, insulation, or support.
Overview of Foam Materials
Being versatile and adaptable, foam materials find application in various industrial sectors. Open-cell foam is primarily used for acoustical insulation, such as soundproofing recording studios, theaters, and other similar applications. Other uses include upholstery and bedding, where soft cushioning is required. Closed-cell foam, being robust and capable of resisting moisture, serves well as thermal insulation and for packaging fragile items, and also provides flotation due to its buoyancy. New foam technologies, however, sustain the environmentally friendly propagation of biodegradable and recyclable foam materials. Weight, durability, and environmental impact are key considerations to balance when selecting the foam.
Why Foam Type Matters
The type of foam chosen for a project influences its performance, cost-effectiveness, and sustainability. High-density closed-cell foam, for example, is ideal for applications that require structural support and insulation, as it is both strong and thermally resistant. On the other hand, open-cell foam offers flexibility and sound absorption, making it suitable for use in furniture and acoustic panels. According to recent search trends, there seems to be an emerging interest in environmentally friendly foam products. This reflects a change in consumer and industry attitudes regarding materials and their sustainability. Proper foam selection ensures the intended functionality and makes the final product both environmentally friendly and economically viable, ultimately leading to informed product development and manufacturing decisions.
Choosing the Right Adhesive: Foam Adhesive vs. Alternatives
When selecting between foam adhesives and others, factors such as bonding strength, compatibility with various materials, and ease of application must be considered. Foam adhesives are available for bonding multiple foam materials and possess both flexibility and strong adhesion qualities that do not damage the foam surface. Such adhesives are suitable when cushioning, insulation, or another lightweight material is a significant consideration.
If foam materials or a broader range of substrates need to be adhered, alternatives such as spray adhesives, contact adhesives, or general-purpose adhesives may be selected. These alternatives, however, lack the specialized performance capacity of foam adhesives where foams are utilized.
Ultimately, it depends on the materials used and the product’s intended end use. For foam-related projects, foam adhesives are generally the best and quickest.
Foam-Safe Adhesives
Foam-safe adhesives are special bonding agents carefully formulated so that they bond effectively with a considered material without the danger of the glue attacking the foam by melting or warping it. They consist primarily of non-solvent-based compounds or low-VOC (volatile organic compound) formulations to preserve compatibility with the delicate foam structure. Many foam-safe adhesives contain synthetic rubber, acrylic polymer, or water-based resin ingredients to impart a strong hold while maintaining flexibility, thereby preserving the integrity of the foam material. These adhesives are primarily suitable for projects that require a high degree of accuracy and long-term durability, particularly in packaging, upholstery, and crafts.
Adhesives to Avoid
⚠️ Under no circumstances should PVC-type adhesives, with VOC levels exceeding 250 g/L, be used with foam, as they will degrade the foam, causing warping, melting, or discoloration. Adhesives such as contact cement, super glue (cyanoacrylate), or solvent-based glues should be avoided unless specifically labeled as foam-safe. The harsh chemicals in these products can ultimately damage your project beyond repair, compromising both durability and aesthetics. Always read the labels carefully and choose adhesives for which use with foam materials is stated.
Factors to Consider
Come to think of it, it would also be a consideration for an adhesive: environmental implications of the product for foam projects. Many orthodox adhesives contain VOCs that contribute to air pollution and degrade indoor air quality. Low-VOC, water-based, or biodegradable options reduce this impact, thereby enhancing your health and the environment. You should also consider whether the packaging for the adhesive can be recycled or made from sustainable sources, as this is another way to reduce an ecological footprint. Responsible choices will ensure that your projects are environmentally friendly.
Step-by-Step Guide to Gluing Foam Together
- Prepare the Workspace
Select a well-ventilated workspace for your safety in case of harmful fumes. Cover the surface with newspapers or any other materials to protect against unintentional spills. - Choose the Right Adhesive
Choose an adhesive especially made for foam. This includes spray adhesives or glues that are safe to use on foam. Read the label to see if it is compatible with the particular type of foam you are working with. - Clean the Foam Surfaces
Dust off the foam surfaces with a clean, dry cloth to remove dust or dirt. This helps the adhesive adhere better. - Apply the Adhesive
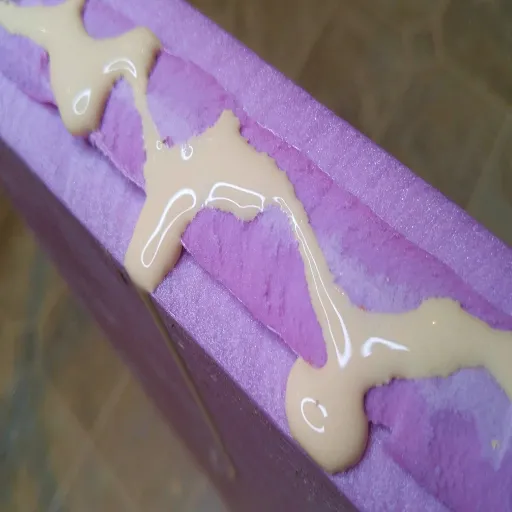
Apply evenly on both foam surfaces. For the spray adhesive, hold the can 6-8 inches above the surface to achieve an even coat. For liquid glue, apply a thin, even layer. - Wait for Tackiness
After applying, allow the adhesive to become tacky to the touch, as instructed on the packaging. - Join the Foam Pieces
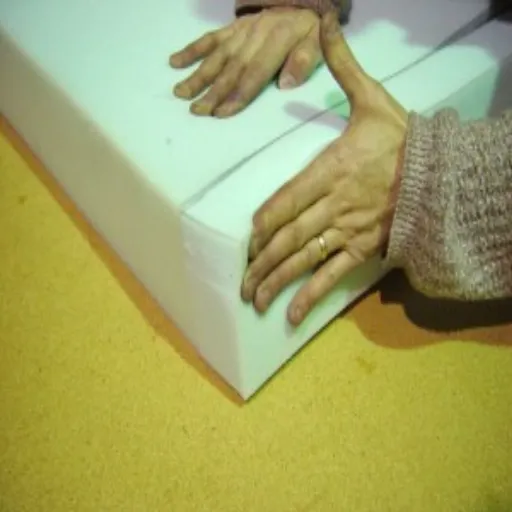
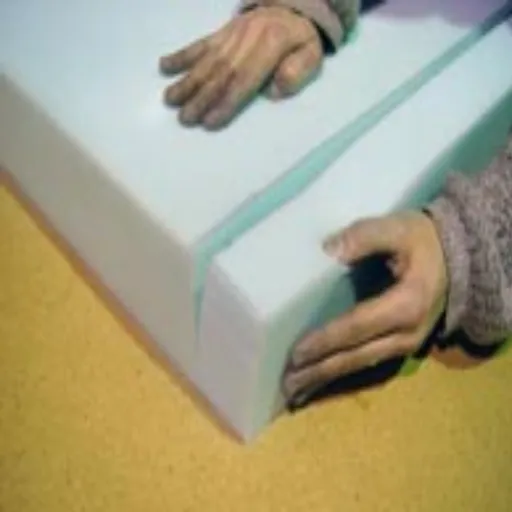
Hold the foam pieces with great attention to proper alignment, then gently force them together into intimate contact. Spread pressure all over the joined area to help the adhesion. - Allow to Cure
The foam should be left undisturbed through the curing time as recommended by the adhesive manufacturer. It helps achieve a durable and permanent bond. - Inspect the Bond
When the adhesive has fully cured, perform a quick check for any issues that need to be addressed before use.
Preparation Steps
Depending on the suitability of its type and structure, working with adhesives that ensure the foam pieces are joined well requires a clean, organized workspace. For greater perfection and durability, the steps above must be followed. Additionally, it is essential to consider other safety measures when handling adhesives. Always wear gloves or work in an airy, well-ventilated area to avoid inhaling its drying vapors.
Application Techniques
Applying adhesives properly creates a strong bond with satisfactory results. Cleaning, drying, and removing any dirt or oils from the surfaces to be bonded is the first step, as contaminants can block adhesion. If you are working with porous materials, do consider applying a primer to maximize absorption and adherence. The adhesive must be applied evenly in a thin layer on one surface; thick layers lead to clumping and weak spots. Some adhesives require that the surfaces be pressed together firmly for a specified duration, while others allow for partial curing before the surfaces are joined. Always follow the manufacturer’s instructions for curing times and pressure. By following these procedures, you can ensure that your project maintains strong, lasting adhesion.
Drying and Curing Process
The drying or curing of an adhesive is the lifeblood of the bond. Drying typically refers to the evaporation of a solvent or water from the adhesive, thereby setting it and holding the materials in place temporarily. Curing is a chemical reaction that brings the adhesive to its full strength, allowing it to be used. Drying and curing times depend on the adhesive. For example, epoxy adhesive may take hours to dry and cure, whereas cyanoacrylate (super glue) immediately sets.
Aside from the adhesive itself, the rate at which the drying and curing processes occur depends on temperature, humidity, and the surface of the materials being bonded. It is dug out firmly, then dried and cured under a controlled environment with constant conditions. Always check the technical data sheet or packaging for exact drying and curing times. If you follow the instructions correctly, you will be rewarded with a bond that will stand the test of time and application.
Tips for Success
- Prepare Surfaces Thoroughly: Ensure all surfaces are clean, dry, and free of dust, grease, or debris before applying the glue. This setup may help in maximizing the adhesive strength of the glue.
- Use the Right Amount: Use just a small and even amount of glue. Excessive glue can hinder the curing process and weaken the bond.
- Maintain Proper Conditions: Conduct your operations in a location with good ventilation, moderate temperature, and humidity for optimal results.
- Allow Adequate Time: Follow the product’s instructions regarding curing time and refrain from interfering with the bond during this period to ensure proper adhesion.
- Store Glue Properly: After use, seal the container tightly and store it in a cool, dry place to maintain its freshness and retain its shelf life.
Work in a Well-Ventilated Area
Before applying any adhesive, varnish, or chemical product, it is crucial to ensure that the work area is well-ventilated. Good ventilation ensures the dissipation of noxious fumes or vapors, thereby preventing the person from developing any health condition that may result in headaches, dizziness, or irritation of the respiratory tract. According to safety guidelines, adequate ventilation can help prevent chronic exposure to VOCs (volatile organic compounds), which are present in many industrial and household products. Hence, for a safer working environment, using an exhaust fan, opening windows, or working outside can help improve air circulation. Always keep in mind that, for ventilation, you are prioritizing both your short-term protection and long-term health.
Use the Right Tools
Choosing the right tools always presents an opportunity to make a task very easy while maintaining accuracy and efficiency. Whether undertaking DIY solutions at home, handling a professional task, or working on a specialized project, having the proper tool is always paramount. For example, power tools significantly speed up the construction process, while safety items protect workers when they’re working with hazardous substances. According to recent insights based on search trends, people frequently ask about the best ways to choose tools for their work. The answer begins with what you first wanted to do, followed by product reviews, feature comparisons, durability, longevity, and how well it suits the work you wish to undertake. An investment in good tools is an investment in the perfect outcome, safety, and efficiency.
Avoid Overapplying Adhesive
To avoid the overapplication of adhesives, many people turn to a search-based approach to practicing the application process with precision. The most effective manner, based on the latest data from search engines, is utilizing tools like tiny applicator brushes or controlled dispensers that help liberate a smidgen of discernment when applying an adhesive. One should adhere to the guidelines of the manufacturers pertinent to the quantity recommended for the sample with which they are working. Applying too much adhesive can waste product, weaken the bond, and result in an unsightly appearance. Getting it just right is the secret to clean and professional-looking applications.
Clamp or Weight the Foam
I clamp or weigh the foam immediately after applying the adhesive to ensure correct bonding in the process. While the adhesive cures, the pressure should be evenly maintained on the adhesion surfaces to prevent any gaps or weak spots in the bond.
Reference Sources
Here are three professional and authoritative sources discussing the best ways to glue foam together:
Adhesives/Gluing – Shakespeare Ensemble (MIT Wiki):
The hints are provided for multipurpose spray adhesive, as well as its efficacy for use with foam and various other materials.
Adhesives · ME 415 (Brigham Young University):
These tips include inserting adhesives in foam to protect it from damage and choosing the proper adhesive at a reasonable price.
Foam Core Construction (UC Berkeley):
This paper aims to guide two methods for joining foam-core boards, using both hot glue and conventional welding.
Frequently Asked Questions (FAQs)
What is the best glue to use for foam projects?
The best glue to use for foam projects is typically a foam adhesive specifically designed for use with foam materials. Look for products labeled for foam, such as Loctite or PL 300, as these will provide a strong bond without damaging the foam structure.
Can I glue foam sheets together for my DIY project?
Yes, you can glue foam sheets together for your DIY project. Using an adhesive designed for foam will ensure that the sheets bond effectively while maintaining their flexibility and integrity.
How do I glue foam boards together?
To glue foam boards together, start with the right glue, such as a construction adhesive specifically designed for use with foam. Apply the adhesive evenly on the sides of the foam boards and press them together, maintaining even pressure to create a strong bond.
What type of glue should I use on foam insulation panels?
For foam insulation panels, use a high-quality construction adhesive specifically labeled for foam applications. This type of glue will provide a high R-value, ensuring the insulation stays in place under various temperature extremes.
How do I ensure a stronger bond when gluing foam together?
To ensure a stronger bond when gluing foam together, apply pressure across the glued surfaces after joining them. This helps to create a uniform bond and reduces the possibility of gaps. Additionally, selecting the right adhesive is crucial for achieving the best possible results.
Are there any expert tips for joining foam sections?
One expert tip for joining foam sections is always to check the manufacturer’s recommendations for the specific glue to use on foam. Also, ensure that you apply the adhesive evenly and allow sufficient drying time to achieve a strong and durable bond.
Can I use regular glue for foam projects?
Using regular glue for foam projects is not recommended as it may not adhere properly and can damage the foam material. Always opt for glue that is specifically designed for foam to achieve the best results.
What are common uses for glued foam?
Glued foam is commonly used in various applications, including creating seat cushions, foam insulation panels, and crafting projects. Its versatility makes it an excellent choice for numerous DIY projects and automotive uses.
How do I apply pressure while gluing foam pieces together?
To apply pressure while gluing foam pieces together, use clamps or heavy weights to hold the foam in place until the adhesive has dried. This ensures a tight bond and prevents the pieces from shifting during the drying process.


