


The entire process of gluing leather can be a tricky and challenging task if you don’t have the right tools and knowledge of proper gluing techniques. Step 1: Choose the right glue. Whether you want to attach or bond leather for crafting, repairing a treasured jacket, or for any other kind of creative work, obtaining the named glue is crucial for yielding professional-grade results that last. With so many different types of glues available, it can be confusing to decide which one to choose. However, this guide will help you navigate the options. The guide will explain the best way to glue leather, describe why certain glues work better for specific tasks, and provide a few practical tips that will ensure your projects hold together.
Introduction to Leather Crafting
Leatherworking, also known as leather craft, involves transforming leather into functional or decorative items through various techniques, including cutting, sewing, embossing, and dyeing. This craftsman shop can produce a broader range of products, including wallets, belts, bags, and accessories. Leather is a supreme raw material, considering its durability and versatility, which further assures that any design will be long-lasting and custom-tailored. The very bare minimum, however, would be something to cut with, hole punches, stitching needles, and some kind of glue for bonding. A bit of practice and attention to the smallest detail can build the rewarding art world of teaching into creating unique leather articles.
Overview of Leather Crafting as a Hobby
Leathercraft is a satisfying hobby that combines creativity with practical application. It allows artists to conceive and pursue the craft of making highly personalized objects. The spirit of the art rewards patience and a keen eye for detail, for every project demands a high degree of planning and split-second workmanship. It can also work in the craft’s favor, alleviating stress, as time is part of the healing process, and both the hands-on aspect and mental engagement have therapeutic effects. Thanks to online forums, video tutorials, and workshops, this is a perfect time to learn and share techniques. Leather products carry the value of their time and durability. Hence, this is an ideal hobby for making heartfelt gifts or launching a side business.
Importance of Strong, Durable Bonds in Leather Projects
Leatherworking needs strong and long-lasting bonds to preserve the items and make them usable. Both adhesives and stitching work hand in hand to secure leather. A quality leather glue secures layers together with precision, especially on fine details or locations that may not hold with mere stitching. This bonding process, combined with strong thread-like polyester or nylon, adds the necessary strength to endure wear and tear. Correct bonding reduces the likelihood of early-stage product failure and enhances the final product’s aesthetics. Modern gluing technologies and detailed tutorials are fostering a renaissance of leathercraft, allowing aficionados to achieve professional results right at home.
Common Scenarios for Gluing Leather
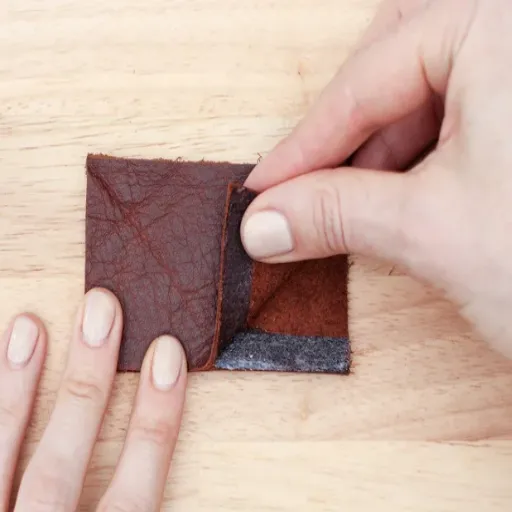
In crafting and repairing setups, gluing leather is a common practice. It is especially beneficial for items such as wallets, handbags, or belts, where stitching alone does not give a secure hold to leather pieces. They are needed for gluing any minor fixes on leather, such as re-gluing edges that have begun to peel or gluing a sole that has become loose on leather shoes. Another primary reason for gluing in leatherworking is when two or more layers of leather are to be carved or embossed; this glue must hold the layers so rigidly that even in intricate design work, there is no lateral movement of the layers. With numerous online searches for effective leatherworking, many will seek a type of glue that requires minimal drying time and is eco-friendly, yet provides a firm hold without compromising the natural flexibility of the leather.
Why Choosing the Right Adhesive Matters
Adhesive selection is crucial in leatherworking because it provides a strong bond, thereby ensuring the durability and integrity of the leather, as well as its functional aspects. Incorrect bonding may result in uneven finishes, or areas of it may become brittle over time, while the glue can also damage the material. In addition, ensuring that the chosen adhesive meets the project’s requirements, such as aspects like flexibility or waterproofing, is essential for ensuring that the end product will withstand both appearance and function. If a relevant adhesive is employed, craftpersons can achieve professional-looking results and a long lifespan for their leather articles.
Interaction of Different Adhesives with Leather
Correctly choosing a glue for leather will depend on the results the artisan wishes to achieve. Contact cement is selected for the firmly lasting bond it provides for items where the joint must appear seamless—the making of shoes and belts being classic examples, showing too that one should be careful during application, or there will be no turning back. Polyurethane-based adhesives are preferred for their flexibility, which is suitable for instances where soft leathers are involved or when movement is crucial, such as in wallets and handbags.
Water-based glues remain an option for those who value environmental friendliness or ease of use, although their strength may be weaker under high stress compared to their solvent-based counterparts. Craft glue is intended for decorative use, as it will never approach the other alternatives in terms of order strength. Hence, one must decide on the glue according to the type of leather, the project goal, and the need to balance shape against function.
Risks of Using the Wrong Glue
Choosing the wrong glue for leather projects can lead to a range of problems, resulting in a final product that loses its appearance and functionality. If the glue is weak, the seams can eventually separate, compromising the item’s durability and potentially causing damage. Too strong glue or unusual glues can damage leather by making it stiff in certain parts, color spots, or even hours, slowly weakening the material through chemical reactions. Furthermore, during application, some products may release harmful fumes and odors, posing health risks when adequate safety measures are not taken. Wasting time and effort on inferior glues can significantly increase the repair costs and sometimes necessitate replacement. To avoid such issues, one must take the time to conduct proper research on the glue that suits their leather type and project specifications.
Key Adhesive Properties to Look For
Consider these critical factors to ensure an adhesive’s durability and usefulness when working with leather:
- Flexibility: An adhesive must retain flexibility upon curing to yield to a leather’s natural movements without cracking or peeling away.
- Strength: It would need to be very strong in its bond to withstand days of stress or heavy use.
- Drying Time: A quicker drying time might work for a sudden repair, but perhaps the slower curing time might work nicely with a more precision-demanding project.
- Water Resistance: If moisture can easily reach the leather product, the adhesive must be water-resistant or waterproof to maintain its bonding.
- Heat and Cold Tolerance: It may be beneficial to consider adhesives that can withstand heat or cold, depending on the materials to which the bonding will be applied.
- Non-Toxic Formulation: Prioritize safety by choosing adhesives with low or no toxic fumes, mainly for indoor projects or those involving prolonged usage.
Step-by-Step Guide: Preparing Leather Surfaces
- Clean the Leather: Use a soft, slightly damp cloth to gently wipe the leather surface, removing any dirt, dust, or debris. For deeper cleaning, apply a cleaner specifically designed for leather and follow the product instructions.
- Dry Completely: The leather should be left to air dry thoroughly in a cool, shaded area, as any remaining moisture can cause unwanted issues.
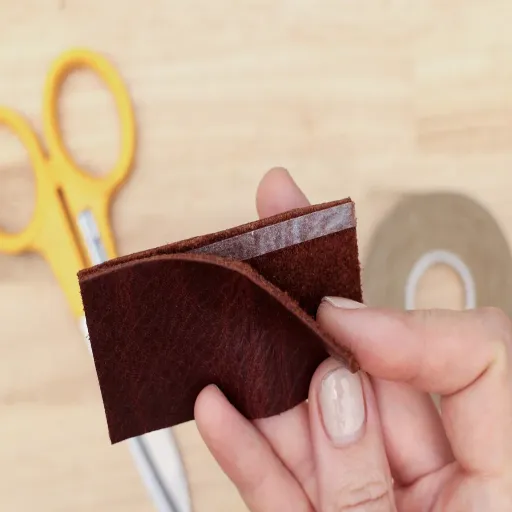
- Roughen the Surface: A slight sanding with fine-grit sandpaper is sufficient for the area that needs bonding or treatment to make it sticky; be delicate not to scratch the leather too much.
- Remove Residue: Dust and particles created by sanding should all be wiped away with a clean, dry cloth.
- Apply a Degreaser (if needed): If exposed to oil or grease, apply a leather degreaser to render the surface suitable for working.
- Inspect the Surface: Check for cleanliness and texture to assure the leather is ready for bonding or treatment.
Cleaning the Leather Surface
The perfect cleaning for leather is a gentle, non-abrasive treatment. Begin by brushing off dirt or loose debris with a soft-bristled brush or cloth. For a deeper clean, mix mild soap and warm water, apply the mixture onto a damp, lint-free cloth, and wipe in a circular motion. Do not let the leather become soaked, as excessive moisture can cause it to dry or warp over time. Wipe away any remaining soap residue with a damp cloth after cleaning, then air-dry the leather while keeping it out of direct sunlight. To keep the softness and shine, applying a conditioner after the surface is dry is permitted. Regular cleaning and conditioning will most definitely prolong the lifespan of your leather pieces and keep them looking ageless.
Sanding for Better Adhesion
In general, sanding is one of the most critical steps in preparing surfaces for satisfactory adhesion, especially when applying paint, stains, or sealants. Sanding will generate some slight roughness, and this roughness will cause coatings to adhere to the surfaces; hence, any peeling or chipping conditions that may develop will be lessened over time. Identify the surface type before prepping it and choose the suitable sandpaper grit: fine for smoothing, coarse to remove old finishes, or correct any defects. Always sand parallel to the grain; especially true for wood surfaces because sanding across the grain leaves visible scratch marks. Clean all dust after sanding, as dust can deter adhesion. In other words, a well-prepared surface results in a durable finish.
Testing the Adhesive
Use a small, inconspicuous area of the material or surface to test the adhesive’s performance. Spread a thin layer of glue on the substrates and apply them following the product’s instructions. Allow the product to cure for the time specified on the label. After curing, test the adhesive gently by applying slight pressure or trying to pull the two materials apart to assess its strength and compatibility with the materials. This certainly helps identify and resolve any issues before the complete application is submitted, thus avoiding potential failures down the line.
How to Apply Glue Effectively
Prepare the Surface
Ensure the surfaces intended for bonding are clean, dry, and free from dust, grease, and debris. Surface preparation is essential for a strong bond.
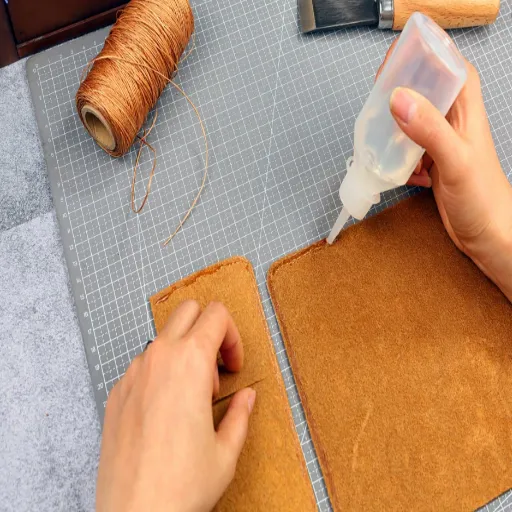
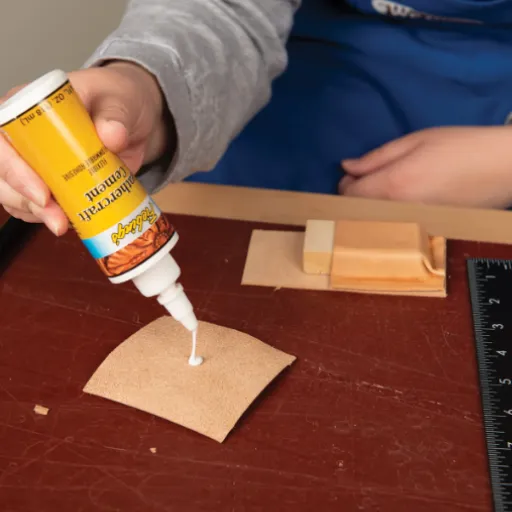
Apply the Glue
Has to be a small and even layer for covering the glue. Excess glue will weaken the bond and probably create a mess.
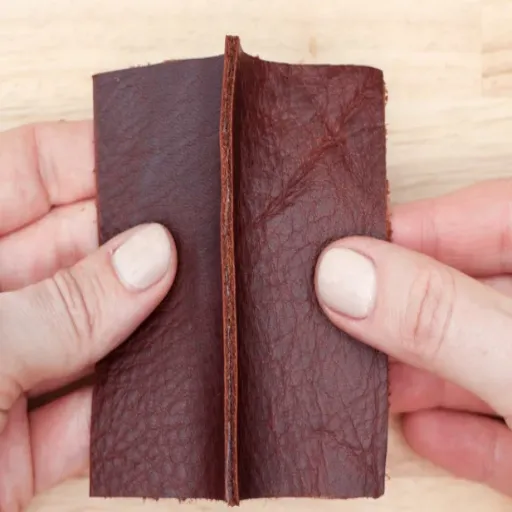
Press the Materials Together
Align the materials and press them together firmly. Using a clamp or a heavy object to maintain pressure while the glue sets may be necessary.
Allow Proper Drying Time
Allow the bond to dry or cure in full for the period indicated on the glue packaging. Moving or disturbing the bond before its time will only lessen its effect.
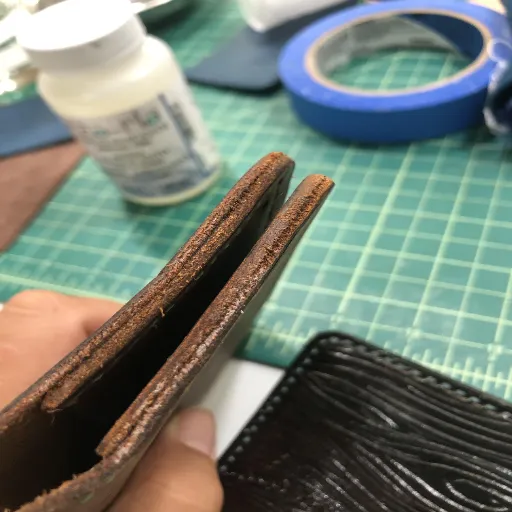
Check the Bond
When the glue is at its maximum dryness, give the bond a gentle test to ensure it is secure. Then, start using the item or proceed to the next phase of the project.
Achieving a Strong Bond
Many factors contribute to forming a strong and reliable bond when gluing. The surfaces to be glued should be clean, dry, and free from any oils and dirt that may interfere with the adhesive action. Another factor to consider in bonding is the type of adhesive used; certain adhesives work better on specific surfaces than others. For example, epoxy glues are best suited for bonding metal and plastic, while wood glue is primarily used for bonding porous surfaces, such as wood. Applying pressure evenly over the glued surfaces and allowing sufficient time for the glue to cure, as recommended by the manufacturer, provides another means of ensuring a strong, lasting bond. Always follow the manufacturer’s instructions for specific guidance suitable for your needs. If combined, these practices, along with proper preparation, would ensure that your project has the best possible results.
Pressing Surfaces Together
Surfaces must be kept pressed together with even pressure throughout the bonding area. This can be done using clamps, weights, or pressing devices, depending on the materials involved. Uneven pressure might produce weak spots in the bond and reduce overall durability. Holding pressure there depends on the adhesive. Generally speaking, adhesives require several hours for complete curing. Curing times and methods have recently taken center stage in adhesive-related queries, emphasizing the paramount importance of adhering to the manufacturer’s directions.
Understanding Drying Times
In conjunction with recent search engine data, one of the frequently asked questions is: “How long does it take for adhesives to dry?” Drying time commonly varies depending on the type of adhesive used, environmental conditions such as temperature and humidity, and the materials being bonded. For instance, flimsy cyanoacrylate adhesives may dry within seconds or minutes, while epoxy adhesives can take as many as hours or even days to complete cure. Users should always refer to the product packaging and follow all instructions provided by the manufacturer, as the recommended drying time is crucial for achieving a strong and long-lasting bond.
Tips to Avoid Common Mistakes
- Read and Follow Instructions: Always read the adhesive manufacturer’s instructions for correct application and drying times.
- Prepare Surfaces Properly: The surfaces to be bonded should be cleaned and dried of dust, oil, or debris to prevent weakening the bond.
- Use the Right Adhesive: Select the adhesive that best suits the materials and conditions of your project.
- Avoid Excessive Application: Applying too much adhesive will only create a mess, prolong the drying time, and reduce the bond strength.
- Allow Proper Drying Time: Do not be impatient; ensure the adhesive is fully cured before applying stress to the bonded materials.
Avoiding Over-Application of Glue
In the case of, say, a glue composition, this extra application is an essential error that compromises the integrity of the project. Contrary to popular belief, adding a little extra glue does not improve its adhesion. Instead, it causes other problems, such as bumps on the surface, longer drying times, and ugly residue that seeps to the surface of the materials. One should never overapply anything; taking a thin, even coat of glue and applying it to the surface corresponding to the size and type of materials to be glued will suffice. Brushes, nozzles, or applicator tips are all good to have on hand, as they might minimize the amount of glue dispensed. Some manufacturers even provide guidelines on different application methods for glue; therefore, it is wise to follow the recommendations in the technical leaflet distributed by the manufacturer of the glue used. Excellence is achieved only when every milligram of glue is accounted for.
Ensuring Proper Ventilation
It is essential to provide proper ventilation when working with adhesives or similar substances that may emit fumes. Proper airflow dilutes hazardous vapors to a concentration that minimizes adverse health effects, including headaches, dizziness, or respiratory tract symptoms. Recent data indicate that various searches, such as “workshop ventilation” or “safe glue usage,” suggest that portable exhaust fans, opening windows, or mechanical ventilation systems are the most effective solutions for improving ventilation in workshops. In the case of an indoor setup, safe use is ensured by positioning the fans such that they blow the fumes away from the user and towards openings. Adhesives with low VOCs (volatile organic compounds) can also help reduce indoor air pollution. Above all, prioritizing ventilation will ensure that the workspace is clean and well-ventilated.
Preventing Uneven Bonds
Meticulous preparation and technique will certainly prevent uneven bonding when adhesives are used. Clean, dry, and debris-free surfaces are among the most critical steps to keep in mind, according to recent search trends. Several factors, including grease, dust, and moisture, can significantly impact the uniformity of the bond. If an adhesive is applied evenly in a single, thin layer across the interface, the likelihood of gaps or spots with reduced strength will be minimized. Meanwhile, as the adhesive cures, pressure is applied using clamps or weights to promote an even bond. The manufacturer’s instructions should be followed regarding drying times and the amount of adhesive to be used for this application.
Troubleshooting Adhesive Issues
Adhesive Fails to Bond Properly
Cause: Contaminated surface or incorrect adhesive choice.
Solution: Ensure all surfaces are clean, dry, and free from contaminants such as grease or dust. Use an adhesive specifically designed for bonding the materials together.
Adhesive Dries Too Quickly or Slowly
Cause: Environmental factors like temperature or humidity.
Solution: Work in an environment where temperature and relative humidity are within the range suggested by the adhesive manufacturer.
Uneven Bond or Weak Spots
Cause: Improper application and/or not providing enough pressure during curing.
Solution: Apply adhesive evenly and clamp or weigh down the bonded items to enforce even pressure until the adhesive is fully cured.
Adhesive Becomes Brittle Over Time
Cause: The adhesive is not suitable for the application due to aging.
Solution: Obtain an adhesive suitable for long-term applications under those conditions. Store the adhesives to make for an extended shelf life.
What to Do If the Glue Doesn’t Stick
If the glue won’t stick, first, I will check if the surfaces are clean, dry, and adequately prepared. If they are, then I will ensure that I use the adhesives that are the best choice for the materials and conditions at hand. Then, the glue will be reapplied liberally if needed, all gluing surfaces will be clamped precisely, and full time will be allowed for curing.
Fixing Glue Stains or Spills
Whatever the glue is spurring on stains or spills, it is better to act fast before the glue cures. With water-based glues, such as white glue or school glue, keep a cloth handy that is merely damp with water to gently blot the stain. Rubbing the stain would only encourage it to spread. Warm, soapy water acts better in loosening the residue of dried glue. For super adhesives like super glue and epoxy, one can carefully apply a subsequent rejuvenating agent, such as acetone or nail polish remover, provided the surface in question is not porous and the remedy is used without harming the material. Always test in an inconspicuous area; when testing, use protective gloves and work in a well-ventilated space.
Reference Sources
Here are three professional and authoritative sources discussing the best way to glue leather:
Columbia University – Best Glue for Textiles
When acrylic resin adhesive is compared with other fast-drying adhesives, it stands tall.
Purdue University Extension – Leathercraft Manual 101.4
This manual provides a straightforward guide for using rubber cement to glue leather, as well as an overview of various tools used in the leather-making craft.
Colorado State University 4-H – Leathercraft Manual
In this guide, therefore, you will discover how to apply glue onto the flesh sides of leather and also make things easier for combining leather with other materials like fabric.
Frequently Asked Questions (FAQs)
What is the best glue for leather items?
The best glue for leather items is often a specialized leather adhesive that creates a strong, flexible bond. Look for products specifically formulated for leather to ensure they work well with the material and provide the best results—brands like Barge, E6000, and Aleene’s offer reliable options for various leather projects.
How do I prepare leather for gluing?
To prepare leather for gluing, ensure the surface of the leather is clean and free from dirt and oils. Use a cloth to wipe down the area and allow it to dry completely before applying the adhesive. This ensures a better bond and helps the adhesive perform optimally.
Can I use a glue gun for leather projects?
Yes, you can use a glue gun for specific leather projects, but it’s essential to ensure that the glue sticks you use are compatible with leather. Hot glue is often not the best choice for long-term durability, but it can be helpful for temporary fixes or quick projects.
What should I do if air bubbles form while gluing leather pieces together?
If air bubbles form during the gluing process, gently press the area with your fingers to help eliminate them. You can also use a thin layer of adhesive and apply it evenly to avoid trapping air. If the bubbles persist, you may need to remove the adhesive and reapply it carefully.
How long does it take for leather glue to dry?
The drying time for leather glue can vary depending on the type of adhesive you’re using. Generally, it can take anywhere from a few minutes to several hours for the glue to dry completely. Always refer to the manufacturer’s instructions for the specific product you are using to ensure optimal results.
Is it necessary to clamp the leather pieces while the glue dries?
Clamping the leather pieces together while the glue dries is often a good idea, as it helps ensure a tight bond and prevents movement that could weaken the adhesive. Use clamps or weights to hold the pieces in place, ensuring that you do not damage the leather in the process.
What are some tips for the successful gluing of leather materials?
For successful gluing of leather materials, start by choosing the best glue suitable for your project. Prepare the surfaces by cleaning and allowing them to dry. Apply a thin layer of adhesive, avoid over-saturating the leather, and let the glue cure in a well-ventilated area. Testing the adhesive on a scrap leather piece before applying it to your project can also help ensure a successful bond.
Can I repair damaged leather using glue?
Yes, you can repair damaged leather using glue, especially if the damage involves separating seams or small tears. Apply a suitable leather adhesive according to the manufacturer’s instructions, and then hold the pieces together until the glue has set. This can help restore the integrity of the leather item without the need for sewing.


