


Gluing leather can be rugged since you have to consider many factors, such as strength, durability, and preservation of the material’s natural beauty and flexibility. Whether it is your favorite leather item to repair, a handmade project to complete, or a professional upholstery job, selecting the proper adhesive is vital for a successful outcome. Some glues work differently, and using the wrong one might result in weak connections, messy outcomes, or even destruction of the materials you’ve got. This write-up will detail the types of glue that are best for leather, how effective they are, and even some tips to get a perfect finish on your leather projects. So, get ready to be very sure of yourself in the realm of leather bonding!
Understanding Leather Types and Their Adhesive Needs
There are different kinds of leather available, including full-grain, top-grain, genuine leather, and bonded leather, each having special characteristics that determine the type of adhesive needed. Among the leathers, full-grain and top-grain are the two that stand out due to their density and durability, which call for the strongest and most flexible glues, such as contact cement or polyurethane-based ones. In contrast, genuine leather, which is more processed and less durable, usually accepts all-purpose craft glues or leather-specific adhesives. Another category is bonded leather, made from leather scraps and fibers; therefore, it is not very strong and may require a strong adhesive to hold together. It is crucial to know the kind of leather to select an adhesive that not only provides the desired durability but also permits flexibility, making it apt for your project.
Overview of Leather Types
Leather is a material obtained from various animals such as cows, goats, sheep, and others. The leather types are categorized based on the quality and characteristics of the skin used. When leather is not chemically treated and retains its entire grain layer, it becomes full-grain leather, the highest quality among all types of leather. It is used in making the finest quality goods such as luxury bags, shoes, and high-end furniture. On the contrary, top-grain leather is sliced off the top layer of the hide, which is then sanded and treated to perfection; thus, on this leather, you will see a bit of the natural features of the skin, though the leather has been treated to be softer and more uniform. The term “genuine leather” is usually applied to lower grades of leather that are bonded together, making it more affordable but less durable than full-grain or top-grain leather. Finally, bonded leather is made from a mixture of leather dust and synthetic materials. It is less durable but the most economical leather. The selection of leather type is based on the final product’s purpose, the buyer’s durability requirements, and the budgetary constraints.
Adhesive Compatibility
Assessing adhesive compatibility with materials requires knowledge of the specific properties of both the adhesive and the substrate. Leather, for instance, will have good compatibility with contact cement or strong polyurethane adhesives because they create a flexible and durable bond. On the other hand, for synthetic materials or bonded leather, cyanoacrylate (super glue) adhesives may work better. All these factors, like temperature resistance, flexibility, and strength, should be considered when choosing an adhesive for optimal performance and longevity.
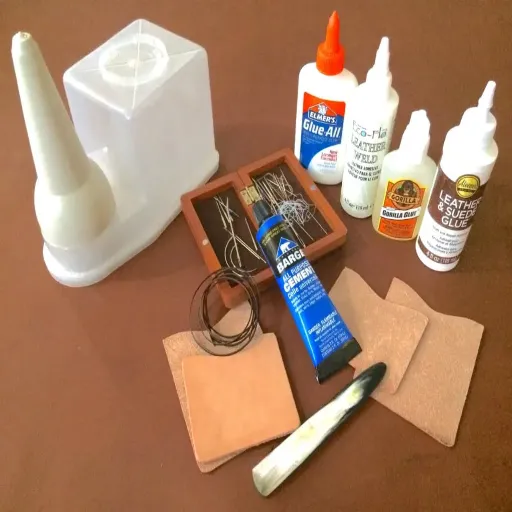
Essential Tools and Materials Needed for Gluing Leather
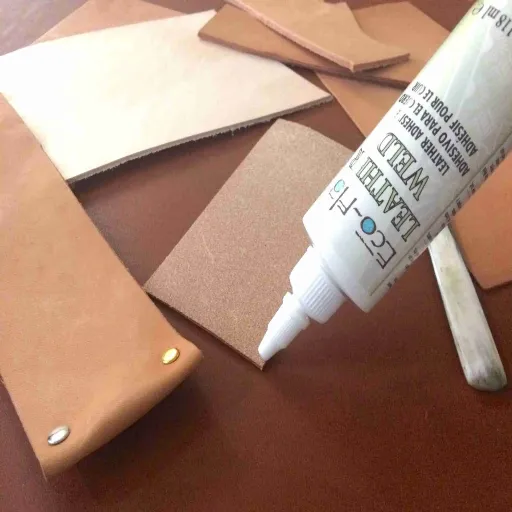
- Adhesive – Choose an appropriate glue such as contact cement, polyurethane adhesive, or cyanoacrylate, depending on the type of leather and desired bond strength.
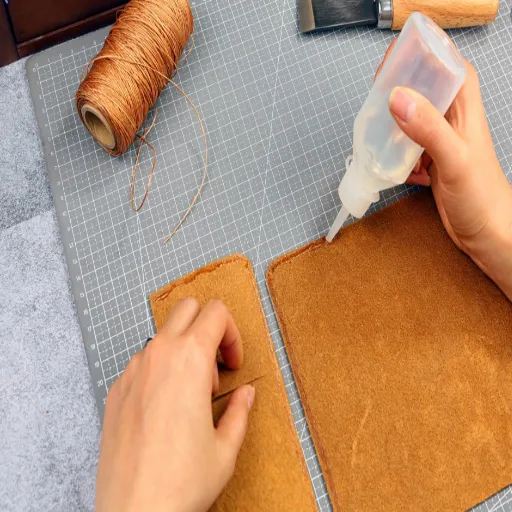
- Applicator – Small brushes, glue spreaders, or spatulas for evenly applying the adhesive.
- Clamps or Weights – To hold the leather pieces in place while the glue sets.
- Cutting Tools – A sharp utility knife or scissors for trimming leather edges as needed.
- Clean Cloth – For removing excess glue and ensuring a neat finish.
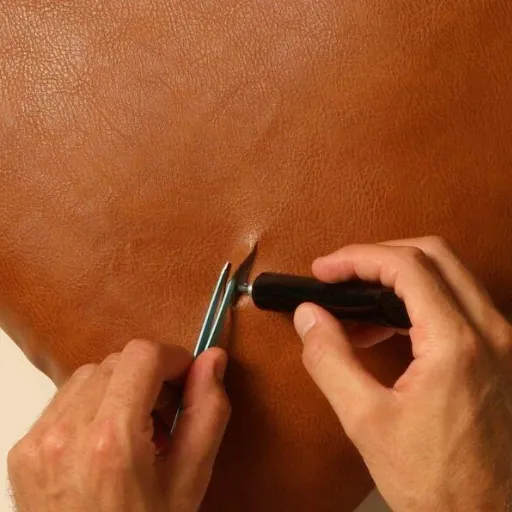
- Scratch Awl or Sandpaper – Used to roughen surfaces for better adhesive bonding.
- Protective Gear – Gloves and a well-ventilated workspace to ensure safety while handling adhesives.
Types of Adhesives for Leather
Choosing the right adhesive is the most crucial step in the leatherworking process if your goal is to achieve a durable and high-quality result. The following are the main types of adhesives that one can find in the market for leather art projects:
Tools for Effective Application
In the process of working with leather adhesives, one can find that the presence of proper tools greatly influences achieving exact and long-lasting results. Below are the primary tools that one should think of:
Applicator Brushes
The use of small and fine brushes is best for the delicate application of glue to intricate areas or the most delicate leather surfaces. They not only help minimize the glue but also keep the finish clean.
Glue Spreaders
The use of flat spreaders, mostly made of plastic or silicone, ensures even distribution of glue over larger areas, though this doesn’t guarantee there won’t be drying spots or weak bonding.
Clamps or Weights
If one seeks a bond that is strong and withstands the test of time, one can use either clamps or hefty weights to keep the leather pieces together while the glue dries. The pressure should be uniform to eliminate any chances of shifting or the appearance of wrinkles.
Cutting Tools
Professional-looking edges are achieved using precision knives or scissors, which are also used for trimming or clean cutting of the leather before bonding.
Protective Equipment
Using gloves, aprons, and masks is essential for safety, especially when working with strong adhesives like epoxy or solvent-based glues, which might emit toxic fumes or cause skin irritation.
Step-by-Step Guide on How to Prepare the Surfaces for Gluing
- Clean the Surfaces: Start with the surfaces and thoroughly clean them. Use a cloth with water or a suitable cleaning solution to wipe off all the dirt, grease, or dust. After that, make sure the surface is not only completely wiped of all residues but also dry before moving on to the next step.
- Sand the Surfaces (if necessary): For smoother materials, you may use fine-grit sandpaper to lightly sand the surface, creating a slight roughness. This will enhance the bonding of the adhesive.
- Remove Debris: After the sanding is done, make sure there is no dust or particles left by using a dry, clean cloth or brush.
- Inspect for Damage: Look for any cracks, splits, or structural issues that may be present on the surfaces. If there are any, consider repairing or reinforcing them to have a stronger bond.
- Dry the Surfaces: Surfaces must be dehydrated and free of moisture before the application of the adhesive. This will eliminate the chances of weak bonds or curing issues, thus making the process very effective.
Cleaning the Leather
Cleaning leather surfaces is a task that must be done regularly to maintain proper care and keep them looking beautiful. So, start with a soft, dry cloth to dust off and remove all the loose dirt. In case the leather is soiled or stained, mix lukewarm water with a mild soap or specialized leather cleaner. Take a clean cloth, dampen it with the mixture, and gently wipe the leather in circular motions. Be careful not to use too much water, as this can ruin the leather. After cleaning, take a separate damp cloth to wipe off the soap residue, then immediately dry the leather with a soft towel. Follow this up by applying leather conditioner to keep the leather soft and prevent cracking. Always remember to test the cleaning products on a hidden area first to ensure they won’t discolor or harm the leather.
Roughening the Surface
To properly roughen the leather surface for repair or preparation, first take fine-grit sandpaper, such as 220-grit, and lightly scuff the spot. This creates a rough surface that helps glues or coatings stick better. When sanding, apply even pressure throughout to prevent uneven wear or damage to the material. Once the sanding is done, take a clean, dry cloth and wipe the surface to remove any dust or particles. Roughening up the leather properly is a key to obtaining a strong and professional finish in leatherwork or restoration. Always use the gentlest and most controlled methods to keep the leather’s integrity intact.
Tips and Tricks for Achieving a Long-lasting Bond
- ✓ Clean the Surface Thoroughly: The surfaces must be spotless and free of any interference with the adhesive. The cleaner should be selected according to the material type.
- ✓ Use the Right Adhesive: Always choose an adhesive formulated for the materials you are bonding to ensure there is no incompatibility and the joint will be strong.
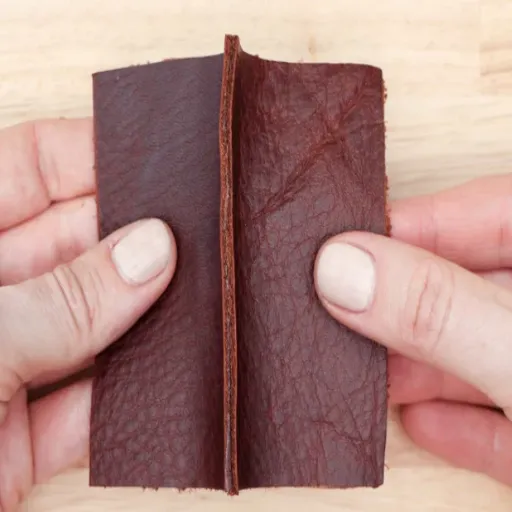
- ✓ Apply Even Pressure: After the surfaces have been joined, it is essential to press them together evenly to ensure the adhesive has complete contact and can cure properly.
- ✓ Allow Adequate Curing Time: It is crucial to follow the manufacturer’s instructions regarding curing to achieve the strongest bond possible. Don’t put stress on the bond before it’s completely healed.
- ✓ Store Adhesives Properly: The effectiveness and the shelf life of adhesives can always be maintained by storing them in cool and dry places.
Curing Time for Maximum Bond Strength
The adhesive type is the primary factor that determines the curing time for the maximum bond strength. Fast-curing adhesives, such as cyanoacrylates (super glue), may take only a couple of minutes for bonding, whereas epoxies can take several hours or even days to cure completely. It is good to refer to the manufacturer’s instructions for specific curing times and conditions. Temperature, humidity, and the materials being joined together are some of the factors that can affect the curing process. To get the best results, keep the adhesive undisturbed during the suggested curing period for the strongest and most durable bond.
Environmental Factors Affecting Adhesive Performance
The environmental factors are decisive and significant in the success and durability of adhesive bonding. The curing of the adhesive, and consequently its strength, is highly influenced by temperature. High temperatures may weaken or degrade some adhesives over time, while very low temperatures may prevent curing altogether. Moisture is also a very important factor, since high humidity can disrupt the adhesion process by either creating a barrier between the surfaces or changing the chemical composition of the adhesive. In addition, some adhesives can degrade from UV exposure, thus making their bond weaker and less effective with time. Therefore, selecting adhesives specifically designed to endure the environmental conditions of the application is crucial to their optimal performance and longevity.
Common Mistakes to Avoid When Gluing Leather
- ⚠ Not Preparing the Surface Properly – The lack of cleaning and roughening of the leather surface can prevent the adhesive from bonding. Dirt, oils, and any coatings should always be removed before the application of the glue.
- ⚠ Using the Wrong Adhesive – Not all glues are appropriate for leather. The selection should be made from either adhesives intended explicitly for leather or those that provide strong, flexible bonds suitable for leather applications.
- ⚠ Applying Too Much or Too Little Glue – Using too much glue can result in a messy bond and weaken the outcome, while using too little can cause the bond to break. For optimum adhesion, a thin, even layer should be applied.
- ⚠ Skipping Curing Time – The premature use of the glued item before the adhesive has dried or cured completely can weaken the bond. Always observe the curing time recommended in the adhesive’s instructions.
- ⚠ Failing to Clamp or Press – The leather pieces that have been glued together will need to be either pressed or clamped firmly during the drying process for a strong bond. Neglecting this step may lead to weak adhesion.
Skipping Surface Preparation
One of the biggest mistakes made while working with leather, which often leads to adhesive failure, is skipping surface preparation. For there to be a strong bond between the leather pieces, they must be cleaned very well, dried properly, and be free of any contaminants like oils, dirt, or old glue. If this step is neglected, weak adhesion is created, making the bond more likely to break under stress. The latest data suggests that searches for “how to clean leather before gluing” have increased sharply, revealing that people are becoming increasingly aware of the necessity of surface preparation. If you clean the surface with appropriate agents like alcohol or a leather-specific cleaner and then allow the leather to dry thoroughly, you will likely see a significant increase in the effectiveness of your adhesive work. Proper preparation is the key to durable and long-lasting results.
Using the Wrong Adhesive for Leather
When the incorrect glue is applied to the leather, it can result in unsatisfactory outcomes. The bond might be weak, the residue visible, or the material damaged in the worst case. The latest search data shows that many people are asking, “What adhesive is best for leather?” The answer to that question very much depends on the project type. For example, if the project involves repair, using contact cement and glue for leather are the best general bonding methods because they provide a strong and flexible hold. On the other hand, if the project requires precision, such as for intricate crafting or repairs, cyanoacrylate (super glue) may be suitable, but the application must be tiny to avoid stiffness. It is essential to consider the type of leather and its use before choosing the adhesive to achieve a professional and long-lasting result.
Overapplying Glue and Rushing the Process
Applying too much glue and hurrying the process can result in poor quality and leatherworking. I have discovered that using excessive glue often results in uneven bonding and leftover glue, which can be hard to remove. The time spent applying a thin, uniform layer, followed by curing, ensures that a professional finish will last. Patience is the key in this process, and it really proves its worth.
Reference Sources
Below are five scholarly and reputable sources of reference you can rely on to confirm the accuracy of your article titled “The Best Way to Glue Leather to Leather.” The sources are academic and provide exhaustive discussions on adhesives in leather and their applications in the leather industry:
- “Biopolymer applications for different treatments of the historical paper manuscripts and leather bindings: A Review”
The paper elaborates on the application of biopolymers and glue for leather bindings and discusses the characteristics and performance of different adhesives. - “Animal Glues and Related Materials: An Annotated Bibliography”
This annotated bibliography gives a detailed description of the role of animal glues in leather restoration and other applications. - “Adhesives in the leather industry-perspectives for changing needs”
The paper looks into the special difficulties of surface bonding and the gradual development of adhesives in the leather industry. - “Improving the economic and environmental sustainability of painting and gluing operations in a luxury leather goods industry using DMAIC methodology”
This case study presents the enhancement of adhesive processes in the high-end leather goods sector, providing comprehensive insights into eco-friendliness and economic efficiency. - “Animal glue”
This chapter provides a thorough introduction to the entire process of animal glue production and its various uses, including the leather industry.
Frequently Asked Questions (FAQs)
What is the best glue to use on leather?
The best glue to use on leather depends on your specific project. For a strong and permanent bond, many recommend using leather cement or Barge glue. These adhesives are designed to create a bond that is often stronger than the leather itself, making them ideal for various leathercraft projects.
Can I use regular wood glue for leather?
No, regular wood glue is not suitable for leather. Wood glue is designed for porous materials and may not provide the necessary bond for leather. Instead, opt for adhesives made explicitly for leather, like leather cement or a quality shoe glue.
How long does it take for leather glue to dry completely?
The drying time for leather glue can vary based on the type of adhesive used. Typically, most leather glues require a drying time of at least 24 hours to achieve a permanent bond. It’s essential to allow the glue to dry completely in a well-ventilated area to ensure optimal adhesion.
What types of leather glue are available?
There are several types of leather glue available, including water-based adhesives, contact cement, and industrial-strength glues. Each type has its unique properties, so it’s essential to choose the right glue for your project based on compatibility with your leather and the desired strength of the bond.
Is it necessary to stitch leather after gluing?
Stitching leather after gluing is not always necessary. Still, it can add extra strength and durability to your project, especially for items that will undergo stress, such as leather jackets or shoes. Combining stitching with glue can ensure a more robust and long-lasting bond.
Can I use a glue gun for leather projects?
While a glue gun can be used for leather projects, it’s essential to use a glue stick that is compatible with leather. Not all glue guns provide a strong enough bond for leather, so it’s recommended to choose a high-temperature glue gun and use adhesives that are flexible and waterproof.
What should I do if the glue doesn’t bond properly?
If the glue doesn’t bond properly, it may be due to insufficient surface preparation or using the wrong type of adhesive. Make sure to clean the surfaces and ensure they are dry before applying glue. If the bond still fails, consider trying a different kind of leather glue or adhesive for better results.
How do I choose the right glue for my leather project?
To choose the right glue for your leather project, consider the type of leather you are using, the nature of the project, and whether the bond needs to be permanent or temporary. Additionally, check the adhesive’s compatibility with leather and whether it can withstand environmental factors such as water exposure.


