


Hanging drywall is a necessary stage in most building and renovation projects, but the way you do it can determine the quality of the final result — a durable, professional-looking one. A common issue that bears consideration is whether to glue drywall — if you decide to do it, what would be the best method? This article examines the usefulness of using glue in drywall installation, the factors that make this choice appropriate, the selection of adhesive, and the techniques that create a bond that is not only strong but also durable. Whether you are an expert or on your first DIY project, knowing these methods can help you save time, effort, and money on materials. Be prepared to see how adhesive solutions can not only make your drywall installation easier but also provide excellent results!
Understanding Drywall Adhesives
Drywall adhesives are special products designed to hold drywall panels to the framing or other surfaces firmly. The main aim of the adhesives is to avoid using too many fasteners, reduce nail and screw pops, and elicit a flatter, smoother surface. These adhesives are available in various forms, such as tubes for caulking guns or pre-mixed buckets, and they are typically used with mechanical fasteners for optimal performance. When selecting a drywall adhesive, it is essential to use one explicitly marked for drywall or construction use, as these are designed to meet the job’s requirements. A good application, where the surfaces are clean and the adhesive beads are uniform, results in a bond that is strong and reliable over time.
Popular Adhesive Brands
Drywall adhesives, a necessary part of drywall finishing, have some reputable brands that amaze us with their performance and dependability. Among these brands, we can find:
Loctite
Celebrated for its strong bonds and innovative formulas
Liquid Nails
Frequently chosen for heavy-duty building applications
3M
Offers a broader range of durable adhesives that require little effort to use
Gorilla Glue
Earned a reputation as the strongest and most versatile glue for all kinds of surfaces
DAP
Offers a family of products that are easy to use and designed for specific applications
Key Takeaway: A trustworthy brand should be chosen for quality and peace of mind on any project.
Benefits of Using Adhesives
Adhesives are packed with benefits, which is why they are the number one choice in a wide range of industries and applications.
- ✓ Clean and Efficient Bonding: Eliminates the need for mechanical fasteners and reduces damage to substrates
- ✓ Equal Stress Distribution: Distributes stress equally over bonded surfaces for stronger and more durable structures
- ✓ Versatile Material Bonding: Ability to bond dissimilar materials like metal, plastic, and wood
- ✓ Aesthetic Appeal: Hides joints and fasteners for a seamless look in products and buildings
- ✓ Lightweight Solution: An Essential factor in the aerospace and automotive industries for maintaining efficiency and performance
Pros and Cons of Gluing vs. Nailing
| Method | Advantages | Disadvantages |
|---|---|---|
| Gluing |
|
|
| Nailing |
|
|
Advantages of Using Glue
Glue is a highly adaptable and robust solution for bonding different materials, providing the entire surface of an application with uniform strength. Unlike nails that damage and make marks on surfaces, glue is a perfect choice for eating or unseen surfaces. There are also advanced adhesives that can bond opposite materials together, like wood to metal or plastic, which can really help in designing and building creatively. Moreover, some types of glue can resist water or heat, which adds to their durability factor in harsh conditions. The modern adhesives are not only light but also require very little equipment, making them user-friendly. All these benefits are why glue is an indispensable tool across various industries, from woodworking to automotive manufacturing.
When to Choose Nailing
Among the various fastening techniques, nailing is the quickest and most straightforward approach. It is beneficial in those tinkering sessions where structural integrity is a must, like building, laying down floorboards, or making rough carpentry. Nails are a very cheap option and have good holding power on materials like wood, making them a reliable choice for heavy-duty operations. Besides, the use of pneumatic nailers and other power tools has increased the speed of the process, giving it a real leg up over traditional methods like adhesives or screws. Nevertheless, nailing is not always the right choice for projects that demand a perfect finish or involve using different types of materials. In such cases, it is better to rely on other fastening methods like glue or screws.
Step-by-Step Guide to Gluing Drywall
1Prepare the Surface
Before you proceed, make sure the wall studs or surfaces are completely clean, dry, and without any foreign particles or dust. The adhesive will form a stronger bond in this way, eliminating any weak spots.
2Choose the Right Adhesive
Pick a first-class construction adhesive that is meant for drywall only. Verify the product label for compatibility with your materials and environmental conditions.
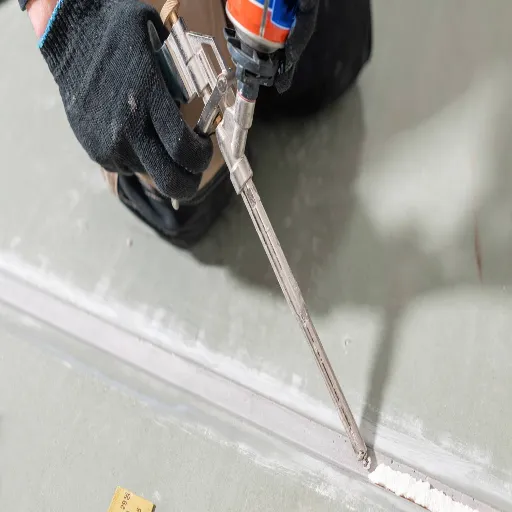
3Apply the Adhesive
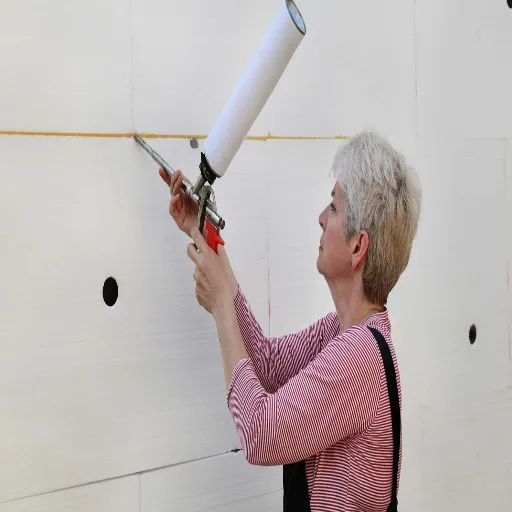
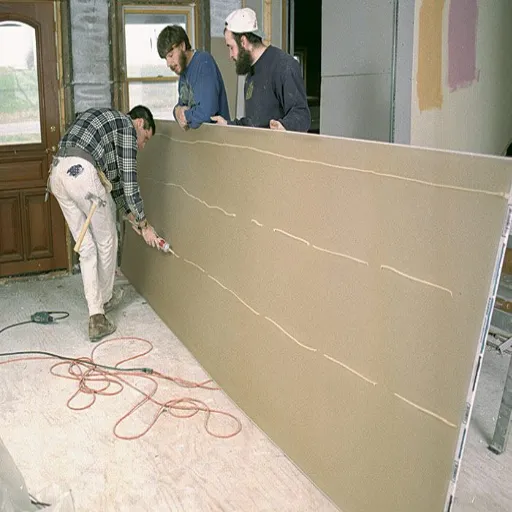
Apply the adhesive in a continuous bead along each stud or surface where the drywall sheet will attach using a caulking gun. If you want the best results, then follow the manufacturer’s recommended bead thickness.
4Position the Drywall Sheet
With great care, lift the drywall sheet and place it against the adhesive-coated surface. Align the edges very well to prevent gaps or misalignment.
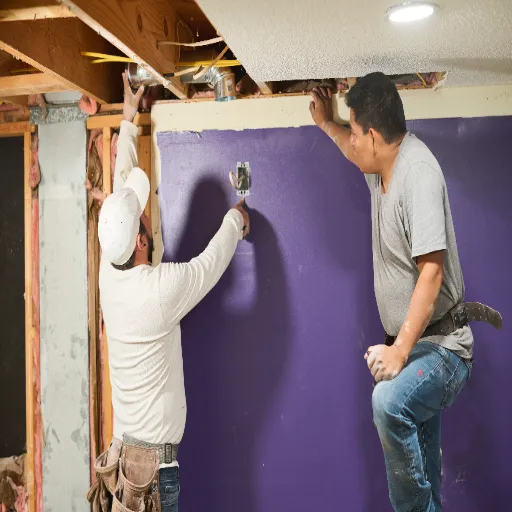
5Secure with Screws or Nails
The glue provides strong adhesion, but it is recommended to temporarily hold the drywall with screws or nails until the adhesive is completely set. This will help to keep the placement flush and even.
Application of Drywall Adhesive
In the process of installing drywall, one of the most important things is to clean and prepare the surfaces properly if you are going to use adhesive. It is necessary first to clean the surface to remove any dust, oil, or other small particles that could weaken the bond before applying the adhesive. Today’s adhesives are designed for better strength and durability, ensuring they will maintain the bond over time. However, it is crucial to be aware that temperature and humidity in the room may slow down the setting time of the adhesive. According to current best practices, it is essential to combine adhesive and mechanical fasteners, such as screws or nails, to achieve the best results. Always adhere to the manufacturer’s particular instructions regarding application and drying times to access the highest performance and efficiency.
Finishing Touches After Installation
Once the installation is done, it is essential to carefully check the area for any imperfections or misalignments. Next, it is necessary to clean the installed surfaces to remove any dust, debris, or adhesive residue that might have been left over from the process. The use of a proper sealant on edges or in gaps can not only add to the durability of the surface but also make it look more elegant. However, if painting or finishing materials are needed, make sure the surfaces are correctly prepared and primed before the application. The installation will maintain its quality and appearance over time through regular maintenance and occasional cleaning. The manufacturer’s care and post-installation maintenance recommendations should always be followed to ensure product performance is sustained for an extended period.
⚠️ Common Mistakes to Avoid When Using Adhesives
❌ Using the Wrong Type of Adhesive
Always opt for an adhesive suitable for the materials being joined and the conditions of use, such as temperature or moisture exposure.
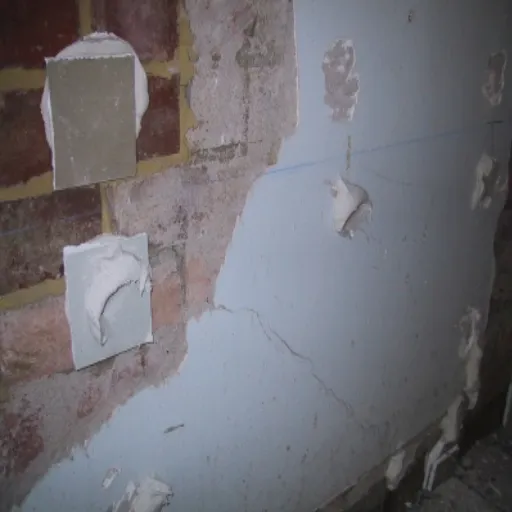
❌ Failing to Prepare Surfaces Properly
To create a strong bond, the surfaces should be clean, dry, and free of dust, grease, or debris. Apply the adhesive only after such preparation.
❌ Applying Too Much or Too Little Adhesive
Application of an unsuitable amount can result in a weak bond. Adhere to the manufacturer’s instructions for the correct amount application for the best quality.
❌ Ignoring Drying or Curing Times
Moving or using the bonded items too quickly before the adhesive has completely dried can weaken the bond.
❌ Skipping Safety Precautions
Use adhesives in areas with good ventilation and always follow safety measures, such as using gloves when needed, to prevent injuries.
Neglecting Surface Preparation
Proper surface preparation is really a significant step that is often ignored when adhesives are used. Failing to clean, dry, and sand surfaces as necessary might lead to either weak bonds or an adhesive that does not stick at all. Recent research shows that the number of people searching for “how to prepare surfaces for adhesive bonding” has increased significantly, highlighting the need to educate people about this topic. To achieve the strongest adhesion possible, it is essential to consistently remove dust, grease, and other contaminants and apply the recommended surface treatments specific to the adhesive being used. By taking these steps, bond durability and performance can be significantly improved.
Over-Reliance on Glue Without Support
Using glue alone, without other support, can increase the risk of cracking between joints, especially when high stress is applied or the structure has aged. Moreover, the use of data from the search engine showing a recent increase in users searching for “why does glue fail under pressure” and “how to reinforce adhesive bonds”, together with the news of the search engine showing an increase in searches for these terms, it is evident that people are looking for ways to tackle this issue. One way to overcome this problem is by associating mechanical fasteners, clamps, or additional structural supports with adhesive applications, which can significantly improve the overall stability and longevity of the projects. The knowledge of these reinforcements and their implementation will guarantee trustworthiness even in the most challenging situations.
Practical Tips and Recommendations
💡 Surface Preparation
Make sure that the surfaces are clean, dry, and devoid of any oils or dirt. By increasing the texture, sanding smooth surfaces can also help the bond get stronger.
💡 Choose the Right Adhesive
Adhere to the material and environmental conditions when selecting the adhesive type. For instance, epoxy is perfect for heavy-duty bonding, whereas cyanoacrylate is suitable for speedy fixes.
💡 Even Application
Spread the adhesive evenly on the bonding area to avoid weak points. Do not apply more than necessary, since excess glue can weaken the joint.
💡 Add Mechanical Supports
Strengthen the joints with screws, brackets, or clamps when required. The mechanical support provides stability and lessens the stress on the adhesive.
💡 Allow Proper Curing Time
Follow the manufacturer’s instructions for curing times to achieve the strongest bond. Do not interrupt the curing process by disturbing the bond.
Consider Environmental Conditions
In the case of adhesives, it is essential to consider environmental conditions that may influence the bonding process and durability over time. The temperature changes can alter the adhesive’s viscosity, resulting in either a weak bond or uneven application. Humidity, on the other hand, may cause curing delays, especially with adhesives that are sensitive to moisture. Moreover, certain adhesives used outdoors may become less effective due to light exposure, which causes degradation. To get the best outcome, always pick an adhesive that is intended for the particular environmental conditions where it will be applied. If you ensure these factors are compatible, you will have a bond that is stronger and more reliable.
Combining Glue and Screws for Best Results
In the case of mixing glue and screws, achieving the perfect result is crucial. I am ensuring that I choose the top-quality adhesive suitable for the materials and apply it evenly on the surface. After the screws have secured the joint, I am giving the glue enough drying time to cure completely. This technique combines the strength of mechanical fasteners with the bonding power of the adhesive, creating a strong and lasting connection.
Reference Sources
Below are three references from trustworthy and highly regarded sources that you can rely upon to confirm the validity of your paper dealing with the subject “can you glue drywall”:
1. Drywall Innovations
The article elaborates on the application of glues in the process of drywall installation and provides examples, such as self-adhesive panels, of their use.
2. An Inquiry into the Life Cycle of Systems of Inner Walls: Comparison of Masonry and Drywall
This publication provides a comprehensive evaluation of drywall systems, focusing on the flow of materials and their environmental impacts, which can be considered when installing adhesives in drywall applications.
3. Moisture Parameters and Fungal Communities Associated with Gypsum Drywall in Buildings
The research has examined the components of gypsum drywall, including glue, and has also studied the impact of moisture, a significant environmental factor, on its performance.
Frequently Asked Questions (FAQs)
❓ Can you glue drywall to the ceiling?
Yes, you can glue drywall to the ceiling using a premium-grade adhesive designed for drywall. This method can help reduce the number of screws needed and minimize nail pops, making for a cleaner installation. However, it’s essential to follow local codes and guidelines for ceiling installations.
❓ What type of glue should I use for drywall?
For drywall installations, it’s recommended to use a high-quality drywall adhesive, such as PL 200. This adhesive is formulated to provide a strong bond and can help in reducing the number of fasteners needed, saving time and money on your home improvement project.
❓ Is it necessary to use screws with drywall glue?
While drywall glue can provide a strong bond, it’s generally advisable also to use screws in the field of the board. This combination helps ensure that the drywall stays secure and reduces the chances of nail pops and loose edges over time.
❓ How do I apply glue to drywall?
To apply glue, cut the end of the glue tube and apply a bead of glue along the studs or joists where the drywall will be installed. Make sure the glue holds all the way to the edges for optimal adhesion. Avoid making a mess by using a caulking gun for precision.
❓ Can I use drywall adhesive for insulation boards?
Yes, using adhesive for drywall can also be effective for insulation boards. Ensure that the adhesive you choose is compatible with the insulation material and suitable for your specific application to maintain a proper vapor barrier.
❓ Will using adhesive for drywall reduce nail pops?
Using adhesive in conjunction with screws can help reduce nail pops by providing a more stable and secure installation. The glue holds the drywall flat against the studs or joists, minimizing movement that can lead to nail pops and loose panels.
❓ What are the benefits of using drywall adhesive?
Using drywall adhesive can save time and money by reducing the need for excessive screws and providing a stiffer installation. It helps achieve a cleaner finish and can lead to fewer problems, such as nail pops down the line, making it a wise choice for general construction projects.
❓ How long does drywall glue take to dry?
Drywall glue typically sets in about 24 hours, but complete curing may take longer. It’s essential to check the manufacturer’s instructions for the specific product you are using, as drying times can vary based on temperature and humidity conditions.
❓ Can I glue a piece of drywall to a patch?
Yes, you can glue a piece of drywall to a patch in areas where the original drywall has been removed. Ensure the surface is clean and apply a bead of glue before placing the patch. Using screws to secure the patched area further is also recommended for better longevity.
❓ How can I avoid making a mess when using drywall glue?
To avoid making a mess when applying drywall glue, use a caulking gun for precise application and ensure the glue is spread in a controlled manner. Additionally, consider using glue tubes with a foil seal inside, which can help minimize excess product when cutting the end.


