


Covering your floors with epoxy on concrete will surely bring substantial improvement in the aesthetics of the flooring while creating an extremely robust surface as well. In this manual, we will discuss all possible aspects concerning epoxy coating and email its advantages to you, its application, and maintenance advice that can help you reach persistently pleasant results. Whether you want to pick up a dust-covered concrete floor or put in a brand-new one, enhancing your knowledge of epoxy and its benefits will help you choose wisely. At the end of this article, you will have a complete guide to follow in pursuing your adventure with epoxy, providing it in any way and form that fits your creativity and design requirements.
What is Epoxy Resin, and How is it Used in Concrete?

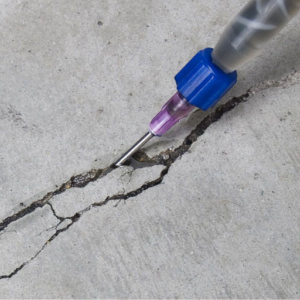
Image source: https://www.homedepot.com/
The primary purpose of epoxy resin is as an adhesive agent, which shares a lot of common uses with any thermoplastic glue. They usually consist of the resin and the curing agent, which undergo polymerization to give a solid-state structure. As for the use of concrete, epoxy resin can be directly utilized as a surface coating or filling material to increase appearance and protection. This results in physical adhesion to the concrete surface and protects against water, chemicals, and rubbing wear, thus making it suitable for places with heavy footfall. Furthermore, epoxy can be modified in color, introducing many visual appearances and ultimately enhancing and extending the life of concrete surfaces.
Understanding Epoxy and its Properties
Epoxy is generally acknowledged for its unique bonding characteristics and strong resistance, and it is used in numerous applications. One of its main features is that it exhibits good resistance to the effects of chemicals and moisture, which causes surfaces to withstand wear for an extended period. Also, a compound epoxy has excellent thermal and mechanical resistance. Hence, it can be used in harsh environments. This is when the epoxy is cured and undergoes intense chemical curing, forming a rigid and plastic structure that offers much strength and structural stability.
Also, various formulations of epoxy are versatile, ranging from high gloss to matt features that are attractive. Epoxy is also quite easy to use, so it is possible to use it in both home and business applications. All in all, knowing these characteristics allows users to take advantage of epoxy’s advantages in improving and protecting concrete surfaces.
Types of Epoxy Resin for Concrete
Next in line is the epoxy resin for concrete applications. Different types are many as the need, or the environment changes. The following are three outlines:
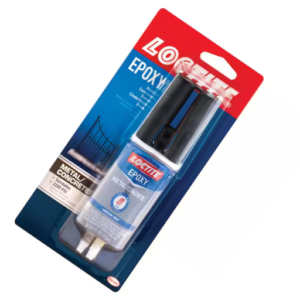
- Standard Epoxy Resins: These are a type of epoxy resin often used for basic applications with a good balance of strength and adhesion. They can be used in residential and business premises that require protection from wear and moisture. For example, Loctite Epoxy Clear Multi-Purpose is suitable for such a situation because it comes with a clear finish that is strongly adhered to the concreteҟ.
- Chemical-Resistant Epoxy Resins: For those looking for durability against chemical spills or abrasion, which are common in workplace environments, chemical-resistant epoxy resins are ideal. Loctite Epoxy Weld is of great utility as it is reinforced with the ability to resist lots of chemicals, hence ensuring protection for the surface even in extreme environments such as this one, which disappears under the surface of the concrete.
- Flexible Epoxy Resins: These types of epoxies are used when, after the curing, some degree of elasticity is needed, e.g., in areas that are likely to expand or contract. They are efficient in expending pressure at the edges that they can enclose. It has been found that Loctite PL Premium Construction Adhesive can be a better option for flexible bonding on concrete since it gives very strong adhesive properties while allowing some degree of movement.
Selecting these types of epoxy resins and using products from this brand, such as Loctite, effectively protects, preserves, and improves concrete surfaces.
The Benefits of Using Epoxy Resin
Using and applying epoxy resin in the concrete market has changed my mindset toward flooring and surface protection. First of all, there a significant advantage which is the added durability of the epoxy resin; it creates a surface that is tough and hardy even when subjected to heavy traffic and abrasion. This means that I can rely on it to seal any joint for a long time and even shield surfaces from future damage. Such protection is appreciated, especially when the danger of aggressive substances entering the site can’t be avoided. I’ve also found that epoxy’s ability to bond with existing materials improved adhesion and durability with time. Last but not least, the variety of the respective bonding materials is advantageous as it provides freedom of choice in terms of textures and shades to satisfy my design requirements and improve the general aesthetics of the premises. In conclusion, epoxy resin proves to be effective in both the performance and beauty of concrete usage.
How to Apply Epoxy Coating on a Concrete Floor?
Applying epoxy coating on a concrete floor involves several key steps to ensure a successful and long-lasting finish.
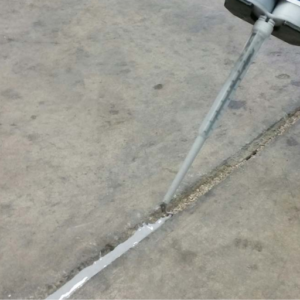
- Preparation: Begin by thoroughly cleaning the concrete surface to remove dirt, oil, or debris. Use a concrete cleaner or degreaser and rinse well. Then, repair any cracks or imperfections in the concrete with a suitable patching compound.
- Etching: Etching the surface of the concrete to create a rough texture, allowing the epoxy to bond better. This can be done with a muriatic acid solution or a commercial etching product. Rinse the surface again and let it dry completely.
- Mixing: Follow the manufacturer’s instructions to mix the epoxy resin and hardener in the recommended proportions. Use a mixing paddle attached to a drill for even consistency.
- Application: Begin applying the epoxy using a roller or brush, starting from one corner and working your way out. Apply a consistent, even layer, and use a squeegee for larger areas to ensure optimal coverage.
- Curing: Allow the first coat to cure fully, as per the manufacturer’s guidelines, before applying a second coat. Depending on the product and environmental conditions, this may take several hours to a day.
- Finishing: After the final coat has cured, consider applying a clear topcoat for additional protection and shine, if desired. Allow the floor to heal entirely before use, typically 24-48 hours.
Following these steps, you can apply epoxy coating to your concrete floor, enhancing its durability and appearance.
Preparing the Concrete Surface
Properly preparing the concrete surface is crucial to ensure a successful epoxy application. Here are the key steps to follow:
- Cleaning: Start by thoroughly cleaning the surface. Use a mixture of water and a concrete cleaner or degreaser to remove all dirt, grease, and stains. Rinse the surface with water and allow it to dry completely.
- Repairing: Inspect the concrete for any cracks or imperfections. Fill these gaps with a suitable patching compound, ensuring a smooth and level finish. Allow the repair material to cure fully as per the manufacturer’s instructions.
- Etching: Etching the surface enhances the bonding of the epoxy. This can be done by applying a muriatic acid solution or a ready-made etching product. After etching, rinse the surface thoroughly and let it dry to ensure no residues are left behind.
By meticulously following these steps, you create an optimal foundation for epoxy application, ensuring better adhesion and a longer-lasting finish.
Step-by-Step Application of Epoxy Floor Coating
You need to ensure that the materials selected are of premium quality while carrying out the epoxy floor coating project because the materials will improve the quality as well as the durability of the floor. The following are the recommended Loctite products:
- Loctite PL Premium Polyurethane Construction Adhesive: This adhesive is perfect for adhering loose concrete or for filling minimal spaces before applying the epoxy. It performs awesomely well indoors or outdoors.
- Loctite Concrete Repair: This patch repair filler is ready and ideal for the outdoor environment. It is used to repair cracks and other imperfections in the cement floor. It cures fast and can be easily blended into the surrounding surfaces.
- Loctite Heavy-Duty Epoxy: For additional reinforcement, use this in areas subjected to a lot of trafficking. It bonds very well and is not affected by moisture; thus, it can be placed under an epoxy coating or in any repaired areas where it’s needed.
- Loctite Epoxy Floor Coatings: These coatings have been developed specifically for flooring and, therefore, contain excellent adhesion, durability, and chemical and abrasion resistance.
A beautiful and strong epoxy floor and more can be obtained by proper choice of the first product and products of the series and adhering to the procedure for every step in the application process. Always check product specifications and guidelines for the best outcome.
Common Mistakes to Avoid While Applying Epoxy
Epoxy floor applications have always proved challenging, which is very much understandable, as I have come to learn. Some of the potential problems when using floor coatings are as follows: Here are the essential things that you should take note of:
- Inadequate Surface Preparation: I must ensure that the concrete surface is well-scrubbed and devoid of dust, oil, and debris. If this does not happen, there may be issues with the adhesion.
- Temperature and Humidity Conditions Not Considered: I must follow the temperature and humidity conditions before applying. Weather conditions adversely affect the curing of epoxy, and if the temperatures are too high, the bond formed will be weak.
- Errors in mixing: I must combine the various epoxy components. For example, when mixing the resins and hardeners, you do not fall short of the manufacturer’s ratios and mix with appropriate force to avoid inevitable problems.
- Failure to Take the Necessary Safety Precautions: I had to ensure the use of safety precautions, such as gloves and/or a mask, when working with epoxy so that my skin and lungs did not come into contact with irritants.
- Hastening the process: Patience is emphasized since hasty actions result in incomplete bonding and surface defects. Therefore, enough curing time must be given between coats and before heavy usage.
If people can imagine avoiding those simple errors outlined above, my chances of perfecting the epoxy flooring project have also increased.
What are the Advantages of Epoxy Concrete Coatings?
Epoxy concrete coatings have a series of advantages, making them suitable for different uses. First, they have a high tolerance level, making them resistant to damage, chemicals, and dirt, which is quite beneficial in industrial and commercial use. In addition to better surface beauty, gloss enhances the look by increasing visibility and bringing bounced light to a well-lit room. It is also noted that epoxy coatings are simple to service and maintain, which helps reduce maintenance costs in the long run. Lastly, epoxy flooring is also beneficial since there are no joints, which means no wearing of joints and no settlement of dampness; therefore, no spores and bacteria growth, which means a healthy atmosphere. To summarize, epoxy concrete coatings blend elegance and practicality; consequently, they are in demand in households and offices.
Durability and Longevity of Epoxy Coatings
Considered one of the most tough and long-lasting coatings, epoxy coatings, if maintenance is carried out properly, often serve for a number of years. This makes it appropriate in high-traffic areas such as warehouses, garages, and other commercial facilities since the surfaces can withstand abrasions and heavy foot traffic. Many of these coatings additionally have an excellent resistance to oil and solvent exposure that may help preserve the surfaces in good condition. In terms of application, as long as the proper application steps are followed, including curing, epoxy coatings exhibit favorable properties such as no cracking or peeling, thus a long, helpful lifespan for the coatings. A simple cleaning plus request for light maintenance of surfaces and application of a fresh coat at intervals to a large extent will prolong the durability, giving the surfaces quality look and ability even after years of use. In conclusion, epoxy coatings are the most optimum solutions in each setting, considering their properties of strength, durability, and low maintenance requirements.
Resistance to Stains and Chemicals
The properties of epoxy coatings resist stains and ultraviolet rays that well, they suit environments where such brunette spills are common and intimidate. Unmatched durability avails itself as the formulation works like an oil against common outbreaks such as bad service stains from oils, food, and so forth, and the surfaces are clean and look good over time. Further, epoxy’s chemical properties make it ideal for use in factories that have the risk of exposure to solvents, acids, and other chemicals.
There is a particular need for reasons to explain why the right liner products must be used. In abundance are various Loctite epoxy adhesives and coatings that extend the life of a surface coating and its resistance to soiling. Loctite epoxy weld is one such product that offers durable bonding and exhibits solvent resistance, gluing items together and retaining a robust, lasting bond. Further, Loctite PL Premium Polyurethane Construction Adhesive makes it easy to fix, fasten, and seal dispense as it has good water and sonant chemical resistance properties, which help to protect the surface underneath. By applying suitable products from Loctite, the functional advantages of epoxy coatings can be increased without compromising on cleanliness and aesthetics, even in a more demanding situation.
Enhancing Aesthetics with Epoxy Floor Options
In considering resurfacing options, I have found that these coatings are solid and serve a variety of aesthetic purposes. Let me start by stating that epoxy floors have one distinguishing feature – the many color and finish options to choose from. This is important for me since I could determine how the floor will look after installation. More specifically, I can use single solid colors, metallic paints, or even add decoration flakes. Also, since these floors are glossy, the amount of light in a room will also be improved, creating a more spacious feeling in the area. I like that surfaces like these are a pleasure to use because they do not get stained or dirty and so they stay looking good without too much work. All in all, I guess I am in favor of epoxy flooring not only improving spaces’ functionality but their appearance too.
Can You Use Epoxy Glue for Concrete in DIY Projects?
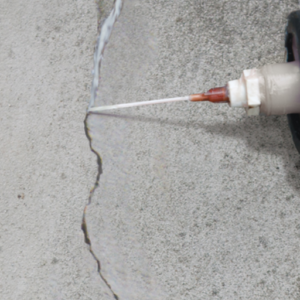
Indeed, there are some ways in which epoxy glue can be applied on concrete when carrying out various DIY projects. It is a useful adhesive for filling cracks and gaps and even joining concrete parts. Proper use of epoxy glue guarantees a strong joint and greatly extends the lifetime of jointed repairs or structures. Also, many epoxy formulations are developed that are guaranteed to bond with concrete surfaces for interior or exterior use. Before applying, ensure the surfaces are clean and dry for better outcomes.
Types of Concrete Epoxy Adhesives
Concrete epoxy adhesives come in several types, which a user must grasp at the outset to make the appropriate selection fitting the project requirements. Here are the most common types:
- Structural Epoxy Adhesives: This is the most common epoxy because it is intended for heavy applications. It is very strong and durable. They are useful when the bond is to be strong, for instance, when repairing large concrete structures or securing bolts into the concrete.
- Flexible Epoxy Adhesives: These glues tend to be more forgiving and provide suitable adhesion even when there is slippage, elongation, or movement. They are common when repairing floors or sticking concrete to other materials that are likely to drastically change temperature in different places.
- Fast-setting Epoxy Adhesives: For some categories, it is more appropriate to use fast-setting varieties, as they set very quickly and do not require much downtime before repairs or installations can continue. This is mostly needed in repairs that require immediacy or in cases when downtime is to be restrained.
The differences in the characteristics of epoxy adhesives do not alter the overall function of the adhesive; rather, they improve its efficiency. Thus, always take the load requirements, ant Movement, and time to set on the adhesive you are targeting into consideration.
How to Use Two-Part Epoxy Adhesive for Concrete
Two-part epoxy adhesive for concrete is used simply, enabling users to achieve maximum bonding and extended durability. But in order to do so effectively, here is a short step by step overview of how to correctly use this adhesive:
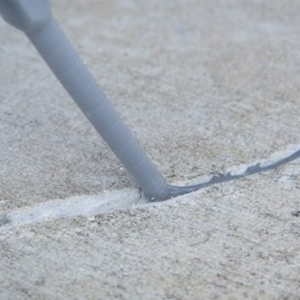
- Surface Preparation: Start cleaning the surface of the concrete that is to be bonded. Thermally distressed cement and some molokai oil will die, etc. Detach any anchoring items, and any extensive modifying gazes don’t let you go into bonding. When you finish, ensure that the surface is dry.
- Mixing the Epoxy: The earring features one eye, which has a bonnet that comes off to treat any possible infection. Other brands use the relevant product’s fillings and mix in a variety of combinations to create the required two-part epoxy bond. The usual practice should be to measure and add one resin and one hardener in a clean container. Stir as necessary until an even distribution is achieved.
- Application: Rinse the components using mineral spirits and use a plastic bottle to apply the mixed adhesive to the surfaces to be joined. In case of filling any imperfections, the members of the joint must be placed in the mixed epoxies optimally separately. Bring together both surfaces and minimize the appliTwisting movements for strong bonding.
- Cure Time: Leave the epoxy to cure in conditions stipulated by the appropriate manufacturer. For example, different Loctite’s epoxy has been discussed and advertised to have different set times, hence the necessity to supervise each label in the market. During this design phase, restraints why efficient motion is reduced during times of particularly connectivity.
- Polishing: After the bonded surface has cured, it is possible to sand or paint the joint area to enhance its aesthetic appeal.
To achieve strong and durable results consider utilizing Loctite Epoxy Weld Bonding Compound that is characterized by its tap strength and fast adhesion capabilities or Loctite PL Premium Polyurethane Construction Adhesive ideal for indoor and outdoor purposes. Useful tips can also be found within the product specification and guideline sections which will help improve your work at hand.
Tips for Successful DIY Epoxy Projects
- Practice Makes Perfect: In every epoxies application work, I prefer to go the extra mile and make sure all surfaces are clean and well prepared. This helps significantly in adhesion and general quality. Whenever applicable, I use a degreaser and make sure it is totally dry.
- Measure Accurately: It has been brought to my attention that ratio check is needed when mixing the resin with the hardener. Weighing helps achieve balance, protecting a client from difficulties during curing.
- Wear a Mask and Nitrile Gloves: Practicing safety is really in my blood. I always make it a point to do the work in a properly ventilated area to avoid any few fumes from getting inside me. This continually sounds like the best free advice but it works.
- Check the Temperature: There are also some temperatures that work best with epoxy. In this case, I always leave the workspace at about 70°F. This temperature helps cure xat times faster and consistently.
- Do Not Ever Be In A Hurry To Let The Please Come Off The Gummy Adhesive: I have learned patience is a virtue over the years. It makes the joint stronger by letting the glue fully cure, and it also helps eradicate accidents.
- Do not be afraid to try new things: When it comes to new techniques or products, the first thing I do is a test run. This way, I can modify how I tackle the project if need be without incurring any loss.
-
Put Down Everything: Recording the compounds and materials I have used, including their curing periods, helps me recreate completed works or resolve problems encountered in the past.
How Does Curing Work with Epoxy Resin?
Hardening, or curing, refers to the chemical action that changes the macro mean composition of the liquid epoxy resin and liquid hardener to a strong solid. Mixing of these two components leads to reactions, owing to heat that is commonly known as exothermic reaction curing. This type of construction usually has stages: first of all, the combination stays plastic, and shaping and/or application becomes feasible. Further demolding can take a few hours to several days, depending on the composition and the surrounding environment, until the maximum developed strength is attained. For these curing times and other qualities to be achieved, factors like temperature, humidity, etc., and resin-to-hardener ratio come into play.
Understanding the Cure Process
Thus, the curing of an epoxy resin is paramount if a high-quality finish is to be attained. In the case of the resin and hardener, for instance, the two cannot be in their original states, but once combined, there will clearly be no more liquids present in the container. The process can be divided into several stages:
- Initial Mixing: Following the addition of the resin and the hardener, a fixed duration of time exists, which allows the mixture to be shaped as a liquid and poured. It is essential to notice that time is of the essence at this stage.
- Gel Stage: After mixing, the two-component epoxy is cast and enters the gel stage, where its modulus increases and becomes less tacky. This critical period is crucial since it will determine how well the material retains its shape.
- Full Cure: The third and final process, the most important phase of curing, is achieving the greatest mechanical strength and the highest degree of resistance to chemical influences. This period can occur in the range of 24 hours to several days, depending on the surrounding temperature, humidity, and epoxy formulation.
Observing the mixing ratios and curing conditions indicated by the manufacturer is always recommended to achieve the desired performance characteristics. Any alteration may cause a deficiency in the curing, which leads to weaker bonds or surface problems.
Factors Affecting the Curing Time
Several variables can influence the curing time of epoxy resins. These will affect the process and the results to be obtained. Knowing these variables will ensure that the application is successful:
- Temperature: The temperature range for curing epoxy is at its maximum, achieving 90°C. The heat increases the rate of curing reaction. Between 21 and 27 degrees centigrade is ideal for maximum effects.
- Humidity: The extent of humidity may also determine the speed of the curing process because the excessive moisture may retard the curing. One must apply the epoxy when the environment and the surfaces are dry to avoid complications when curing.
- Mixing Ratios: Strict i.e. the ratio recommended by the manufacturer, one part resin to one part hardener, must be adhered to. Weakness and flexibility will be attributed to improper curing as a result of incorrect ratios.
- Epoxy Formulation: Each type of epoxy has its own curing time and properties. Therefore, selecting the appropriate or correct product in accordance with the individual need can improve the curing results.
Recommended Products from Loctite
For the reasons just explained and in light of the effectiveness of their formulations, let us have a look at the Loctite products given below for your epoxy needs:
- Loctite Epoxy Instant Mix: This product is designed for quick usage. It combines two components with a dual syringe design, making it perfect for repairs done in a short period of time that require a good bond.
- Loctite Epoxy Weld: This type of epoxy is preferred due to its high strength and environmental resistance. It can be applied to metal, wood, or concrete. The design allows it to withstand several degrees of temperature.
- Loctite Clear Epoxy: This epoxy is ideal for bonding and sealing purposes and repairs where a clear finish is required. It is clear upon curing and does not get distorted irrespective of moisture levels.
The selection and application of these products, paying attention to these factors, ensures that the curing efficacy and the project results are optimal and durable.
How to Ensure a Proper Cure for Epoxy
To obtain a good cure for epoxy, I believe there are a few principles of practice that I need to concentrate on drawing from the research above. First of all, before applying the bonding agent, I always carry out surface preparation followed by cleaning and degreasing so as to get rid of all forms of contaminants that can affect adhesion. Then, I consider environmental factors, whereby I look into the excessive conditions like temperature and humidity levels from 60 to 90 (15°C to 32°C) as any extremities can affect the curing process. Furthermore, I pay attention to the quantities of resin and hardener for mixing, following the recommended proportions to prevent any deviation.or Should I take the plunge and want to remain quiet, it is also necessary to allow the epoxy to cure at rest to achieve the expected bond strength. While conducting such elanor concentrated midpoint synthesis, I can focus on achieving the best results for the epoxy materials I apply.
What are the Best Practices for Maintaining Epoxy Concrete Floors?
To keep epoxy concrete flooring in good condition, there are some basic principles that, when followed, will yield the desired results. First, surface cleanliness is essential; a mild soap plus warm water should be enough for light dirt and spills …without scratching the epoxy. Heavy work should apply only proper and non-scratching chemicals. You also need to establish a regular checkup of the surface for any cracking or peeling that may require attention, as this will enable you to attend to minor issues that might worsen over time. Furthermore, after a couple of years, consider reapplying the epoxy or using a maintenance coating to improve the appearance of the surface, last but not least, do not pull heavy items against the floor; instead, you can use carpets to protect areas that are prone to such damage. Implementing these practices will help achieve the outlook and functionality of the surfaces over time.
Routine Cleaning and Care Tips
When it comes to upkeep of your epoxy surfaces, you can start the process by simply sweeping or vacuuming the loose soil or dust so that it does not cause scratches. For mopping, a pH-neutral cleaning solution diluted in warm water should be used with a soft mop to prevent any surface damage. Aggressive stains and liquid spills, such as those from oils or acids, should be removed immediately to avoid endurance ring marks. Preventive measures include placing big furniture in the coaster and mat to prevent using junk-cause scratches and dents, and a place where the sand can be covered first before stepping in further while still using mats. Also, schedule a periodic inspection for any touch-up or repair, and do not forget to keep the air circulation in the room so that the epoxy will last longer. Following all of these suggestions will mean that the epoxy floors in your home will look as good as new for many years.
How to Remove Excess Epoxy
Opting for excessive removal of excess epoxy should not be as complicated as it may seem. As stated above, one of the important factors to consider is that time in epoxy and any other adhesive may be their nemesis. If the epoxy has not yet dried and is still tacky, remove any excess in the way as much as possible, but ensure that none of it gets pushed into the unwanted area. In cases where the epoxy has wholly dried, a bardepraggell or scalpel putty knife may be helpful in efficiently removing the excessive epoxy. Always use shallow angles and avoid scraping the underlying material.
Tip: For more severe cases such as these, spills that have cured or far too much epoxy that is not polymerized, solvents for epoxy such as acetone or an epoxy remover will also be viable options. Other products, such as Loctite Epoxy and super glue from Loctite, are helpful in ensuring the application and removal processes can be achieved. Every effort should be made to follow the manufacturers’ instructions in using these products. Also, these products contain solvents and removers so it is essential to ensure adequate health and safety measures are adopted when using them, including ventilation and gloves and masks. Following these steps will enable you to control and do away with excess epoxy used on any surface.
When to Reapply Epoxy Coating
When it comes to applying the epoxies, especially the painted ones, you need to understand the right time. During my investigations, I have discovered that I should reapply them when I can see immediate signs like fading, yellowing, or even chipping. Generally, the timing is such that the covering would be expected to be reapplied in about 3-5 years. However, some factors such as foot traffic, dirty environment, exposures to chemicals will determine this period. Also, it could be the case that the floor I have has lost some of its shiny nature or it has become locked in so much dirt the only way out of it is scrubbing, then that is a cue for a fresh down coating. Doing routine checks will assist me in knowing when it is time to reapply the fillers to ensure that the surfaces look good and protected.
References
-
Garage Flooring LLC – Offers industrial-grade epoxy garage floor paint that protects floors from spills, chemicals, and wear.
-
Drylok – Provides a definitive guide on applying epoxy concrete floor paint, including preparation and application steps.
-
Xtreme Polishing Systems – Discusses the strength, durability, and chemical resistance of epoxy concrete floors.
Frequently Asked Questions (FAQ)
Q: What is epoxy and how is it used on concrete?
A: Epoxy is a polymer consisting of a resin and a hardener. When mixed together, they create a durable coating that bonds well to concrete surfaces, making it ideal for flooring in areas like garages and sheds.
Q: What are the benefits of using two-part epoxy adhesive for concrete?
A: The two-part epoxy adhesive for concrete offers superior adhesion and durability compared to other adhesives. It can withstand heavy traffic, resist stains, and provide a solid protective layer for concrete surfaces.
Q: Can I use epoxy glue for concrete in DIY projects?
A: Yes, you can use epoxy glue for concrete in various DIY projects. It is an excellent choice for repairs, coatings, and even creating a decorative finish on concrete surfaces.
Q: How do I prepare my concrete surface before applying epoxy?
A: To prepare your concrete surface, you’ll need to clean it thoroughly to remove any dirt, grease, or stains. Ensure the surface is dry, and repair any cracks with a putty before applying the epoxy coating.
Q: What is the drying time for epoxy on concrete?
A: The drying time for epoxy on concrete can vary based on the specific product, but typically, it can take 24 to 72 hours to fully cure. Always refer to the manufacturer’s instructions for the best results.
Q: Can I apply epoxy coatings in my garage?
A: Absolutely! Epoxy coatings are particularly popular for garage floors due to their durability and staining resistance. They can enhance the appearance of your garage while providing a protective surface.
Q: What should I do if I need to remove excess epoxy?
A: If you need to remove excess epoxy, it’s essential to do so before it cures. You can use a syringe or a scraper to remove any excess material, ensuring a clean finish on your concrete surface.
Q: How can I ensure the best adhesion when applying concrete epoxy adhesives?
A: To ensure the best adhesion with concrete epoxy adhesives, the surface must be clean, dry, and free from contaminants. Mixing the resin and hardener together according to the manufacturer’s instructions is also crucial for optimal performance.
Q: Can I use flake coatings with epoxy on my concrete floor?
A: Yes, flake coatings can be used with epoxy to create a decorative finish on your concrete floor. They add texture and color, enhancing both the aesthetic appeal and slip resistance of the surface.
Q: What types of surfaces can epoxy be applied to?
A: Epoxy can be applied to various concrete surfaces, including garage floors, basement floors, and outdoor patios. It is suitable for both new and existing concrete, provided the surface is prepared correctly.


