


Thus, in the case of construction and home improvement projects, it is extremely important to have a durable and dependable bond between the materials used. The right glue can be decisive whether you are building a stone wall, mending a disturbed brick arrangement, or making your outdoors more attractive. The present post will dissect the power and flexibility of brick and stone adhesive, a missionary solution for making alliances in both indoor and outdoor surfaces that last long. Find out how this mighty glue not only prunes the time and labor but also takes care of the sturdiness of your projects, all while being user-friendly and great in pulling off results. Keep reading to unravel the reason why brick and stone adhesive is the tool all builders, DIY hobbyists, and pros cannot do without.
Understanding Adhesives for Brick and Stone
What is Masonry Adhesive?
Masonry adhesive is a special bonding agent that is meant to glue together construction materials like brick, stone, concrete, and other masonry surfaces. It is an alternative to the regular use of mortar, offering a quicker and more convenient way to do different construction and repair jobs. This type of adhesive is often provided in the form of cartridges or tubes that are very easy to use, and so it is very easy to apply the adhesive directly onto the materials.
In contrast to mortar, which needs to be mixed and applied very carefully, masonry adhesive requires no water or any preparation. It is usually powerful and tough that the bond can withstand the external pressures such as humidity, heat, and cold. This makes it suitable for both interior and exterior use.
Masonry adhesive is a lot of help in precision and fast completion of projects. It doesn’t matter whether you’re laying bricks or repairing loose stones or making features in your garden, it gives you a clean, dependable, and efficient solution. Its wide range of applications and strong bonding capabilities mean it is a must-have tool for both pros and home improvement fans.
Types of Brick and Stone Adhesives
When choosing the right adhesive for brick and stone projects, it is crucial to take into account the specific needs of the task. Three main types of adhesives are usually referred to in these situations:
Polyurethane Adhesives
These adhesives can be described as strong and tough, and they are suitable for both indoor and outdoor projects. They create a bond not only with bricks, stones, and concrete but also with wood. Besides, their high resistance to weather, water, and temperature changes makes them a perfect choice for outdoor applications.
Epoxy-Based Adhesives
Epoxy adhesives are often associated with their very high strength and versatility. Their use is usually restricted to heavy-duty applications like bonding big stones or structural repair. These adhesives provide a good barrier to moisture and chemicals, thus reliable results in tough environments.
Construction Adhesives
Usually sold in easy-to-use tubes, construction adhesives are the most affordable multi-purpose options for a variety of lightweight stone and brick applications. They are often used for making DIY fixes and decorative projects, like attaching veneer stones or little bricks.
Note: All these adhesives come with their own set of advantages, and the final decision is made based on the project’s requirements. For structural repairs or heavy installations, epoxy-based adhesives are most frequently selected. On the other hand, polyurethane and construction adhesives are dominant in flexibility and general-purpose use, respectively. It is always a good idea to adhere to the manufacturer’s instructions regarding application and safety.
Key Properties of Effective Adhesives
Effective adhesives have different properties but still the same things in common and that is why they are used in the same areas. The most significant aspect is adhesion strength which means how securely the adhesive bonds to the surface. This critically ensures that the adhesive is durable and can stand up to structural applications or even the most demanding environments.
The other property, which is next in importance, is flexibility. Some adhesives are produced while considering movement, vibrations, or the thermal expansion of the materials. This is especially true in cases where the materials might contract or expand due to the changing temperatures. Moreover, flexibility helps the bond’s strength to be maintained even when conditions are changing.
Resistance to environmental factors is another remaining major issue. The best adhesives, besides moisture and heat, might resist chemicals and UV illumination, depending on the project. The good news is that the bond will still be strong and trustworthy even if the environment is harsh or has changed after a long time. Hence, using an adhesive with these properties would mean an enhanced chance of getting the job done right the first time in a multitude of projects.
Choosing the Right Glue for Bricks

Factors to Consider When Selecting Adhesive
When it comes to choosing an adhesive for bricks, you need to assess several factors with utmost precision in order to achieve the desired result in your project. The following are the most important things to think about:
1. Type of Adhesive
The adhesives differ in their application. Brickwork usually suggests construction adhesive, epoxy, and polyurethane as the top choices for the adhesive. Bonding in structural works is provided by epoxy at a level that is strong and durable. The adhesive in such applications is usually given by polyurethane if the environment is expected to be moist, for they are found to be very good at resisting water penetration.
2. Environmental Considerations
The adhesive has to be very strong to resist the mentioned environmental conditions – thermal shock, humidity, water and frost, and daylight. As per the research, the adhesives with polyurethane as a base can keep more than 90% of their original strength after being exposed to UV rays for a long time, thus making them a good option for application outdoors.
3. Load and Stress Requirements
In the case of brickwork that is load-bearing, a high-strength adhesive has to be selected. Strong epoxy adhesives, for example, can possess a strength exceeding 5,000 psi which makes them applicable to high-stress areas.
4. Surface Preparation
Inadequate surface preparation will lead to poor adhesive performance. Absolutely the best results will be achieved if the brick surface is clean, dry, and dust-free. Tests done on adhesion show that properly cleaned surfaces can provide a 25% increase in bond strength.
5. Curing Time
The time taken for an adhesive to completely cure is an important factor especially in a time-sensitive project. Fast-curing adhesives can shorten project time but may take away some bonding strength.
6. Chemical Resistance
Adhesives that come in contact with chemicals or are likely to be treated with strong cleaning agents need to have chemical resistance properties. Epoxies are the ones that are most noted for their toughness and their ability to resist acids, oils, and solvents is impressive.
With the help of these factors, you can select an adhesive that fits your project requirements and ensure the joint will be strong, reliable, and lasting. The manufacturer’s instructions and product specifications are also good sources of information for the best results.
Comparing Indoor vs Outdoor Adhesives
The selection of adhesives is very much dependent on the environment where it is going to be used, as indoor and outdoor adhesives are made to satisfy different requirements. Indoor adhesives are generally made for controlled environments and are very good at bonding materials that are sheltered from extreme weather. These adhesives usually pay attention to the simplicity of the application and the cleanliness of the finish, making them suitable for woodworking, furniture assembling, and interior repair.
Outdoor adhesives, however, are specially made to bear tough conditions like rain, temperature changes, and ultraviolet light. They give strong, water-resistant bonds that hold on for a long time, even if subjected to different weather patterns. These adhesives are widely used in the construction of buildings, gardens, and exterior applications where lasting strength is the main factor.
To be able to choose the right one, you need to first assess the features that the project will require. In a situation where indoor is concerned, give priority to the strong and aesthetically pleasing adhesives. When it comes to products used outdoors, those that are moisture, temperature, and environmental stress resistant should be the ones you consider. Knowing the differences between the two types of adhesives really helps ensure the best adhesive choice in terms of longevity and efficiency regardless of the application.
Understanding Waterproof and Heavy Duty Options
Waterproof adhesives and heavy-duty adhesives are specialty solutions that can tackle very specific issues in indoor and outdoor applications. Moisture-resistant adhesives allow water to pass through them but still stick well. In addition, these adhesives can be used in areas subject to water exposure like bathrooms, kitchens, and outdoor places. The adhesive will form an unbreakable bond to the area without letting splashes, spills, or humidity cause weakening or decay, thus making sure of long-lasting results even in the wettest environment.
On the contrary, heavy-duty adhesives are made to endure and exert a lot of force. Their main applications are construction, woodworking, and repairs that dictate a very strong and dependable bond among surfaces. Even though they might be overkill in some apps, adhesives can typically carry the weight of heavy materials such as wood, metal, and stone, thus being a versatile option for projects where durability is the main concern. Moreover, they are made to work under extreme temperatures, so they can be counted on in various environmental conditions.
It’s crucial to consider your project’s requirements when deciding which adhesive brand – waterproof or heavy-duty – should be used. Waterproofing adhesives are much more suitable for places that will get wet, whereas heavy-duty adhesives are better for projects that will require strength and stability. By gaining knowledge of the potentials and limits of both offerings, the right adhesive can be chosen confidently ensuring secure and long-lasting bonding.
Application Techniques for Brick Adhesives
Preparation of Surfaces for Bonding
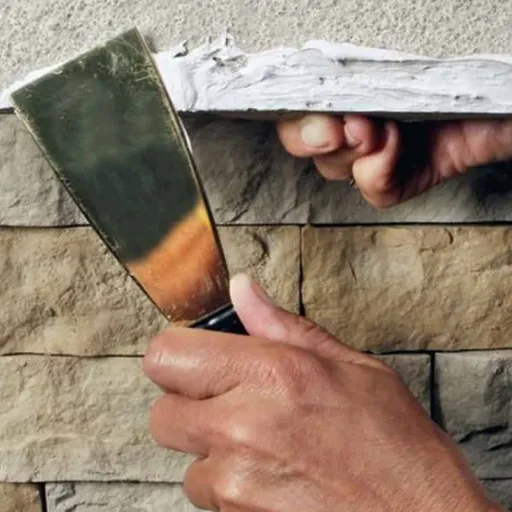
The right surface preparation is a must in the case of using brick adhesives, and therefore it is the first step to the whole process of the adhesives’ application. Start cleaning the surfaces thoroughly with a stiff brush or with a clean damp cloth to get rid of all dust, dirt grease, and loose particles. A clean surface sets up a good strong contact area for the adhesive. After this, allow the surfaces to dry completely before doing anything else.
After this, inspect the surfaces well—look for cracks, uneven places, and also for damage. You may have to repair the irregularities as an uneven surface will weaken the adhesive bond. Gap-filling or smoothing over the rough patches is not only good for a uniform application of the adhesive but also generally for stability. Plus, if the surface is porous, you might want to apply a primer because it can help in the adhesion process and thus create a good bonding scenario.
Lastly, check if the surfaces are properly aligned before the adhesive is applied. Take measurements or mark guides to prevent misalignment as making adjustments after the adhesive is applied might compromise its effectiveness. Good planning, cleaning, and inspection make the surface preparation hassle-free and thus contribute to a secure and lasting bond.
Step-by-Step Guide to Using Construction Adhesive
Prepare the Surfaces
First, make sure that the surfaces to be glued together are properly prepared. Specifically, they should be clean, dry, and completely free of any dust, grease, or other materials that could weaken the bond. A thorough cleaning using a brush or a cloth is recommended for this purpose. In cases where the bond is particularly strong, a final rinse with water may be conducted, followed by a complete drying period of the surfaces. Adhesive works best on the smooth and well-prepared surfaces of a strong bond.
Apply the Adhesive
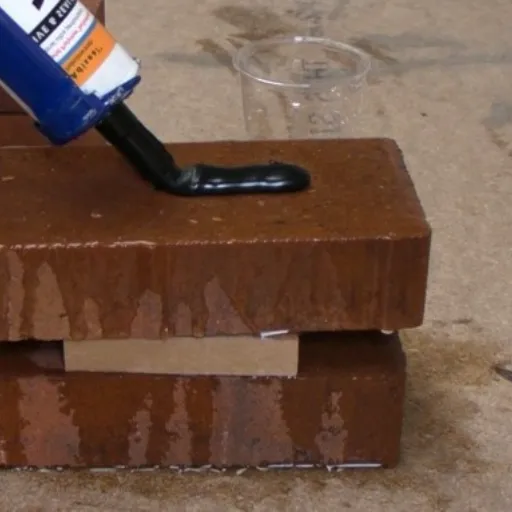
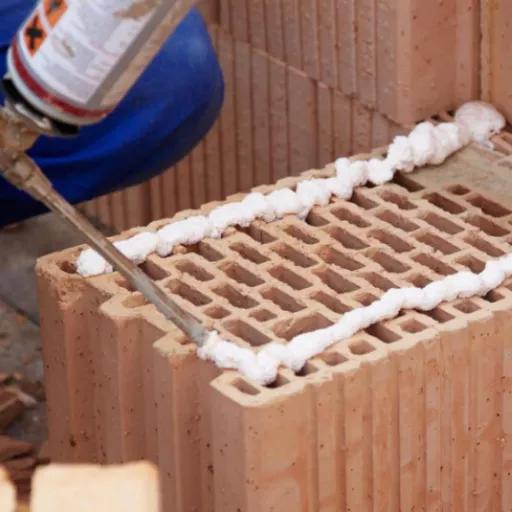
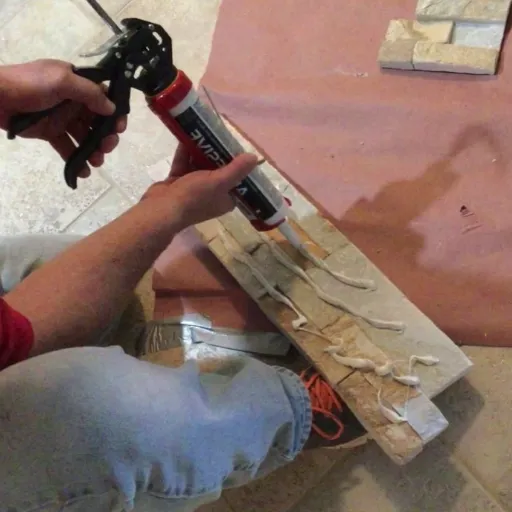
A precise application of the adhesive is ensured by loading the adhesive cartridge into a caulking gun. The nozzle tip is to be cut off so that the size of the bead required is reached and adhesive is applied evenly along the surface of one side. In the case of large or heavy materials, a zigzag pattern application is suggested for better coverage and strength. Try to apply just the right amount of adhesive; excess adhesive can cause a mess and take longer to dry.
Join the Surfaces
Bond the surfaces together without delay after applying the adhesive. Employ not only sticky but also steady pressure to guarantee a strong seal, and if needed, apply clamps or weights to keep the glued materials in place while the adhesive sets. Consult the adhesive’s directions for particular curing times, which typically go from a few hours to a day for maximum strength.
Clean Up and Finish
Damp cloths should be used to wipe off any excess adhesive before it dries, to avoid any mess when cleaning up. The coming together of the two materials should be kept still during the curing time. After the curing period, check the joint to ascertain that it is strong enough to bear the load or conditions for which it was made. Hence, proper cleanup and waiting during curing are paramount for achieving durable results.
Common Mistakes to Avoid During Application
❌ Insufficient Surface Preparation
One of the major mistakes in adhesive application is neglecting proper preparation of the surfaces to be bonded together. Adhesive cannot be bonded strongly if there is dirt, oil, or dust on the surfaces. It is a must to clean, dry, and decontaminate the surfaces before the adhesive application takes place every time.
❌ Using the Wrong Adhesive Type
The application of an adhesive that is not appropriate for the materials or the conditions can turn out to be a failure. Think about material compatibility, temperature tolerance, and environmental exposure when picking an adhesive. It is very important to use the right adhesive for the particular application to get strong and lasting bonds.
❌ Overusing or Underusing Adhesive
Excess adhesive can cause a problem that is hard to clean and can also weaken the bond. On the other hand, insufficient adhesive might produce a weak or incomplete bond. Follow the instructions strictly and use the correct amount for the best results.
Maintenance and Troubleshooting
Signs of a Weak Bond and How to Fix It
In adhesive applications, the weak bond is often indicated through some obvious signs. These might be visible spaces or surfaces being separated, decreased resistance to physical factors, or accidental splitting under lesser stress than expected. Among other signs might be the edges of the adhesive layer that are lifting, lines of cracks forming in it, or a slight shifting of the materials that are glued together. If the bond does not function as it should in everyday use, it is probably already weakened.
To strengthen a weak bond, one first needs to take the failed adhesive off carefully. The next step would be to completely clean the surfaces so that no residue, dirt, or grease is left, as they would hinder the bonding of the new application. Make sure the surfaces are dry and properly prepared since preparation is very important for strong adhesion. Apply the adhesive according to the recommended amount and method in its instructions, getting even coverage for a consistent bond.
For more lasting results, think about the environment in which the adhesive would be utilized. Characteristics such as temperature, humidity, and the suitability of the surface materials for bonding are extremely important factors that determine the strength of the bond. Taking these factors into consideration can help avoid weak bonds in the future. It is also advisable to have regular inspections of the components that have been glued together, especially those used daily, as this would enable you to detect early signs of failure.
💡 Pro Tip
Regular inspections of bonded components, especially those in daily use, can help you detect early signs of bond failure before they become serious problems. This proactive approach saves time and money on repairs.
Cleaning and Maintaining Bonded Surfaces
The longevity and reliability of a bond are largely dependent on the proper cleaning and maintenance of bonded surfaces. As a first step, use only a clean, soft cloth and a mild cleaning solution to wipe off any dirt, dust or debris on the surface. Most of the time, it is better to avoid harsh chemicals or abrasive tools unless they have been specifically mentioned as safe for use on bonded materials, because such things can make the bond weaker. If the surface you have cleaned and dried is in a high-moisture area, this will not be good for the adhesive as it will weaken and eventually fail.
It is also very important to carry out regular maintenance so that the bond will not lose its strength. Have regular checks to find out if there are any signs like cracks, peeling, or other forms of separation. If you see any little damage, do something about it right away because it can stop the damage from getting worse. Even for surfaces in the open air or where the bond is exposed, you can still use such things as weather-resistant coating or shielding against too much sun to minimize the effects of nature on the bond.
In addition, if you stick to the manufacturer’s instructions concerning the care and maintenance of the adhesive, it will go a long way in increasing the life of the bonded surfaces. Only carry out cleaning and repair procedures that are suitable for the type of adhesive used. In the event of bond failure, clean the area thoroughly before reapplying adhesive because the residue from the previous bond may interfere with the new application and cause poor bonding. Following these measures will guarantee the reliability and strength of the bonds for a long period of time.
When Should You Reapply Adhesive?
Reapplying adhesive becomes a must when the bond already reveals some visible signs of its weakening or perhaps even failure. Such signs can include peeling, cracking, or the separation of the surfaces that were stuck together. In case the surfaces that were bonded together are not holding securely any longer, it is high time to take a closer look at that area and reapply adhesive where necessary. A lot of stress, moisture, or extreme temperatures can quickly cause the deterioration of bonds and thus entail earlier reapplication.
Before starting the reapplication process, it is important to make sure that the surfaces are clean, dry, and without any old adhesive residue. The debris or remaining adhesive should be gently removed using cleaning tools or solvents that are appropriate and will not harm the materials. Surface preparation of high quality is utmost important to securing successful bonding, since the presence of contaminants or residue can lead to a reduction of adhesion strength, followed by more failures after reapplication.
One should always adhere to the instructions given with the adhesive selected, as this gives the best chance for optimal performance. Spread the adhesive uniformly and let it cure completely as directed. It might be good to keep on checking the bonded zones for wear and instability as this might lead you to the right moment for reapplication, hence avoiding damage or hazards caused by weak bonds. The proper maintenance and timely reapplication have a cumulative effect in that they increase the durability as well as the reliability of adhesive bonds in the long run.
Ethical and Safety Considerations

Non-toxic Options for Health-Conscious Users
The use of non-toxic adhesives is becoming more and more popular among people who care about the environment and their health. The reason is that non-toxic glues are usually not made with harmful substances at all. One of the most common substances that is used in glues is the so-called volatile organic compounds (VOCs). These VOCs are known to irritate the respiratory system of human beings and also cause harm to the environment. Besides, water-based non-toxic adhesives are now considered as the best in the line due to their non-toxicity but still having the same quality and longevity as solvent-based products.
When picking a non-toxic adhesive, it is crucial to look for certifications that prove the product’s safety. “Low VOC” or “environmentally safe” labels are authentic confirmations of non-toxic compositions. Moreover, users have to check the compatibility of the product with the materials in order to avoid any unsafe usage on the chosen surfaces that might lead to damage or performance reduction.
Non-toxic adhesives are a part of the conscious effort made by health-conscious users to create non-toxic indoor environments and reduce exposure to harmful substances. These glues are especially needed in homes with kids, pets, or people sensitive to chemicals. By selecting the non-toxic option, consumers can get both effective bonding and well-being and environmental responsibility.
Eco-Friendly
Water-based formulations with minimal environmental impact
Family Safe
Perfect for homes with children and pets
Low VOC
Reduced harmful emissions for better indoor air quality
Environmental Impact of Adhesive Products
Adhesives have the potential to pose an adverse effect on the environment straight from the materials used in their production through disposal. One of the biggest contributors to greenhouse gases during manufacturing is the petroleum-based chemical composition of traditional adhesives. On top of that, some adhesives may discharge VOCs that will not only affect the air but also contribute to the climate change phenomenon.
Maintaining the recycling status of non-biodegradable adhesives is challenging if not impossible. The strength and non-biodegradability of some glues can render it impossible to separate and process collaborating materials for recycling, that is, leading to a large volume of waste in landfills. Not only that, but the leaky disposal of adhesive products can also contaminate the soil and groundwater with harmful chemicals, thus posing a long-lasting pollution risk.
The aforementioned impacts are usually dealt with by eco-friendly alternatives like water-based or biodegradable adhesives, which are widely accepted. Such alternatives curtail VOC emissions and their effects on the environment. Furthermore, if combined with these adhesives, the use of recyclable or compostable materials can further help in the adoption of sustainable practices and, thus, the reduction of ecological harm.
Disposal Guidelines for Adhesive Tubes and Cartridges
The right way to get rid of adhesive tubes and cartridges is to cut down on environmental damage and at the same time comply with local waste management regulations. To start with, check the product label or packaging for the disposal instructions that the manufacturer has provided. These usually indicate if the material is recyclable, hazardous, or if it can be disposed of through the general waste aesthetically.
If there is still some adhesive in the tube or cartridge, then it should be treated as hazardous waste, owing to the possible presence of VOCs or other toxic chemicals. Call your local waste management center or hazardous waste collection site for proper disposal guidance. Always refrain from pouring excess adhesive into the sink or disposing of it with the regular trash as this might lead to environmental damage.
First of all, you need to check if they can be recycled by looking for local symbols and the recycling regulations in your area. If you can remove some adhesive, then do so in order to make sure they will be accepted for recycling. However, if recycling is not an option for you, then discover the proper way of getting rid of these empty tubes at your place and follow it strictly. Making use of eco-friendly adhesives and cutting down on waste through proper disposal are both ways of helping create a greener, healthier, and more sustainable environment.
♻️ Responsible Disposal Checklist
- Check the manufacturer’s disposal instructions on the product label
- Contact local waste management for hazardous waste collection
- Never pour adhesive down drains or dispose with regular trash
- Look for recycling symbols and follow local recycling guidelines
- Consider eco-friendly adhesive alternatives for future projects
Frequently Asked Questions (FAQ)
Q: What is the best glue for bricks?
A: The best brick glue usually relies on the individual use case. In case of outside use, a strong construction adhesive such as Loctite PL Premium is the one suggested. This glue is resistant to weather and bonding bricks in different environments is its best application.
Q: Can I use tile adhesive for bricks?
A: Tile adhesive is meant for ceramic and tile surfaces; however, it may not give the same bond strength as specialized brick glue. So, it’s recommended to use an external brick adhesive when working outdoors as that will yield optimum results.
Q: How do I apply exterior brick adhesive?
A: Apply exterior brick adhesive by first cleaning and dusting off the surfaces of the bricks. Use a trowel for an even and proper spread of the adhesive on the brick or surface. For aligning the bricks securely, they will have to be pressed together very tightly. If you are after a high-quality hold, you can opt for Loctite PL 500 adhesive which is meant for landscape blocks.
Q: Is there a flexible glue for bricks?
A: There are indeed flexible adhesives that are perfect for bricks, and if the temperature changes frequently that would be a good choice. The flexibility of the sealant accommodates movement and hence, it’s suitable for both exterior and interior applications.
Q: How do I clean up excess glue after installing bricks?
A: You can use mineral spirits to clean the uncured adhesive. Just soak a cloth with mineral spirits and wipe the area of excess glue. It is necessary to clean immediately after application to get the best results.
Q: What type of adhesive is best for heavy-duty applications?
A: Premium adhesive like Loctite PL Premium is the most effective for heavy-duty applications. It strong bond on different surfaces, including wood and brick, and hence is suitable for both indoor and outdoor projects.
Q: Can I use brick glue in cold temperatures?
A: Plenty of external brick adhesives, such as Loctite PL 500 landscape block adhesive, are capable of working nicely in cold weather. To be extra sure, it is better to check the product specifications before applying that to your specific conditions.
Q: What is the advantage of using fast grab adhesive for bricks?
A: The interesting fact about fast grab adhesive is the quick joining of bricks without needing any sort of extensive clamping or support. Such thing can be beneficial in terms of time during installation and that’s why many DIY projects prefer it.
Q: Can I use glue for bricks on a variety of surfaces?
A: Most of the brick adhesives are indeed capable of sticking to not only concrete and wood but also foam and so to most surfaces. The versatility that they offer makes them suitable for different landscape and building projects.
Q: What should I consider when choosing the right brick adhesive?
A: While picking the correct brick glue consider the surrounding (indoor or outdoor), the temperature, the weight of the bonded materials and whether you require flexible or fast grab adhesive. Making the right adhesive choice is an important aspect of your brick and stone projects’ quality and durability.
References
-
Home Depot – Brick Construction Adhesive – Features top-selling construction adhesives for bricks, including Loctite Power Grab Express.
-
Loctite – Brick Adhesives You Can Always Rely On – Highlights strong adhesive options like Loctite PL Premium Fast Grab for brick projects.
-
Quora – What Can I Use to Stick Something to a Brick? – Discusses adhesive options like Gorilla Glue and Rhino Glue for bonding bricks.
-
Lowe’s – Glue and Construction Adhesive Buying Guide – Provides a comprehensive guide on different types of adhesives and their applications, including for bricks.


