


Bonding fabric to plastic may be surprisingly difficult in crafts, do-it-yourself projects, or repairs. One is often bewildered by so many adhesives on offer to bind two materials of conflicting properties. Sometimes, you ask for a strong and permanent hold from the glue; other times, you want the glue to maintain the flexibility of your materials-the trick is to select the proper glue to dignify professional work. In this article, we’ll inform you about the different adhesives used for bonding fabric to plastic, weigh in their pros and cons, and share expert tips for a successful project. Stay with us to learn how to build durable, seamless, and frustration-free concoctions!
Understanding Glue for Fabric and Plastic
What Makes a Good Adhesive?
Any good adhesive for bonding fabric to plastic would ensure a strong and lasting bond while accommodating the unique properties of each material. Fabric is flexible and porous, and depending on the kind of plastic, it may be rigid and non-porous, requiring the adhesive to essentially bridge the gap created by the difference. If possible, the adhesive would do this quickly-without enormous clamping or curing time.
When choosing an adhesive, properties to consider are flexibility, durability, and resistance to environmental factors such as humidity or temperature. Flexibility is one property of an adhesive that must be considered if fabric is the material; this is so that the material can move naturally without cracking or damage to its bond. It would also have to be able to resist wear and tear with time, especially if the bonding is going to be applied to something frequently used.
Ideally, the adhesive would also be easy to apply and clean, leaving little to no mess to work around and ensuring a smooth continuation; it would also be opposed to the very fabric and plastic types being used. Testing on a small portion of an inconspicuous area would also ensure results in an effective bond with no damage to either of the materials. Considering all these factors will lead to selecting an adhesive suitable for the requirements of your project, giving you professional-grade results.
Types of Glues for Bonding Fabric to Plastic
When bonding fabric to plastic, it is important to select a glue meant to work on both materials. The right glue results in a lasting bond and keeps either material from being damaged. Several glues satisfy this general criterion, each suitable for different purposes and applications.
Key Glue Types:
- Epoxy glue: Provides strong and permanent bonding with water and heat-resistance qualities, preferable for projects needing durability
- Hot glue: Quick fastening solution, best for temporary or low-stress applications where flexibility is a priority
- Fabric glues: Reliable option that provides flexible finish without stiffening the fabric
Before you outline your project, check to be certain if the glue’s label reads that it bonds to fabric and plastic; once checked, give it a dry test on the inconspicuous spot to check the compatibility.
Factors to Consider When Choosing the Right Glue
Several important aspects should guide you when selecting glue for your project. First of all, think of the materials being bonded. Some glues are made to work with fabrics, some with plastics, some with metals, and some with wood – hence, check if the glue works with the above materials or not. If it is a project involving various materials, make sure your glue is labeled as multi-surface or multi-material to ensure a secure and lasting glue bond.
Material Compatibility
Ensure glue works with both fabric and plastic materials
Environmental Conditions
Consider heat, moisture, and outdoor element exposure
Application Method
Choose based on drying time and precision requirements
Secondly, think of the environment as well as the conditions to which your glue must hold up. Exposure to heat, moisture, and outdoor elements may require waterproof glue or one that is temperature-resistant. Should flexibility be a requisite in your project, such as with clothing or wearable items, the glue must itself retain flexibility upon drying. Tagging the specifications on the packaging can already direct you henceforth.
Lastly, think of drying time and how to apply. Should it be something that requires precision when sticking things together, glues that are slow to dry are very handy, as they allow one to adjust things before the glue sets. Otherwise, fast-drying ones work well for simplistic and hurried jobs. As for applying, make sure the method of application, i.e., brush, nozzle, or spray, should go well with the amount of control you require on this project. Bearing these factors in mind will in turn guarantee the successful outcome of your glue use.
Top Adhesives for Attaching Fabric to Plastic
Best Glue for Fabric to Plastic
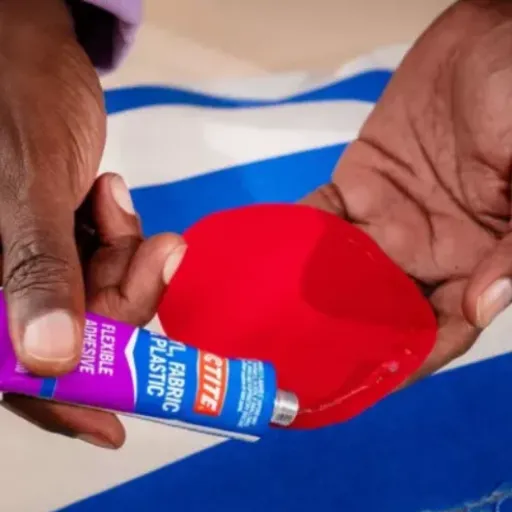
While silk and steel-withginger-brown could almost be considered under the oils in an atmospheric description in France, Multidimensional Accessories could, in theory, describe anything and everything from basic cloth to plastic. That said, when fixing two seemingly opposite materials – fabric and plastic – something that would weld those in modular bonding-inthe meantime of a flexible nature and out of the molasses of many set-searching adhesives for porous fabrics and non-porous plastics becomes the best thing. These types of adhesives benefit the bond, which needs to remain secure as they flex with their very imperfect partners in texture and structure-lab-equilaterals of plastic and fabric.
💡 Pro Tip
An adhesive that dries with a clear finish is recommended, especially if the glue might be visible. Waterproof properties serve well if the bonded material will be exposed to moisture.
To achieve the best result, an adhesive that dries with a clear finish is recommended, especially if the glue might be insignificant to bear eyes. Also, requiring it to become waterproof serves well if the glue will see their bonded material exposed to moisture. Hence, check the label to make sure the glue could glue fabric and plastic since many adhesives do not work well on non-porous surfaces.
Make sure you always follow the instructions given when applying the glue. Begin by cleaning and drying the surfaces from dirt, oil, or dust that may weaken the bonding. Apply the glue thinly and evenly on one side, join the two surfaces, give a little pressure, and allow for the bonding to set for the specified time. By doing so, the two surfaces will be bonded securely and will not peel or come off with time. Preparation and the use of the proper glue are an assurance towards the success of your project.
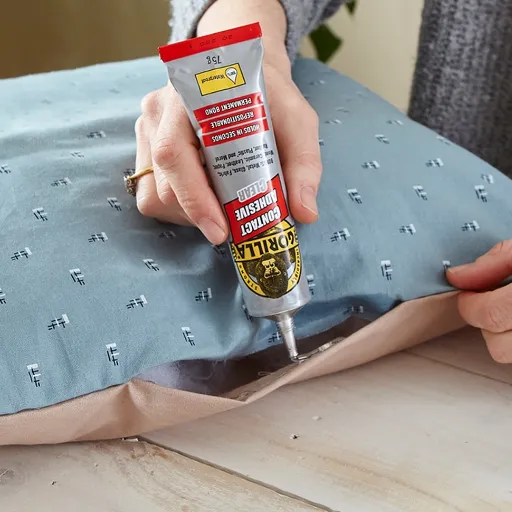
Gorilla Glue: A Heavy-Duty Option
Gorilla Glue Features
Popularly used for heavy-duty projects with versatility and strength, Gorilla glue works effectively on various materials like wood, metal, ceramic, stone, or glass, useful for indoor and outdoor applications. Water resistance also makes it great when ambient moisture or humidity is present, keeping the bond intact.
⚠️ Important Application Notes
- Apply sparingly – glue expands during curing
- Surfaces should be clean and slightly moist
- Clamp or hold surfaces firmly until set
- Allow minimum 24 hours curing time
Application of Gorilla Glue dictates the success of the dry, strong bond. This glue needs to be applied sparingly, as it expands during curing. Surfaces should be clean and slightly moist; this slight moisture activates the curing of glue. Apply the glue, then clamp or hold the glued surfaces firmly together for alignment until they set. For the best results, give it a minimum curing time of 24 hours.
Its long-lasting properties and reliability made it the common glue for repairs and construction work. The glue will expand and create a mess if it is not applied thoughtfully. However, if Gorilla Glue is prepared and applied correctly, nothing, from tiny repairs to the largest construction, can stand in its way.
Super Glue for Quick Repairs
Super Glue Advantages
Super glue can be considered a go-to product for fast, efficient repairs. It dries fast and has strong adhesive properties with which it bonds plastics, ceramics, metals, and even wood. While other adhesives may require several hours to be set, super glue bonds firmly in practically seconds, thus giving instant results in most cases.
✓ Application Process
- Clean and dry bonding surfaces thoroughly
- Apply small amount to one surface
- Press objects together firmly for few seconds
- Work in well-ventilated area
The process of application is quite easy. First off, the bonding surfaces must be clean and dry. Put a small amount of super glue on one of the surfaces, then press the objects together firmly for a few seconds. Fewer amounts are better because thin-layer bonding can be stronger. Work in a well-ventilated area and avoid getting glue on the skin as it bonds almost instantly to flesh.
⚡ Limitations
Super glue works well for smaller, lighter objects but should not be relied on for repairs that must sustain serious stress or weight. It can fail under high-temperature conditions or when exposed to water over an extended period.
Super glue works well for smaller, lighter objects but should not be relied on for repairs that must sustain serious stress or weight. It can fail under high-temperature conditions or when exposed to water over an extended period; therefore, depending upon your repair complexity, random use is not advisable. For quick and temporary fixes, super glue works well and is reliable.
Application Techniques for Strong Bonds
Bonding Surfaces Preparation
In order to ensure a stronger bond through super glue, the surfaces need correct preparation. The surfaces need to be cleaned thoroughly, to wash down any dirt, dust, particles, grease, finger marks, or subtle grime prevent adhesion. This can be simply washed with soap and water or an appropriate degreasing agent for such surfaces. A complete drying process shall need to follow once clean, as moisture will not do any good for the glue.
Step 1: Clean
Remove dirt, dust, grease, and grime
Step 2: Dry
Ensure complete moisture removal
Step 3: Roughen
Light sanding for better grip
Step 4: Align
Check positioning before gluing
The next thing would be to identify any smooth areas on the surface. Super glue usually prefers to bond on something slightly roughened, as it gives more area for the glue to cling. Sand it lightly if necessary, using fine-grit sandpaper to give a texture. Once finished sanding, clean off all dust or residue from sanding. It is essential to keep the surface clean to allow full contact between the adhesive and the surface.
Lastly, an alignment check must be performed to ascertain how the pieces are fitted one to the other and to decide on their exact final placement. Because superglue sets so rapidly, anything less than perfect positioning will cause misalignment and will weaken the bond. With these steps, your repair or project should stand the test of time and perform as expected.
Applying Glue: Tips for Best Results
When applying glue, preparation is key for a strong and lasting bond. Before applying any glue, clean both surfaces thoroughly to get rid of dirt, grease, or any unwanted debris that could hinder adhesion. You may use clean cloths or alcohol wipes to ensure the surface is left residue-free. Also, the surfaces must be completely dry before gluing; any moisture can weaken the adhesive.
🎯 Application Best Practices
- Thin layer application: Excess glue may overflow and reduce bond strength
- Use proper tools: Applicator tips or spreaders for precise application
- Work quickly: Position surfaces immediately after glue application
- Apply pressure: Use clamps, weights, or tape during curing
Apply a thin layer of glue for the best results. Excess glue may overflow, creating a mess, and ironically, this may also reduce the strength of the bond. Use the applicator tip of the glue bottle (if it comes with one) or a spreader for more precise application. Work quickly if the glue dries fast, positioning the surfaces immediately after the glue has been applied to ensure proper placement and contact.
After aligning the glued pieces, clamp the assembly; alternatively, depending on the nature and size of the materials, one can use weights or tape to keep the glued pieces in place. Holding the parts together while the glue is curing is important for a strong bond to form. Always exercise patience and obey the drying time or curing time prescribed on the package of the glue before using or stressing the item you’ve just fixed. Following these steps will help you to get a well-bonded, neat-looking result.
Drying Times and Setting Techniques
Drying times and setting techniques are of utmost importance in attaining a firm and long-lasting adhesive bond. Drying time is the duration taken for the glue to become surface-dry, whereas curing time is the period taken for the adhesive to acquire full strength. These times, however, can differ widely in accordance with the adhesive used and the environmental conditions prevailing-may be temperature conditions or even humidity. To put it differently, a good adhesive that sets within minutes is often claimed to cure within hours or an entire day.
Effective bonding with the adhesive means following the instructions about drying and curing times provided by the manufacturer. Keep the materials joined together in the drying stage; any disturbance may weaken the adhesive or shift the alignment with which it was bonded; some adhesives need clamping or even pressure to hold the materials firmly in place while the adhesive sets. Once the drying phase has gone through, no stress or weight should be applied to the joint to maximize strength development during the curing phase.
Moreover, temperature and humidity are two environmental factors that affect drying and curing times considerably. The higher the temperature and the lower the humidity, the faster the drying of an adhesive, while a low temperature or more humidity does just the opposite. Hence, always working in a comfortably ventilated and temperature-controlled environment would be a good practice. Now that you have thought about working time, adhesive compatibilities, and temperature conditions, remember that specific adhesives work on only particular surfaces-if used on others, their performances will surely be poor. Adhering to these instructions will provide even an indifferent craftsman an effective bond with long-lasting properties.
Durability and Maintenance of Fabric-Plastic Bonds

Waterproof vs. Washable Fabric Glue
Waterproof and washable fabric glues are meant for different uses. What you choose will ultimately depend on the project itself and its intended use. Waterproof fabric glue is perfect for items that might encounter water or moisture most days like, outdoor gear, rainwear, or swimwear. It will bond to the fabric and do not allow water into the glue layer from which the glue breaks down and the fabric wets into that particular area.
💧 Waterproof Glue
Best For:
- Outdoor gear
- Rainwear
- Swimwear
- High-moisture environments
Features:
- Long-term water resistance
- Prevents glue breakdown
- Maintains bond integrity
🧺 Washable Glue
Best For:
- Clothing items
- Household fabrics
- Items needing occasional cleaning
- Indoor applications
Features:
- Gentle wash compatibility
- Strong initial bond
- Not suitable for submersion
Washable fabric glue, on the other hand, is meant for projects that will be cleaned but do not find themselves being continuously wet. It applies well to clothing or household items that are washed occasionally. Obviously, it will strongly bond the items yet does not possess very strong bonding in instances where water may beat against the bond for a long time, such as in heavy rainfall or water submersion.
When choosing, you concentrate on the environment and use of the object you want to bond. For outside or high-moisture environment, waterproof glue is better for longer carrying; for ordinary clothes and items that can tolerate gentle washing, washable glue is a way to go. Knowing the difference leads to a bonding that will stay strong and making sure that the project stays useful over time.
How to Mend and Repair Bonds
The right tools and techniques are necessary for mending bonds to ensure they hold in certain conditions. Prep the bonding surfaces first. Make sure to clean the areas weighing dirt, grease, or any kind of residue that could stand in between. For best results, sand the area lightly whenever this is necessary to create a little bit of roughness for the glue to set well.
🔧 Repair Process Steps
- Assessment: Identify the failure point and cause
- Preparation: Clean and prepare surfaces thoroughly
- Selection: Choose appropriate adhesive for materials and environment
- Application: Apply thin, even coat with proper pressure
- Curing: Allow full curing time before use
Once the surfaces have been prepared, select the glue based on the material and the environment. For use on fabric or paper, perhaps a clear, fast-setting glue might do. On the other hand, for materials better resistive than glass, such as metal and wood, an epoxy or a waterproof glue would be best. Application must be a thin and even coat, pressing hard to bond the surfaces. Clamp them or hold them carefully while curing for the time recommended by the manufacturer.
After bonding, allow plenty of time for adhesive drying before testing against the objects’ usability. Meanwhile, being gentle in handling is a sure way to reveal adhesion strength and durability. Correctly closing adhesive containers after use, using safety measures such as working in well-ventilated places, will also count toward the success and longevity of your repairs. These measures will leave you with lasting strong bonds.
Sealers and Finishing Techniques
When handling plastic and fabric materials, choosing the appropriate sealer or adhesive will better ensure strength and an aesthetic finish. For plastics, adhesives labeled for plastic surfaces should be preferred. Solvent-based adhesives, like cyanoacrylates, create an exceptionally good bond by partially melting the surface of the plastic. It is best to have a clean and dry surface of the plastic for the application of these adhesives to increase adhesion strength.
🧵 Fabric Finishing
- Water-resistant fabric glues
- Flexible adhesives for movement
- Waterproofing spray application
- Stain resistance treatment
🔬 Plastic Finishing
- Clear protective spray coating
- UV damage protection
- Scratch resistance enhancement
- Surface preparation importance
In contrast, for fabric, water-resistant or flexible fabric glues best facilitate the natural movement and flexibility of the material. These adhesives serve the project well when it needs to resist repeated use or repeated exposure to moisture. The glue should be applied evenly, following the product instructions, ensuring an adequate drying time so that it bonds securely over the long haul.
A finishing touch with an appropriate sealer or coating can add a nice sheen to any project. For plastic, some clear protective spray can be applied that could help against scratching or UV damage. For fabric, sealing with a waterproofing spray designed for fabrics also helps maintain durability and keeps the material resistant against staining or exposure to water. Always test on a hidden spot first to ensure the result is as expected.
Common Mistakes to Avoid

⚠️ Critical Errors That Weaken Bonds
Avoiding these common mistakes will significantly improve your bonding success rate and ensure long-lasting results.
Incorrect Types of Glue
Failure to use the right kind of glue is often the fatal error that destroys the success of a project. Every material has different properties and glues are formulated accordingly for those differences. For instance, gluing with a normal school glue on plastic or metal might not give you the best bond since it does not have adhesive properties necessary for bonding with non-porous surfaces. Similarly, wood glue may not work well if it’s bonding glass or ceramic as it’s not designed to stick to smooth glass.
Avoiding this error calls for glue-to-material type matching. Porous surfaces like wood or paper usually work well with strong wood glues or craft glues. Non-porous surfaces such as plastic or glass fail when adhesives lack high bonding strength, which epoxy types or cyanoacrylate glues generally give. Fabriced materials like fabric need a glue that will maintain elasticity and durability after it dries.
Check the label on the adhesive to make sure it is appropriate for the intended use before commencing the project. Applying some glue in a small and inconspicuous spot can give away its compatibility. Strengthening the bond and resultant durability will come from the right choice of glue, so enjoyment prevails throughout the finished and lasting achievement.
Poor Surface Preparation
Poor surface preparation is one of the many reasons why adhesives fail to create a strong, lasting bond. Dirt, oils, or one rough surface could prevent glue from sticking. Dust, grease, and other contaminants act almost like a barrier between the adhesive and the materials that are supposed to be joined together, weakening the bond substantially. Cleaning and preparing the surface properly is vital to help the adhesive perform better and ensure that the application will be a success.
Dirt & Dust
Creates barrier between surfaces
Oils & Grease
Prevents adhesive contact
Moisture
Interferes with curing process
Smooth Surfaces
Limited adhesive grip area
Prepare surfaces properly by working on good basic cleaning. A damp cloth works well for dust and dirt, and a suitable cleaning solution should be used if grease and oils are present. The surfaces must be allowed to dry thoroughly since moisture interferes with the curing of the adhesive. For relatively hard and smooth surfaces, merely sanding them to a very slight degree to create a slight roughness to aid adhesion can be very useful. Ensure the surface is clean and prepared for the type of adhesive being used.
Proper preparation of surfaces will not only promote better bond strength but will also ensure that the bond will remain viable for many years. It prevents degradation of the bond due to environmental factors such as heat, moisture, or mechanical stress probably degrading an environment-bond until environmental factors such as heat, moisture, or mechanical stress act on the bond. These steps will definitely help take the adhesive to its maximum potential so that the end result would be more dependable.
Ignoring Drying Times
To that end, leaving out drying times greatly compromises the bonding strength. Drying time is critical because during this stage, the adhesive cures and establishes a firm grip onto the surfaces being joined. Neglecting to observe drying times can diminish the bonding effect considerably, consequently exposing the bonds to greater risks of failure with stresses, temperature variations, or moisture.
⏰ Timing Guidelines
- Initial Set: Wait for surface to become touch-dry
- Handling Time: When item can be moved carefully
- Full Cure: Maximum strength achieved
- Service Time: Ready for intended use
In some cases, the adhesive is taken for testing or erects another filling as soon as after being applied, before it achieves full strength. This incomplete curing usually results in poor performance with the surface peeling off or cracking, with the substrate separating from one another. The disregard for specified drying time in applications that call for durability and precision can give way to costly rectification, safety hazards, or in short, product life.
Follow all manufacturers’ drying and curing times to obtain optimal results. Should these times become an issue, consider using fast-drying adhesives formulated for these types of projects, so long as the adhesive characteristics meet the requirements of the application. This step is vital for preserving the bond’s performance, safety, and durability in any environment.
Frequently Asked Questions (FAQ)
📚 References
-
Gluing fabric to plastic: Choosing the best adhesives – Loctite – A guide on using Loctite Vinyl, Fabric & Plastic Flexible Adhesive for effective bonding.
-
How to glue fabric to plastic with special adhesive – Loctite – Instructions on using Loctite Vinyl, Fabric & Plastic adhesive for bonding fabric to plastic.
-
Gluing fabric to plastic: Choose the best adhesive for the job – LePage – Recommendations for adhesives like LePage Flexible Plastic Adhesive for crafting and repairs.
-
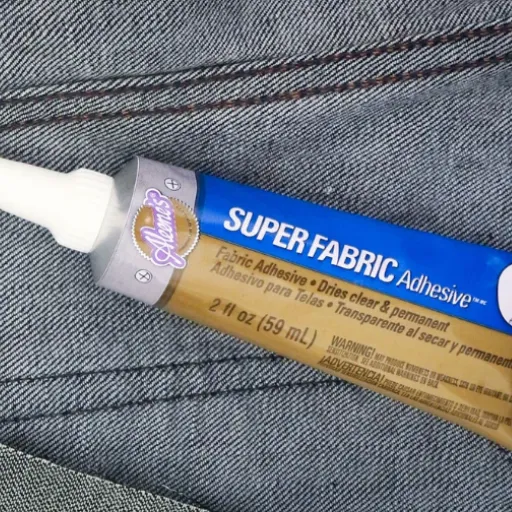
Tips on How to Glue Plastic – Aleene’s – Tips on using Aleene’s Super Fabric Adhesive for bonding plastic to heavier fabrics like leather.
-
Glue for attaching fabric mesh to plastic body? – FineScale Forum – A discussion on using craft glues like Aileen’s Tacky or PVA glue for bonding fabric to plastic.


