


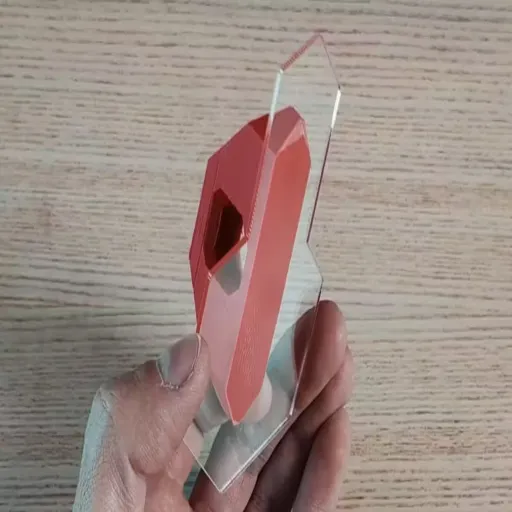
When 3D printing is involved, the fusion of two materials can unlock a range of creative and practical applications. This ubiquitous combo of PLA, a 3D printing filament, and acrylic, a highly versatile and durable material commonly used in design and fabrication, can be a bit tricky to bond together without the right approach. Here is a guide for you on gluing techniques, complete with step-by-step procedures for gluing PLA and acrylic, ensuring a strong structure for your projects. This guide provides instructions on gluing PLA to acrylic, allowing you to create a stronger and seamless structure for your projects. Whether you are a hobbyist pursuing novel designs or a professional seeking to achieve solid results, this exposition will provide valuable perspectives and tips to help you in your pursuits.
Understanding PLA and Acrylic Properties
PLA (Polylactic Acid) is a biodegradable thermoplastic derived from natural sources like corn starch or sugarcane. Easy to print with, it is lightweight and environmentally friendly. It, however, can be brittle and lacks high heat resistance; hence, it cannot be used in high-temperature environments.
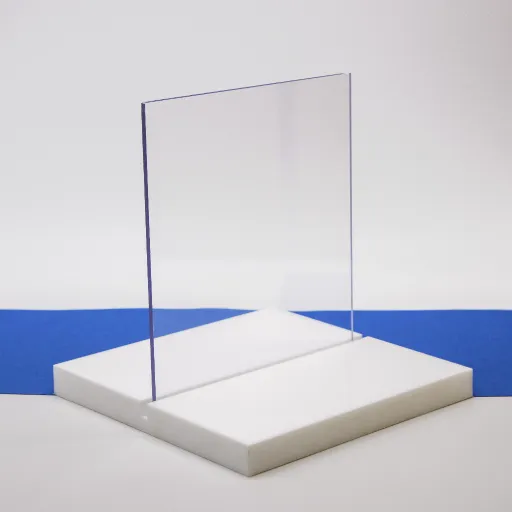
Acrylic, also known as PMMA (Polymethyl methacrylate), is a transparent, complex, and rigid plastic. It is suitable for almost all kinds of applications, offering strength and resistance to scratches with glass-like clarity. Although non-biodegradable, the exploitation value of acrylic tips outweighs the durability concerns.
Depending on the different properties of both materials, they join together to form a strong adhesive layer that is compromised due to variations in surface texture, chemical compatibility, and thermal behavior. One must be very aware of these characteristics to establish a strong and workable connection.
P
What is PLA?
PLA, which stands for Polylactic Acid, is a biodegradable and bioactive thermoplastic that is created from renewable resources, such as corn starch, sugarcane, or cassava roots. It enjoys applications in 3D printing, packaging, and medical implants due to its eco-friendly nature and ease of processing. PLA tends to have a relatively low melting point compared to other plastics; hence, it is suitable for precision-use applications but not well-suited for high-temperature environments. Due to its versatility and eco-balance, this plastic is highly favored across industries seeking to improve their environmental performance.
A
What is Acrylic?
The word “acrylic” refers to a type of transparent thermoplastic, technically known as polymethyl methacrylate, used widely in lighter or less shatter-prone alternatives to glass. When the polymerization of methyl methacrylate (MMA) takes place, the final product, acrylic, is formed. This material is extremely popular amongst consumers due to its durability, clarity, and resistance to weathering. Due to its superior optical transparency and strength, acrylic is widely used in windows, lenses, signs, and aquariums. Additionally, acrylic can be shaped and laid down by applying heat, offering great versatility for artists and engineers. It is by this robustness and resistance to UV light that the material has maintained its reputation for both indoor and outdoor use.
Choosing the Right Adhesive
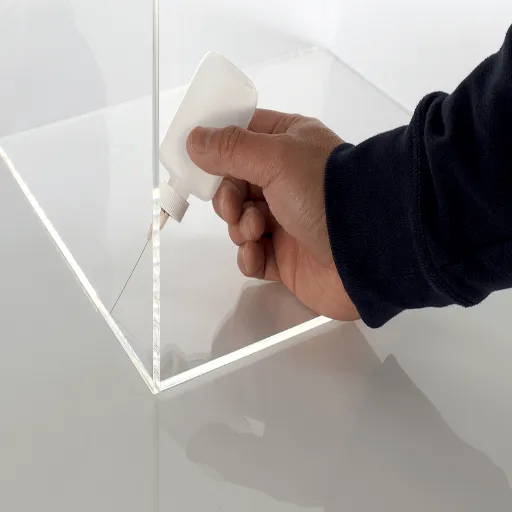
When selecting the right adhesive for acrylic, the application and bond type must be taken into consideration. Since solvent adhesives slightly soften and fuse the surfaces, these are often best for acrylics, imparting a strong, clear bond. For everyday uses, the two-part epoxy adhesives offer strength and lasting bonds, particularly when applied to high-stress situations. Check compatibility with the substrates to avoid any damage or discoloration. In any case, it follows that the directions on the packaging should be strictly adhered to.
Adhesive Types for PLA and Acrylic
Adhesives must be chosen with the properties of both materials in mind when bonding PLA and acrylic. PLA, being a biodegradable thermoplastic, reacts well with cyanoacrylate adhesive due to its fast setting time and strong bonding ability. For greater durability, stronger epoxies are required in cases of high stress on the bonds, and temperature resistance is also necessary. Acrylic emphasizes solvent-type glue, such as methylene chloride or specially formulated acrylic cements, which actually fuse the surfaces for a clear and strong bond. When bonding PLA with acrylic, two-part epoxy is the most versatile because it adheres well to both materials. Ensure the surface is clean and debris-free for smooth adhesive application. Always check with the adhesive manufacturer’s specifications for compatibility and optimal performance.
Factors to Consider
When determining the appropriate adhesive for the project, it is crucial to consider the following key points:
- Material Compatibility: Ensure that the adhesive is suitable for the material you are bonding, whether it is PLA, acrylic, or another type of plastic. Consider material-specific recommendations for optimal results.
- Environmental Conditions: Consider the conditions in which the bonded materials will be used. Changes in temperature, humidity, or chemical exposure can alter the durability of the bond over time.
- Curing Time: Various adhesives have curing periods that range from a few seconds to several hours. The right adhesive needs to be chosen in accordance with your allotted time for the idea, so you have ample time for setup.
- Strength Requirements: Determine the needed strength of your bond depending on its application. Use adhesives having high tensile and shear strength for demanding and load-bearing exercises.
Surface Preparation Techniques
Surface preparation is crucial for forming strong bonds. Here is how to prepare the surfaces properly:
- Clean the Surfaces: Remove dirt, dust, grease, and oil using a suitable cleaning agent, such as isopropyl alcohol or soapy water. Be sure to dry the surfaces before proceeding.
- Remove Loose Material: Rust, old adhesive, or flaky paint should be removed by sanding, scraping, or wire brushing.
- Roughen Smooth Surfaces: For non-porous or smooth materials, such as metal or plastic, it is essential to sand the surface to enhance adhesion through texturing lightly.
- Ensure Compatibility: Select an adhesive that is suitable for your surface materials to prevent bonding problems.
- Avoid Contamination: Handle prepared surfaces as little as possible to keep them free of oil or residues from skin contact.
🧽 Cleaning the Surfaces
Using cleaning as a final pre-adhesive treatment to surface preparation will determine adhesion success. Remove dirt, dust, visible debris, or other potential contaminants using a soft cloth or brush. Some grime may need to be removed, for which a cleaner suitable for the material is used; for instance, isopropyl alcohol is applicable for metals, whereas a mild soap and water combination is ideal for plastics. Dry the surface finish completely before proceeding. An oily cleaner should be avoided, as it will leave oily residues and, therefore, affect adhesion. Solvent cleaning, when done correctly and completely, forms the most critical basis for a long-lasting and usable bonding.
🪚 Sanding
Sanding is a crucial step in preparing surfaces for the application of adhesives or coatings. By way of abrasion or sanding against imperfections on the surface or uneven areas, one smooths out the surface, essentially making it rough, so that mechanical bonding between the adhesive and the substrate can occur. The choice of sandpaper varies according to grit sizes, depending on the material. Heavy material removal requires coarser grits, whereas fine finishes require finer grits. Sanding should always be done in one direction to avoid uneven textures. After an abrasive surface is achieved, the surface must be cleaned to remove dust and dirt, as these can inhibit adhesion. Both these steps, sand and clean, will result in a surface ready for durable, long-term bonding.
⚠️ Common Mistakes to Avoid
- Skipping Surface Preparation: When the surface isn’t sanded or cleaned, adhesion does not occur properly; hence, these bonds remain unreliable.
- Using the Wrong Adhesive: Care must be taken to ensure that the adhesive used is suitable for the materials being joined under the specified working conditions.
- Applying Too Much Adhesive: The excess adhesive can squeeze out, ruining the appearance and compromising the bond.
- Failing to Allow Proper Curing Time: The strength of the bond will be compromised if the cure time is not respected because of rushing the process.
- Ignoring Temperature and Humidity Conditions: Excessive temperature or moisture renders the wholesale effect of the adhesive substandard.
🚫 Skipping Surface Preparation
Skipping surface preparation is one of the most common errors associated with adhesives, which can significantly reduce the bond strength. Surface preparation involves cleaning to remove dust, grease, or dirt, all of which interfere with adhesion if present. Another step is to roughen the smooth surface to facilitate bonding by providing a larger surface area for grip. Many users are currently searching for reasons why their adhesive projects fail, and improper surface preparation remains one of the primary reasons. Correctly preparing surfaces will ensure strong bonds that last more than just a moment.
⏰ Ignoring Curing Times
The most common mistake in adhesive projects, as a recent search trend has made it clear, is ignoring the advised curing times. Many buyers question why their bonded joints fail over time. However, the weakness of the bond is often due to insufficient curing. Curing enables the adhesive to develop fully and achieve its greatest strength. When a step like this is done hurriedly or ignored, the world’s weakest bond is usually formed, and it is spoiled and refused. Hence, follow the manufacturer’s curing instructions patiently to achieve a good and durable result. In cases where time is of the essence, fast-adhering adhesives are suitable for your project without sacrificing their strength.
💡 Practical Tips and Expert Insights
🎯 Surface Preparation is Key
Ensure all surfaces are clean, dry, and free from contaminants such as dust, grease, or oil. Preparation will guarantee good adhesion and, subsequently, prevent bond failure.
🔧 Choose the Right Adhesive
Select the appropriate adhesive based on your materials and their intended end-use. Refer to the manufacturer’s guidelines to ensure that the physical properties match your project requirements.
📏 Follow Application Guidelines
Using the adhesive in a thin, even layer, as recommended, is paramount. Overdoing or underdoing it may weaken the adhesion.
⏱️ Allow Adequate Curing Time
Follow curing times and conditions (i.e., temperature, humidity) to allow the adhesive to reach its full strength.
🧪 Conduct a Test Bond if Possible
Try the glue in a small, inconspicuous area to ensure it works and meets performance requirements before proceeding with the whole application.
👨🔬
Expert Tip
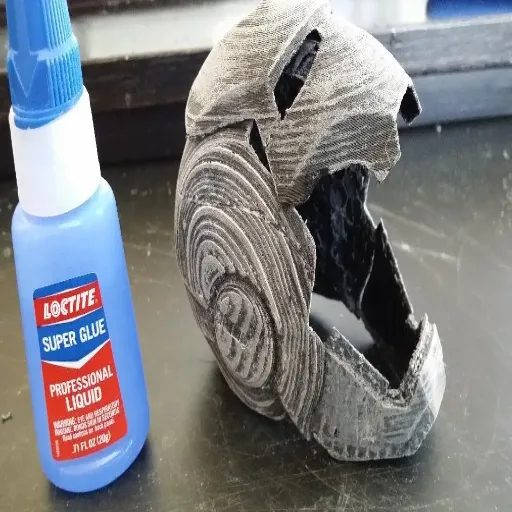
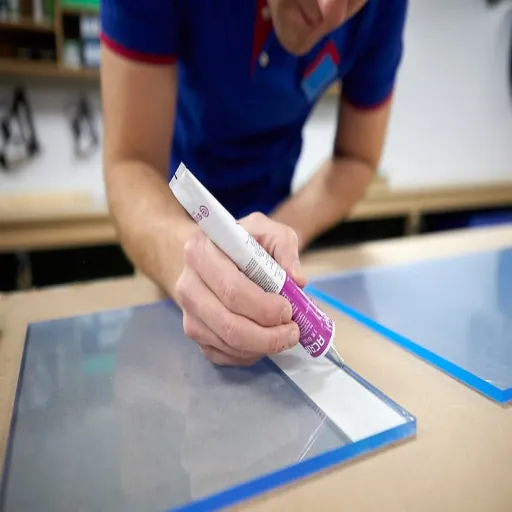
In this PLA-to-acrylic gluing scenario, the preferred adhesive is cyanoacrylate glue (super glue), since it bonds strongly and cures quickly. Best results are ensured by cleaning the surfaces to be glued, removing dust or grease. Light sanding of the areas to be glued may also aid in enhancing adhesion, as it provides the glue with more texture to grasp. A thin layer of glue should be applied, and the pieces should be pressed together gently while carefully aligning them to avoid damage or misplacement. Always use the adhesive in a well-ventilated area, following the safety recommendations specified by the manufacturer.
🔨
DIY Tip
PLA to acrylic bonding can be effected with any strong adhesive, such as the cyanoacrylates (super glue) or a two-component epoxy. I have found that each of these provides a strong bond when the surfaces are cleaned and then lightly sanded to provide adhesion.
📚 Reference Sources
Here are five professional and authoritative reference sources you can check to verify the accuracy of your article on “gluing PLA to acrylic.” These sources focus on adhesives and bonding techniques for PLA and acrylic for credibility and depth of treatment:
- Blending Caproylated Starch with Poly (Acrylic Acid)-g-Protein-g-Poly (Methyl Acrylate) as an Adhesive Material
Addresses adhesive materials for bonding PLA fibers, including very advanced adhesive formulations. - Preparation and Characterization of Poly (Acrylic Acid)-g-Feather Protein-g-Poly (Methyl Acrylate)
It talks about water-based adhesives and their applications and efficiency in bonding PLA fibers. - Effects of Different Curing Methods on Adhesion Strength of Single-Lap Joints
Describes the bonding of PLA plates obtained by 3D printing through DP-8005 acrylic adhesive for practical insight into adhesive performance matters. - Integrating Mussel Chemistry into a Bio-Based Polymer to Create Degradable Adhesives
On the opposite side are bio-based adhesives, which demonstrate strength in bonding to PLA, streamlining the search for suitable adhesives. - Improving Polylactide/Starch Biocomposites by Grafting Polylactide with Acrylic Acid
Studies the bonding properties of PLA composites with acrylic acid, which has certain aspects relevant to understanding adhesive interactions.


