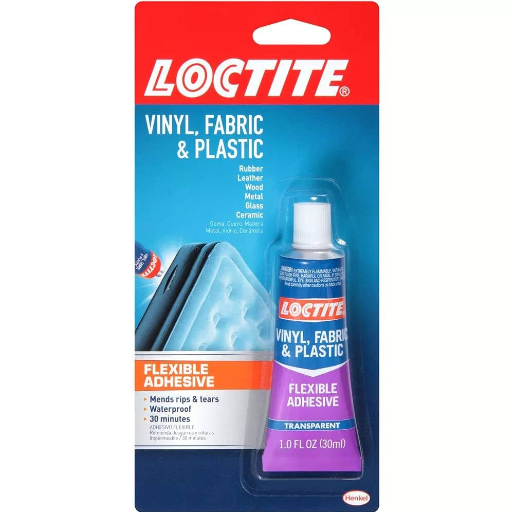
Gluing components of 3D printed parts made from PLA (Polylactic Acid) is often difficult to accomplish. In this tutorial, I will present various methods and materials designed to glue PLA parts together for different project requirements. From the nature of PLA and traditional glues to surface bonding adhesives and the techniques used in this article, I have covered all the technical aspects that the readers will require to achieve maximum results. Along with that, I will delve into advanced surface preparation and joint design to improve bond strength while addressing trouble spots and common issues. Professional or hobbyist, this guide is an expert tool that will help everyone successfully glue PLA 3D printed parts together.
What is the Best Glue for PLA 3D Printed Parts?

Each project comes with adhesive requirements, from strength to precision and environmental durability. The best glue for PLA parts, for example, is super glue, aka cyanoacrylate glue, which works wonders with PLA because of its minimal setup time and fast bonding capabilities. Super glue, however, pales in comparison to epoxy adhesives when enhanced durability or gap-filling is required. Epoxy adhesives are more robust and better suited for rough or uneven surfaces. Welding glues designed for PLA offer the strongest bonds, mechanically and aesthetically, but aren’t easy to get out onto the market and are best suited for professional applications. Choose whichever glue meets your professionalism, but always own up to surface preparation for the best adhesion.
Exploring Different Glues for PLA
When it comes to gluing PLA 3D printed parts, several adhesives stand out based on their unique properties and use cases. Below is an analysis of commonly recommended glues for PLA, gathered from reliable sources, to help you make an informed choice:
- Cyanoacrylate Glue (Super Glue)
Cyanoacrylate glue is the most widely used adhesive for PLA parts thanks to its fast bonding time and ease of application. It is especially effective for small to medium-sized parts with smooth surfaces. Super glue forms a strong bond quickly, but it is less effective for filling gaps or bonding large, structural components. Proper surface preparation, like light sanding and cleaning, enhances adhesion.
- Epoxy Adhesive
For applications requiring stronger bonds, impact resistance, or gap-filling properties, epoxy adhesives are a superior choice. These two-part adhesives create a chemical bond that is highly durable and water-resistant. Epoxies take longer to cure but provide excellent stability, making them suitable for more demanding applications where strength and durability are critical.
- Welding Adhesives
Specialized PLA welding adhesives, sometimes referred to as plastic welder glues, chemically bond the PLA surfaces by slightly melting them, creating a near-seamless mechanical and aesthetic connection. This method offers the highest strength but requires careful application and is typically used in professional or industrial settings due to its complexity and handling requirements.
Each adhesive type serves varying project needs, so consider factors like bond strength, curing time, and ease of use when selecting the best glue for your PLA 3D printed parts.
Comparing Epoxy, Super Glue, and Weld-On
When comparing Epoxy, Super Glue, and Weld-On adhesives for PLA 3D printed parts, understanding their distinct properties, applications, and advantages aids in selecting the most effective solution.
- Epoxy
Epoxy adhesives are known for their outstanding bond strength, particularly in structural applications. They work by forming a chemical bond between surfaces, creating a durable and water-resistant joint. This property makes epoxy ideal for high-stress applications or environments with exposure to moisture or chemicals. Although they require precise mixing and longer curing times, their gap-filling ability ensures stable adhesion on uneven surfaces.
- Super Glue
Super Glue (cyanoacrylate) is a fast-curing adhesive best suited for small repairs and projects where speed and ease of use are paramount. With minimal preparation required, it creates a hard, brittle bond almost instantly. However, its mechanical strength is lower compared to epoxy, making it better suited for low-stress applications. Super Glue may not work effectively on rough or uneven PLA surfaces unless combined with an accelerator.
- Weld-On
Weld-On adhesives, as plastic welding agents, chemically soften and re-bond PLA at a molecular level, forming a seamless joint. This process results in superior tensile strength and a clean finish. However, their usage often involves specific handling conditions, controlled application techniques, and proper ventilation, limiting accessibility to professional or industrial users. Weld-On adhesives are particularly advantageous for projects requiring precise, durable, and aesthetically neat bonds.
Key Takeaway
For low-stress, quick fixes, Super Glue is the most convenient option. Epoxy is recommended for demanding applications needing robust, gap-filling bonds, while Weld-On is the top choice for achieving professional-grade, nearly invisible seams with high strength.
Why Polyurethane Glue Might Be a Better Choice
Its flexibility, strength, and durability make Polyurethane glue a versatile and appealing adhesive option. Unlike cyanoacrylate and epoxy glue, polyurethane glue is proficient in bonding wood, metal, plastic, and ceramic together. It is perfect for outdoor use because of its moisture activated curing process, which enables it to fill in gaps strongly and withstands harsh weather. In addition, the glue’s capability of maintaining flexibility after curing makes it an ideal candidate for long-term use, as it can withstand stress without failure. Although it requires prolonged curing time and proper clamps, its performance in powerful conditions is more than enough reason to choose it as an adhesive for both DIY projects and professional use.
How to Glue PLA Together Effectively?

Utilizing the correct adhesive and methodically executing the procedure is critical to creating a robust and durable bond when gluing PLA parts. Cyanoacrylate is the most popular adhesive for PLA since it bonds exceptionally well and cures rapidly. For fine work, apply glue to one side only and press the pieces together firmly and accurately. For larger, more load bearing parts, strength and durability can be achieved with epoxy resin, but it does take longer to cure. Prepare the surface by cleaning and lightly sanding the bonding area as this greatly increases the chances of adhesion. Also, use some sort of weight or clamps to hold the pieces in place until they have fully cured. Having these measures guarantees the best results with the most professional finish.
Preparing PLA Surfaces for Gluing
Before gluing PLA parts together, the surface requires adequate treatment to gain a strong and lasting bond. To begin, the surfaces must be clean by eliminating dust, grease, or any residue; isopropyl alcohol (IPA) works well for that. After cleaning, roughen the bonding surfaces with some fine-grit sandpaper (220-400 grit) to allow stronger adhesion. Clean the surface again to get rid of any sanding particles. It is wise to allow the materials to come to room temperature before applying adhesive, since moisture in warm surfaces can weaken the bond. Following all steps will guarantee that PLA components adhere and have a durable connection.
How to Apply the Glue for Maximum Strength
As with all superglue procedures, initially focus on one contact area and spray or brush the glue on lightly. For superglue work, the most commonly suggested adhesives are superglue or two-part epoxy for PLA, and that is for a reason. For cyanoacrylate glue, a very thin even coat will do the trick, and for epoxy, be sure to stir the resin and the hardener thoroughly per their labeling directions before applying. After the glue is put on, accurately position the parts so that they are not glued together in the wrong relation to one another, because repositioning is nearly impossible until the glue has cured. Clamps, weights, or tape can be used to secure the parts with proper adjustment so that all glued features will experience the same amount of clamping force. The time for the glue to cure will be different depending on the product, but be sure to follow the labeling directions. Few minutes to several hours is reasonable for most products. Make sure the bond is not disturbed during the given period for strength to be optimum.
Tips on Clamping and Allowing Glue to Cure
Pay attention while clamping as the pressure needs to be evenly spaced on the glued surface, otherwise weak points may be created in the bond. Employ the clamps of the correct dimension for the intended parts and shape, and add other supporting materials like padded wooden blocks to avoid direct clamp impressions on the material. The clamps should provide enough force to minimize movement of the components without being too tight as this will remove excessive glue, and in turn weaken the bond.
During the curing process, the environment’s temperature and humidity must be kept stable as large extremes can affect adhesion. Most adhesives work better between 65 to 75 degrees Fahrenheit and moderately humid conditions. Hold the joint as is for the recommended time of curing. Some epoxies and high strength glues may need 24 hour curing periods to ensure strong bonding. Testing the bond before the elbow joint has finished curing will compromise its integrity, so it must be avoided.
Can You Use Hot Glue to Bond PLA?

Although hot glue can bond PLA, it is not suitable for creating strong and durable bonds long-term. PLA has a low melting point which makes it prone to melting or deforming hot glue, especially if it is overused. While hot glue can be beneficial for temporary and low-strength bonds on light-weight objects, it is far more reliable to use plastic-specialized adhesives such as cyanoacrylate (super glue) or epoxy. Whatever the case may be, always factor in the stress and intended use on the joint when choosing an adhesive for PLA.
Pros and Cons of Using Hot Glue with PLA
Pros:
- Ease of Use: Hot glue is simple to apply and does not require extensive preparation or additional tools. It is widely accessible and quick to work with.
- Fast Setting Time: The glue sets rapidly, allowing for quick assembly of components without long wait times.
- Temporary Bonds: It works well for temporary fixes or prototypes that do not require high strength or longevity.
- Non-Toxic and Safe: Hot glue is generally safe to handle, with minimal fumes compared to some chemical adhesives.
Cons:
- Low Bond Strength: Hot glue is not ideal for critical joints, as the bond lacks the strength needed for high-stress applications or heavy loads.
- Heat Sensitivity: PLA’s low glass transition temperature (~60°C) makes it prone to warping or deforming when exposed to the high temperatures of hot glue.
- Limited Durability: Over time, hot glue can lose adhesion, especially in environments with temperature fluctuations or high humidity.
- Not Long-Term Reliable: For permanent applications or projects subjected to constant stress, specialized adhesives like cyanoacrylate or epoxy are much more effective.
While hot glue can be a convenient solution for quick repairs or temporary setups with PLA, it is not recommended for projects that require structural integrity or long-term reliability.
Alternative Methods for Gluing PLA Using Heat
- Heat Welding: Heat welding involves using a soldering iron or similar heated tool to melt and fuse PLA parts directly. By pressing the heated tool along the seam of the two pieces, the plastic liquefies and bonds together upon cooling, creating a strong and durable connection. This method works well for precise, localized applications but requires practice to avoid damaging or deforming the material.
- Using a 3D Pen: A 3D pen extrudes melted PLA filament, enabling you to “weld” parts together by filling and fusing gaps. This method offers greater control over small details and is particularly useful for post-processing or enhancing the durability of joins. The proper filament color should match your project for seamless results.
- Friction Welding: This technique uses a rotary tool with a spinning PLA rod to generate heat through friction. When applying the spinning rod to the PLA surface, the plastic softens, enabling a strong bond. This method is efficient for quick fixes and can produce a clean, stable join, though consistent pressure and speed are critical for effective results.
Each of these alternatives utilizes heat to manipulate and join PLA but requires precise handling and the appropriate tools to achieve optimal results without compromising the material’s integrity.
Is Acetone an Effective Adhesive for PLA?

Acetone cannot be used as an adhesive to bond PLA parts since PLA is chemically resistant to acetone. Unlike ABS which dissolves and bonds under the influence of acetone, PLA does not undergo the same chemical processes. Thus, acetone cannot effectively weld or bond PLA materials. Instead, plastic specific adhesives, epoxy resins, and heat can be used to join the two parts.
Understanding the Reaction Between Acetone and PLA
Upon closer inspection of the reaction between acetone and PLA, it is clear that PLA’s chemical structure makes it relatively inert to acetone. PLA and acetone’s reactivity is nowhere near that of ABS, whose dissolution and bonding with acetone is a standard procedure. PLA does not possess sufficient solubility required to break itself down into simpler components by the action of acetone. Because of the unaltered molecular chains of PLA, acetone can’t undergo a chemical weld. Studies indicate that the application of some amounts of acetone to PLA undergoes almost no reactivity except maybe for whitening and etching of some surfaces, which is strictly cosmetic. This is because of intermolecular hydrogen bonding predominating in polyactic acids, that PLA is a type of, strong enough to prevent the penetration or dissolution of acetone. Therefore, acetone does not serve as a solvent or adhesive for PLA, indicating the avoidance of bonding methods appropriate for this material.
How to Use Acetone Safely When Gluing 3D Parts
When gluing 3D printed parts, acetone is typically used for smoothing or bonding materials like ABS. To ensure safety during this process, adhere to the following guidelines:
- Work in a Well-Ventilated Area – Acetone emits strong fumes that can be harmful if inhaled in large amounts. Always use it in an open or well-ventilated space, and consider using a fume extractor if working indoors.
- Wear Protective Gear – Use gloves resistant to chemicals, such as nitrile gloves, to prevent skin contact. Additionally, wear safety goggles to protect your eyes from accidental splashes.
- Keep Away from Open Flames – Acetone is highly flammable, making it critical to avoid its use near open flames, sparks, or any heat sources.
- Use Appropriate Applicators – For controlled application, use a brush, cotton swab, or applicator suitable for delicate areas of the 3D printed part.
- Store Properly – Store acetone in a sealed, labeled container made of a compatible material (e.g., glass or specific plastics) and keep it away from children, heat sources, or direct sunlight.
- Dispose Responsibly – Dispose of used acetone by local hazardous waste regulations to prevent environmental harm.
By adhering to these steps, you can ensure safe and effective use of acetone when bonding or finishing appropriate 3D-printed materials like ABS. Always consult the manufacturer’s guidelines for both the material and the acetone product to achieve the best results while minimizing risks.
What Are the Common Mistakes When Gluing 3D Printed PLA Parts?

When gluing 3D printed PLA parts, several common mistakes can compromise the bond’s strength and quality:
- Incorrect Adhesive Selection – Using an adhesive unsuitable for PLA, such as general-purpose glues, often results in weak bonds. Cyanoacrylate (super glue) or specific plastic adhesives are better suited for PLA.
- Ineffective Surface Preparation – Failing to clean and sand the bonding surfaces can reduce adhesion. Dust, oils, or smooth surfaces prevent proper bonding.
- Excessive Glue Application – Applying too much glue can lead to uneven bonding and longer drying times, and it may also create visible residue on the finished part.
- Insufficient Clamping or Pressure – Not clamping the parts firmly during curing can result in gaps or misalignments, weakening the joint.
- Skipping Curing Time – Rushing the assembly before the adhesive fully cures reduces durability and long-term bonding strength.
Avoiding these mistakes and following proper gluing techniques ensures strong, clean, and reliable bonds between PLA components. Always read and follow adhesive manufacturer instructions for optimal results.
Avoiding Excess Glue and Ensuring Clean Glue Joints
To avoid using excess glue and achieve precise, clean glue joints, follow these steps:
- Measure and Apply Adhesive Sparingly – Use the minimal amount of glue necessary to cover the bonding surfaces. A fine-tip applicator or syringe provides greater control, reducing spillover and creating less mess. Spread the glue thinly and evenly for consistent bonding strength.
- Prepare Surface Areas Properly – Proper preparation ensures effective adhesion and minimizes excess residue. Clean surfaces thoroughly to remove grease, dust, or debris, and lightly sand the areas to improve mechanical grip if necessary.
- Remove Residue Immediately – Wipe away any excess adhesive promptly using a cloth or paper towel dampened with a suitable solvent. Waiting too long may allow the glue to cure, making removal difficult and leaving permanent marks.
- Use Appropriate Clamping – Apply even pressure with clamps, ensuring alignment during curing. Excess adhesive squeezed out during this step can be cleaned off gently before it sets, ensuring neater joints.
- Rely on Application Tools – Utilize tools like glue spreaders, brushes, or applicator bottles to control the exact amount of adhesive applied and avoid oversaturation.
By combining controlled application, surface preparation, and diligent cleaning practices, you can achieve strong, clean glue joints while minimizing waste and unsightly residue.
How to Deal with PLA Pieces That Don’t Fit
When dealing with PLA pieces that don’t fit together as intended, precise adjustments and careful techniques can resolve the issue effectively. Follow these steps to achieve the best results:
- Measure and Identify the Problem Area – Use calipers or a ruler to measure the dimensions of the PLA pieces, comparing them to the original design specifications. Look for areas with incorrect tolerances or printing defects.
- Sand and File for Precision – Use fine-grit sandpaper, needle files, or precision rotary tools to incrementally adjust the offending parts. Sand or file in small increments, checking the fit regularly to avoid removing excessive material.
- Apply Controlled Heat – Gently apply heat using a heat gun or warm water (around 55–70°C) to soften the PLA slightly. This allows for minor reshaping or bending, which can be particularly useful for adjusting warped or slightly oversized pieces.
- Reprint or Scale in Software – If the fit issues are significant, consider modifying the original design in CAD software by adjusting tolerances or scaling the model by a small percentage. Reprinting the parts with corrected measurements ensures precise compatibility.
- Use Structural Adhesives or Fillers – For gaps that cannot be resolved through fitting alone, apply adhesives like cyanoacrylate or epoxy, or use PLA-friendly filler materials to bridge or secure the connection.
These methods help to address common problems with PLA fits while maintaining structural integrity and aesthetic quality. Always proceed slowly and test often to ensure the adjustments meet your goals without causing unintended damage.
Techniques to Sand and Clamp for Better Results
The desired outcomes of sanding and clamping can only be attained with proper technique, appropriate tools, and preparation. For sanding, surface flaws should first be removed using coarse grit sandpaper, such as 60 – 80 grit, followed by 220 or finer grit sandpaper for a smooth finish. Always sand with the surface grain and avoid putting too much force for better results. Using an orbital sander is more efficient for sanding, just remember to remove dust after each grit change to avoid scratches.
Bar clamps work best for long, linear edges whereas corner clamps work well for angles. Always check the clamp alignment before applying force to avoid any unnecessary deformations or pressure points. Add a protective layer on the surface to avoid damage from the clamps. When clamping glued joints, always allow adequate dry time after closing them and do not forget to follow the manufacturer’s recommendations. Apart from aesthetics, proper sanding and clamping improves the finish’s structural integrity as well.
References
Frequently Asked Questions (FAQ)
Q: What is the best way to glue PLA 3D printed parts together?
A: The best way to glue PLA 3D printed parts together is by using a combination of CA glue (cyanoacrylate) and epoxy resin. CA glue provides a quick bond, while epoxy resin offers a stronger, more durable hold. For added strength, you can also use friction welding to slightly melt the plastic and create a weld.
Q: How do I prepare PLA parts for gluing?
A: To prepare PLA parts for gluing, clean the surfaces to be joined with isopropyl alcohol to remove any dust or grease. Lightly sanding the surfaces with sandpaper can also help by creating a rougher texture for the adhesive to adhere to, ensuring a strong bond.
Q: Can I use superglue for PLA parts?
A: Yes, you can use superglue (CA glue) for PLA parts. It works well for small pieces and quick fixes. However, for larger or load-bearing parts, it is recommended to use epoxy resin for a more durable bond.
Q: Is epoxy resin effective for gluing PLA parts?
A: Yes, epoxy resin is highly effective for gluing PLA parts. It creates a strong bond and fills gaps between parts. Many epoxies come with a hardener and provide a working time of several minutes, allowing you to position the parts accurately before the glue sets.
Q: What is friction welding and how does it work with PLA?
A: Friction welding is a technique where you use a rotating tool, like a soldering iron, to create heat through friction. This heat melts the plastic at the joint, creating a strong weld. It is an effective method for joining PLA parts without the need for additional adhesives.
Q: Can Gorilla Glue be used on PLA parts?
A: Gorilla Glue can be used on PLA parts, but it may not provide as strong a bond as CA glue or epoxy resin. It expands as it cures, which can be useful for filling gaps, but it requires clamping and a longer curing time.
Q: What are some common mistakes to avoid when gluing PLA parts?
A: Common mistakes include not cleaning the surfaces properly, not sanding to create a rougher texture, using too much adhesive, and not allowing enough time for the glue to cure. Ensuring a good fit between the parts and applying the adhesive evenly will help get a good bond.
Q: Are there any safety precautions to take when gluing PLA parts?
A: Yes, always work in a well-ventilated area to avoid inhaling fumes from the adhesives. Wear gloves to protect your skin and safety goggles to protect your eyes. Be cautious when using heat-based methods like friction welding, as they can cause burns.
Q: How does PLA compare to other types of plastic like PETG or PVC when it comes to gluing?
A: PLA is generally easier to glue than PETG or PVC because it doesn’t require special solvents. However, PLA can be more finicky as it is more brittle. PETG and PVC may require different adhesives or methods to achieve a strong bond.


