3D printing with PLA has revolutionized the way we create, innovate, and bring ideas to life. However, despite PLA’s versatility, joining or repairing 3D printed parts can be a challenge without the right adhesive. Whether you’re assembling complex designs, fixing broken components, or optimizing your project’s overall strength, selecting the best glue for PLA is crucial.
This guide is designed to provide comprehensive insights into the most effective adhesives for PLA, their features, applications, and tips for achieving strong and durable bonds. We’ll explore a range of options, from super glue to specialized 3D printing adhesives, and highlight their compatibility with PLA material and other surfaces.
What is the best adhesive for gluing PLA parts together?

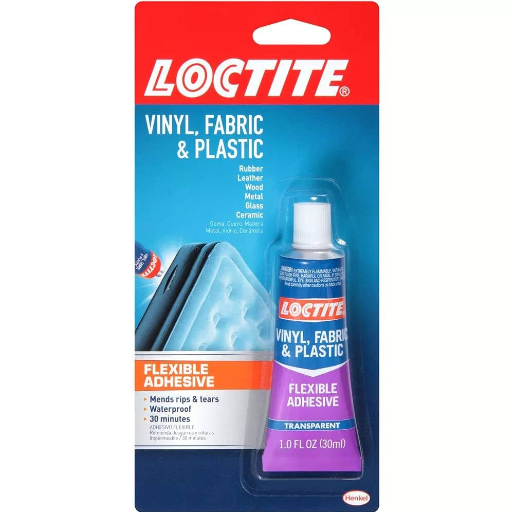
When gluing PLA parts together, the best adhesive largely depends on the specific requirements of your project. For most applications, cyanoacrylate glue is highly effective due to its fast curing time and strong bond with PLA. For even stronger connections, especially for structural parts, a two-part epoxy can be an excellent choice, as it provides robust, durable adhesion. Alternatively, solvent-based adhesives such as dichloromethane can chemically bond the parts for a seamless finish, though they require careful handling.(Recommended: Loctite Glue)
Comparing super glue, epoxy, and specialized PLA adhesives
When determining the best adhesive for PLA, the specific application and desired bond strength are key factors. Super glue (cyanoacrylate) is a convenient option for quick fixes and small projects due to its rapid curing time and strong initial bond. However, it may not be the most durable choice for heavy-duty or load-bearing applications.
Epoxy, particularly two-part epoxy, excels in providing robust and long-lasting adhesion. It is ideal for structural repairs or projects requiring a high-strength bond, though it usually involves a longer curing process. Epoxy can also fill small gaps between parts, which adds to its versatility.
Specialized PLA adhesives, such as solvent-based options like dichloromethane, chemically bond PLA surfaces by softening the plastic and fusing them together. This method creates a seamless and highly durable connection but requires careful handling and good ventilation due to the toxic nature of the solvents.
Each adhesive type has its strengths and limitations, so choosing the best option depends on the project’s specific requirements, such as speed, strength, or precision.
Understanding the pros and cons of cyanoacrylate glue for PLA
Super glue, also called cyanoacrylate glue, is one of the most common and best options when it comes to bonding PLA plastic. One of its main benefits entails strengthening and rigidifying borders almost instantly, often within seconds, which is suitable for projects that require fast bonding. In addition, CA glue can be used without any prior limitations like tools or curing equipment since it is readily available and simple to use.
On the other hand, CA glue does have certain shortcomings. Even though CA glue bonds PLA quite effectively, the connection is quite likely to yield to stress or large temperature changes, becoming brittle. This would prove to be a problem in high-load applications. Moreover, achieving a neat and clean finish is often very difficult due to the possibility of rough edges or marks caused by excess glue. Glue safety is another quite concerning issue since it can bond skin almost instantly and requires the user to handle it very carefully due to the pungent fumes it emits.
In conclusion, CA glue is an efficient binding agent for a lot of PLA projects, particularly those which are inline for speed and convenience. However, it is not effective in cases where there is a need for flexible or durable applications under extreme conditions.
Exploring the benefits of two-part epoxy resins for strong bonds
Two-part epoxy resins are highly versatile adhesives, well-known for their superior strength and durability. These adhesives consist of two components—a resin and a hardener—that, when mixed, cure to form a robust chemical bond. One of the key benefits of two-part epoxy is its exceptional adhesion to various materials, including metals, plastics, ceramics, and wood. This makes it ideal for applications requiring long-lasting, high-strength bonds.
Additionally, epoxy resins offer excellent resistance to environmental factors such as heat, water, and chemicals, which makes them suitable for both indoor and outdoor uses. They also have gap-filling properties, enabling them to bond uneven surfaces effectively. However, curing times can vary, with some formulations requiring several hours, so planning is essential.
Overall, two-part epoxy resins provide unparalleled reliability and versatility, particularly in demanding applications that require a combination of strength, durability, and precision.
How do I prepare PLA surfaces for optimal adhesion?

To prepare PLA surfaces for optimal adhesion, start by cleaning the surface thoroughly to remove any dust, dirt, or grease. Use isopropyl alcohol on a lint-free cloth for effective cleaning. Next, lightly sand the PLA surface with fine-grit sandpaper to create a slightly rough texture, which helps adhesives bond more effectively. After sanding, clean the surface again to remove any residual dust. Ensure the surface is dry before applying adhesive.
Essential steps for cleaning and sanding PLA before gluing
When working with PLA, selecting the appropriate adhesive is crucial for a strong and durable bond. Cyanoacrylate is one of the easiest and most effective options for bonding PLA parts due to its fast-curing nature and strong adhesion. Epoxy adhesives are another excellent choice, especially for high-strength requirements, as they provide a durable bond and work well on both smooth and slightly rough surfaces. For projects requiring flexibility, polyurethane-based adhesives can accommodate slight joint movements without compromising integrity.
Each adhesive type has its unique characteristics, so it’s important to consider the nature of your PLA project, environmental factors, and required strength before making your selection.
Techniques for roughening smooth PLA surfaces to improve bonding
Improving the bond strength of smooth PLA surfaces can be achieved by carefully roughening them through mechanical or chemical methods. One common technique is sanding the PLA surface using fine-grit sandpaper, which creates micro abrasions and increases the surface area for the adhesive to grip. It’s important to sand evenly and clean the surface afterward to remove any dust or debris.
Another method involves using a chemical treatment like acetone or isopropyl alcohol to slightly etch the PLA surface. While PLA does not dissolve in acetone, it can soften briefly, creating a texture that aids bonding. For best results, apply these chemicals sparingly with a cloth or cotton swab to avoid surface damage.
Lastly, using tools like a wire brush or abrasive pads can provide targeted roughening, especially in hard-to-reach areas. These mechanical techniques work well for quick applications but require care to prevent deforming the PLA. Always ensure the prepared surface is clean and dry before applying adhesive for optimal results.
The importance of working in a well-ventilated area when preparing PLA
Working in a well-ventilated area is crucial when preparing PLA, especially if you’re using chemicals like acetone or solvent-based adhesives. These substances can release fumes that, if inhaled, may cause respiratory irritation or long-term health impacts. Proper ventilation ensures that harmful vapors dissipate, reducing the risk of inhalation. Additionally, heat treatment or sanding PLA can produce fine particles or odors; ventilation minimizes exposure to these by-products. To maintain safety, consider using an exhaust fan, open windows, or work in an outdoor space. Employing a respirator for added protection may also be beneficial in enclosed environments.
What are some tips for applying glue to PLA parts?

When applying glue to PLA parts, ensure both surfaces are clean, dry, and free of debris to maximize adhesion. Use a glue type suitable for PLA, such as cyanoacrylate or epoxy, depending on the strength and flexibility needed. Apply the glue sparingly to avoid excess that could mar the finish or weaken the bond. Press the parts together firmly and allow sufficient curing time as specified by the adhesive manufacturer. If additional strength is required, consider sanding the bonding surfaces lightly to improve grip.
Step-by-step guide to applying super glue gel for precise control
Prepare the Surfaces
Begin by ensuring both PLA parts are clean, dry, and free of dust or grease. Wipe the surfaces with a dry cloth or mild alcohol solution if needed for better adhesion.
Select the Right Glue
Use super glue gel, as its thicker consistency allows for more precise application, reducing the risk of drips or spreading.
Apply Glue Sparingly
Open the super glue gel tube and apply a small, controlled amount directly to one bonding surface. A thin layer is typically sufficient to create a strong bond.
Join the Parts
Align the pieces carefully before pressing them together, as adjustments will be difficult once the glue starts to set. Apply firm but even pressure for a few seconds.
Secure the Bond
Optionally, use clamps or tape to hold the parts in place while the glue cures. Most super glue gels bond quickly, but full curing may take a few hours, depending on the manufacturer’s instructions.
Clean Excess Glue
If excess glue seeps out, gently wipe it off with a damp cloth immediately. For dried glue, carefully scrape it away with a blade or fine sandpaper to maintain a clean finish.
By following these steps, you can achieve a strong, precise bond that enhances the durability and appearance of your PLA parts.
Techniques for using epoxy resin on larger PLA pieces
Using epoxy resin on larger PLA pieces requires careful preparation to ensure durability and a smooth finish.
Surface Preparation: Sand the PLA surface with fine-grit sandpaper to create a slightly rough texture. This step improves adhesion by giving the epoxy resin a better grip. After sanding, clean the surface thoroughly with isopropyl alcohol to remove any dust or oils.
Choosing the Right Epoxy: Select a two-part epoxy resin suited for your project’s requirements. Fast-curing resins are ideal for quick results, while slower-curing options provide more working time for intricate applications.
Mixing and Application: Follow the manufacturer’s mixing instructions precisely, ensuring a proper resin-to-hardener ratio for optimal results. Apply the epoxy evenly using a brush, spatula, or pour method, depending on the size and complexity of the PLA piece.
Layering for Strength: For larger pieces, consider applying multiple thin layers of epoxy rather than a single thick layer. This approach prevents uneven curing and reduces the risk of air bubbles. Allow each layer to partially cure before adding the next one.
Curing Process: Maintain a stable environment for curing, typically avoiding humidity and temperature fluctuations. Epoxy resin can take anywhere from several hours to a full day to cure completely, so adhere to the recommended curing time.
Finishing Touches: Once the epoxy is fully cured, sand it lightly if needed to smooth out imperfections. For a polished finish, buff the surface or apply a clear coat.
These techniques ensure a strong bond and a professional appearance when working with larger PLA pieces and epoxy resin. With the appropriate tools and methods, the final result will be both functional and visually appealing.
How to use activators to speed up the curing process
Using an activator to hasten the setting process ensures that time is saved and efficiency is guaranteed through any task that utilizes epoxy resin. An activator is a chemical substance that strengthens and accelerates the hardening of resin without compromising bond strength.
Choose the right activator: As is the case with all tools and materials, ensure that the activator selected works well with the specific selected epoxy resin. Solutions such as heat activated hardeners or UV light sensitive activators are good examples.
Mix Properly: Ensure that the activator is added according to the manufacturer’s guidelines. Using too much can lead to excessive bubbling or weakening through a bond, therefore precise measurement cannot be overlooked.
Heating or UV light: For heat activated or UV sensitive ones, apply heat through a heat gun or a UV lamp and watch as the curing process begins. Care should also be taken to maintain a consistent distance and temperature to prevent damage to the material.
Monitor the work: Planning and monitoring the sped up curing process while working toward shaping, positioning or molding the material gives an edge against completing the job before the epoxy hardens completely.
How long does it take for different adhesives to cure on PLA?

The curing time for adhesives on PLA can vary depending on the type of adhesive used and environmental conditions such as temperature and humidity.
Cyanoacrylate: Typically bonds within seconds to a few minutes and reaches full strength in 24 hours.
Epoxy Resin: Initial setting takes around 5-30 minutes depending on the formulation, with full curing achieved in 24-48 hours.
Polyurethane Adhesive: Usually sets in 1-2 hours but may require up to 24 hours for full curing.
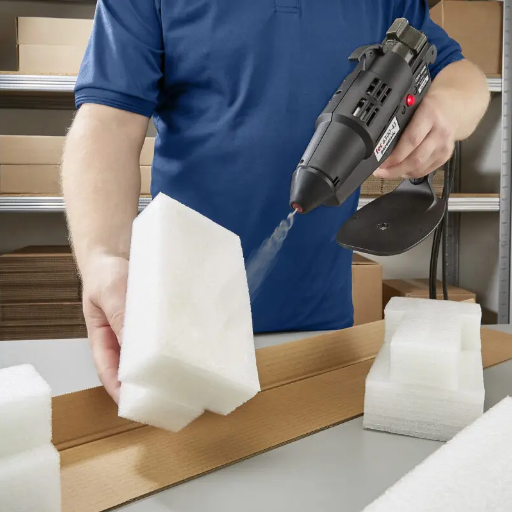
Hot Glue: Adheres almost instantly but lacks long-term durability compared to other adhesives.
Always refer to the adhesive manufacturer’s instructions for the most accurate curing guidelines.
Understanding curing times for super glue, epoxy, and specialized PLA adhesives
The curing times for super glue, epoxy resin, and PLA adhesives depend on several factors, including humidity, temperature, the materials being bonded, and the adhesive formulation. For super glue, high humidity accelerates curing, whereas low humidity may slow it down. Epoxy resin curing is heavily influenced by the resin-to-hardener ratio and ambient temperature, with warmer temperatures typically leading to faster curing. PLA adhesives, designed specifically for bonding 3D-printed materials, often have precise setting and curing instructions tailored to PLA’s properties, which manufacturers detail for optimal strength.
Factors that affect drying and curing times for glued PLA parts
The drying and curing times for glued PLA parts depend on several key factors:
Adhesive Type: Different adhesives have varying curing properties. Cyanoacrylate (super glue) typically cures faster in high-humidity environments, while epoxy resin curing times depend on the specific resin-to-hardener ratio and ambient conditions. PLA-specific adhesives are formulated to bond efficiently but may vary in curing time based on product-specific guidelines.
Environmental Conditions: Temperature and humidity are critical. Warmer temperatures often accelerate curing, while colder conditions slow the process. Higher humidity levels can speed up the setting of certain adhesive types, like cyanoacrylate, while others may perform best in controlled humidity environments.
Surface Preparation: Properly prepared surfaces significantly affect bonding effectiveness and curing times. Clean, dry, and roughened PLA surfaces promote a stronger adhesive bond and can slightly reduce cure time by ensuring better contact between the adhesive and the material.
Adhesive Application: The amount of adhesive applied impacts curing times. Excessive adhesive can prolong drying times, while a thin, even layer allows for faster and more uniform curing.
What are the best practices for achieving a strong bond between PLA pieces?

When aiming to achieve a strong bond between PLA pieces, follow these best practices:
Surface Preparation: Ensure that the bonding surfaces are clean, dry, and slightly roughened. Sanding lightly with fine-grit sandpaper can improve adhesion by increasing surface area.
Adhesive Selection: Use adhesives specifically recommended for PLA, such as cyanoacrylate, epoxy, or solvent-based plastics adhesives, depending on your project’s requirements.
Application Consistency: Apply a thin, even layer of adhesive for uniform bonding. Avoid using excessive amounts that could weaken the bond or extend curing times.
Clamping and Alignment: Properly align the pieces and use clamps or weights to hold them in place during curing for a precise and strong bond.
Environmental Considerations: Work in a clean, moderate-temperature environment to ensure optimal adhesive performance and minimize curing issues.
Techniques for clamping and holding PLA parts together while the glue dries
Proper clamping and alignment are critical for ensuring strong bonds when joining PLA parts. Here are some effective techniques:
Spring Clamps: Use spring clamps to apply consistent pressure to small or medium-sized parts. They are easy to adjust and provide sufficient force to hold parts in place without damaging them.
Rubber Bands or Elastic Straps: For curved or irregularly shaped pieces, rubber bands or elastic straps offer flexibility and even pressure distribution. Ensure they are tight enough to hold the parts securely without sliding.
Binder Clips: These are ideal for flat or thin parts and offer a quick and inexpensive solution for keeping edges perfectly aligned while the glue sets.
Vise or C-Clamps: For larger or heavier components, use a vise or C-clamps to ensure a firm grip. Place a protective layer, such as a soft cloth or foam, between the clamp jaws and PLA to prevent surface damage.
Weight Pressing: For simple, flat parts, pressing a weight on top of the joined pieces can be sufficient. Ensure even pressure by applying weight across the joint area.
Custom Jigs or Forms: For complex geometries, create custom jigs or forms to hold the pieces together during the curing process. This method prevents warping and ensures precise alignment.
Tape and Temporary Fasteners: Masking tape or painter’s tape can serve as an auxiliary tool for holding small parts together during curing. Alternatively, threaded inserts or screws can temporarily secure parts until the adhesive fully sets.
Remember to verify alignment before leaving the parts to cure and follow the recommended curing times for your adhesive to achieve the strongest bond.
How to ensure proper alignment of PLA pieces during the bonding process
The default alignment strategy is optimal for ensuring the strength and accuracy of PLA part bonds. Some helpful hints are:
Marking: Before joining the parts together, plan with an outline on where the PLA parts need to be aligned and mark them using a washable marker or a pencil. This makes certain that the markings made are unambiguous.
Bonds Check: Prior to gluing the parts, check the alignments and their positions by assembling the parts together. Make certain that all adjustments that need to be done to the pieces so that they are placed correctly are done.
Jigs and Guides: These can be made from wood, cardboard and even 3D printed parts, which can serve as temporary guides or jigs to aid adhesion while aligning the parts.
Alignment References: Parts being glued together can serve as internal anchors to ensure accurate alignment, but care should be taken that other parts are adjusted relative to the major reference.
Glue and support: Resting the clamp or other holding devices around the parts after gluing them in place assists avoid unwanted movements while the adhesive sets.
With the above listed techniques, precision in PLA parts with aim of ensuring they fit together properly is maintained.
Tips for achieving invisible seams when gluing PLA 3D printed parts
Proper Surface Preparation: Sand the edges to be glued using fine-grit sandpaper. This removes imperfections and ensures smooth, flat surfaces for consistent bonding.
Choose the Right Adhesive: For a seamless finish, use adhesives like cyanoacrylate glue, epoxy resin, or PLA-specific solvent-based adhesives. Test on a small area first to ensure compatibility.
Minimize Excess Adhesive: Apply a thin, even layer of adhesive to minimize glue squeeze-out. Excess glue, if visible, can disrupt smooth seams.
Post-Sanding and Polishing: After the glue cures, sand the seam area gently with progressively finer grit sandpaper. For a polished look, finish with a polishing compound or a coat of primer and paint.
Color Matching: Use adhesive or filler that matches the PLA filament color to disguise the seam naturally. Alternatively, paint the joined pieces to unify appearance.
Heat Application: Carefully apply controlled heat with a heat gun or soldering iron to smooth out visible seams. However, avoid overheating, as it may warp the PLA.
By following these techniques, you can achieve nearly invisible seams, resulting in professional-looking, seamless PLA 3D printed parts.
References
Frequently Asked Questions (FAQ)
Q: What is the best way to glue PLA parts together?
A: The best way to glue PLA parts together depends on your specific needs. Superglue, especially Loctite super glue or super glue gel control, is popular for its quick setting time and strong bond. Epoxy and model cement can also be effective for achieving a strong weld between surfaces.
Q: How do I choose the right type of glue for PLA?
A: When choosing the right type of glue for PLA, consider the strength of the bond you need and the environment in which the item will be used. Superglue and epoxy are good for strong, permanent bonds, while hot glue is suitable for temporary fixes. Ensure the glue is compatible with PLA materials.
Q: Can acetone be used as a way to glue PLA?
A: Acetone is not effective for gluing PLA because it does not melt or dissolve PLA like it does with ABS. Instead, use products like superglue or epoxy for bonding PLA prints together.
Q: What are some recommended products used for gluing PLA?
A: Recommended products for gluing PLA include Loctite super glue, super glue gel control, Weld-On 16, and two-part epoxy. These provide a good bond for PLA materials.
Q: How should I apply the glue for the best results?
A: To apply the glue effectively, ensure surfaces are clean and dry. Apply a small amount of glue to one surface, then press the materials together and hold them in place until the glue sets. It’s important to work in a well-ventilated area.
Q: Is hot glue a good option for gluing PLA parts?
A: Hot glue can be used for temporary bonds but may not provide the strong, lasting weld needed for structural 3D-printed parts. It is better suited for projects where the bond won’t get stressed.
Q: What techniques can enhance the bond between PLA surfaces?
A: Sanding the surfaces to create a rough texture can help improve adhesion. Using an applicator for precise glue application also ensures a clean bond. Friction welding is another method where the heat generated by a rotating plastic rod melts and welds the pieces together.
Q: Can I use model cement on PLA?
A: Model cement is generally not recommended for PLA, as it is designed for polystyrene. However, some model cements that contain solvents compatible with PLA may work, but testing is advised.
Q: Why is a well-ventilated area important when applying adhesive to PLA?
A: Working in a well-ventilated area is crucial when applying adhesives like superglue and epoxy, as they can emit fumes that are harmful if inhaled. Proper ventilation ensures safety while working with these materials.


