


Unarguably, glue adhesion for resin prints is very demanding, especially for new 3D printing resin enthusiasts or those who construct multi-part, intricate models. Whether it is assembling a functional item, creating an art piece, or repairing a break, knowing how best to work with that particular glue will render the finished piece seamless and durable. To help you decide on your course, this guide offers practical tips, expert insights, and a step-by-step approach that makes creating anything with resin print a breeze. If you want to elevate your resin work, read on for everything you need to know about resin print gluing.
Understanding Resin Prints
Resin printing is a method of creating 3D objects using photopolymer resin, a liquid that hardens upon exposure to UV light during printing. Of utmost consideration for said prints are the preservation of high-density detail and smooth surface finish, which render them appropriately suitable for designs, prototypes, and miniature figures. They are considered to be more brittle than other 3D-printed materials, such as filament; hence, care must be taken to avoid cracking and breaking. On the other hand, post-processing methods such as cleaning and curing must be conducted appropriately to impart additional strength and quality to the end product.
Characteristics of Resin Prints
Resin prints offer the highest degree of precision and the capability for rendering exceedingly fine details. This is achieved by depositing small amounts of liquid resin, curing it, and then proceeding to the next layer using UV light, preferably in SLA or DLP-type printers. What sets resin printing apart as a high-end differentiation from other methods is its smooth surface finish, which is of prime importance in applications such as jewelry design, miniature detailed models, and dental molds. Resin prints can produce very complex geometries that are impossible or very challenging to achieve with any other 3D printing technology. Still, the brittle nature of cured resins demands careful handling and post-processing. Thus, the nature of resin printing makes it an alluring yet very niche technique in additive manufacturing.
Why Do Resin Prints Need Gluing?
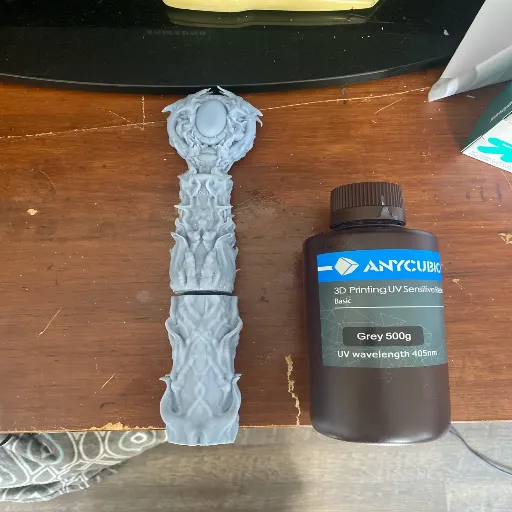
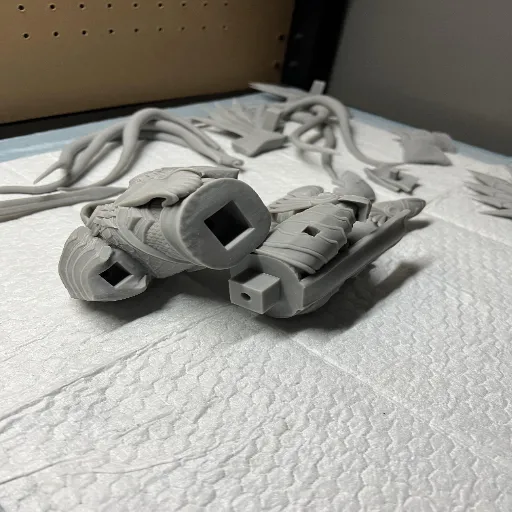
Due to the size limitations of 3D printers and the complexity of some designs, this is a standard method for gluing resin prints. Most consumer-level resin printers have a relatively small build volume, which prevents the printing of large objects. That is why any larger model needs to be split into multiple parts for printing. Once printed, the parts require firm adhesion with adhesives. For some complex or overhanging geometries, separate printing of these parts is necessary to avoid problems such as build failure or excessive supports, which can increase the assembly count. The special adhesives best suited for this purpose are cyanoacrylates, such as superglue, or epoxies, which chemically bond to cured resin materials. Gluing with proper techniques and alignment cures a structure with no visible seam, thereby enhancing the beauty and strengthening the finished model.
Choosing the Right Adhesive
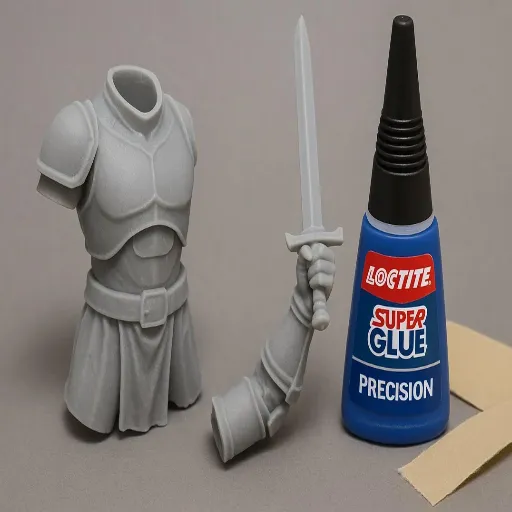
Important: When selecting bonding agents for resin models, consider the bond strength, curing time, and compatibility with the available materials. Generally, cyanoacrylate is best suited for a fast cure on small or lightly stressed parts. One can subject an assembly to a larger configuration by an epoxy bond, which creates a stronger and more durable bond. Ensure that surfaces are clean and dry before applying the glue; otherwise, it may not adhere correctly. When in doubt, test the glues on scrap materials.
Overview of Adhesive Types
| Adhesive Type | Best For | Properties |
|---|---|---|
| Cyanoacrylate (Superglue) | Small surfaces, quick fixes | Fast cure, easy application, brittle under stress |
| Epoxy Glue | Structural purposes, larger parts | High strength, chemical resistance, and durability |
| Silicone Glue | Flexible materials | Retains elasticity after curing |
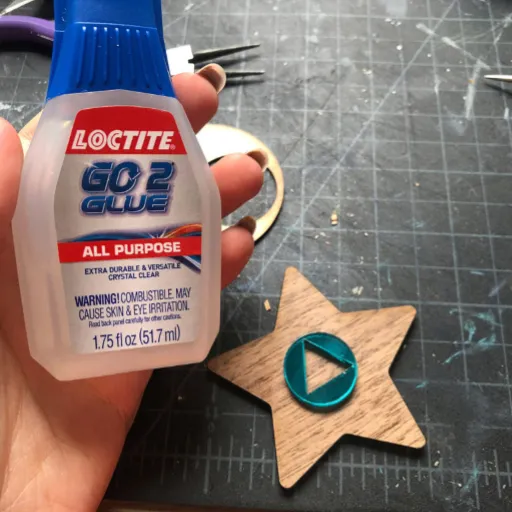
| Polyurethane Adhesive | Wood, plastics, metals | Strong bonds on nearly all materials |
Each type of adhesive has its own properties for absorbent and other related uses, and choosing the right one guarantees durability and will serve you through your project.
Factors to Consider When Choosing Glue for Resin
Before purchasing glue for resin, consider several factors to ensure optimal bonding results:
- Resin Type: The glue may work fine with epoxy resin, but not so with polyester resin or polyurethane resin
- Adhesion Strength: Prioritize this, especially in projects that require durability or load-bearing capabilities
- Heat Resistance: Consider if the bonded product will be exposed to temperature changes
- Material Compatibility: Verify the adhesive bonds to materials like wood, metal, or plastic
- Curing Time: Some projects require immediate setting, while others benefit from slower curing
Pro Tip: Always cross-check the instructions provided for both resin and adhesive to protect yourself from application errors.
Common Challenges and Troubleshooting Tips
Weak Bond Strength
Cause: Improper surface preparation or using an incompatible adhesive.
Solution: Clean and dry surfaces thoroughly before applying the adhesive. Ensure the adhesive is suitable for the materials in use.
Adhesive Not Curing Properly
Cause: Insufficient curing time, low temperatures, or incorrect mixing ratios.
Solution: Follow the manufacturer’s curing guidelines, maintain suitable environmental conditions, and carefully measure mixing ratios.
Adhesive Failure Under Stress
Cause: Exposing the bond to excessive force or unsuitable conditions too soon.
Solution: Allow the adhesive to cure fully before applying stress, and use adhesives rated for the intended load and environment.
Adhesive Drip or Excess Material
Cause: Over-application of adhesive.
Solution: Use precise application tools and remove excess properly before curing.
Identifying Common Challenges in Resin Bonding
Resin bonding, while offering strong and durable connections, presents its own set of challenges that can affect the quality and longevity of the bond. Here are some key issues and how they can be addressed:
| Challenge | Description & Solution |
|---|---|
| Surface Contamination | Contaminated surfaces, such as those with dust, grease, or moisture, can prevent proper resin adhesion. Cleaning and preparing surfaces meticulously is crucial for achieving optimal results. |
| Improper Mixing Ratios | Achieving the correct resin-to-hardener ratio is crucial for achieving proper curing and optimal bond strength. Always follow the manufacturer’s guidelines and mix the components thoroughly to avoid weak or failed bonds. |
| Environmental Factors During Curing | Extreme temperatures or high humidity during the curing process can negatively affect the resin. Maintain a controlled environment to minimize adverse effects and ensure consistent performance. |
| Air Bubbles in Application | Trapped air bubbles within the resin can reduce the bond’s mechanical integrity. Apply the resin carefully using techniques such as slow pouring or vacuum extraction to eliminate bubbles and achieve a smooth application. |
Solutions to Improve Adhesion and Finish
To accomplish enhanced adhesion and a superior finish in resin bonding works, an artisan can exploit the following methods:
- Surface Preparation: Properly preparing the surfaces to be bonded is critical. Ensure that they are clean, dry, and free from contaminants such as dust, oils, or oxidation. Techniques such as sanding or chemical etching can create a textured surface to enhance mechanical bonding.
- Optimal Environmental Conditions: Pay close attention to environmental factors such as temperature and humidity during application. Ideal conditions vary depending on the resin type, but typically involve moderate temperatures and low humidity to prevent such problems as premature curing or bubble formation.
- Use of Primers and Adhesion Promoters: Applying specialty primers or adhesion promoters specifically designed for specific materials can enhance bond strength and durability. These agents enhance the chemical interaction between the resin and the surface.
- Controlled Application Techniques: Use systems like vacuum degassing to remove air bubbles from the resin before application. Additionally, use methods such as precise pouring or spreading to ensure a smooth and even layer of resin.
- Curing Process Optimization: Follow the recommended curing times and temperatures outlined by the resin manufacturer. Using curing aids such as UV lamps for certain resins may also improve finish quality and adhesion strength.
Tools and Accessories for Gluing Resin Prints
When it comes to gluing resin prints, you know the right glue-ups, the right tools, and accessories mean the difference in results. Here is a list of the most essential items:
Epoxy Resin or UV Glue
These adhesives are commonly used for resin prints due to their strong bonding capabilities and compatibility.
UV Light Source
A UV lamp or flashlight is crucial for curing UV glue quickly and securely.
Sandpaper or Abrasive Pads
Used to lightly sand the surfaces for better adhesion by creating a rough texture.
Clamps or Rubber Bands
These help hold parts firmly in place while the adhesive cures.
Isopropyl Alcohol (IPA)
Clean surfaces thoroughly with IPA to remove dust, oils, or residues before applying glue.
Precision Applicators
Tools such as fine-tip brushes or applicator bottles ensure accurate placement of glue.
Essential Tools for Successful Bonding
Professional bonding resin prints require suitable tools and best practices. Adhesives must be given sufficient curing time, as rushing the process would weaken the bond. UV light-cured resin-based adhesives can be used to create a seamless finish, which is particularly recommended when using UV resin models. For larger and more complex pieces, it is advisable to test-fit parts before gluing, ensuring alignment and minimizing errors. Following these tips will grant you projects of markedly better durability and appearance.
Safety Gear for Resin Printing and Gluing
⚠️ Safety First!
For me, the utmost priority when working with resin printing and gluing is to keep the chemicals off my skin. The best way to accomplish this is to wear gloves.
- I wear nitrile gloves for work with resin and adhesive
- I wear safety goggles to prevent anything from being splashed into my eyes
- I wear a respirator to try to avoid inhaling any fumes that may be harmful to me
- It is also essential to ensure good ventilation of the area to create a safe working environment
Expert Advice for Beginners and Pros

When working with materials such as resin, it is always advised to prepare well. For beginners, it is a repetitive process where materials are gathered, small and inexpensive projects are undertaken, and skills are developed. This is where one should refer to the industries in relation to mixing ratios, as they are always precise to guarantee quality. When the level of maturity is reached, there is no room for failure, as the best tools and best practices will be used to upgrade the work. Both beginners and experts will need to ensure that their workplace is free from unnecessary clumsiness. Most importantly, there is a need to observe safety measures and adhere strictly to them, irrespective of one’s competency level.
Tips for Beginners in Gluing Resin Prints
📝 Beginner’s Checklist
Step 1: Surface Preparation
You should pay attention to the preparatory stage if you want to glue resin prints together in a way that makes them robust and indistinguishable. Start by cleaning off any surface you plan to glue very well. Often, resin prints will contain oils or dust on their surfaces that will inhibit adhesion; thus, cleaning using isopropyl alcohol is absolutely fine for you. Hence, clean all the surfaces and sand down the edges, as this is where you will apply the glue. To some extent, the roughness will help the glue bind more effectively.
Step 2: Selecting the Right Adhesive
Selecting the proper adhesive when working with resin prints is an important decision. For small components, the commonly used adhesive is cyanoacrylate superglue. However, for large and heavy components, an epoxy glue may prove to be useful since it is stronger.
Step 3: Application
Place the adhesive sparingly to prevent any oozing, and glue resin prints together with no spaces between them. Heavy items can slide off or shift out of position when left to cure without any clamps holding them in place. This is why the use of clamps is recommended when gluing such items together.
Step 4: Curing
Lastly, this process will take time to dry the glue, as instructed by the manufacturer of the material in use. This craft is best understood through the discipline of patience and accuracy.
Advanced Techniques for Experienced Makers
For those with proficiency in creating objects, understanding and practicing more sophisticated methodologies can also save considerable effort and enhance work quality.
Vacuum Forming
An exemplary course of action is vacuum forming, which includes heating a piece of plastic and then using a vacuum to mould it into a desired shape. It helps make good shapes, including a lot of details, and is often a part of the prototyping process or made-to-order production.
CNC Machining
Another way is to use CNC machines. These machines offer mechanized cutting, engraving, and even shaping of materials —be it wood, metal, or acrylic —without any compromise on precision. These machines are truly remarkable when combined with the power of 3D modeling, as they can bring even the most unimaginable designs to life.
Resin Casting
Additionally, it is exciting to work with resin casting because it allows for the addition of various elements. By incorporating dry flowers, small mechanical parts, or artistic motifs into colored or clear resin, makers can create fantastic crafts that wouldn’t be a plain 2-dimensional piece of art.
💡 Expert Insight: When these sophisticated methods are used in conjunction with adequate planning and trial and error, advanced crafters can extend the limits of conventional craftsmanship. Spending effort on honing these abilities is rewarding and leads to the creation of amazing works.
Reference Sources
There are five professional and authoritative resources on gluing resin prints or similar issues:
- Post-Processing Your 3D Prints
A discussion on the importance of gluing 3D prints for joining multiple parts and building larger models. - 3D Printing a Yeehaw Friend | ENGI 210
A blog post from Rice University exploring resin printing and post-processing. - Frequently Asked Questions (3D Printing) – Marston Makerspace
From the University of Florida, discussing resin/SLA 3D printing and related processes. - Multilayer Bonding – What’s It All About?
A technical piece on bonding techniques that may lead to more understanding of adhesive applications. - 3D Printing onto Textiles: A Systematic Analysis
An academic paper discussing adhesion between 3D-printed polymers and other materials, which could be pertinent to bonding techniques.
Frequently Asked Questions (FAQs)
❓ What is the best glue for resin prints?
The best glue for resin prints typically includes super glue, epoxy, or specialized adhesives designed for bonding resin. Super glue is popular for its quick-drying properties, while epoxy provides a strong bond ideal for larger pieces. Choosing the right glue depends on the size and type of the parts you need to bond.
❓ Can I use hot glue on resin prints?
While hot glue can be used to hold parts of resin prints together temporarily, it may not provide a firm or long-lasting bond. It is best reserved for quick fixes rather than permanent assemblies, as it may cause damage to the resin over time due to heat exposure.
❓ How can I effectively glue resin pieces together?
To glue resin pieces together effectively, ensure that the surfaces are clean and free of dust. Applying a thin layer of glue along the seam and pressing the parts together will yield the best results. For larger pieces, using a strong adhesive, such as epoxy or Loctite, can enhance the bond.
❓ What should I do if there are gaps between resin parts?
If there are gaps between resin parts, consider using a filler or modeling putty to fill them before applying glue. This will create a smoother surface and improve the adhesion between the pieces. Always ensure that you sand the area lightly for better bonding.
❓ Is using super glue safe for resin prints?
Using super glue is generally safe for resin prints, but it’s essential to apply it in a well-ventilated area and wear eye protection. Some super glues may irritate the skin or eyes, so safety should always be a top priority when working with adhesives.
❓ Can I use acetone with resin prints?
Acetone is not recommended for use with resin prints as it may cause damage to the resin material. It can weaken the structure and affect the appearance of your prints. Instead, consider using a cleaner specifically designed for resin if needed.
❓ What is the difference between super glue and epoxy for bonding resin prints?
Super glue is a fast-acting adhesive that works well for minor, quick repairs. At the same time, epoxy provides a stronger and more durable bond, making it suitable for larger assemblies and projects. Super glue dries quickly but may be brittle, whereas epoxy can fill gaps and is more flexible after curing.
❓ How can UV curing improve the bonding of resin prints?
UV curing can enhance the bonding of resin prints by using UV light to harden the adhesive quickly. This technique works well with UV-sensitive glues and can help create a strong bond in a shorter amount of time, making it ideal for intricate projects.
❓ What types of glue should I avoid for resin prints?
Avoid using glues that contain solvents or harsh chemicals, as they may cause damage to the resin material. Additionally, avoid using low-temperature adhesives that may not withstand stress or heat, as well as any glue that is not explicitly designed for resin bonding.


