


Soldering Styrofoam onto plastic can present a surprisingly difficult endeavor. Because these two materials have their respective inherent qualities, without an appropriate adhesive and proper technique, it is nearly impossible to obtain a long-lasting and reliable bond. Whether on a DIY project, in complex crafts, or industrial installations, getting an arrow adjacent to knowing which adhesive to choose is crucial for success. The guide formally explains the interplay of Styrofoam-to-plastic bonding, classification of adhesives to consider, preparation steps, and tips to make the whole adhesion process really Work: long-lasting and sturdy. After reading, you would be confident and well-versed in taking on the task efficiently and precisely.
Understanding Styrofoam and Plastic
Styrofoam- a form of expanded polystyrene (EPS)- is widely used for being lightweight and porous, providing extremely good insulation against heat. On the other hand, being subjected to heat or certain chemicals quickly causes deterioration. On the other side, there come plastics, which are a whole big array of synthetic polymers with many types varying by flexibility, durability, resistance to environmental factors, and whatnot. Thus, the particular adhesive application largely depends on the plastic being bonded since certain plastics, such as polyethylene and polypropylene, have quite low surface energy and can thus be difficult to adhere to. In this way, knowing the material properties becomes an assurance that the most appropriate adhesive is put into application with correct preparation for best results.
What is Styrofoam?
Styrofoam, legally called expanded polystyrene foam (EPS), is an extremely light, rigid, and versatile kind of foam encapsulating 95-98% air and only 2-5% polystyrene plastic. First conceptualized somewhere around the mid-20th century, EPS is a polymer made by bead polymerization where beads of polystyrene are expanded and fused to each other under heat and pressure. The bulk of Styrofoam is for packaging, insulation, and disposables, valued because of thermal insulation properties, resistance to moisture, and cushioning ability. On the contrary, it can best be described as a calamity for simply not going away; it remains on land for hundreds of years, thus draining our living space and contributing to environmental pollution. Production in huge amounts and consequent environmental impacts ensured that research into EPS recycling or the development of environmentally friendly alternatives grabs the most attention in contemporary material science and waste management initiatives.
Properties of Plastic
- Durability
Plastics are sturdy materials that resist abrasion and environmental wear and tear. One example: polyethylene, commonly used for packaging, has a long life and remains functional after use of even a few decades.
- Lightweight
Low density is synonymous with plastics (ranging from about 0.8 to 2.2, depending on the kind of polymer). Making them light, plastics are commonly used in energy-intensive sectors such as transportation and aerospace.
- Thermal Insulation
The very low thermal conductivity (ranging from 0.031 to 0.04 W/m·K) of many plastics, say polystyrene, provides an excellent thermal insulation property. This property finds applications in packaging food and insulating a building.
- Electrical Insulation
Plastics act as excellent electric insulators; the resistivity of plastics like PVC and PTFE often exceeds 10¹⁶ ohm-cm. Electrical wiring, cabling, and electronic components require such a property.
- Chemical Resistance
Plastics resist many chemicals ranging from acids to bases and solvents. For instance, polypropylene is chemically inert with respect to dilute acids and alkalis and, therefore, finds good use in laboratory containers and storage tanks.
- Flexibility
Plastics can vary from rigid to extremely flexible depending on the sort of polymer. Elastomers such as silicone rubber stretch to 700% of the original length before rupture, whereas those polymers which have a high modulus of elasticity are less flexible but lend structural integrity.
Why Bonding Styrofoam to Plastic?
Adhering Styrofoam to plastic has its own peculiarities brought on by the very nature of these materials. Styrofoam or what’s really expanded polystyrene (EPS) is a lightweight, porous material, making it very difficult to establish adequate adhesive joints without compromising its structure. While plastic, on the contrary, may differ a lot in chemical composition, surface energy, and texture-uncovering layers of incompatibility with many different adhesive types.
Choosing the Right Adhesive
- Material Compatibility: Ensure the adhesive is compatible with the materials being joined. For instance, it should be epoxy and cyanoacrylate for hard plastics and silicone for flexible materials. Also, always check the manufacturer’s recommendations.
- Strength Requirements: Consider the load or stress to which the bond will be subjected. Structural adhesives such as epoxies are suited to high-strength requirements, while hot glue suffices for low-weight or short-term considerations.
- Environmental Conditions: Check any heat, moisture, or chemical present. Go for an adhesive with resistance along those lines, for example, polyurethane for outdoor or waterproof epoxies for areas with moisture concerns.
- Application Method: The adhesive selected needs to meet the requirements of precision and curing time, ensuring it is easy to apply and to work with.
By assessing these factors, you can choose an adhesive that maximizes durability and efficiency for your specific project.
Compare common types of adhesive
|
Adhesive Type |
Bonding Strength |
Best Uses |
Curing Time |
Temperature Resistance |
Waterproof |
Flexibility |
|---|---|---|---|---|---|---|
|
Epoxy |
Very high |
Metals, plastics, ceramics |
5 min to 24 hours |
Excellent (>250°F/121°C) |
Yes |
Low |
|
Polyurethane |
High |
Wood, plastic, outdoor applications |
2-12 hours |
Good (up to 180°F/82°C) |
Yes |
Moderate |
|
Cyanoacrylate (Super Glue) |
Moderate to high |
Small repairs, non-porous materials |
Seconds to 1 minute |
Limited (<150°F/65°C) |
No |
Low |
|
Silicone Adhesive |
Moderate |
Glass, metal, waterproof sealing |
12-24 hours |
Excellent (>400°F/204°C) |
Yes |
High |
|
Hot Melt Glue |
Moderate |
Crafts, temporary bonds |
Seconds |
Poor (<120°F/49°C) |
No |
Moderate |
|
Acrylic Adhesive |
High |
Automotive, construction, outdoor use |
Minutes to hours |
Excellent (up to 300°F/149°C) |
Yes |
Moderate to high |
|
PVA (Wood Glue) |
Low to moderate |
Wood, paper, porous materials |
30 min to 24 hours |
Poor (<150°F/65°C) |
No |
Low |
|
Contact Adhesive |
High |
Laminates, rubber, plastics |
Immediate |
Good (up to 180°F/82°C) |
Somewhat |
Moderate to high |
Advantages of Gorilla Glue
- Exceptional Bond Strength
Considered strongest for bonding, Gorilla Glue can attach almost anything from wood, metal, ceramic, foam, glass, stone, and many more. Thanks to a polyurethane adhesive formula that creates bonds much stronger than the many traditional adhesives, Gorilla Glue instances serve durability and reliability for heavy-duty applications.
- Waterproof and Weather-Resistant
It has a rating for indoor and outdoor use; Gorilla Glue is waterproof for 100% and weather-resistant when subjected to extreme conditions. Gorilla Glue can withstand rains, snow, and heat, making it a brilliant pick for outdoor assignments or locations involving very humid conditions.
- Temperature Tolerance
Depending on ambient temperature, Gorilla Glue works perfectly well even at temperatures over 200°F (93°C), performing excellently in heat and cold with no loss of strength of bonds. This makes it useful for applications at extreme environmental conditions.
- Expands for Better Coverage
The other key characteristic is that Gorilla Glue expands while curing. This helps the glue fill in small gaps and voids, making sure the bond is true and complete on uneven surfaces.
- Long-Lasting Performance
Using Spray Adhesive
A spray adhesive is a multipurpose bonding agent, meant for providing a method of even and controlled adhesion to various materials. Typically, it is used for paper, fabric, foam, cardboard, metal, and some plastics so that it will be a strong adhesive, yet without too much mess. Modern formulations sometimes allow for quick drying, ensuring that the work continues space-efficiently. Always ensure a well-ventilated workplace. Always keep moving and spraying evenly so that a thin film is deposited.
Preparation of surfaces is paramount when using spray adhesive. The two surfaces about to be bonded shall be clean and dry and should not contain any traces of oil or dust. Using the spray adhesive, an equal mix of its components should be ensured by shaking the spray can before use. It is often recommended to put adhesive on both porous surfaces for bonding, letting curing for 30-60 seconds before joining. The curing time depends on temperature and humidity; hence, it should be observed very carefully. When correctly applied, spray adhesives create strong and durable bonds that resist moderate stresses and repeated use, thereby conferring spray adhesives with an indispensable landmark placement in craft applications, repairs, and industrial uses. Follow the instructions given by the manufacturer to great effect.
Step-by-Step Guide to Glue Styrofoam to Plastic
- Prepare the Surfaces
Ensure that both the Styrofoam and plastic surfaces are clean and dry. Use a clean cloth to remove dust, grease, or debris that could interfere with adhesion.
- Test Compatibility
Verify that the spray adhesive is safe for use on Styrofoam and plastic. Check the label or manufacturer’s instructions to confirm its suitability.
- Apply Adhesive
Shake the spray adhesive can well. Spray an even, thin coat of adhesive onto Styrofoam and plastic from a distance recommended on the packaging, generally 6 to 8 inches.
- Allow Curing Time
Allow for the adhesive to tack slightly, 30 to 60 seconds after application or follow the manufacturer’s description regarding tack time to gain an optimal degree of tackiness for bonding.
- Join the Pieces
Place the Styrofoam carefully upon the plastic surface and apply firm pressure evenly.
- Secure and Set
Clamping the pieces will enhance the bonding for a few minutes. As stated on the label, clamp or set for the time recommended, and avoid any movement during this period.
- Inspect the Bond
After the adhesive cures completely, inspect the joint to ensure that it is well-formed. Allow full curing time for maximum strength, which can be anywhere from a few hours to 24 hours, depending upon the product.
Preparing the Surfaces
A huge surface preparation will ensure the proper adhesion and longer life. Start with cleaning both surfaces by way of eliminating dirt, grease, and even minute substances that could act against the adhesion. Using isopropyl alcohol would be the best option to clean, as it doesn’t leave residues on the surface. For surfaces that are pretty smooth, sand the respective surfaces using a fine sanding paper slightly; this roughening of the surfaces increases mechanical grip for the glue.
After sanding, clean the surfaces again to eliminate all dust particles. Hence, the application of a funky method such as primers or activators may be of needed when you encounter some materials, especially metals and plastics or any materials known to give poor adhesion results. Follow these preparation methods and be sure to create an even stronger, longer lasting bond.
Applying the Adhesive
Tips for Successful Bonding
- Surface Preparation
Clean and dry all surfaces to be bonded. Contaminants such as dust, oils, and residues should all be removed. Apply the proper cleaning agents or abrade the surface if so recommended for adhesion application.
- Choose the Right Adhesive
Choose an adhesive that is compatible with the materials being used to bond them together and consider the operating environment or any operating temperatures, load, and exposure to chemicals.
- Follow Manufacturer Guidelines
Follow instructions specified by the adhesive manufacturers and consider application time, curing time, and environment for the best outcome.
- Apply Even Pressure
Hot-dip application of pressure through clamps and weights ensures contact of the two adhesives with no gaps at all.
- Allow Adequate Curing Time
While curing, do not manipulate the assembly. Refer to the technical data sheet for specified curing time and conditions.
Optimal Conditions for Adhesive Use
In order for an adhesive to perform well during its time of use, consideration MUST be given to all working environmental factors and clues to substrate preparation. This includes one of the major factors in temperature; most adhesives work perfectly when cured in 65°F to 85°F (18°C to 29°C) temperatures. If temperatures are beyond their range, either curing will not be proper or bond strength will degrade. Another factor is relative humidity; normally, it should be between 40 and 60 percent to avoid drying out to an extent of being hindered too soon or inadequate curing.
Humidity is the second factor to consider. Usually, 40-to-60 percent is ideal; that could prevent premature drying or late curing. Clean surfaces definitely would aid adhesion; instead, it should be free of any contaminant such as dust, trace oils, or moisture that can potentially obstruct bonding. The use of cleaning agents or primers specifically indicated by adhesion manufacturers would certainly increase adhesion general performance.
Make sure there’s fresh air in the work area to facilitate the curing of adhesives that are VOC-emitting. Check also that the bonded substrates and adhesive would not be stressed by changes in temperature as a result of the difference in thermal expansion between substrates. The said parameters contribute to the reliability, longevity, and application performance of submerged adhesive applications in domestic and industrial areas.
Cleaning Up Excess Glue
Moving quickly to remove the glue before it cures will make it very easy to remove it later on. Water-based adhesives can be cleaned by wiping with a damp cloth or sponge while still wet. In the case of solvent adhesives, attention must be given to the cleaning agents mentioned in the directions, which commonly include acetone or some sort of specialized solvent. Excessive scraping or the use of abrasive tools should be avoided since they may inflict damage on the substrate. Cured adhesive removal may require a mechanical approach using a putty knife or chemical softeners. Always consider safety procedures while handling chemicals, such as wearing gloves and ensuring adequate ventilation. Cleaned-up adhesives mean fewer chances of damage to the surfaces and a higher quality of the finished product.
Ensuring a Strong Bond
This preparation can help produce long-lasting bonds. First off, select the right adhesive for the materials you want to glue. Clean objects to be bonded. They must be free from any dirt or grease, any residues that could weaken adhesion to its opposite. Then place the adhesive according to the right quantity and cure time as stated on the packaging. Hold the surfaces under pressão against each other while curing, using clamps or anything heavy to maintain constant pressure. Allow the adhesive to cure fully before subjecting it to stresses. With these preparations, the glue will surely trim away barriers to having strong and enduring adhesion.
How to Clamp for Optimal Adhesion
Checking the Bond Strength After Curing
Once curing is completed, one needs to test the achieved bond strength against predefined performance requirements. Tensile testing is by far the most common measurement method used: bonded materials are subjected to a measured level of applied load until the moment of failure, thus measuring the maximum force the adhesive can endure. Peel tests are also very useful, particularly on flexible bonds, to determine the resistance that adhesives face when peeling forces are applied.
Reference Sources
-
Formulation and Characterization of Adhesive Produced… – This research focuses on converting polystyrene waste into adhesive using affordable solvents and additives.
-
Upcycling Polystyrene – Discusses improvements in rupture modulus, shear strength, and glue line shear strength related to polystyrene.
-
Environmental Implications of Styrofoam Waste – Investigates the environmental impact of styrofoam waste and its persistence in ecosystems.
Frequently Asked Questions (FAQs)
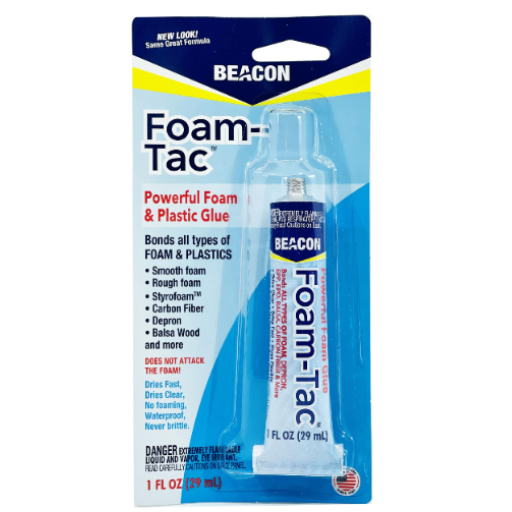
Q: What is the best foam adhesive for polystyrene and plastic?
A: When it comes to adhering foam, especially expanded polystyrene (EPS), to plastic, using the appropriate adhesive is crucial. Hot glue is a popular choice due to its ease of use and quick drying time, but it may not always provide the strongest bond on hard plastic surfaces. For a more durable and waterproof solution, consider using epoxy or contact cement, which are known for their strong adhesive properties. Super glue, or cyanoacrylate glue, can also work well, but it may cause some brittleness in the bond. Always check the compatibility of the adhesive with both materials to ensure that it will adhere properly without causing damage or dissolving the foam. Liquid nails can be another effective option for a robust connection.
Q: How do I ensure my adhesive will adhere polystyrene foam to hard plastic?
A: To ensure a successful bond between polystyrene foam and hard plastic, it’s important to choose an adhesive that can penetrate both materials effectively. Contact cement is often recommended as it provides a strong bond and allows for some repositioning before it dries. Make sure to apply the adhesive evenly to both surfaces and allow it to become tacky before pressing them together. If using hot melt glue, ensure that the glue works well with the type of plastic you’re using, as some plastics may not provide the best compatibility. Additionally, cleaning the surfaces with a solvent like acetone can help remove any contaminants that might interfere with adhesion. Finally, giving the adhesive enough time to cure properly will enhance the strength of the bond.
Q: Can I use Elmer’s glue for foam and plastic bonding?
A: Elmer’s glue is a popular choice for many crafting projects, but its effectiveness in bonding foam to plastic can vary. While it works well with porous materials like wood and paper, it may not adhere effectively to hard plastic surfaces without additional support. If you choose to use Elmer’s glue, consider applying it to both surfaces and allowing it to dry thoroughly before applying pressure. However, for better results, especially with non-porous surfaces, you might want to opt for stronger adhesives like cyanoacrylate or epoxy, which provide a more robust and longer-lasting bond. Always test a small area first to ensure compatibility before proceeding with your project.
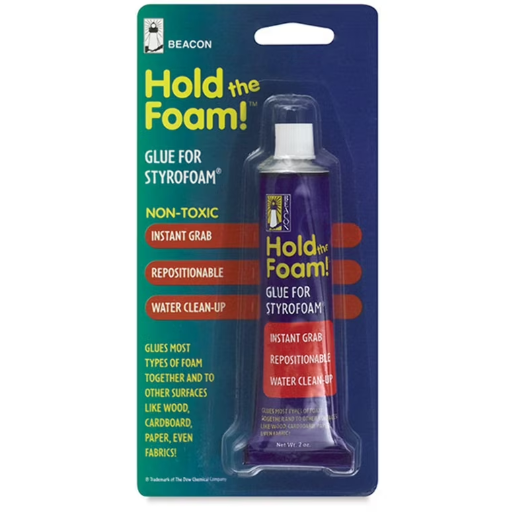
Q: What happens if I use a hot glue that melts polystyrene?
A: Using a hot glue that melts polystyrene can lead to undesirable results, including deformation and damage to the foam. Polystyrene is a type of polymer that can be sensitive to high temperatures, causing it to melt or dissolve when exposed to certain adhesives. It’s essential to select a low-temperature hot glue that is specifically formulated to work with foam materials. If the glue will melt the foam, consider using alternatives like silicone adhesive or a specialized foam adhesive that is compatible with both polystyrene and plastic. Always check the manufacturer’s guidelines to ensure that the adhesive won’t compromise the integrity of the foam or the plastic during the bonding process.


