


Always a household name when it comes to repairs or DIY, Gorilla Glue is trusted for its powerful adhesive capabilities and versatility. However, the drying time of Gorilla Glue remains vital to developing the best finish. The time needed may make all the difference when furniture is being glued, crafting is underway, or simple repairs must be made to a broken item. This article will discuss the various factors that affect drying time, provide tips on how to expedite the curing process, and share some secrets to maximizing the benefits of Gorilla Glue. Keep on reading for a tempting treat toward your sticky future!
What is Drying Time vs. Curing Time?
Under drying time, we define the timeframe within which Gorilla Glue dries, or develops a dry surface-that is, a superficial stage in which the surface appears set but may not yet have full strength. On the contrary, curing time is the period during which the adhesive becomes fully hard and attains its maximum bond strength. The glue should dry within a couple of hours, but curing can take longer than 24 hours, depending on factors such as temperature, humidity, and the amount of glue used. It is essential to wipe out weighing variables so the cure can develop into a powerful and practical bond.
Definition of Drying Time
Drying Time is the initial phase when the adhesive loses either its solvent or water content and transitions from a liquid to a more tacky or solid state. At this point, the glue will feel dry to the touch, but it may still lack bonding strength. Manufacturers recommend a drying time ranging from 15 minutes to a few hours, depending on the type of adhesive and environmental factors. This stage is crucial in better positioning of materials before the permanent setting of an adhesive begins.
Definition of Curing Time
The term’ curing time’ signifies the period required for an adhesive to harden and achieve its maximum bonding strength. Therefore, unlike drying time, which occurs on the surface, curing time implies the complete chemical reaction within the adhesive, which becomes a lasting and permanent bond. In effect, the curing time can widely differ from one adhesive to another, one material to another, and is also influenced by external factors such as temperature or humidity. For example, epoxies can cure over a period of 24 to 72 hours, whereas certain quick-set adhesives might complete curing within one hour. It is therefore paramount to follow the manufacturer’s guidelines to ensure maximum adhesion potential.
Importance of Understanding Both
Understanding the difference between drying time and curing time is essential to ensure one achieves the best result while working with an adhesive. Drying time is the period during which the adhesive loses its surface moisture and becomes tack-free. In contrast, curing time is the actual chemical process that fully hardens the adhesive, developing its strength and durability. It is, neck and neck, the most recent data that speak against the choice of surface-fast drying adhesives due to the weakest bond strength and hence low bond longevity, especially in applications involving high stresses. A preparation of both parameters enables their maximization from professional to DIY, so that bearing paraphernalia are installed as intended and adhesive performance is not compromised by cost re-evaluation.
General Drying Times for Gorilla Glue Products
Drying times for these Gorilla Glue products may vary due to the chemical formulas:
| Product Type | Initial Set Time | Full Cure Time | Special Notes |
|---|---|---|---|
| Original Gorilla Glue | 1-2 hours | 24 hours | Universal adhesive for multiple materials |
| Gorilla Super Glue | 10-45 seconds | 24 hours for the strongest bond | No clamping required |
| Gorilla Wood Glue | 20-30 minutes clamping | 24 hours | Designed explicitly for wood projects |
| Gorilla Construction Adhesive | 30 seconds | 24 hours | Heavy-duty construction applications |
| Gorilla Epoxy | 5 minutes | 24 hours | Multiple surface compatibility |
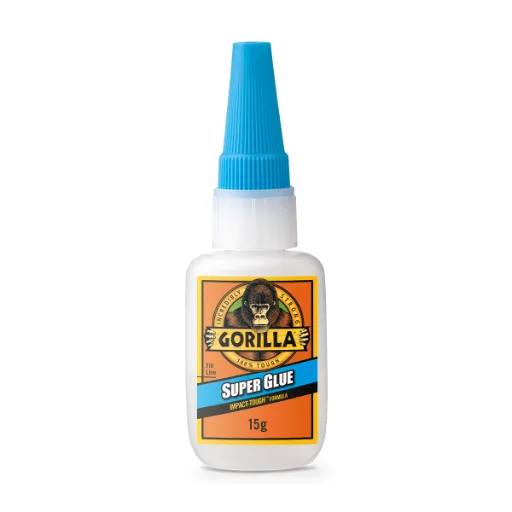
Gorilla Super Glue
Gorilla Super Glue has been designed for quick repairs or projects needing an immediate bond. It dries in as few as 10-45 seconds, providing the perfect window for a quick fix. While the bond will hold before you even pick up your glued item, allowing the item to sit with the glue intact for about 24 hours undisturbed will provide the strongest and most durable bond. The glue acts quickly but works best on clean and dry surfaces, ensuring the best bond with minimal wait time.
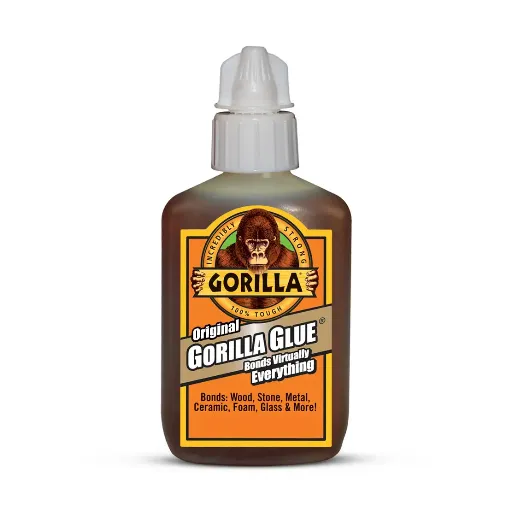
Original Gorilla Glue
The Original Gorilla Glue has been hailed as a universal adhesive, renowned for its dependable bonding strength, making it suitable for a wide range of projects and materials, including wood, stone, metal, ceramic, and more. When used, it typically takes one to two hours to set, with variations depending on environmental temperature and humidity. The full curing time, however, requires a period of at least 24 hours for ultimate bonding strength. Clamping or applying force to the surfaces being bonded during the initial setting stage is essential to ensure optimal results.
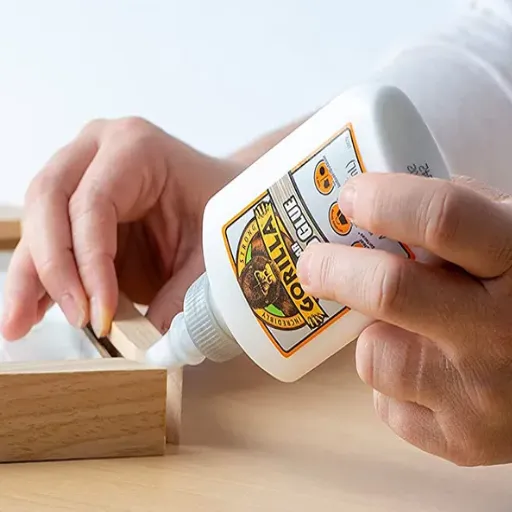
Gorilla Wood Glue
Gorilla Glue generally requires a clamp time of 20 to 30 minutes to ensure the adhesive takes effect on the surfaces to be joined. To achieve the best results, it is essential to allow the glue to dry completely, which takes approximately 24 hours, thereby ensuring maximum bonding strength and longevity for your woodworking projects. Different factors, such as temperature, humidity, or materials involved, can modify the drying time.
Gorilla Epoxy
The Gorilla Epoxy sets in approximately 5 minutes and is therefore suitable for speedy repairs and fast-adhesion projects. A complete cure is achieved within approximately 24 hours after the epoxy is applied, resulting in a strong bond. The product has a myriad of uses, including working with metal, plastic, ceramic, and wood surfaces. Dirty or oily surfaces reduce bond strength; hence, surfaces should be clean before bonding. These times are approximate and may vary slightly due to atmospheric conditions, such as temperature and humidity.
Factors Affecting Drying Time
Drying time for epoxy and similar adhesives is affected by several factors:
- Temperature: High temperatures often result in a faster drying time, whereas low temperatures can significantly slow down the drying process. The optimal temperatures are usually specified on the product label.
- Humidity: High levels of moisture can delay drying time because moisture interacts with the curing process.
- Surface Preparation: Properly prepared surfaces ensure an even bond surface and facilitate the glue’s drying more predictably.
- Layer Thickness: Thin layers dry quickly, while thick layers will often take longer to cure.
- Ventilation: Augmented airflow will disperse unpleasant odors and possibly provide a quicker drying effect.
Environmental Conditions
Environmental conditions have a tremendous impact on defining the essence of efficiency and competitiveness associated with these processes, particularly in the drying or curing of adhesives or painting. Temperature, humidity, and airflow are the most acknowledged factors here. Lower temperatures tend to slow down chemical reactions, extending the drying or curing time. In contrast, high temperatures can speed up the process, but may also lead to cracking or an uneven finish. High humidity levels retard the evaporation of solvents, leading to longer processing times, whereas low humidity helps in quicker drying. Ventilation works well with these factors to produce consistent airflow, which yields uniform results and helps disperse harmful fumes. Balancing factors, as discussed in product literature and research, yields excellent results in both commercial applications and home usage.
Material Type
The selection of materials under specific environmental conditions needs an understanding of the response of substrates to temperature, humidity, and ventilation. Suppose a water-based paint performs well under moderate humidity and temperature ranges and is therefore commonly used for indoor projects. For an area that requires high durability, oil-based paints are better suited. Untreated woods are at a high risk of moisture damage, unlike pressure-treated or composite types. Similarly, metal surfaces would require coatings to combat corrosion, especially in high-humidity environments where rust is likely to occur. Reviewing product specifications and consulting guides or tutorials from professionals can facilitate finding the best material for a particular application, thereby extending its lifespan.
Application Thickness
The desired film thickness for the material’s application will depend on the type of product and its intended use. For paint, a coat typically follows somewhere between 1 and 3 mils of dry film thickness. The manufacturer, however, will often specify both wet and dry measurements. Sealants or adhesives can be applied in a wide range of thicknesses, from thin to precisely bond to thick to fill spaces or provide structural support. Always check the manufacturer’s specifications or consult with the installation instructions. Environmental conditions, such as temperature and humidity, may affect the drying or curing time of the material.
Tips for Optimal Use of Gorilla Glue
- Prepare the Surfaces: Clean, dry, and dust- or grease-free surfaces are required for optimal adhesion. Sanding smooth surfaces very lightly will help with bonding.
- Use Water Sparingly: Gorilla Glue will expand during curing, and the only means of activation is moisture. Gently dampen one surface before applying any glue. Do not over-saturate.
- Apply a Thin Layer: Apply a minimal amount of glue; too much will become messy as it expands and, in the process, reduce bond strength.
- Clamp for Best Results: Clamping two surfaces tightly together or placing a heavy object on top of them will provide a good hold. Clamp for at least 1-2 hours whilst curing might continue for up to 24 hours.
- Store Properly: Ensure the glue bottle is kept fully sealed and stored in a cool, dry place to maintain its shelf life.
Prepare Surfaces
This is a crucial step in ensuring the bond remains strong and durable. Start by cleaning the items of every dirt, dust, grease, or old glue. An ideal cleaner is a combination of alcohol or soap and water, and the surfaces need to be dried thoroughly afterward. If the materials are smooth, the bonding interface might be lightly sanded to improve adhesion by texture. After sanding, wipe off any residue before applying glue. Correct surface preparation ensures that the glue acts to its fullest and yields lasting results. Continually adapt the method to the materials involved.
Use the Right Amount
Achieving correct results can only be obtained by using adequate glue. An inadequate amount might lead to weak bonds, while extensive use results in a mess and prolonged drying time. For many applications, a thin, even layer of adhesive on one or both surfaces would be sufficient for bonding. Follow the instructions provided by the adhesive manufacturer for specifics, as different types of glue, such as cyanoacrylate, epoxide, or polyurethane, require different operational adjustments. Other factors to consider include temperature, external environment, and humidity, which can impact the setting of the glue. The glue application methods involve applying just the right amount and following the directions for proper use to create a neat, complex, and long-lasting bond.
Follow Product Instructions
When following the instructions, combine the given guidelines and any recent information to achieve the best results. The manufacturer may specify steps to follow, but contemporary trends and user experiences shared on the web may offer additional advice or suggestions on how to overcome a problem. Keeping search tools trustworthy will enable you to access recent reviews, FAQs, or expert comments concerning the product at any time. By merging manufacturer instructions with modern information, users can achieve the expected results, along with enhanced ones, ensuring they experience both efficiency and satisfaction.
Optimize Conditions
Optimization requires the latest search engine data, balanced against traditionally accepted techniques and the modern emphasis on meeting user needs. For example, if that were to improve device performance, users could perform maintenance steps as recommended by the manufacturer, combined with recently documented user-reported instances of performance issues. To ensure that such an optimization would stand on reliable and practical grounds, an advanced tool would search for the most frequently updated tutorials, reviews, or optimization tips. Hence, this approach addresses the immediate concern while facilitating better developments.
Common Mistakes to Avoid

Ignoring Regular Updates
Postponing software or firmware updates can lead to performance lags and increase the risk of security threats. Always stay informed about the latest releases from trusted sources.
Skimming Instructions
Ignoring manufacturer-oriented directions can lead to imperfect use or skipping steps during installation or maintenance. Don’t rush through and read those instructions properly.
Relying on Unverified Sources
Listening to whatever the random online forum has to say may prove to be unreliable counsel. Stay true to trustworthy sources or official recommendations.
Overloading Devices
Running too many applications and storing too much data, if not appropriately managed, can result in a slowdown. Get into the habit of clearing your cache and managing storage effectively.
Skipping Preventative Maintenance
Failing to maintain your devices with routine exercises such as ventilation cleaning or malware scanning is liable to cause problems that can be avoided. Get into the habit of performing preventive maintenance to prolong the device’s lifespan.
Using Too Much Glue
Using an excessive amount of glue during DIY projects or repairs often results in untidy work and weak bonds. Online search trends reveal that clumping, slow drying, and issues with achieving adhesive strength are the most commonly encountered problems when excess glue is used. To avoid these issues, one should never use excessive glue and should apply a thin, even layer of glue across the surfaces to be bonded. Using more glue than necessary is not only a waste of glue, but it also creates a mess to deal with and does not present a visually appealing finished product.
Skipping Surface Preparation
A step that is often overlooked in recent searches is surface preparation for adhesives. Improper surface preparation usually results in insufficient adhesion and premature bond failure. A significant number of people search for ways to troubleshoot the bonding issues that arise from skipping this crucial operation. Good surface preparation requires cleaning, drying, and sometimes roughening the surface to ensure the adhesive adheres tightly to it. Without surface preparation, contaminants such as dust, grease, or moisture can interfere with bonding, preventing it from achieving its full strength. Correctly answering this question would provide the best recommendation, always preparing surfaces according to the adhesive manufacturer’s directions for maximum bonding performance and durability.
Not Allowing Enough Drying Time
Rushing the drying process is a standard error made when using adhesives, resulting in weak bonding and ultimate failure. According to the latest search, many users ask: How long does an adhesive need to set properly? The simple answer depends on the type of adhesive; each type specifies its own drying and curing times, as specified by the manufacturer. Instant adhesives, such as cyanoacrylate, may dry in seconds, while structural adhesives, like epoxies, require hours to cure fully. Always refer to the product instructions for recommended times and optimal conditions, as the drying time may also be affected by environmental factors such as humidity and temperature. By being patient here, one ensures a stronger and longer-lasting bond.
Improper Clamping
This is a common problem that may compromise the adhesive bond, thus leading to weaker joints or an uneven distribution of adhesive. Clamping holds the surfaces tightly during the curing period, ensuring there are no gaps or improper adhesion. The pressure to be used for clamping, however, must be selected in accordance with what is being bonded. Too much pressure squeezes out too much adhesive, resulting in low strength, and too little pressure results in uneven surfaces. On a more practical note, recent data indicate that users are searching for clamping methods for special materials, suggesting a need for precise instructions. Always follow the adhesive manufacturer’s technical instructions regarding clamping pressure and time for optimal results.
Practical Advice for Your Projects
- Follow Manufacturer Guidelines: Always begin by reviewing the adhesive manufacturer’s recommendations for clamping pressure and clamping time.
- Apply Even Pressure: Select clamps that apply even pressure to the bonded surfaces to ensure a strong, well-localized bond develops.
- Avoid Over-Clamping: Excessive pressure can cause the adhesive to expel from the joint, reducing its strength. Tighten clamps with full strength, but be cautious.
- Test Small Sections: If unsure, test with small quantities of glue, if possible, to verify the authentication of pressure or the process for larger work.
- Allow Proper Curing Time: Set it down undisturbed for the whole curing time recommended by the adhesive manufacturer for perfect results. Never rush it.
Plan Ahead
Planning leads to significant growth in efficiency and success in project undertakings. According to recent search insights, popular search queries related to project planning typically concern time management, resource allocation, and risk mitigation plans. With a properly structured plan, the goal must be clear, foreseen issues must be addressed, and resources must be utilized effectively. Using this perspective, by combining practically any tool or data, you can hence formulate a road map that is actionable toward the actual achievement of an already identified goal.
Choose the Right Product
Depending on whether the customer correctly selects the product, recent data trends from search engines must be taken into consideration. The standard questions revolve around features, price, and compatibility with existing systems. Start by identifying your needs, and then proceed to identify the problems your product must solve. Review the reviews and case studies to gain insight into customer satisfaction and long-term performance. Another thing to consider is whether the product is scalable and easy to integrate, allowing it to grow in line with your usage. When you utilize selection criteria that align with recent search trends and expert opinions, your choice will be well-informed, maximizing value and functionality.
Test on a Small Area
Holding a totally committed position, I prefer testing the product on a small area to study the “how” of its working and “how” it fits with my requirements. This option ensures that I can identify any disadvantages and determine if the product meets my needs without posing any greater risk.
Reference Sources
Given below are the five professional-authoritative reference sources that you may use to cross-check if the article on the “Gorilla Glue Drying Time” has been written correctly:
“Strength and Durability of One-Part Polyurethane Adhesive Bonds to Wood”
According to the USDA Forest Service, this study examines the bonding ability and performance of polyurethane adhesives on wood, which are similar to Gorilla Glue.
“Influence of Drying Time and Temperature on Bond Strength of Contemporary Adhesives to Dentine”
Published by ScienceDirect, this paper highlights the effects of drying time and environmental factors on adhesive sealing strength, including curing phenomena on adhesives.
“On the Nature of Joint Strength in Paper: A Review of Dry and Wet Strength Resins Used in Paper Manufacturing”
Available on ResearchGate, this article reviews molecular bonding mechanisms and the forces created in adhesives to form strong bonds, which helps to understand the performance of Gorilla Glue.
“Gorilla Glue Nitrogen System”
This document, issued by the University of Cincinnati, offers insights into the product line of Gorilla Glue and its adhesive systems, including their drying and curing characteristics.
“Investigating the Affected Factors on the Design of Display Case for Paper Work”
Published in the International Journal of Applied Arts Studies, an article that reviews adhesive properties and drying times in their specialized applications, and thus offers the particular context for adhesive performance.
Frequently Asked Questions (FAQs)
How long does Gorilla Glue take to dry?
Gorilla Glue typically takes about 20 to 30 minutes to set, but to cure and achieve maximum strength fully, it requires 24 hours to dry completely. Environmental factors, such as temperature and humidity, can affect the drying time; therefore, it’s essential to consider these conditions when using the adhesive.
What affects the drying time of Gorilla Glue?
Several factors can affect the drying time of Gorilla Glue, including the amount of glue applied, the type of surface being bonded, temperature, and humidity levels. Using too much glue can lead to longer drying times, while applying less glue can speed up the process. Additionally, ensuring good clamping pressure helps achieve a strong bond more quickly.
How long does Gorilla Glue take to cure fully?
Gorilla Glue takes a full 24 hours to cure under optimal conditions. While it may feel dry to the touch within minutes, it’s essential to wait the full drying time to ensure the strongest adhesive bond possible.
Can I accelerate the drying time of Gorilla Glue?
Yes, you can speed up the drying process of Gorilla Glue by increasing the ambient temperature and reducing humidity. Additionally, using a fan or heat source can help, but be cautious not to overheat the glue, as this may affect its performance. Ensure that you still allow enough time for the adhesive to cure for optimal adhesion.
How long does Gorilla Glue take to set?
The set time for Gorilla Glue is approximately 20-30 minutes. During this period, the glue begins to bond the surfaces together, but for the adhesive to achieve its full strength, it is crucial to allow it to dry completely for 24 hours.
What is the full drying time for Gorilla Glue?
The full drying time for Gorilla Glue is about 24 hours. While it may harden in a matter of minutes, waiting for the complete cure time ensures that the adhesive reaches its maximum strength and durability, making it ideal for long-lasting repairs.
What should I do if I notice squeeze-out from the glue?
If you notice squeeze-out from the glue, it’s essential to clean it up before it dries to maintain a neat finish. Excess glue can be wiped away with a damp cloth while it’s still wet. Once dry, Gorilla Glue can be challenging to remove, so timely cleanup is essential.
How can I ensure strong adhesion with Gorilla Glue?
To ensure a strong adhesion when using Gorilla Glue, apply the adhesive evenly and use the right amount of glue—less is often more. Clamp the surfaces together firmly and allow the glue to set undisturbed for at least 20 to 30 minutes. Then, allow it to dry for a full 24 hours for optimal results.
Is Gorilla Glue suitable for all surfaces?
Gorilla Glue works well on a variety of surfaces, including wood, metal, ceramics, and more. However, it’s essential to ensure that the surfaces are clean and dry before applying the glue. For certain materials, you may need to select a specific type of Gorilla Glue, such as Gorilla Super Glue or Gorilla Wood Glue, to achieve optimal results.


