


For maximum durability and functionality of 3D printed components, strong bonds must be achieved during assembly. Unfortunately bonding PLA and PETG is more challenging than it might seem due to their unique surface properties. This guide is aimed toward assisting you in making informed decisions on selecting adhesives and techniques for these widely used printing materials. Whether you’re repairing damaged parts, constructing complex models, or making custom parts, we aim to equip you with insights on reliable glues and techniques that guarantee seamless and firm bonds. Read on as we simplify everything you need to know to make sure your 3D printed components are precisely and reliably positioned.
What is the Best Glue for 3D-Printed Parts?
3D-printed parts have varying requirements when it comes to bonding them, which makes it critical to analyze what material is used for the print. For PLA, cyanoacrylate (super glue) works fantastically because of its bond strength. For ABS parts, acetone-based glues or even acetone works well to chemically melt and fuse the parts together. For PETG, epoxy adhesives tend to work best as they are reliable and durable. Remember, for all prints it is imperative that surfaces are clean before applying glue to ensure adhesion and strength.
Understanding Glue Options for 3D Prints
Bonds between 3D printed parts can be made to last and be strong only if an appropriate adhesive is chosen alongside application techniques and environmental factors. The first step to improving bond adhesion is to sand the area slightly. This provides a degree of mechanical adhesion in conjunction with area enhancement. Additionally, cleaning with alcohol wipes ensures there is no dust, oils, or residue which may lead to weakening of the surface to surface bond.
The bond interface has to be as uniform and smooth as possible. Any texturing or irregularity does not contribute positively to bond formation which can lead to uneven curing or creation of weak zones. During the curing stage, the interface should be clamped or at least uniform pressure applied to further aid in joining strength. Temperature and humidity have been proven to influence the adhesive as well. For example, cyanoacrylate adhesives bond much faster under moderate humidity conditions while epoxies have been proven to require certain temperatures for effective curing (reactive hardening).
Choosing Between Super Glue and Epoxy for PLA
In the case of PLA, super glue (cyanoacrylate adhesive) and epoxy have both advantages and disadvantages when considering specific PLA projects. Super glue is great when something needs to be fixed quickly because it works very fast and is easy to use. It is good for low-weight PLA projects, and super glue works well on PLA because it can get into small spaces. Like all cyanoacrylate glues, super glues have their disadvantages too. Their tensile strength falls short after some time, moody weather, or when certain levels of heat, stress, or moisture is applied over time.
We can not talk about the opposite PLA bonding solution without mentioning its mid-range cost epoxies first. Epoxies are famous for having insane mechanical strength and durability. It makes it perfect for structural elements that must carry a load or be exposed to harsh weather. Mixing resin with its hardener takes time. The good news is that this gives them a greater impact, vibration, and environmental resistance. For the rest of us who require accuracy with complex fittings, time is no real issue when two-part epoxy is used after the initial (set-up) waiting period.
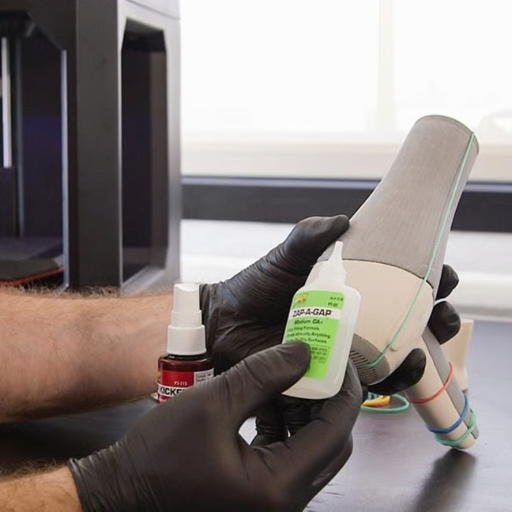
How to Use Gorilla Glue on 3D-Printed Parts
With 3D printed parts, using Gorilla Glue requires a very specific approach for best results in part adhesion and part strength. Before gluing the 3D printed parts, prepare the surfaces first. Sand the surfaces that are to be glued, removing any blemishes with fine sanding and creating a rougher finished surface. After sanding, use isopropyl alcohol to remove any dust, grease, or other residue, which will wash away and leave no residue behind.
Take a 3D part and apply water gently to one of its surfaces. As described under instructions, the glue will only start reacting when it is slightly misted with water. Make sure the surface is not dripping with water as this will prevent the overall foaming and solidification of the glue. Align the two surfaces as noted above and apply water to one of the surfaces. To avoid any form of shifting, weight should be placed.
How to Glue PLA 3D-Printed Parts Together?
- Prepare the Surfaces
Check that the surfaces tobe bonded are clean, dry, and free of dust and grease. If needed, use fine sandpaper to smooth rough edges to enhance contact.
- Choose the Right Adhesive
For bonding PLA, cyanoacrylate glue (super glue) works best. A stronger PLA bond can also be achieved using two-part epoxies.
- Apply the Glue
To both surfaces, apply an even and thin layer of adhesive. Too much glue will create a mess due to oozing out.
- Position and Press
Set the pieces perfectly before joining and pressing them. Maintain firm holds for a few seconds to ensure proper initial adhesion.
- Secure the Bond
While adhesive curing time, clamps, tape, or weights can be used alongside the described methods to hold parts together, always follow the glue manufacturer’s curing time instructions.
These are all the necessary steps to achieve a strong, durable bond on PLA 3D printed parts with carefully handling adhesives and proper ventilation.
How to Clamp the Parts for a Strong Bond?
3D printing fragments with a PLA material requires proper clamping to ensure that bonds are durable. First, surface misalignment needs to be avoided at all costs by precisely aligning the surfaces to be bonded during curing. Use spring clamps or bar clamps with padded jaws to apply even pressure or small hoses with soft walls on the surface. All pressure should be balanced throughout the bond line, but not too tight so that adhesive is extruded from the joint, weakening the bond. In the absence of clamps, heavy items or specially designed weights would be suitable to maintain pressure while curing.
Use zip ties, elastic bands, or even custom foam molds for the more complex fragments to help maintain positional integrity throughout unique geometries. Make sure, however, that no matter the choice of clamps, the curing time should amplify the spatial, relative, and time proportions recommended by the manufacturer. The adhesive will work even better if the environment is stable at the recommended temperature and humidity levels.
Best Techniques for Sanding PLA Before Gluing
Achieving a seamless bond greatly benefits from sanding PLA before applying glue. PLA bonds more strongly when surface roughness is increased, so sandpaper starting at a coarse 120 grit works best for removing print lines. Make sure to grade all the way up to 220 or 320 grit sandpaper. The bond area is best sanded in a consistent manner, as even joints strengthen the bond while uneven joints could weaken the bond’s vertical shear strength. Thermoplastics like PLA are best worked on with wet sanding, as it soothes overheating due to friction and reduces the sandpaper’s clogging.
During the sanding step, masks work well to stop you from inhaling fine dusty particles. Use isopropyl alcohol to clean up the sanded surface, ensuring complete removal of dust and oils. Strong penetration from the adhesive maximizes bond strength by effective surface penetration, which requires thorough pre-3D printed project surface finishing. Components require thorough surface preparation when glued together for lasting reliability.
Can You Use Super Glue on 3D Prints?
Indeed, super glue works on 3D prints and is very effective when it comes to gluing PLA, ABS, and PETG. Super glues active ingredient, cyanoacrylate glue, works with glue bonded 3D models since it forms sturdy bonds very fast with separated rigid and smooth surfaces. It is best to clean, sand, and align the surfaces together for optimal adhesion prior to glue application to ensure a strong durable bond.
What Makes Super Glue Effective for Plastic?
The primary reason super glue is effective with plastic materials is the chemicals and the way it cures plastic. As long as we have moisture, including the little amounts the surface contains, cyanoacrylate adhesives will undergo polymerization. PLA and ABS are gentle, non-porous, and homogeneous plastics. These characteristics will aid the cyanoacrylate used as a glue to firmly bond with the applied surface after being smeared with the adhesive. Furthermore, the modern super glues are produced with additives to make them suitable for difficult types of plastics which is why they strongly bond and endure extreme environmental conditions like temperature shifts or pressure. These attributes make super glues dependable for applications requiring fast and precise bonds between plastic parts.
Tips for Using Cyanoacrylate on 3D-Printed Parts
- Properly Prepare the Surface
Prior to bonding 3D printed components, it is crucial to remove any contaminants like dust, oil, or residue, and wounds from the sharpened surfaces collective to the airless environment to ensure optimal glue strength. Scrubbing surfaces with isopropyl alcohol (IPA) improves exposure due to PLA and ABS being smooth while lightly sanding the glue contact area enhances bond to durable components.
- Choose the Right Type of Cyanoacrylate
Different suppliers stock different formulations of cyanoacrylate, therefore suites to bond 3D cyanoacrylate parts. For such parts best candidates are cyanoacrylate of medium to thick viscosity as it will fill in gaps caused by layer lines. There are also some custom formulations of cyanoacrylate for flexible or high strength bonds which are dependent on the end material and application.
- Work Quickly but Precisely
As previously mention, solvent loses moisture fast, hence it is imperative to glue and align the pieces quickly immediately after application. Depending on the formulation and humidity of the atmosphere, working time is usually around 5-30 seconds. The bond is also required to dry for additional hours which will depend on the concentration of the glue used.
- Use an Accelerator for Faster Bonding
In critical speed scenarios, a cyanoacrylate glue can have an accelerator applied pre or post glue application on one or both surfaces. The accelerator works best when used on both surfaces as it reduces curing time and can set a bond within 1 to 2 seconds. However, sparing usage should be utilized as excessive accelerators can lead to brittleness.
- Avoid Over-Application
Applying too much adhesive will lead to either weak joints from too much looseness or spillover which is inevitably difficult to clean. Luckily, a small amount of cyanoacrylate is normally enough as it diffuses easily between bonded surfaces. Aside from weak bonds, excess adhesive can also cause the bond to turn white and blooming can occur.
Following these tips will ensure that with the right amount of cyanoacrylate glue and 3D printing parts, savvy users will be able to maintain precision and dependability in their project integrity and perform project functions seamlessly.
Is Epoxy a Good Choice for 3D Prints?
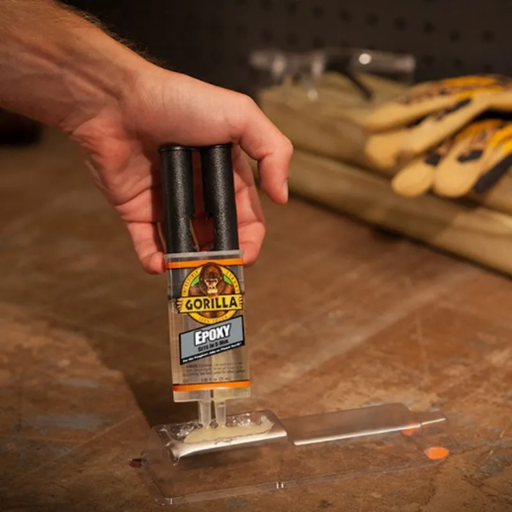
Yes, epoxy is an option for 3D prints, especially when the joints must be strong and durable. Its gap-filling characteristic makes it useful for joining parts with uneven surfaces or imperfections. Furthermore, epoxy bonds well with most 3D printing materials, including PLA, ABS prints, and even printed resins. Functional parts that need to be protected from the environment are better suited to exposed epoxy joints because it is heat-resistant and waterproof. Like all epoxies, these too require time to mix and cure, which needs to be undertaken with cyanoacrylate’s speed in mind, and won’t be as convenient as quicker adhesives.
Advantages of Using Epoxy for Stronger Bonds
- High Tensile Strength
Epoxies, for example, are exceptionally strong in tension, often with values exceeding 5,000 PSI which makes them ideal for demanding applications needing durability. These same features guarantee lasting bond strength for components that will undergo mechanical load or stress.
- Excellent Chemical Resistance
Due to its extreme strength and ability to withstand chemicals like oils, solvents, and even acid, epoxies are a useful tool to have with industrial competitions. By fortifying bonds made under such risks, failure becomes less likely over long amounts of time.
- Versatility Across Materials
Metals, plastic, ceramic and composites do not stand a chance alongside epoxy’s bonding capabilities. Due to the multi-material diversity of epoxy, it works wonders specifically for projects that involve different substrates because most adhesives fail to deliver optimal results.
- Temperature Tolerance
Epoxy adhesives continue to function at high temperatures for the adhesives in electronics and machinery applications due to their heat resistance of 120-200 °C (250-390 °F) relative to the formulation used.
- Gap-Filling Properties
Epoxy has a very thick nature which makes it possible to fill gaps and spaces between parts therefore ensuring perfect bonding even when parts are misplaced. This characteristic reduces the accuracy that is required in assembly and provides rigidity in structure.
Due to the above reasons, epoxy bonding is considered one of the best and strongest adhesives used in industrial and household works.
Comparing Epoxy and Super Glue for 3D Printing
|
Key Point |
Epoxy |
Super Glue |
|---|---|---|
|
Bonding Strength |
Extremely high |
Moderate |
|
Drying/Setting Time |
Hours to fully cure |
Seconds to a few minutes |
|
Gap Filling Ability |
Fills gaps effectively |
Limited gap-filling capability |
|
Durability |
Resistant to stress and wear |
Less durable under high stress |
|
Temperature Resistance |
High heat resistance |
Limited heat resistance |
|
Moisture Resistance |
Excellent water resistance |
Moderate water resistance |
|
Precision Application |
Requires careful application |
Easier to apply in small areas |
|
Shelf Life |
Longer shelf life when stored properly |
Relatively short shelf life |
|
Compatibility with Materials |
Broad material compatibility |
Suitable for fewer materials |
|
Cost |
Typically more expensive |
Generally inexpensive |
What Should You Avoid When Gluing 3D Prints?
- Using the Wrong Adhesive
Avoid using a chemical bond that is not suited to the material of your 3D print. Some adhesives are best suited to PLA like some are to ABS or even PETG.
- Applying Excess Adhesive
Using too much adhesive glue can create a mess or even weaken the bond, resulting in uneven surfaces or residue on the final print.
- Skipping Surface Preparation
Ignoring the cleaning steps of a specific surface thoroughly will cause weak bonds. The surface that is going to be bonded should be clean of any dust and if needed lightly sanded in order to fully adhere.
- Ignoring Proper Drying and Curing Times
Moving too early with applied stress on the glued components will result in loss of bond strength if not fully cured.
- Exposing the Bond to Harsh Conditions Prematurely
Avoid exposing the glued print to heat, moisture, or mechanical stress right after gluing. Doing so may reduce the effectiveness of the bonded joint.
Why Acetone is Not Recommended for PLA?
Though acetone is frequently used for smoothing and bonding processes for some 3D printing materials such as ABS, it has a negligible effect on PLA (polylactic acid). The reason for this is that PLA’s chemical structure, unlike ABS, is resistant to the acetone’s smoothing and dissolving action. Unlike ABS, which easily dissolves in acetone, creating smooth surfaces or strong bonds, PLA stays unaffected by such treatment and therefore renders the substance ineffective for practical purposes like surface treatment and adhesion.
Furthermore, the partial reactions whereby acetone and PLA interact often lead to surface whitening or textural inconsistencies, both of which are undesirable. This lack of predictability, paired with limited reaction, is what renders materials unable to function as smoothing agents. Studies show that better bonding and finishing results are yielded with PLA adhesives as opposed to ethyl acetate, further confirming these findings. For best results, PLA should not be used with acetone and instead be exposed to thorough sanding, polishing, or resin coating, while post-processing.
Understanding Glue Set Times and Curing
The adhesive’s set time and curing period are critical parameters that impact the bond’s strength and durability in different ways. Set time is the initial phase where the adhesive temporarily holds the parts together to some degree while restraining further flow, and where softening does not take place. Curing, however, is the complete chemical process which leads to a permanent bond of the adhesive which attains full strength. The materials to be bonded, the type of adhesive, ambient temperature, and humidity levels greatly influence these durations.
As an example, superglue, or cyanoacrylate adhesives as they are more formally known, have a notably short set time of a few seconds as long as conditions are normal, although full cure may take up to twenty-four hours. Epoxies exhibit longer and sometimes more variable curing periods depending on their formulation, and this can range from several hours to several days. Heat increases these rates, while excessive humidity particularly affects low-energy adhesives such as polyurethane, interfering with proper bonding.
Reference Sources
-
Failure and Fracture in Adhesively Bonded 3D-Printed Joints (2023): This study reviews the failure mechanisms in adhesively bonded joints with 3D-printed polymer substrates. It highlights the influence of adhesive type, layer thickness, and printing parameters (e.g., raster direction) on joint strength.
-
Evaluation of Structural Epoxy and Cyanoacrylate Adhesives (2020): This study compares the adhesive strengths of epoxy and cyanoacrylate (CA) on 3D-printed Acrylonitrile Styrene Acrylate (ASA) and Nylon 12 Carbon Fiber (NCF).
Frequently Asked Questions (FAQs)
Q: What is the best glue for PLA printed parts?
A: The best glue for PLA is often cyanoacrylate glue, commonly known as superglue. It creates a strong bond between PLA pieces and is easy to use. For larger surfaces, epoxy resin can also be a good choice.
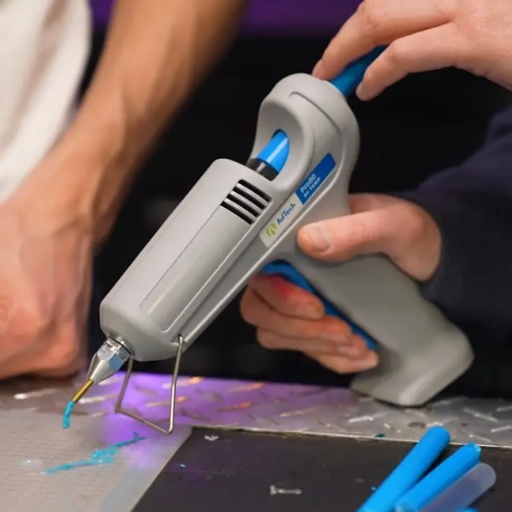
Q: Can I use hot glue to bond PLA parts together?
A: Yes, you can use hot glue to bond PLA parts together, but it may not provide the strongest hold. It’s best suited for larger or less critical joints where strength is not paramount.
Q: How do I choose the right glue for PETG filament?
A: When choosing the right glue for PETG, opt for a plastic-specific adhesive or superglue. These options will effectively bond PETG and maintain the integrity of the printed pieces.
Q: Is it possible to use a glue stick for 3D printed parts?
A: While glue sticks can be used for temporary bonds or light assembly, they are not ideal for permanent solutions. It’s recommended to use stronger adhesives like superglue or epoxy for lasting connections.
Q: What is the best way to glue PLA pieces together?
A: The best way to glue PLA pieces together is to use superglue or epoxy. Apply a small amount of glue to one surface, press the pieces together, and clamp them until the glue sets.
Q: Can I use a hot glue gun to assemble small parts of 3D prints?
A: Yes, a hot glue gun can be used to assemble small parts of 3D prints, but ensure that the bond is sufficient for your project’s needs, as hot glue may not be as strong as other adhesives.
Q: What type of glue should I use for 3D prints made of PLA?
A: For 3D prints made of PLA, the recommended glues are superglue (cyanoacrylate) and epoxy resin. Both provide strong bonds, making them suitable for joining PLA pieces effectively.
Q: How can I effectively bond two parts of a 3D print in one piece?
A: To bond two parts of a 3D print in one piece, choose a strong adhesive like superglue or epoxy. Apply a small amount, press the parts together firmly, and consider using clamps to hold them while the glue cures.
Q: What should I do with excess glue when gluing printed pieces?
A: If you have excess glue when gluing printed pieces, use a cloth or paper towel to wipe it away before it dries. This will help maintain a clean finish on your project.


