


3D printing isn’t just a cool fad, it’s changed how we make, test, and mess around with all sorts of things. The only headache many makers bump into is that some projects are made of several pieces that need to stick together. Glue them right and you get a near-invisible seam; glue them wrong and the part snaps before you can show it off. This post digs into the gluing tricks pros and weekend warriors use, listing the best products and breaking the steps down so anyone can follow along. When you’re done reading, you’ll know how to join parts in a way that looks polished and, more importantly, lasts.
What Is the Best Glue for 3D Prints?
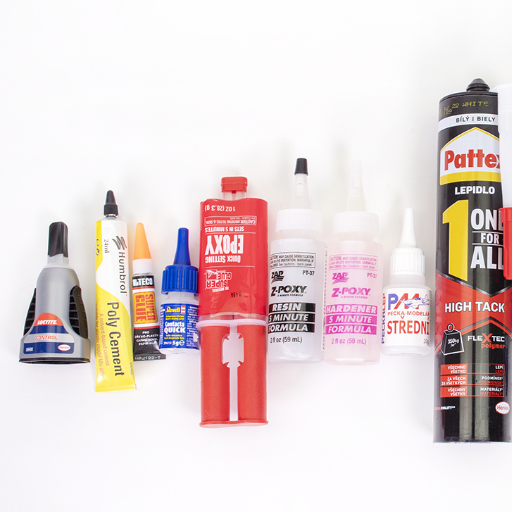
Choosing the right adhesive really comes down to what the plastic is.
- PLA: The super-fast way in most garages is good old cyanoacrylate, better known as super glue, because it grabs in seconds and holds tight. Got a wider gap? A two-part epoxy can step in and fill that space like a champ.
- ABS: Acetone steals the spotlight here; a tiny puddle melts the edges and lets the two halves fuse as one. If the smell isn’t your thing, an epoxy or a glue made just for ABS will still do the job without turning your workshop into a chemistry lab.
- PETG: PETG plays hard to get with most standard glues, yet a tough epoxy usually gets the win. Some brands even sell special formulations that claim to bond PETG almost as easily as it prints, so looking for those can save a lot of trial and error.
Whatever glue you pick, start by wiping the surfaces with alcohol to remove grease or dust. That quick step can make the difference between an okay bond and a rock-solid one. And dont skimp on the curing time; most adhesives get to full strength only after sitting still for a while.
Choosing the Right Glue for PLA
- Super Glue (Cyanoacrylate): People reach for super glue on PLA because it sets almost before you blink. The bond feels brittle in a few spots, but for tiny parts or detailed areas, the speed is hard to beat. Just remember, too much moisture can mess with the joint later.
- Epoxy Resin: Mixing a resin with its hardener turns epoxy into a powerhouse. This stuff survives heat, humidity, and the occasional backyard drop-test, so it’s the go-to for big assemblies.
- Hot Glue: Hot glue won’t break any strength records, yet it shines when you’re in a hurry or need something temporary. The same flexibility that weakens the bond can actually save your part if it flexes a lot. Use it for prototype joints or quick alignment, not for weight-bearing seams.
- Polyurethane-Based Adhesives: Polyurethane glues are tough and stick to just about anything, even when those things are made of totally different materials. If you add PLA plastic to wood, metal, or fabric, this type of adhesive usually gets the job done. The bond stays strong, even when the weather flips from humid to freezing.
To make the bond hold, you’ll need to prep the surfaces first. A quick pass with fine-grit sandpaper roughs them up just enough to grab the glue. Wiping the area with isopropyl alcohol zaps dust and grease, so the bond can bite. Finally, read the instructions on the bottle and leave the joint alone for the full curing time; rushing it almost always leads to failure.
Is Super Glue Effective for 3D Printed Parts?
Super glue-paper label cyanoacrylate, if you want to sound fancy-jumps on PLA, ABS, and resin prints like a lightning bolt. The stuff cures almost on contact, stealing tiny bits of water from the air or even your fingertip to turn into a plastic-like bond. Wipe away dust or fingerprint grease before you squeeze the pieces together, or the join can be weaker than wet cardboard. Small brackets and trim parts hold up beautifully, but a five-foot gantry probably needs a beefier adhesive. For bigger jobs that have to bend a little or carry weight, twin-tube epoxy or a solvent-based glue usually steals the show.
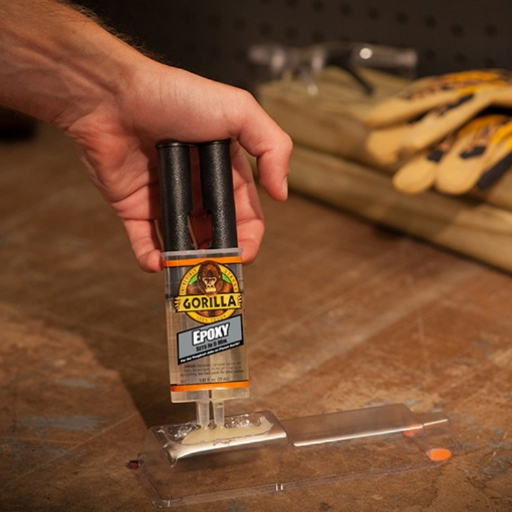
Comparing Gorilla Glue and Epoxy for 3D Models
|
Key Point |
Gorilla Glue |
Epoxy |
|---|---|---|
|
Adhesive Type |
Polyurethane-based |
Two-part resin and hardener |
|
Bond Strength |
Strong, suitable for general use |
Extremely strong, ideal for heavy-duty |
|
Curing Time |
1-2 hours initial set, 24 hours full cure |
6-12 hours initial set, 24-72 hours full cure |
|
Flexibility |
Moderate flexibility after curing |
Rigid, minimal flexibility |
|
Water Resistance |
Excellent water resistance |
Excellent, depends on formulation |
|
Heat Resistance |
Moderate |
High, withstands elevated temperatures |
|
Material Compatibility |
Wood, foam, ceramic, metal, more |
Metal, plastic, resin, wood, more |
|
Gap Filling |
Expands as it cures, fills gaps well |
Excellent for precision bonding and filling |
|
Ease of Application |
Simple, one component |
Requires precise mixing of two components |
|
Ideal Uses |
Small repairs, porous materials |
Structural models, load-bearing joints |
|
Shelf Life |
Approximately 1-2 years |
Longer if kept sealed and unmixed |
|
Cost |
Affordable, widely available |
Generally more expensive per volume |
How to Properly Glue 3D Printed Parts Together?
- Prepare the Surfaces
Before you start, give both surfaces a good wipe so dust, grease, and loose bits dont sneak in. Isopropyl alcohol works wonders here. If the edges look ragged, a quick pass with fine sandpaper roughens them up for a stronger stick.
- Choose the Right Adhesive
Pick your adhesive based on the plastic you’re working with. PLA and ABS usually bond well with standard cyanoacrylate (the stuff most people call super glue). For larger parts or a tougher seam, a two-part epoxy does the trick.
- Apply the Adhesive
Apply a thin line of glue to just one surface something like toothpaste is plenty. Go easy; puddles ooze out later and leave a glossy mess.
- Join the Pieces
Line the parts up by eye and press them together with firm, even pressure. A pair of spring clamps or a length of rubber band keeps them locked while the adhesive works its magic.
- Allow Time for Curing
Super glue may set in seconds, but most epoxies want 4 to 8 hours-or even longer-to hit full strength. Read the label so you dont rush the job.
- Finish the Joint
After the bond has hardened, 220-grit sandpaper will level any visible glue beads. That small step separates a DIY repair from a store-bought look.
Manufacturers love to include warnings, so glance at those before you start. Following their advice maximizes durability and saves you from repeat fixes.
Using Epoxy for Stronger Bonds
Epoxy adhesives have become a favorite shelf item for pros and DIYers alike, mainly because they grip like a vise and dont let go. The classic formula mixes a sticky resin with an equally thick hardener; together they bake into a heat-proof, chemical-proof plastic that shrugs off most everyday wear and tear. There’s a reason folks talk about shear strength in pounds per square inch- lots of tests show epoxies can crank out over 2,500 psi, far outpacing run-of-the-mill glues. The latest blends cure in a hurry and even bend a bit, so you’ll find them on aircraft wings, highway bridges, and under the hoods of half-built racing cars. Even the best formula won’t work wonders on dirty or bumpy metal, so wiping the surface first is time well spent.
Tips for Using a 3D Pen to Join Parts
- Select the Correct Filament Material
Not every plastic gets along with every job. PLA is friendly, cheap, and even breaks down over time, while ABS shrugs off heat but smells bad when you print it. Heavy-duty links may call for PETG or nylon, as those handle real-world knocks and pulls better than most.
- Preheat the 3D Pen Properly
Most 3D pens let you tweak the heat, and doing so pays off. Keep PLA around 190-220°C and ABS at 220-250°C. Too cool, and the bond fails; too hot, and you char the material-making a mess instead of a weld.
- Clean and Prepare the Parts
A little isopropyl alcohol on a paper towel cleans the surface faster than you can say bond. Light sanding is optional but gives the filament something rough to grab, especially if the plastic is shiny.
- Use Controlled Application Techniques
When the pen heats up, move it along the seam in long, steady strokes. For tougher joints, lay down a cross-hatch pattern or make two passes; extra layers never hurt where stress lives.
- Secure the Parts in Place
Don’t let your pieces wiggle when you lay down the filament. A simple pair of clamps, some sturdy tape, or a homemade fixture will lock everything in place and stop those annoying gaps from popping up.
Stick to the plan, and you’ll discover just how handy a 3D pen can be for bonding parts, prototyping, quick fixes, or creative weekend projects. It’s all fair game.
Can You Use Acetone to Glue 3D Prints?
Many hobbyists swear by acetone as a quick glue for ABS 3D prints. The solvent melts the outer layer, forming a bond while it evaporates. Because the chemistry is so different, acetone has almost no effect on PLA, PETG, or similar filaments. Safety first: always work in a space with good airflow, and slip on gloves to protect your skin. Following those steps, you can join ABS pieces into a nearly invisible seam.
How Acetone Works on ABS and Other Plastics
Acetone is the go-to solvent if you’re working with ABS plastic. It melts the surface and creates a nearly invisible weld. The same chemical magic simply doesn’t happen with other filaments. Polylactic Acid, or PLA, keeps its shape around acetone. So does PETG, the glycol-modified cousin of plain polyethylene terephthalate. Their molecular makeup blocks the solvent from breaking any bonds. For those tougher materials, epoxies, super glue, and a quick blast from a heat wand do the trick. Each adhesive brings its own quirks. Epoxy cures hard but takes time; cyanoacrylate sets fast but can leave a haze. Picking the right bond with an eye on the plastics chemistry saves headaches later on the production floor.
Safety Precautions When Using Acetone
Acetone is that fast-evaporating, almost nail-polish-smelling solvent you sometimes see on a shop floor or in chemistry labs. It cleans metal, strips grease, and pops up in lots of paint-remover recipes. Even so, acetone is shy about warning you when it burns. The vapors circle the room, settle in your lungs, or leap toward an open flame long before you notice. For that reason, you must work with the stuff in a room that has big windows or is hooked up to exhaust fans. A paper mask won’t cut it; real respirators move the air out. Touch the liquid and you’ll discover just how thirsty your skin can be. Nitrile gloves keep it at bay, and safety goggles stop the splash before it starts. Store the chemical in a heavy-duty plastic or metal can with a screw-on cap. Put that can on a cool shelf, not next to the hum of a furnace or the pop of welding sparks. If the material gets into an eye, flush with water for 15 minutes while someone grabs the first-aid kit. Knowing the steps ahead of time saves precious seconds. Follow these simple rules, and acetone becomes a useful ally rather than a nervous hazard.
What Tools Do You Need for Gluing 3D Prints?
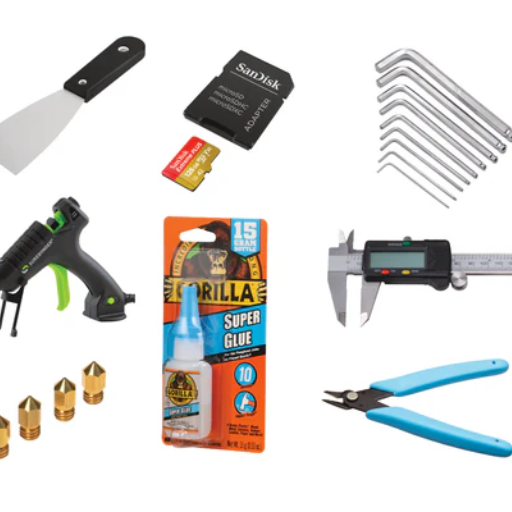
- Adhesive: Pick the right glue for your print material. Quick-drying super glue (cyanoacrylate) works well on small PLA pieces. For heavy-duty joins, a slow-set epoxy gives ABS parts the muscle they need.
- Applicator Style: A tiny brush or a nozzle tip lets the glue hug every curve without oozing out. A tidy application saves sanding later.
- Hold It Still: Plastic clamps, or even a stack of ordinary books, keep the parts from shifting while the bond firms up. Movement during curing leads to weak spots.
- Sandpaper Trick: A few strokes with fine-grit paper rough up the surfaces and wipe away residue. That tiny texture grabs the glue like Velcro.
- Gear Up: Safety goggles and nitrile gloves stand between your skin and the instant-bond magic of cyanoacrylate. Better to suit up than scrub dried glue off your fingers.
With this kit in hand, you can fasten all sorts of 3D parts together and expect the connection to last.
Essential Tools for Applying Glue
Getting glue to stick the right way is more than just slapping some paste on a surface. First, wipe away dirt, grease, or fingerprints so nothing gets between the adhesive and the material. A bit of isopropyl alcohol or a gentle household solvent does the trick, but be sure you pick a cleaner that is safe for whatever you’re working with. Let the cleaned area dry completely because any leftover moisture will wreck the bond.
When you do apply the glue, spread it in a thin, even layer. Sponges, small brushes, or precision syringes help keep things tidy and stop puddles that look messy later. Press the two pieces together right after applying the adhesive so the glue squishes into every gap. A clamp, rubber band, or even a heavy book holds everything snug while the bond sets. Finally, check the package for curing time-sharp drops in temperature or rising humidity can stretch that clock.
Using a Hot Glue Gun for Quick Fixes
A hot glue gun is that unsung hero you reach for when you need just about anything to stick without a lot of fuss. It competes with wood, plastic, fabric, even the odd scrap of metal, and it usually wins. Plug the tool in and give it the few minutes the manual asks for every maker has their sweet spot, but two to five is common. Most models push the glue out at a toasty 250°F to 400°F, so think about swapping the stick if you’re jumping between high-temp and low-temp jobs.
Slide a fresh glue stick into the chute, then squeeze the trigger slowly for an even bead; a jerky trigger equals a thick, ugly drip. Keep an eye on how much comes out just a dot is sometimes all you need to keep the workspace tidy and still get a solid bond. Press the pieces together right away because the glue firms up faster than you might expect, and watch your fingers. The nozzle and the goo itself stay dangerously hot for longer than the bead looks liquid.
How to Ensure a Strong Bond Between Glued 3D Printed Parts?
- Clean the Surfaces: Before anything gets glued, wipe the join lines with rubbing alcohol and let them dry. Dust, oil, or even leftover filament powder will ruin the bond the second you squeeze the parts together. A quick pass with fine sandpaper gives the plastic a scratched-up, hungry look that grips the adhesive.
- Choose the Right Adhesive: Not every glue likes every plastic. PLA parts bond fast with cyanoacrylate and epoxy, while ABS prefers those old-school acetone-based potions. Reading the label saves a lot of head-shaking later.
- Apply Even Pressure: Clamp the pieces together as soon as the glue touches them. Even pressure closes any tiny gaps and keeps the joint from shifting while the bond sets. A scrap block or a rubber band works in a pinch if real clamps are missing.
- Follow Curing Instructions: Patience beats speed almost every time in this hobby. Follow the manufacturer’s wet-and-dry times; glossy cyanoacrylate sometimes lies until you test it. Rushing will hand you a spider-web bond that snaps with a light tug.
- Test the Bond: Once the glue appears cured, see how much force the joint shrugs off. Stress it slowly, and don’t assume it’s strong until it proves strong. A failed test beats a broken print.
Preparing Surfaces for Optimal Adhesion
- Cleaning the Surface: The very first step is to wipe away every bit of gunk. Dust, oil, fingerprints anything that sits on top will mess up the bond. Grab isopropyl alcohol for glass or tiles, or use a heavy-duty degreaser on parts that are really greasy. Do not skip the rinse; leftover cleaner is just another contaminant.
- Surface Roughening: A slick finish may look fine, but it barely grips. Light sanding, grit-blasting, or a quick chemical etch gives the glue something to dig into. Aluminum is a good example: roughen it, then coat it with primer at once to stop the metal from oxidizing.
- Drying and Moisture Control: Water in any form prevents the bond from locking down. Steam, sweat, or even condensation can hide in microscopic grooves. Double-check with a clean finger; if it feels cool or damp, let it sit a few minutes longer. That extra time is worth it.
- Application of Primers: Some plastics, like polyethylene or polypropylene, push adhesives away as soon as they touch. A primer changes that attitude by creating a more willing surface. Brush, spray, or wipe the primer on and give it a moment to react before adding the adhesive layer.
- Temperature Considerations: Before you start, take a quick look at the thermometer. Most glues and tapes work best when the tubes, bottles, and surfaces are close to the maker’s recommended temperature. A cold workshop can thicken the adhesive like honey in the fridge, while summer heat may thin it too much. Either way, you’ll miss the sweet spot where the bond really grips.
Once everything is at the right temp, the joint stands a much better chance of surviving rough use later on. Skip the chill or the blast furnace and youre already halfway to a strong hold.
Using Sanding Techniques for Better Glue Application
A little light sanding is often the unsung hero in any bonding job. The scratch marks create mini ledges for the glue to cling to, kind of like spikes on a climbing shoe. Pick a medium to fine sheet, say 120 to 220 grit, between mowing down high spots and leaving the face too slick.
Press evenly across the area so you dont end up with ridges or bald patches. That lumpy finish could let the adhesive slide instead of stick. When you’re done, blast away the powder with compressed air or swipe a tack cloth. Dust may look tiny, but it is a stubborn wall.
Reference Sources
-
Interlayer Adhesion Analysis of 3D-Printed Continuous Carbon Fibre-Reinforced Composites: This study focused on improving the shear strength of 3D-printed composites by modifying printing parameters like layer height and line width, reducing the layer height from 0.4 mm to 0.3 mm increased shear strength by 40%.
-
3D Printing Cement-Based Ink for Construction: This research explored the use of cementitious materials as a binder for 3D printing in construction. It emphasized the importance of bonding between layers for structural integrity and proposed methods to control setting time and improve adhesion.
-
A Textile Reinforcement Method for 3D Printed Concrete: This study investigated the use of textile mesh reinforcement to improve the flexural strength of 3D-printed concrete. The addition of mesh significantly increased flexural strength and ductility, but voids under the mesh affected performance.
Frequently Asked Questions (FAQs)
Q: What is the best way to glue 3D prints together?
A: The best way to glue 3D prints together often depends on the type of filament used, but superglue, epoxy, and specialized adhesives like 3D Gloop are popular choices for achieving strong bonds.
Q: Can I use a glue stick for 3D printed parts?
A: While glue sticks are useful for temporary adhesion or bed adhesion during printing, they are not recommended for permanently bonding 3D printed parts together.
Q: Is superglue a good option for joining 3D printed parts?
A: Yes, superglue is a commonly used adhesive for joining 3D printed parts, especially for PLA prints, as it works well with this type of material and provides a quick bond.
Q: How do I apply excess glue when gluing 3D prints?
A: When applying excess glue, it’s important to carefully control the amount used. Use a small applicator to apply glue to the edges of the parts, then press the parts together firmly to avoid excess glue seeping out.
Q: What type of glue works best for PLA and ABS 3D prints?
A: For PLA prints, superglue is highly effective, while ABS can be bonded using acetone or a specific ABS glue. Epoxy can also be a versatile option for both materials.
Q: What is 3D Gloop and how does it help in 3D print bonding?
A: 3D Gloop is a specialized adhesive designed specifically for bonding 3D printed materials. It works by chemically melting the surface of the prints, creating a strong bond when the parts are pressed together.
Q: Can I use a 3D printing pen to glue two parts together?
A: Yes, a 3D printing pen can be used to melt and fuse the edges of two parts together. This method allows for more control and precision when bonding 3D printed pieces.
Q: How do I ensure the strength of the bond when gluing 3D prints?
A: To ensure a strong bond, make sure the surfaces are clean and free from dust. Apply the appropriate amount of glue, press the parts together firmly, and allow sufficient curing time as recommended by the adhesive manufacturer.
Q: What should I consider when choosing the type of glue for 3D printed materials?
A: Consider the type of filament used (such as PLA or ABS), the intended use of the bonded pieces, and the strength of the bond required. Each type of glue has its specific advantages and limitations based on these factors.


