


The choice of adhesive, as well as the application techniques, dramatically affect the bond’s strength when working with foam materials. This document tries to explain and help achieve professionally satisfactory results in bonding foam, irrespective of the project. The objective of this article is to provide extensive resources for professionals and DIYers ranging from different types of foam and their ‘glue options,’ various step-by-step guides, troubleshooting hints, and common blunders made during the process. Getting this guide will allow you to make sound decisions when going about constructing models, fabricating cushions, dealing with insulation, or any other challenge you may encounter.
What is the Best Glue to Use for Foam Projects?

It is important to pay attention to the type of foam you want to work on and the requirements of the project at hand when choosing the best glue for foam works. Contact adhesives or spray adhesives are very good for use for the majority of general applications as they bond strongly and cover fully without eating into the foam. For polystyrene foam which is mostly used in insulation, water-based contact glues or foam safe adhesives that are free from solvents are sure to provide the needed support without damaging the material. While hot glue is useful for quick steps, certain types of foam may become deformed due to the heat. To achieve the best outcome while preserving as much of the material as possible, it’s best to work with small sections of the foam first.
Comparing Different Adhesive Types for Foam
Compatibility, adhesive strength, drying time, and other application specifics must be analyzed when choosing an adhesive to ensure maximum efficiency. Among adhesives falls the water-based contact adhesive that verifiably does not harm polystyrene or polyurethane foams and still offers a strong bond. On the contrary, some adhesives like solvents have a strong bonding strength, but can ruin polystyrene foam since it is a solvent-based adhesive. While solvent-based adhesives do have a tendency to weak bond the foam depending on the environment, they are still easier to use than spray adhesives that require finer herbs-covering technique and are best suited for larger areas. Spray adhesives also pose a threat of crumbling polystyrene foam but they are easy to use and versatile. Spray bonds and bonds from hot glue, quick and efficient, are appropriate for minor repairs. They also work best when dealing with dense foams. Regardless of these quick methods being useful, an adhesive should match the characteristics of the foam while still aligning with the application needs. They do experience deformation when exposed to heat, and thus are only suitable for denser foams that can endure higher temperatures without bending.
When to Use Spray Adhesive vs. Contact Cement
Projects involving quick application of fabric, paper or light weight foam onto surfaces will benefit from the use of spray adhesive. It is easy to use and does not require much effort for non-structural projects that need to create a bond. Nevertheless, when placed under considerable amounts of stress or harsh environments, the bond created may become weaker.
For denser materials such as wood, metal, and even medium to high-density foam, contact cement would be the ideal choice. It is tougher than other adhesives and is able to withstand heat, moisture, and even mechanical stress once placed. While being more durable than it’s counterparts, contact cement is harder to use due to it needing precision while applying. With these factors, the materials needing support in that are more permanent for longer yet withstand place take more consideration when deciding the right solution.
Best Glue Options for Different Foam Densities
Density is a particularly important factor of foam when selecting the proper adhesive. The type of foam selected will determine the most appropriate glue to be used. For low-density foam, the best adhesives are either used as a spray or as contact adhesives since they will have just the right amount of hold needed without damaging the foam. Medium-density foam requires stronger agents as polyurethane adhesives or solvent-based spray adhesives which provide a strong yet flexible connection. High-density foam is more suited with stronger epsomitas or cyanoacrylate (super glue) adhesives. These offer exceptionally better adhesion while being resistant to constant wear and tear.
In any case, remember that the chosen glue will need to align with the set project goals. This includes temperature, humidity, and even mechanical strain, in addition to the materials used. Most of all, follow manufacturer specifications if you are aiming for a durable, long-term binding solution.
How to Choose the Right Glue for Different Types of Foam

- Assess the Foam Type: Classify the type of foam material you have as polyurethane, polystyrene, or memory foam, among others. This will identify which adhesives would work best. Take for instance, polystyrene foam cannot use solvent containing adhesives because it is solvent sensitive. Hence, it needs to be put together with solvent free glue.
- Consider Application Requirements: Determine what the foam is going to be used such as the load-bearing capacity and exposure to physical stress. Light works mean might work well with spary adhesives or glues specially designed for foam, but high strength bonding would require either epoxy or cyanoacrylate adhesives.
- Evaluate Environmental Factors: Think about other environmental elements including but not limited to; temperature, humidity, or even UV light exposure. To give an example, weak hot glue may be detrimental in high-temperature areas over a period of time.
- Test for Compatibility: Evaluate the materials to be used and ensure that the adhesive you intend to use will not dissolve the foam or degrade the material.
Adhesives for Foam Insulation Boards
It is vital to select the proper adhesive in order to maintain the bond strength, lifespan and structural integrity of the foam insulation boards. Based on the collective recommendations of major industry references, the following adhesives are cited as effective:
- Polyurethane Construction Adhesives: These are bonds of choice for foam insulation boards since they provide a firm bond and are quite resistant to environmental conditions like temperature and moisture. They are also solvent-less which protects the foam from damage during application.
- Water-Based Adhesives: Water-based products are suited for use on foam materials as they do not contain solvents that would break down the foam. Many water-based products are preferred because of their low VOC emissions and provide a reliable bond.
- Spray Foam Adhesives: Spray foam adhesives are effective for large-scale projects because they can be applied quickly to provide complete coverage and a strong bond. Their effectiveness is most noticeable when uniform layers are required to be applied across large areas.
Make sure to check the manufacturer’s instructions for compatibility with specific insulation foam materials. Always keep in mind the environmental temperature and humidity to ensure the best selection is made for optimathr and adhesive performance. Proper application surface preparation, such as the removal of contaminants and ensuring a dry guarantee, improves adhesive performance.
Solutions for Styrofoam and Lightweight Foam
Choosing the right adhesive for Styrofoam and other lightweight foams should be done very carefully to ensure that the specially formulated bonds do not lead to degradation or failure to bond properly. Hot glue is fast, but often inappropriate because the high temperature that comes with the hot glue gun will melt foam surfaces. Most lightweight bonding foams work best if applied with water-based contact adhesives. Equally effective is applying spray glue, as long as it is labeled foam-safe. Both cases guarantee that sturdy bonds can be made without harming the delicate structure of the foam.
For increased project durability or for large scale projects, specialty adhesives, epoxy and polyurethane-based glue are very effective, but need precision in the application method. Pay attention to the adhesive selection relative to the project use case, as exposure to the environment and weight supporting functionalities differ. Always ensure effective adhesion when testing the glue on the small piece of foam by confirming the bond achieved does not damage the material.
Step-by-Step Guide: How to Glue Foam Boards Together

- Prepare the Materials
Prepare the work and gather all essential equipment. This includes foam boards, a hot glue gun, non toxic spray glue, epoxy, cutting tools, a straightedge for more precise edges, and clamps. Having them all in advance reduces time wasted in looking for tools.
- Cut Foam Boards to Size
Using a clean utility knife or specialized foam cutter, cut the foam boards into the appropriate dimensions. Remember that the cut edges should not be rough so that they bond firmly.
- Clean the Surface
Using a soft cloth polish the area to which glue will be applied and eliminate the presence of dust or other residues. Better surface hygiene leads to better bond adhesion.
- Apply the Adhesive
Different types of adhesives have distinct methods of application. For example, evenly apply coating to both surfaces for spray adhesives. When using hot glue, apply glue in consistent borders along the edge or area where bonding will occur. Ensure the epoxy is thoroughly mixed before application as well.
- Align the Boards
Carefully adjust the position of the foam boards until they are correctly aligned. Corrections have to be done right away since some adhesives allow very little time for modification.
- Press and Hold in Place
Take the necessary steps to ensure that the foam boards are stuck together. Pressure needs to be applied with the clamps or weights till the adhesive sets. Make sure that the curing time recommended by the adhesive manufacturer is followed, so the bond achieves the greatest strength.
- Inspect the Bond
After the bond has set, test the integrity of the bond to see if it holds and check for weak spots. If the bond requires further fortification, additional adhesive may be applied to the bond’s perimeter.
- Clean Up
Clean up the work area by getting rid of the broken and unused glue materials, but do this carefully so the foam does not get damaged. After cleaning, put the adhesive materials in the bin so they can be thrown away in a safe manner.
Adhering to these simple actions makes it easy to join foam boards together for use in construction, design or any other related work. Always follow the set safety measures put in place for the use of adhesives.
Preparing Foam Surfaces for Better Adhesion
For the strongest bond, the surfaces to be bonded require special preparation to clean the foam. Using a cleaning solution appropriate for the foam type or warm water with mild detergent will suffice. Cleaning means getting rid of any dust, sand, grease, and other forms of debris that may block the bond. Moreover, the surface should also be scuffed with fine sandpaper so it can hold onto glue better. The cleaning process should also be thorough so that no moisture is present since it weakens the bond. Clean, low-energy foams may need a dusting of primer or surface activator designed for adhesives, which will surely improve the effectiveness of the adhesive. Make sure you read all the instructions for the particular piece of foam and adhesive as these will guarantee both strength and durability.
Applying Glue and Pressing Foam Pieces Together
To glue foam pieces together successfully, apply adhesive to both sides of the foam using a brush or spray, depending on the type of glue used. Follow product instructions to ensure the glue sets partially; this step increases adhesion and is commonly referred to as “tacking.” When the foam pieces achieve the desired tackiness during the recommended phase, carefully align and firmly compress the foam pieces together. Maintain constant pressure over the surface for the recommended time. This can be done by using clamps or manually applying weight. That way, a uniform bond is created throughout the surface of the foam. To maximize strength and durability, the bond must be set first; this should be done as per the manufacturer’s instructions.
Proper Drying and Curing Techniques
The efficacy and lifespan of adhesive bonds made will be compromised if proper binder setting and curing is neglected. Drying the glue consists of releasing solvents or moisture, which allows for a surface tack to form, making the bond stronger in subsequent stages. Temperature, air circulation, or moisture along with the guidelines set by the manufacturer will determine the efficiency of achieving a set bond.
Curing, in contrast, refers to the chemical hardening step after the bond is formed. It is usually determined by the conditions of the environment as well as the class of the adhesive applied. For instance, some epoxy adhesives require certain temperatures and curing agents for full strength, and in contrast with polyurethanes, exposure to humidity is advantageous. Follow the directions provided by the manufacturer regarding curing time and environmental conditions while making sure the pieces are not moved until the adhesive sets to full mechanical strength.
Common Problems When Gluing Foam and How to Solve Them

- Improper Adhesive Selection
Employment of the improper adhesive will lead to weak bonds and may damage the parts. Contact foam-compatible adhesives like contact cement, spray adhesives, and polyurethane glue. A proper check with the shrinkage or type of foam taken should always be performed.
- Uneven Adhesive Application
Insufficient coverage of the foam leads to pockets that will weaken the bond. For optimal coverage, scrub the surface of the foam thoroughly without missing a spot and applying the right amount of pressure to ensure that there are no weak spots. If the area is restricted, consider applying a flexible adhesive.
- Insufficient Curing Time
Failure to allow proper curing will lead to a reduced bond strength. Maintain specified curing time and temperature, humidity conditions as stated in the guidelines.
- Surface Contamination
It is extremely important that you scrub the foam clean of grease, dust, and other debris as those will disturb adhesion. A proper scrubbing using the right cleaning solvent on the dry surfaces should be performed before applying an adhesive.
To better work on foam materials and obtain strong bound joints, follow the correct procedure and resolve the most common problems that arise.
Preventing Adhesives from Melting the Foam
Using the correct adhesive is fundamental for the preservation of foam materials because its incompatibility can result in chemical damage. Use adhesives marketed as “foam-safe” or “solvent-free.” These contain no reactants that would destroy the foam. Also, avoid using high VOC (volatile organic compounds) adhesives as well as those with high curing heat, as these would also damage the foam supports. To achieve optimal results, follow the manufacturer’s instructions, apply the glue in thin layers, and ensure ample ventilation during the bonding stage to prevent curing problems while optimizing foam preservation.
Solutions When Glue Won’t Stick to Foam
If foam is being used as a substrate material, and adhesive is not able to properly attach to it, the following suggestions can help in the most comprehensive manner:
- Surface Preparation: Thoroughly clean the surface of the foam and make sure there is no existing moisture or oil on it. Oil and other external factors can obstruct the seal from forming. Use a soft cleanser sponge along with alcohol to remove contaminants.
- Selecting the Right Adhesive: Some forms of adhesive can be incompatible with foam materials. Specifically formulated adhesives such as spray adhesives or polyurethane glues that work with foam are preferred as they interact with foam materials without doing damage.
- Applying Proper Technique: The adhesive must be thinly spread out since thick gluing may weaken bonding or cause inadequate curing. Tightly grasp foam parts together then observe and wait for the suggested curing duration.
- Environmental Conditions: Make sure that other conditions concerning the environment like room temperature and humidity can accommodate the type of adhesive used. Extreme cold or high humidity levels can slow the curing stage.
- Testing Small Sections: Check on a small piece of foam that isn’t visible whether the adhesive works as expected before proceeding with large-scale application.
For ongoing problems, reaching out to the technical assistance of the adhesive label or, as a different method, using a mechanical fastening approach would be beneficial.
Fixing Gaps When Gluing Foam Sections
When attempting to bridge gaps between glued foam sections, surface preparation is essential prior to applying glue. Dust or debris that is present on the surfaces should be cleaned thoroughly, as it inhibits bonding. Apply a high-viscosity foam adhesive that fills small gaps effectively and is made for foams. Adequate coverage of the surfaces should be ensured by applying the foam and pressing the sections together tightly to reduce gaps during bonding. For other substantial gaps, it is best to fill them with foam sealant fill the volume before gluing with compatible adhesives. A good bond is formed after the recommended curing time set by the adhesive’s manufacturer.
What Are the Best Ways to Glue Foam to Different Materials?
As with any other material, attaching foam to different materials requires the use of the correct glue in order to ensure that the attachment is durable. For wood or fabric, water-based contact adhesives or polyurethane glue will work because they are porous and will be absorbed. Plastic and metal, which are nonporous surfaces, will require a stronger glue, such as solvent-based or epoxy adhesive. In the case of wide surfaces, spray adhesives can be used as they are easy to use and offer quick adhesion. The best results are achieved once the surfaces are clean and dry without any dust or grease. Each manufacturer recommends waiting for a certain period before the surfaces are attached and following these guidelines will yield the optimal result.
Techniques for Gluing Foam to Wood
When it comes to adhering foam to wood, the correct adhesive selection is critical to obtain strong and permanent material adhesion. Contact adhesives including solvent-based contact cement excel because of fast drying and strong adhesion. Also, spray adhesives which can be preferred due to wide area even application must be specially made for foam and wood or else they will damage the materials. For small projects, hot glue can be used, but it is not as strong or long-lasting as other alternatives. Remember the wooden surface has to be pre-sanded and cleaned truely. Like all other adhesives, the glue should be applied on both surfaces and compress the foam and wood gently together after the required tack time. While doing curing the bond needs to be held down with light pressure or clamps if necessitated. Remember to always follow the provided instruction of the adhesive for the best results.
How to Attach Foam to Fabric and Upholstery
1Attaching foam to fabric or upholstery requires careful preparation and the use of appropriate materials for a secure and long-lasting bond. Start by selecting a high-strength spray adhesive designed for upholstery projects. For best results, ensure both the foam and fabric surfaces are clean, dry, and free from dust or debris. Apply a thin, even layer of adhesive to both surfaces, following the manufacturer’s instructions for tack time—this is crucial to create a strong initial bond.
While working with spray adhesives, ensure that the work area is very well-ventilated for safety. After achieving a sufficient amount of tack, lay the fabric onto the foam while smoothing it out in a manner that does not leave any creases or air pockets. Use firm even pressure throughout to get full adhesion between the fabric and the foam once the fabric has been pressed down onto it. Achieving sufficient bond strength may take time, so avoid any shear or tension on the upholstery item until the instructions provided with the adhesive are followed. For intricate shapes or curves, adhere pieces in small manageable sections to prevent distortion of the fabric due to uneven stretching. Once these two steps are completed, ensure the adhesive has the amount of time required for curing. This may again take a long while in order to be certain that it is fully shin splints start stopping the work with hinge issues like wrinkles at full arch level.
Bonding Foam to Plastic and Metal Surfaces
When attaching foam to plastic or metal surfaces, one must be meticulous in choosing an adhesive. As for plastics, spray adhesives or contact cement work well with plastics. Clean the plastic surface thoroughly because dust, oil, and other contaminants can easily interfere with the bond. For metals, use a high-strength proprietary non-porous adhesive, polyurethane or industrial grade spray adhesives will work. Sanded or roughed metal surfaces provide better adhesion while ensuring the surface is free of rust and grease. The best results are obtained when adhesive is applied uniformly to the foam and surface. Always allow the correct amount of tack time as specified by the product before bonding. Use the adhesive in a safe well-ventilated area, as protective gear such as gloves and goggles may be required.
References
Frequently Asked Questions (FAQ)
Q: What is the best way to glue foam together for crafts?
A: The best way to glue foam together for crafts is to use a specialized adhesive such as 3M Super 77 spray adhesive or Elmer’s glue. These adhesives are formulated to bond foam effectively without damaging it.
Q: Can I use wood glue to glue foam sheets together?
A: No, wood glue is not recommended for gluing foam sheets together as it may not provide a strong bond and can damage the foam. Instead, use a foam-specific adhesive or a tacky glue designed for foam.
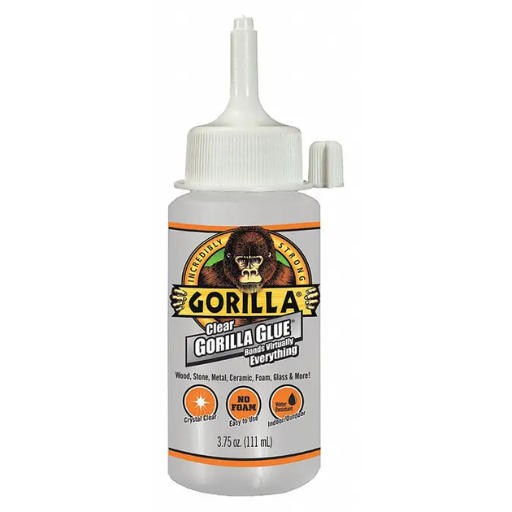
Q: What type of glue works great for gluing two pieces of foam together?
A: Gorilla glue and liquid nails are both excellent options for gluing two pieces of foam together, as they create a strong bond and are suitable for foam materials.
Q: How do I glue foam sheets together without causing damage?
A: To glue foam sheets together without causing damage, use a low-temperature hot glue gun or a foam-safe adhesive like 3M Super 77. Always test on a small area first to ensure compatibility.
Q: Is there a handy DIY guide for gluing foam together?
A: Yes, many handy DIY guides are available online that provide step-by-step instructions on how to glue foam together. These guides often include tips on the best adhesives to use and techniques for achieving a strong bond.
Q: Can I use white glue to glue foam sheets together?
A: Yes, white glue can be used to glue foam sheets together, but it may take longer to dry and might not provide as strong a bond as foam-specific adhesives. Ensure that the sides to be adhered are clean for the best results.
Q: What adhesive can I use to attach foam to foam?
A: You can use foamboard adhesive or 3M Super 77 spray adhesive to attach foam to foam. These adhesives are designed specifically for bonding foam materials effectively.
Q: How long should I let it dry after I’ve glued the foam together?
A: You should let it dry according to the adhesive’s instructions, but generally, allowing at least 24 hours for the glue to cure fully is recommended for the best bond.


