


Getting a strong bond that smoothly blends is aesthetically pleasing when working with leather and wood materials. This goal is only achievable through choosing the right glue. This goal is crucial whether you’re doing furniture restoration, making decor pieces or doing intricate DIY projects. Here you will find the best glues for leather to wood joints with their specific strengths, methods of application and specific cases of use. With the understanding of the most effective adhesive technologies and expert tips integrated within this article, rest assured knowing that you will be able to achieve impeccable bonds between the two materials.
What is the Best Way to Glue Leather to Wood?
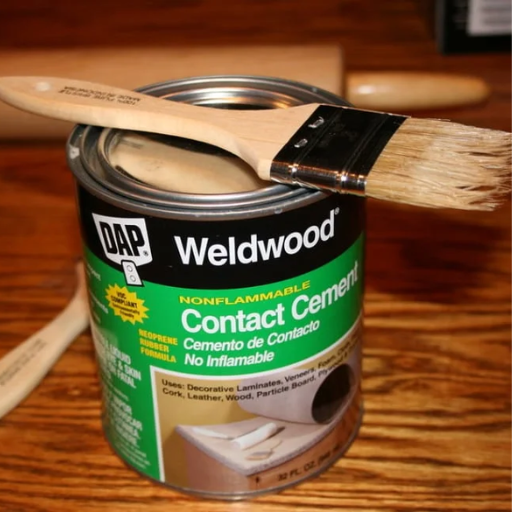
To attach leather to wood, a special high-quality adhesive for different material surfaces needs to be picked out. One of the best results is achieved through adhesives such as contact cement. It bonds effectively and flexibly. To be most effective, surfaces need to be cleaned first to scrub away any dust, oils, or residue. Following the instructions on the adhesive label regarding application, both the leather and wood pieces need to be covered with a thin, even coating of contact cement and left to dry to a set tacky consistency. After that, the two pieces can be pressed together, but precision is vital during this step since it is quite difficult to make alterations once they are glued. Consistent pressure needs to be applied during the setting phase, or the bond will need to be clamped for added support. In any case, adherents need to be treated nicely by patients while waiting for a permanent bond to take place to prevent it from breaking.
How to Choose the Best Adhesive for Your Project
To develop a project, choosing the right adhesive should take into consideration the materials required, the strength of the bond needed, and the environmental factors the adhesive must endure. When dealing with porous materials such as wood and fabrics, PVA glue is very easy to use. Non-porous materials like metal or glass, for example, usually require epoxy resin which is exceptionally durable and resistant to environmental conditions. For flexible materials like rubber or leather, contact adhesives or polyurethane glues are recommended because they are flexible and bond different materials together.
These are just some of the factors that need to be analyzed. For example, outdoor projects or those that deal with extreme temperatures require a different approach. In these cases, it is best to use adhesive products that are weather resistant or heat resistant. Always double check curing times because there are adhesives that need a clamp and those that don’t. The latter makes bonding much easier. Studying the specifications and using mock samples is easier than working with the mistakes that arise from the lack of preparation.
Step-by-Step: Easy Directions for Perfect Bonding
- Identify the Material Types
Begin by determining the materials involved in your project. For porous materials like wood or fabric, PVA glue is typically sufficient. For non-porous surfaces such as metal, glass, or plastic, epoxy resin is recommended due to its superior strength and environmental resistance. Flexible materials like rubber or leather are best bonded with contact adhesives or polyurethane adhesives.
- Consider Environmental Conditions
Assess the environment in which the bonded materials will be used. For outdoor projects or applications in extreme heat or cold, select weather-resistant or heat-resistant adhesives. Adhesives must be rated for the specific conditions to ensure longevity and performance.
- Check Curing Times
Read the product specifications carefully to check for curing times. Some adhesives require clamping during the curing process for maximum strength, while others set without any pressure. Always account for these timeframes in your project plan to avoid premature handling.
- Test with Mock Samples
Before applying adhesive to the primary materials, test with mock samples whenever possible. This step allows you to troubleshoot any issues such as insufficient bonding, wrong adhesive application, or compatibility concerns, all without compromising your actual project.
- Prepare the Surfaces
Clean and prepare all surfaces by removing dirt, oil, or residues. Sand surfaces if necessary to create a rough texture, ensuring maximum adhesion. This preparation step improves the bond’s integrity and can prevent failures over time.
- Apply Adhesive Correctly
Apply the adhesive evenly following the manufacturer’s instructions. For certain adhesives like epoxy, mix the components precisely in the recommended ratio to achieve full strength. Avoid overapplication, as excessive adhesive can weaken the bond or create messy results.
- Allow Proper Curing Time
Give the adhesive sufficient time to cure as specified by the manufacturer. For projects requiring clamping, ensure consistent pressure for the duration of the curing process. Avoid stressing or moving the materials before the adhesive fully sets.
By following these steps attentively and choosing the correct adhesive for the job, you can achieve a strong, durable bond with minimal challenges.
Common Mistakes When You Glue Leather to Wood
- Using the Wrong Adhesive
One of the most frequent mistakes is selecting an adhesive unsuitable for bonding leather to wood. Generic glues, such as standard wood glue or school glue, often fail to create a strong and lasting bond. For optimal results, use a specialized contact adhesive or leather glue designed for porous and non-porous surfaces.
- Skipping Surface Preparation
Neglecting to prepare the surfaces properly can significantly reduce the effectiveness of the bond. Leather should be cleaned to remove any oils or finishes, while wood must be sanded to eliminate rough fibers and create a receptive surface. Ensuring both surfaces are clean and dry is critical to adhesion success.
- Applying Uneven or Insufficient Adhesive
Uneven adhesive application can cause air pockets, weak spots, or visible imperfections in the final bond. Similarly, using too little glue may lead to partial adherence between the materials, increasing the risk of separation over time. Uniform adhesive coverage on both surfaces is essential for durability.
- Not Allowing Proper Drying or Curing Time
Rushing the process by failing to allow enough drying or curing time is another typical error. Contact adhesives often require a short tacky drying period before pressing the materials together, while other adhesives need clamping until fully cured. Ignoring these requirements can weaken the bond.
- Overstretching or Misaligning the Leather
Stretching or misaligning the leather during application can result in wrinkles, bubbles, or uneven adhesion. Take care to position the leather correctly and press it into place firmly but gently without unnecessary tension.
By avoiding these mistakes and adhering to the correct techniques, you can effectively bond leather to wood with strong, aesthetically pleasing, and long-lasting results.
How Do I Attach Leather to Wood Effectively?
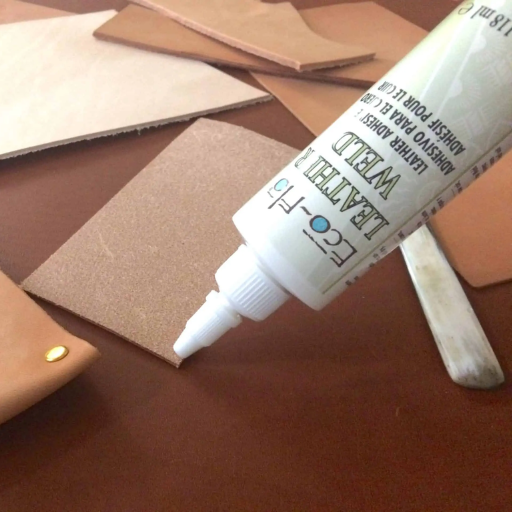
To attach leather to wood effectively, begin by selecting an appropriate adhesive, such as contact cement or a specialized leather glue, to ensure a strong bond. Prepare both surfaces by cleaning them thoroughly and lightly sanding the wood for better adhesive adherence. Apply a uniform layer of adhesive to both the leather and the wood, following the manufacturer’s drying or curing time recommendations. Carefully align the leather to the wood and press it into place firmly, avoiding unnecessary stretching or repositioning. For optimal results, consider using clamps or weights to hold the materials together during the curing process, ensuring a durable and seamless bond.
Understanding Contact Adhesive and Its Uses
Contact adhesive, or contact cement, works well for bonding leather, wood, metal, and plastic. It entails applying the adhesive to both surfaces, allowing it to dry partially, and then pressing the surfaces together. The bond forms almost immediately and doesn’t need any prolonged clamping.
One of the most favorable features of contact adhesives is their strength and flexibility along with the ability to maintain bonds between unlike materials. Besides, Contact adhesive is water resistant and functions well under extreme temperatures, though some requirements may limit functionality. This method is not easily reversible, requiring precise placement of the surfaces. Also, many formulations produce strong fumes while being applied, necessitating proper ventilation. Contact adhesive will provide exceptional and long-lasting results when used on wood or other materials, given the surfaces are well prepared and the removal instructions are followed.
Expert Tips for a Durable Bond
- Surface Preparation
Proper surface preparation is critical for achieving a strong bond. Ensure that both surfaces are clean, dry, and free of dirt, grease, or old adhesive. Sanding the surfaces lightly can improve adhesion by creating a better texture for the glue to grip.
- Application Technique
Apply an even coat of adhesive to both surfaces using a brush, roller, or trowel, depending on the size of the area. Follow the manufacturer’s instructions for the specific drying time before bonding the surfaces. This waiting period helps the adhesive reach its optimal tackiness.
- Precision Alignment
Since contact adhesive bonds almost instantly on contact, align the surfaces accurately before pressing them together. Once bonded, adjustments are extremely difficult, so measuring and marking alignment can minimize errors.
- Bonding Pressure
Apply uniform pressure across the entire surface to ensure a tight bond without air pockets. Tools like a rubber roller or a clamp can be used for precise pressure distribution.
- Ventilation and Safety
Many contact adhesives emit strong fumes during application. Work in a well-ventilated area or use appropriate respiratory protection to avoid inhaling hazardous vapors. Always store adhesives in a cool, dry environment away from heat sources.
By adhering to these expert techniques, you can maximize the durability and effectiveness of your adhesive bond regardless of material type.
Which Glue for Leather to Wood Should I Use?
The particular use of the leather and wood glue will determine which adhesive is best. In most cases, contact adhesive will offer the best solution thanks to its flexible bond which can absorb structural shifts. Before application, ensure both surfaces are clean and dry. If there is any need for gap filling, polyurethane glue will also serve the purpose, although proper curing may require some clamping. For less permanent use, robust double-sided tape that is made especially for leather or wood can be used. Remember, the temperature and humidity conditions will impact the strength of the adhesive.
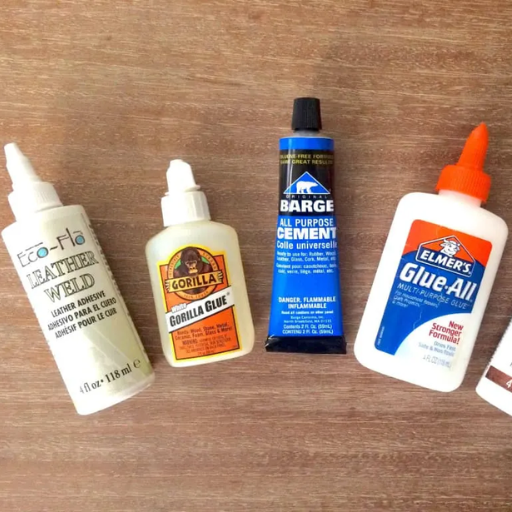
Overview of Top Recommendations
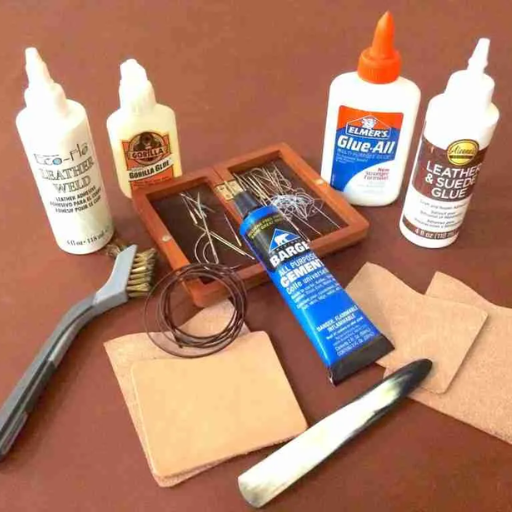
- Barge All-Purpose Cement
Renowned for its exceptional adhesion properties, Barge All-Purpose Cement is a widely trusted choice for bonding leather to wood. Its versatility makes it highly effective in creating a durable, flexible bond. This adhesive works best when both surfaces are thoroughly prepared — clean, dry, and slightly roughened. Additionally, it provides a professional-grade hold suitable for demanding applications.
- Gorilla Polyurethane Glue
Gorilla Polyurethane Glue is ideal for projects requiring strong gap-filling properties. This adhesive expands as it cures, ensuring a robust bond even for uneven surfaces. To achieve optimal results, lightly dampen the wood surface before application. Note that clamping is required during its curing process, which typically takes 24 hours.
- 3M Scotch-Weld Contact Adhesive
Known for its industrial-grade performance, 3M Scotch-Weld Contact Adhesive delivers a powerful bond capable of withstanding temperature fluctuations and material stress. It is especially useful where flexibility and high adhesive strength are paramount. Applying an even layer to both surfaces and allowing sufficient dry time before pressing them together ensures the strongest bond.
These top recommendations offer reliable solutions for bonding leather to wood, catering to a variety of project requirements and environmental conditions. Always follow manufacturer guidelines for best results.
Comparing Products Used by Professionals
When comparing adhesives for bonding leather to wood, professionals prioritize factors such as bonding strength, flexibility, curing time, and applicability across different conditions. Here’s a detailed comparison of commonly used products:
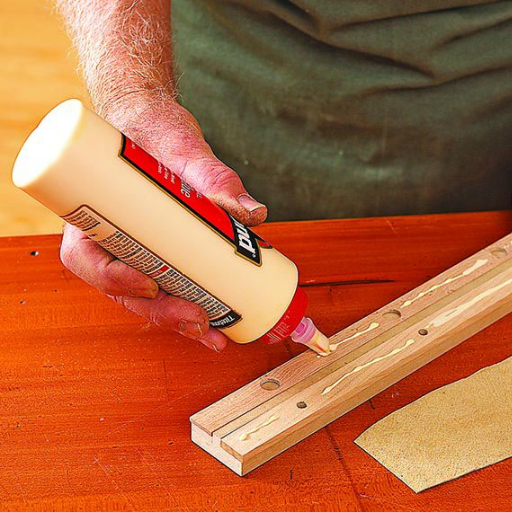
- Gorilla Wood Glue
Gorilla Wood Glue is highly rated for its strong bond specifically designed for woodworking projects. It is versatile, easy to use, and compatible with damp surfaces due to its water-based PVA (polyvinyl acetate) formulation. However, it requires clamping for several hours and may not provide the flexibility needed for dynamic leather applications.
- 3M Scotch-Weld Contact Adhesive
A go-to option for industrial-level tasks, this adhesive is celebrated for its resilience under extreme conditions. While it offers exceptional tensile strength and flexibility, its proper application process—spreading evenly on both materials and waiting for adequate drying before bonding—is critical to achieving optimal performance.
- Barge All-Purpose Cement
Commonly used in leatherworking, Barge All-Purpose Cement is preferred for its all-around compatibility and superior flexibility. Its solvent-based formula enables it to create a permanent, waterproof bond without requiring clamping, making it ideal for projects where precision and adaptability are essential.
Each product serves a unique purpose, with variations in application methods and strengths. For heavy-duty and flexible solutions, professionals favor contact adhesives like 3M Scotch-Weld or Barge Cement, while Gorilla Wood Glue excels in traditional woodworking tasks. Selecting the right adhesive depends on the specific demands of the project and the environmental factors involved.
What Are Some Easy Repairs to Consider?
- Fixing Loose Chair Legs
Using wood glue, reattach loose or wobbly chair legs to restore stability. Apply glue to the joint, clamp securely, and allow sufficient drying time for a durable bond.
- Mending Shoe Soles
For detached shoe soles, contact cement like Barge All-Purpose Cement is ideal. Spread the adhesive evenly on both surfaces, wait for it to become tacky, and then press firmly to bond.
- Repairing Torn Upholstery
Fabric adhesive can be used to patch small tears in upholstery. Simply align the torn edges, apply adhesive along the seam, and press gently to ensure a smooth repair.
- Sealing Cracked Ceramic
For minor cracks in ceramic items, epoxy adhesive provides a strong, waterproof seal. Align the broken pieces, apply the epoxy carefully, and hold in place until set.
These quick fixes are cost-effective and require minimal tools, making them perfect for basic household repairs.
Quick Fixes with Super Glue Variants
- Fixing Broken Plastic
Super glue, such as cyanoacrylate adhesive, is highly effective for repairing broken plastic items. Clean the surfaces to remove any dirt or grease, apply a small amount of glue to one side, and press the pieces together for a secure bond. Hold firmly or clamp for a few minutes for optimal strength.
- Repairing Metal Objects
For minor metal repairs, super glue provides a quick and reliable solution. Ensure the surfaces are clean and dry, apply the adhesive on one side, and align the parts carefully. Press them together and hold until the bond sets, typically within 30 seconds.
- Securing Loose Jewelry
When dealing with loose or detached jewelry components, super glue can restore them swiftly. Use a precision-tip applicator to place a small drop of glue on the affected area, such as a clasp or setting, and press firmly. Allow the adhesive to cure completely before wearing the item.
Super glue variants excel due to their strong, fast-drying properties, making them a versatile option for quick household repairs. Always handle with care to avoid accidental bonding on unintended surfaces.
Using Spray Adhesive for Large Surfaces
Spray adhesives allow for the bonding of large flat surfaces to be done quickly and very efficiently. Like with all adhesives, before using, ensure that the surfaces to be bonded are clean, dry, and devoid of dust or debris. Shake the can well before use. While maintaining a distance of 6-8 inches from the surface, spray the adhesive while sweeping in a consistent motion. Depending on the bond strength, the adhesive can be applied to one surface, or both surfaces, which is also known as ‘double-sided application’. Allow the adhesive to become tacky, which usually takes between 30 seconds to 1 minute, and then slowly press the surfaces together.
As a general rule of thumb, for delicate materials, the spray adhesive can be kept at a wider distance while spraying to prevent bleed through. Always use in a well-ventilated area to minimize exposure to fumes, and consider wearing gloves to avoid skin contact with the very strong adhesive. Spray adhesives can be and are meant to be used on paper, fabric, foam, or lightweight wooden panels. However, always check the manufacturer’s guidance to ensure compatibility with certain materials. Making sure to properly store the spray adhesive can further increase its performance and durability.
Can Contact Adhesive Achieve Long-lasting Results?
Sure, contact adhesive is designed to last a long time when applied on specific materials, and when it is applied correctly, it can have long-term effects. Its bonding effectiveness stems from its capacity to strongly bond on first contact, assuming that both surfaces are prepped adequately. Optimal performance is achieved through cleanliness of the surface, adhesive application balance, and observation of the recommended drying time. Contact adhesives can be used for rubber, laminate, metal, and wood, which makes it perfect for permanent or semi-permanent applications. However, temperature and humidity considerations are required for lasting durability; that is why the instructions provided by the manufacturer on application and storage should be noted for long-term effectiveness.
Advantages of Contact Cement in Leather and Wood Projects
Due to its high bonding strength and versatility, Contact cement is favored in both leather and woodworks. When adhesive is applied to both surfaces and allowed to dry in it’s tacky state, it makes an instant and strong bond. This feature allows for no clamping requirements and makes certain that the materials that are stuck together remain in position from the moment contact is made. In leatherwork, it gives flexibility and great adhesion without disturbing the material’s texture. In woodworking, it bonds with porous and non-porous materials, making it suitable for laminates, veneers, and solid wood. Moreover, contact cement is reliable because of its high heat and moisture resistance. Achieving the best results with the adhesive requires proper surface preparation and obeying the specified drying times.
How to Ensure the Adhesive is Applied Correctly
To ensure the adhesive is applied correctly, follow these steps:
- Surface Preparation: Begin by thoroughly cleaning the surfaces to remove any dirt, grease, or contaminants. Use a degreasing agent or isopropyl alcohol for optimal results. Allow the surfaces to dry completely as moisture can hinder adhesion.
- Choose the Appropriate Adhesive: Select an adhesive that is compatible with the materials you are bonding. Refer to product specifications to verify its temperature, load-bearing capacity, and curing properties.
- Apply the Adhesive Evenly: Dispense the adhesive in a uniform layer across the bonding area. Avoid over-application, as excess adhesive can weaken the bond or cause curing issues. Use a precise applicator for controlled application if needed.
- Assembly and Pressure Application: Align the surfaces correctly and press them together with firm and even pressure. Clamps or weighted objects can be used to maintain consistent pressure during the adhesive’s curing process.
- Cure Time Adherence: Follow the manufacturer’s recommended curing time to ensure full bond strength. Factors such as temperature and humidity can influence curing, so maintain the proper environmental conditions during this stage.
- Final Inspection: After the adhesive has cured, inspect the joint to confirm that it is secure and free from visible defects such as air bubbles or incomplete bonding.
By adhering to these guidelines, you can maximize the effectiveness and durability of the adhesive bond.
References
Frequently Asked Questions (FAQ)
Q: What’s the best glue for bonding leather to wood?
A: To find the best glue for bonding leather to wood, consider using a flexible adhesive like Loctite Super Glue Ultra Gel Control. This type of glue is designed to handle movement or stress without cracking or failing over time.
Q: How do I apply the adhesive to ensure a strong bond?
A: Apply the adhesive by first ensuring both surfaces are clean. Then, apply an even coat of glue to the entire surface of the leather and wood, using a brush-on or spray-on product for uniform coverage. This helps create a high-strength, temperature-resistant bond.
Q: Are there any specific products recommended for this task?
A: Yes, products like Lepage Heavy Duty Spray Adhesive and Gorilla Glue are excellent choices for bonding leather to wood. These adhesives are designed to retain flexibility and strength under temperature extremes.
Q: How can I avoid drips or runs during application?
A: Use a gel or rubber-infused adhesive with a precision nozzle to apply the glue. This allows for better control and reduces the risk of drips or runs, ensuring a clean application.
Q: What is the best way to clean up tools and any drips after gluing?
A: After applying the adhesive, clean up your tools and any drips with a clean cloth before the glue dries. If the adhesive has already cured, carefully cut away any excess with a sharp tool.
Q: Can I use super glue for bonding leather to wood?
A: Yes, many varieties of super glue, such as Lepage Super Glue Ultra Gel, are suitable for bonding leather to wood. These glues dry clear and stay flexible, making them ideal for such tasks.
Q: Is it important to consider the porous nature of the materials?
A: Absolutely. When working with porous materials like leather and wood, using a glue and contact adhesive that penetrates and bonds effectively is crucial. This ensures durability and prevents the bond from failing over time.
Q: Should I be concerned about discoloring the leather?
A: Some adhesives may discolor the leather, so it’s important to test the glue on a small, inconspicuous area first. This will help you determine if the adhesive alters the appearance of the leather.
Q: Are there any related articles or products that could help with this project?
A: Yes, you may want to explore related products like 3M 77 or Loctite Super Glue for specific applications. Additionally, reading related articles on techniques and tips for gluing leather to wood with this helpful guide can enhance your understanding and results.


