


The beauty of joining polystyrene items lies in using the correct method as well as the appropriate materials. This is because polystyrene, which is commonly used in making crafts, packages, or creating models due to its lightweight and usefulness, demands a certain kind of glue. These allow you to smoothly and seamlessly make firm structures. So, understanding the appropriate method of gluing the polystyrene is very essential for any typical DIY project, model formation work or any repair work involving polystyrene. Here in this report, we shall discuss some of the optimum adhesives for polystyrene and devices to let you form a good bond. Get ready to understand some of the tips and knowledge that will enhance the effectiveness and not waste efforts on your polystyrene work.
Understanding the Polystyrene Foam
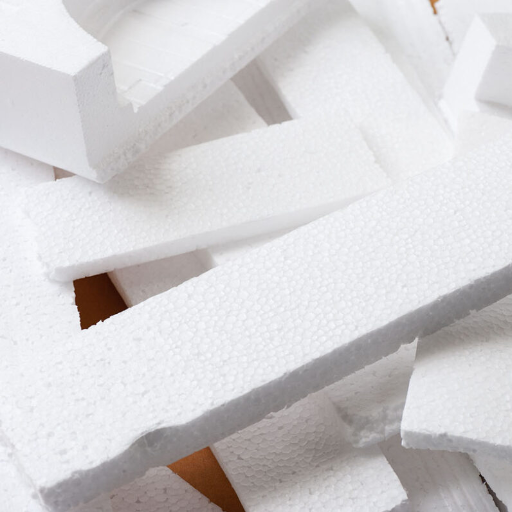
Styrofoam is a lightweight, strong, versatile material used for various purposes such as insulation, packaging, and handicrafts. Styrofoam is expanded polystyrene (EPS) or extruded polystyrene (XPS), both of which are polymerized from styrene. It is preferred as it has excellent heat insulating, waterproof, and is easily shaped or cut, thus making it applicable in many areas. However, the material is very smooth and therefore porous, so in order to bond the material, one would require special adhesives. Understanding these aspects therefore is very important as far as working with styrofoam is concerned.
What is Polystyrene?
Polystyrene is a synthetic aromatic hydrocarbon polymer produced from the monomer styrene, which is based on petroleum. It is a light, flexible, tough material that finds many applications because of that. This material is available in foam or solid state, and the solid one is commonly applied in packaging, eating utensils, and also some laboratory wares, while the foam varieties like expanded polystyrene (EPS) and extruded polystyrene (XPS) mostly serve as thermal insulators and packaging materials. It is because of its high strength-to-weight ratio, ability to resist liquids and certain acids or alkalis, as well as the capability of being moulded into complex shapes, that polystyrene is so widely used in many sectors. However, this desirable trait of polystyrene is its environmental consequences. It is very durable and almost impossible to get rid of. This, therefore, calls for modification of recycling techniques and consideration towards environmentally friendly substitutes for use within a specified period of time.
Types of Polystyrene Foam
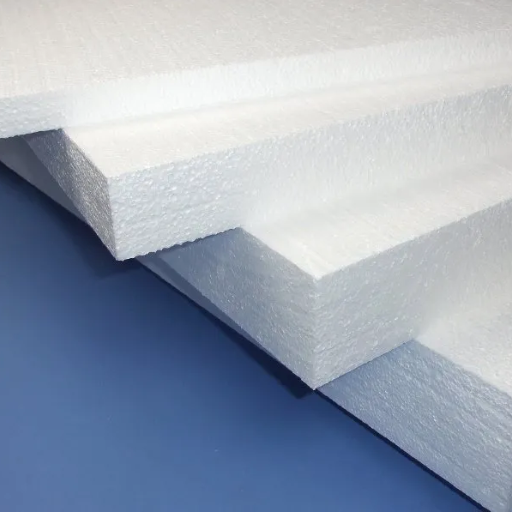
- Expanded Polystyrene (EPS): EPS is a type of foam that is not heavy, but rigid and closed-cell. It can be used for thermal insulation, for safety packaging purposes as well as in building materials. The foam can be designed by means of what is called R values and this range falls between 3.6 and 4.2 for every inch of thickness. Because of good resistance to moisture entry, EPS is readily inexpensive because of its application in walls, roofs, and cool rooms.
- Extruded Polystyrene (XPS) – XPS weighs more than EPS and offers a softer and less homogeneous surface. It entails an extrusion process that serves to increase both the durability and the compressive strength. Its core density especially makes it appropriate for use in areas that need strong wood-type insulation, such as the foundation walls, on or under slabs on ground, and even batts in refrigerated cabinets. It is slightly more efficient thermally in terms of the performance of this product, R values range between 4.5 to 5.0 per inch respectively.
- High Impact Polystyrene Foam (HIPS): This type contains rubber or any other additions that increases the toughness and flexibility of the foam compared to other kinds of polystyrene foams. The two main applications are in the food packaging sector to make yogurt pots or disposable cutleries and in the strength-requiring production of electronics and medical devices.
- Molded Polystyrene Beads: This type consists of expanded beads that have been shaped by steam and pressure into the desired form. The end products such as packing peanuts and lightweight construction blocks are efficient in energy retention and also excel in absorbing impact force.
In conclusion, every kind of polystyrene foam possesses distinct performance benefits and overt and implicit impacts; hence, it is necessary to match the material that will be used with the required action and environmental demands for a given purpose.
Applications of Polystyrene in Crafts and Repairs
- Model Building and Prototyping
Expanded polystyrene (EPS) and molded styrene sheets are often used in building architect models, miniature models and compound and fully functional models. The shapes are easy to cut and shape, and the surfaces are easy to paint so the designers achieve their desired results. It is especially the quality and lightness of expanded polystyrene (EPS) that makes it the preferred material for these applications.
- DIY Insulation Projects
The capacity for heat retention in polystyrene is ideal for construction, making it easy to line small containers and even fill in gaps where insulation is incomplete. This advantage is used to maximize the effectiveness of extruded polystyrene foam (XPS) as it has a higher R value.
- Sculpting and Decorative Crafts
Artisans and craftmakers use polystyrene as material for sculptures, crafts, and decorative items. It is a very useful material when dealing with projects that require detail because it can be easily shaped with hot wire cutters or craft knives.
- Repair of Lightweight Outdoor Equipment
Lightweight marine crafts, buoyancy aids and even insulated cool boxes can be repaired using polystyrene as it makes a great filler. Such capabilities coupled with water resistance make polystyrene filling material of choice for applications that use water.
- Packaging Material in Custom Repairs
Polystyrene foam finds extensive application in custom designing shipping containers meant to carry objects that are delicate. It serves as a cushion protecting the item by absorbing all the shocks that may occur.
Choosing the Right Adhesive
Certain requirements should be met when polystyrene adhesive is being purchased: final application, supported by the available information and its properties. It is not recommended using solvent adhesives as they are capable of dissolving or attacking polystyrene. In this case, it’s better to find a solution rather than different adhesives like epoxy, polyurethane glue, or particularly polystyrene adhesives. These give long-lasting bonding without weakening the material. For such charges as light applications, double-sided foam tape or hot glue will be most suitable as well. One should always ensure that the correct adhesive is being used for the specific conditions, such as temperature or humidity, to enable it to last for a longer period of time.
Best Glue for Polystyrene
Good surfacing techniques must be employed for the most effective adhesion of polystyrene. It is important to take care that surfaces on which the concerned adhesive is to be applied are free from dirt, any form of moisture, and there is no grease on them. As for epoxy or polyurethane glues, mix only if necessary and spread evenly on one or both surfaces using a thin brush or a clean handheld applicator. In hot glue, ensure the gun is at a very low temperature as high temperatures easily damage polystyrene. Also, note that when using designated glues for polystyrene, follow the glue manufacturer’s guidelines related to application thickness and curing time. Place both surfaces pressed together and apply force to the joining points, for example by using clamps or weights, in order to enhance the bond. It is also important to be patient and give the adhesive time to cure, typically between 24 hours and 48 hours, depending on the adhesive used, to get a connection that is strong and reliable. Appropriate ventilation should also be maintained during use of the adhesive, especially if it is solvent-based, so as not to create health hazards.
Comparing Different Adhesives
|
Adhesive Type |
Strength |
Application Method |
Durability |
Suitable Conditions |
Drying Time |
Best Use Cases |
|---|---|---|---|---|---|---|
|
Epoxy |
Very strong |
Two-part mix |
Excellent |
All temperatures/humidity |
Moderate |
Structural bonds |
|
Polyurethane Glue |
Strong |
Apply directly |
Good |
Moist conditions |
Slow |
Wood, foam, and uneven surfaces |
|
Polystyrene Adhesive |
Medium |
Brush or nozzle |
Fair |
Low heat environments |
Fast |
Foam-to-foam bonding |
|
Hot Glue |
Weak to medium |
Heated applicator |
Moderate |
Dry, controlled conditions |
Very fast |
Temporary fixes, crafts |
|
Double-sided Foam Tape |
Medium |
Press-on |
Moderate |
Indoor use |
None |
Posters, light decorations |
|
Silicone Adhesive |
Strong, waterproof |
Direct application |
Excellent |
Extreme temperatures |
Slow |
Sealing and waterproofing |
|
PVA Glue |
Weak to medium |
Direct application |
Poor |
Dry environments |
Slow |
Paper and lightweight crafts |
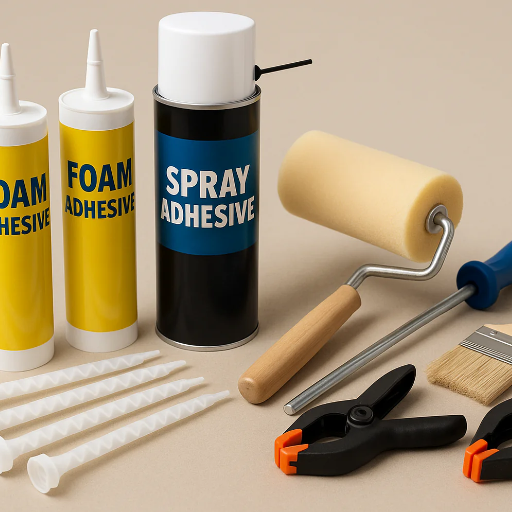
When to Use Spray Adhesive
Undoubtedly, spray adhesive is the perfect choice when the activity requires an easy and swift application on a large area of surface, for instance. And it is very useful in the sectors where light materials like fabric, paper, foam, and thin plastics are involved. Traditional uses of a spray adhesive may vary from linking up snaps and mounting to lining up a creative graph paper. This is because a spray adhesive applied as an aerosol enables very small and uniform application all around, hence becoming liable to any defects like adhesive surplus or poor adhesion.
In situations where one would require temporary or repositionable bonding, this glue would be effectively utilized seeing that many of its formulations allow for tweaks to be made to the bond before it fully dries. Spray adhesive scores high on spray adhesive vs liquid adhesive, because of its short drying time – hence, it is used in time-constrained activities. However, it’s not a bait for any moisture or heat since, for the bond to be between many years, spray adhesives lack the good qualities of silicone or even epoxies. When applying spray adhesive, it is important to avoid inhaling it in too large amounts, as a high concentration of aerosolized particles is dangerous to one’s health.
Step-by-Step Guide to Gluing Polystyrene
- Prepare the Surface
The surface of polystyrene must be free of dust or dirt and dry. Before it is, and can cause the adhesive to separate, you will need to wipe the surface with a Damp cloth. I advise that you take care when selecting chemicals, as some contaminants might interfere with the adhesive.
- Choose the Appropriate Adhesive
When looking to choose an adhesive for sticking polystyrene, one should consider the use of polystyrene adhesive, silicone adhesive or epoxy. Try to avoid using any adhesive with solvents as the solvent can break down the material.
- Apply the Adhesive
Put some adhesive in one of these, surfaces with the help of a brush or a nozzle if the label of the product specifies so. This is done to avoid the spillage after the attachment.
- Join the Pieces
Then respectively fix the two pieces of polystyrene back together by pressing them together, but this time against each other gently and firmly. Make sure to secure the alignment position so as not to move the piece at any other area as some adhesives dry fast.
- Secure and Allow to Cure
Use clamping devices, weights and then apply gentle pressure to maintain the position while the adhesive sets. Comply with the curing period indicated on the adhesive’s packaging for you to achieve the best bonding.
- Inspect the Bond
Preparing the Surfaces
It is very important when it comes to using polystyrene materials that the surface preparation is appropriate. There has to be a proper cleansing of any surfaces to remove dust or grease as well as contaminants that can compromise the sticking capability of adhesives, to start the whole process, use a soft piece of clothing and the proper solvents that won’t eat away at polystyrene just like isopropyl alcohol for quick removal of such dirt. After cleaning the surface, scatter the surface to be cured with the sealing agent so that no residual moisture can spoil it. To increase adhesion, it is good to scratch or roughen the surface manually using a fine-grit sandpaper, which is often in the 180-240-grit range. This increases the surface area and promotes better interaction between the adhesive and the material.
Excessive abrasion should be avoided as it might cause weakening of the polystyrene or even alteration of its structure. One should always read up on the data sheets concerning the materials alongside the instructions on the adhesive in question to determine the bondability level by adhering to what is suggested. The easy removal of the coatings is achievable by being keen on surface preparation.
Applying the Glue
In this respect, work on the following: use an applicator that ensures thin-toed cementing; this could be a brush, a spatula, or a syringe for low-viscosity types of the adhesive. The thickness of the adhesive layer is really crucial if the bonding strength of joints is supposed to be optimal. One must endeavor to apply an adhesive film anywhere from 0.1 – 0.2 mm, which is generally where no bubbles are observed, and for most applications. Regarding polystyrene, it is recommended that solvent-based adhesives or cyanoacrylate adhesives are used due to their short curing time and the superior strength they can guarantee when bonded. Pressure should remain constant on the bonded surfaces for the time stipulated by the adhesive manufacturer, as this is the only assurance that the materials bond exactly as intended. Such processes are temperature and humidity-sensitive during application, and this aspect should be kept under control. When observing safety rules for the adhesive, also make sure that the storage recommendations contained in the expected adhesive’s SDS are adhered to.
Clamping and Curing Time
The duration within which an adhesive is clamped and the method of clamping the surfaces play a big role in the success or failure of the adhesive bond. Most industrial class adhesives are clamped using pressures within the range of 1 to 2MPa for optimal bonding. The duration of the cure also varies considerably depending on the type of adhesive and the environmental conditions. Some of the epoxies have typical cure times of 24 hours at room temperature, whereas other types of adhesives, the cyanoacrylates, for example, can have very fast curing times of less than a second but take up to 24 hours to achieve reasonably cured strength.
It should be highlighted that under high temperatures, curing durations may be shortened when heat-activated adhesives are utilized and are typically optimal at the curing temperature of between 150°F and 300°F. However, such concerns need to be weighed against the overall properties of the materials being bonded so as to avoid any form of thermal destruction. The reverse effect is expected when the atmospheric conditions are cold; curing of the more-initiated adhesives, such as polyurethane, would speed up. It is always necessary to check the clamping and curing times of the specific formulation, and also to check the use of the adhesive in such situations with the manufacturer, and make sure that the exact doses are used.
Common Mistakes to Avoid
- Incorrect Surface Preparation
Lack of proper clean up and treatment of surfaces can result in poor adhesion effects, with the key principle being that every effort should be made to make sure that the surfaces are free of any contamination such as dirt, oil, or even previously used adhesive.
- Using Excessive Adhesive
Even if there is no negative impact on bonding strength, surplus might cause incorrect curing of adhesive, poor adhesion, or even total loss of composite ductility. Add no more than what it is stated in the goods instructions.
- Neglecting Environmental Conditions
It would be irresponsible not to point out that the limitations with regards to the temperature and humidity outperform the curing requirements. Measures should be taken to ensure that the requirements are fulfilled for the place of work providing the service.
- Ignoring Product-Specific Instructions
The process of not following the right guidelines as stated on the adhesive could mean a lot of the misuse of the adhesive especially if the curing agents are not mixed in right amounts. So all curing durations and the necessary mixes should be fixed.
- Insufficient Clamping or Pressure
Using the Wrong Type of Adhesive
Using the wrong type of glue is a common pitfall that can harm a project’s chances of doing well. This is because the adhesive that is not suitable for the material or environment reduces bonding, as each adhesive is formulated for various purposes with differences in the bonding strength, flexibility, and heat and moisture resistance. Epoxy, for example, can very easily join metals and plastics together to form bonds that are very strong and potent; however, super glues, also known as cyanoacrylates, are remarkable for small, very accurate applications and for sealed, impervious surfaces. This concept of using wood glue and expecting it to work on materials such as glass and metals as a building adhesive can best be described as a gross misunderstanding, resulting in weak joints. Moreover, adhesive use is also dependent on the composition of the adhesive—the fact that some adhesives release gas while others degrade upon exposure to certain temperatures or even conditions. Thus, it is important to refer to the technical data sheet (TDS) of the adhesive in question before using it to ascertain if certain values that would affect outlier product performance are given and, where applicable, remain within the residual tolerance of the adhesive in order to get an effective bond. Mismanagement of applications with respect to the channel entails lowering of competitiveness, escalating costs, and increasing necessity for repairs. Adhesive properties have to be clearly understood for their best performance in the application.
Neglecting Surface Preparation
Neglecting proper surface preparation can be said to be the major culprit when the issue of adhesive failure is discussed. The importance of preparing the surfaces well is to ensure that all the surfaces are clean and free from dust, grease, and moisture, hence ensuring there is maximum adhesion. Advancements in material science also obligate the engineer to ensure that all micro contaminants have been removed because even the smallest of residues in the surface can hinder adhesion due to poor surface wettability of the adherend and lack of viscoelasticity of the adhesive. Mechanical methods of surface preparation, such as abrasion or sandblasting, also promote the effectiveness of the use of adhesives because of increased surface adhesion. Lastly, there are chemical methods, such as primers and surface cleaning agents, which are specifically used to ensure that the surface is compatible with the adhesive, and this is usually done at the molecular level. Disregarding the above will end up reducing the structural behaviour of the materials, peeling of the materials due to the force applied to the adhesive, and the loss of durability in due course.
Expert Tips for Successful Bonding
- Ensure Proper Surface Preparation
Prepare surfaces and avoid using adhesive materials until they have been cleaned. The bonding material might start breaking away as dirt starts contaminating the adhesive. For tear-resistant materials, one can employ mechanical or chemical surface preparation for a better bonding surface.
- Select the Right Adhesive
Choose the right adhesive for a particular combination of the materials and the conditions in which they will be used. This includes consideration of the load that the adhesive will bear, the expected environmental exposure and the time the curing will take.
- Follow Manufacturer Guidelines
You should also follow the instructions published by the manufacturers of the adhesives which will include the temperature at which you are going to carry out the application, the curing period and the thickness that you aim to use in every layer.
- Test Bond Strength
For any project of critical nature, perform as small-scale bonding tests prior to engaging in full-scale bonding. This aids in shading off potential failure that might emanate from every rudimentary project.
- Control Environmental Conditions
Ensure that there are proper conditions within the working zone such as to control bonding, e.g. temperature and humidity as bond strength drastically falls and this may have side effect on the adhesive load resistance in long run.
Best Practices for Gluing Polystyrene
- Choose the Correct Adhesive
Use an adhesive suitable for use with polystyrene. Such adhesives can be cyanoacrylate (super glue), epoxy, or special polystyrene cement. They are good at compatibility with polystyrene and have low material degradation. Do not use adhesives based on solvents, as these can dissolve polystyrene.
- Prepare Surfaces Properly
Make sure that both ends to be bonded are free from moisture and oil. To assist in helping better bonding, lightly sand to increase grit; For inner parts or contours, use a non-woven wipe or isopropyl alcohol for proper surface cleaning before applying glue.
- Apply Adhesive Evenly
Coat the adhesive as thinly and on an even layer so that no areas may be subjected to an unequal force as the adhesive dries. Furthermore, overcoating is detrimental since it delivers uneven film curing and creates this weakness. In the instance of wide-open surface areas, make use of a notched spreader to apply the adhesive evenly.
- Utilize Adequate Clamping
Bringing the pieces together and holding them together while the adhesive cures guarantees that the bond will marry properly and also gives rise to the elimination of air spaces. Avoid excessive force, and apply only as much as allows the bond to be strong without distorting the polystyrene or spilling too much of the adhesive.
Tools and Materials to Consider
- Cutting Tools
Engage in the use of utility knives which have replaceable blades or purposeful heated wire materials that are aimed at cutting extruded polystyrene. The mentioned appliances are beneficial to use – their operating considerably diminishes material complication, tidies up the material environment and more prominently adds to better final scores. For improved accuracy during straight cuts, a steel ruler or a stihl saw cutting guide should be used.
- Adhesives
Opt for adhesives like cyanoacrylate, epoxy or polyurethane-based which will be polyethylene compatible. And bearing in mind the molecular makeup of the two materials elucidated, adhesives are suggested to be solvent free to avoid any detrimental effects on the material.
- Spreaders
Dispense adhesives through a notched spreader especially on large surfaces to allow uniform application of the adhesive. Make sure that the size of the notches is well suited and uniform by the recommended spread pattern to avoid incorrect distribution and curing of the adhesive.
- Clamps and Weights
Clamps or weights can be used to maintain light and uniform pressure during the cure cycle as subwoofers will fail to keep the same line. Be sure that the depth of the edges is not very deep, Protecting the edges of the materials with materials made of soft pliable materials.
- Surface Preparation Supplies
Reference Sources
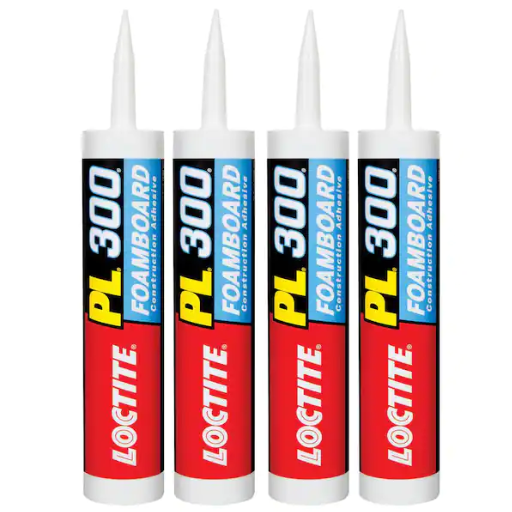
- How to glue Styrofoam: Tips for Styrofoam and polystyrene: This guide recommends using spray adhesives like Loctite Spray Adhesive Multi-Purpose for gluing Styrofoam or polystyrene. It emphasizes the importance of choosing adhesives that do not contain solvents, as these can damage the foam.
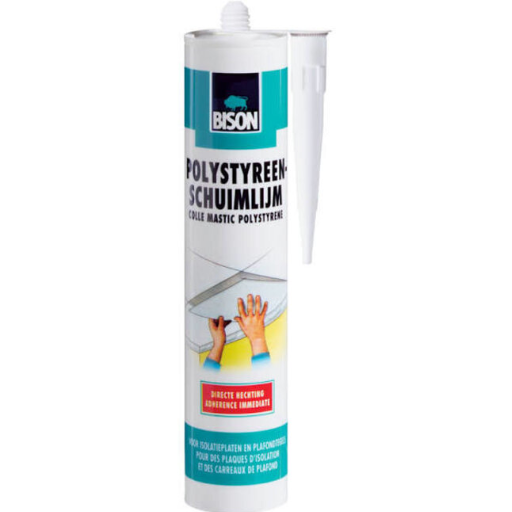
- What adhesive should I use to glue rigid polystyrene: The discussion highlights the use of water-based “project adhesive” or “panel adhesive” for bonding rigid polystyrene. These adhesives avoid solvents that could dissolve the foam and are suitable for insulation and other applications.
- The best glue for polystyrene: This article suggests PVA adhesive (white glue or wood glue) for bonding polystyrene to porous materials like wood, plasterboard, or MDF. It also discusses the compatibility of different adhesives with polystyrene.
Frequently Asked Questions (FAQs)
Q: What type of glue is best for polystyrene?
A: The best type of glue for polystyrene is a solvent-based adhesive, such as styrene cement, which is specifically designed for use with polystyrene materials. Alternatively, you can use a cyanoacrylate adhesive or super glue, but it’s important to ensure that it does not dissolve the foam. Epoxy is another option, offering strong bonds for larger projects. Always check the packaging to confirm compatibility with polystyrene. For crafts, you may also consider using hot glue, but be aware of the potential for melting the foam. Ultimately, choosing the right glue depends on your project size and application method.
Q: Can you use hot glue on polystyrene?
A: Yes, you can use hot glue on polystyrene, but there are some important considerations. Hot glue guns can reach high temperatures, which may melt or deform the foam if applied too liberally or directly. It’s advisable to use a low-temperature glue gun for more delicate polystyrene projects. Also, be sure to apply the hot glue sparingly and allow it to cool slightly before attaching the pieces together. While hot glue is convenient for quick fixes, it may not provide the strongest bond compared to other adhesives designed specifically for polystyrene. For more durable applications, consider using a specialized adhesive.
Q: How long does it take for polystyrene glue to dry?
A: The drying time for polystyrene glue can vary depending on the type of adhesive used. Solvent-based glues generally dry relatively quickly, often within 10 to 15 minutes, but complete curing may take several hours. Cyanoacrylate glue, or super glue, typically sets in seconds but may take longer to fully bond, especially if the surfaces are not perfectly aligned. Epoxy adhesives often require a longer drying time, usually around 30 minutes to an hour for initial setting, with full strength developing over 24 hours. Always refer to the instructions on the adhesive packaging for specific drying and curing times. Patience in letting the glue cure can lead to a stronger bond.
Q: Is it safe to use polystyrene glue indoors?
A: Using polystyrene glue indoors can be safe, but it’s crucial to ensure proper ventilation. Many solvent-based adhesives emit fumes that can be harmful if inhaled in enclosed spaces. Always work in a well-ventilated area or use a mask if necessary. Water-based adhesives are a safer alternative for indoor use, as they have lower odor levels and fewer harmful emissions. Additionally, keep any adhesive products out of reach of children and pets to ensure safety. If you’re sensitive to chemicals, consider using non-toxic alternatives designed for crafting with polystyrene.
Q: Can you paint over glued polystyrene?
A: Yes, you can paint over glued polystyrene, but there are some key points to keep in mind. First, ensure that the glue has fully cured before applying any paint to avoid any reactions that could damage the foam. Use acrylic paints or water-based paints, as oil-based paints may dissolve polystyrene. For a smoother finish, consider priming the surface with a suitable primer designed for foam materials. This will help the paint adhere better and enhance the overall appearance. Always test a small area first to ensure compatibility between the paint and the polystyrene surface.


