Polystyrene is famous for its lightweight and insulating characteristics making it useful in packaging, construction, and even crafting. However, bonding polystyrene is quite challenging due to its particular chemical composition and structure. It requires meticulous preparation, correct selection of adhesive, and precise application techniques. The goal is to articulate the most relevant aspects to consider when gluing polystyrene together. By the end of this article, readers will have adequate insight into adhesive selection, surface preparation, application techniques, and durability of the bonds, ensuring desired strong and reliable bonds. Be it a professional endeavor or a creative pursuit, this article acts as a definitive guide to engaging with polystyrene seamlessly.
What Is the Best Glue for Polystyrene?

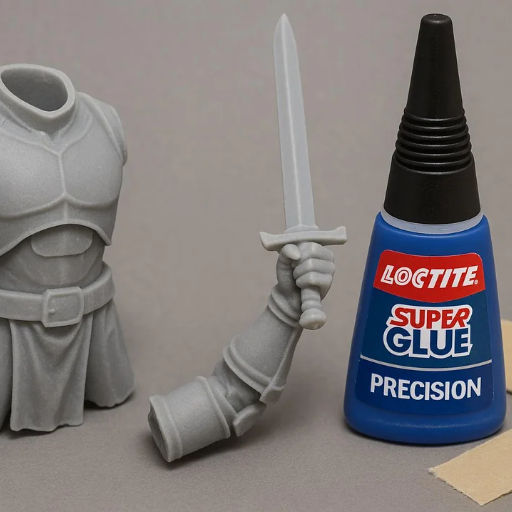
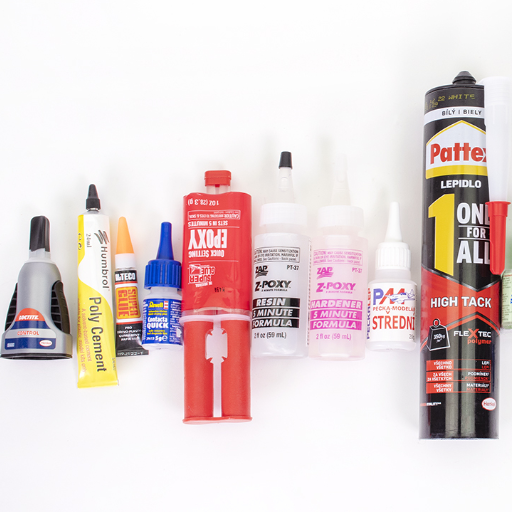
Polystyrene glue selections need to take into account the application intended along with any environmental factors relevant. In general use cases, cyanoacrylate solvent-based adhesives, or epoxy adhesives superglue the surface very effectively. However, styrene craft glues or silicone adhesives are much better for sensitive and precise bonding – since polystyrene is very sensitive to certain solvents, it’s better to avoid damaging it. Be sure the selected glue will be able to endure the mechanical or thermal resistance that will be put on it.
Understanding Polystyrene and Foam Types
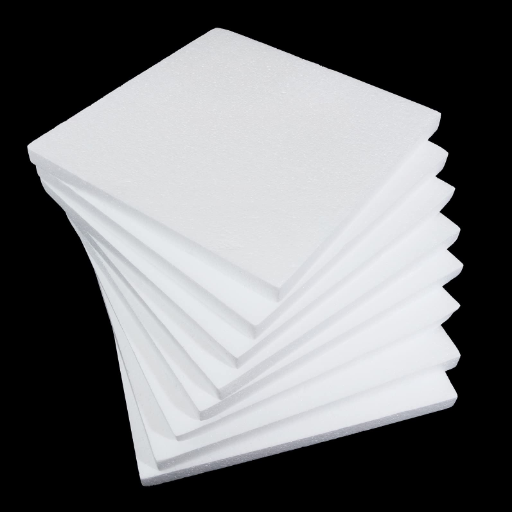
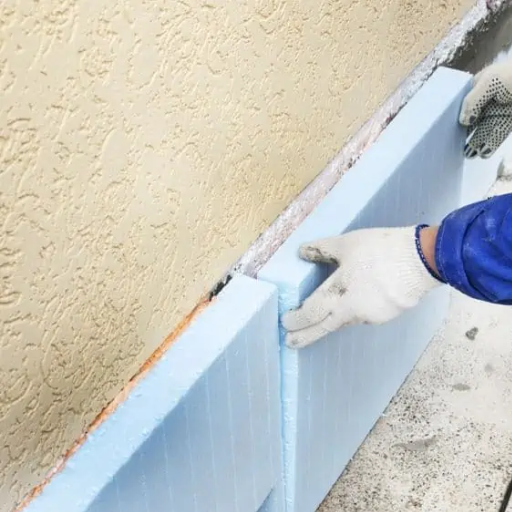
Polystyrene is a multi-use polymer most commonly found in expanded polystyrene (EPS) and extruded polystyrene (XPS), both having unique qualities. While EPS is light and made up of small beads making it perfect for insulating and packaging, XPS possesses a more dense and uniform structure which provides greater durability and thermal resistance. Both types are moisture resistant, though XPS has greater compressive strength making it ideal for load-bearing applications.
Polystyrene foams are also used in craft or construction projects, and they offer strategic bonding difficulties due to their porous and delicate nature. The specific type of polystyrene dictates the required adhesive to avoid degradation during the bonding process. Furthermore, for both EPS and XPS, their thermal and mechanical properties as well as their level of environmental exposure have to be examined to optimize project results.
How to Choose the Best Adhesive for Your Project
The selection of the right adhesive for polystyrene hinges on the specific characteristics of the material along with the requirements of the given task. For expanded polystyrene (EPS), use lightweight adhesives like spray adhesives or. specialized polystyrene glues are preferred to not dissolve the material. The selected glues are designed to securely bond the polystyrene foam without having any harmful chemical reactions. For extruded polystyrene (XPS), stronger adhesives like polyurethane glue are ideal, particularly for projects that require high levels of strength and durability.
Also, environmental considerations like temperature, humidity, and UV exposure should impact your selection. For outside applications, it is critical that the glue can withstand aggressive mechanical actions over time. As a rule of thumb, polystyrene solvent-based adhesives should be avoided as they will damage both kinds of polystyrene. Always observe the manufacturer’s instructions regarding compatibility and perform a small test for optimal performance beforehand. In doing so, a project and material specification analysis can help pick the right adhesive that guarantees a strong bond.
The Role of Expanded Polystyrene in Adhesion
Expanded Polystyrene (EPS) is a Rigid, pliable, lightweight, closed-cell foam utilized in a wide range of applications due to its structural and thermal insulation features. When choosing adhesives for EPS, care must be taken about their delicate nature due to the risk of dissolving in certain solvents. Preferred adhesives such as water-based glues, epoxy resins, and polyurethane glues are more compatible as they offer strong bonds without destroying the material. Upon construction, EPS is easily integrated with many construction applications, especially when used with epoxy-based adhesives which offer enhanced resistance to temperature, moisture, and mechanical stress during service.
An EPS analysis shows that foam integrity is reasoned not to use solvent-base adhesives. More favorable is the use of gripping adhesive and other sorts of adhesive-bonding agents which operate through polymer curing and would provide better results in cases of structural integrity. Optimum values may be achieved only if prior estimation and following specifications of the producers is taken into account. Provided the features of the material and the adhesive are well controlled, EPS will bond with great results.
How to Glue Styrofoam Together Safely

To glue Styrofoam (expanded polystyrene, EPS) together safely, begin by choosing an adhesive that will not react with EPS leading to material deterioration. Water-based glues, epoxy resins, and polyurethane glues are often the best choices as they form strong bonds without corroding the material. Solvent based adhesives should never be used as they will result in the destruction of the foam structure.
All surfaces to be joined must first be cleaned and prepared to ensure all dust, grease, or any foreign substances are removed. The adhesive must be put on using a tool such as a brush or an applicator, paying attention to avoid excess application which may lead to irregular bonding. Allow sufficient curing time as determined by the adhesive manufacturer for strength to be maximized. If the environment has the possibility of changing temperatures or levels of moisture, stronger epoxy-based adhesives are more efficient. Best practices offer better results when safety guidance and recommendations are followed.
Steps to Press the Surfaces Together for Maximum Bond
- Align the Surfaces Precisely
Start by carefully aligning the two surfaces to ensure they are positioned exactly as desired. Misalignment can compromise the bond and may require reapplication of adhesive.
- Apply Even Pressure Across the Surface Area
Once aligned, press the surfaces together firmly and evenly. For best results, use clamps, a heavyweight, or a pressing tool to maintain consistent pressure across the entire surface area to ensure the adhesive spreads uniformly and creates an optimal bond.
- Avoid Disturbing the Bond During Curing
Maintain pressure and ensure there is no movement or separation of the joint during the curing period. Reference the adhesive manufacturer’s guidelines for the required curing time to achieve full strength, as curing times can vary depending on the specific adhesive.
- Monitor Environmental Conditions
Ensure that the bonding process takes place in a stable environment, free from extreme temperature fluctuations or high humidity, unless the adhesive is specifically rated for such conditions. This helps to avoid weakening the bond or prolonging curing time.
- Inspect the Bond After Curing
Once the curing is complete, verify the integrity of the bond. Check for any gaps, incomplete adhesion, or issues that might affect the durability of the connection. If necessary, reapply the adhesive and repeat the process for weak areas.
Using Spray Adhesive for Even Coverage
Spray adhesive is an effective tool for achieving uniform coverage over a variety of surfaces, provided it is applied correctly. To start, ensure the surface is clean, dry, and free from dust or grease, as contaminants can affect adhesion quality. Shake the spray can thoroughly according to the manufacturer’s instructions to ensure the adhesive is properly mixed. Maintain a consistent distance of 6 to 8 inches from the surface and use a sweeping motion while spraying to avoid over-saturation or uneven application. Apply the adhesive evenly and allow it to become tacky, which generally takes 30 seconds to a few minutes, before adhering the surfaces together. This tack time ensures a stronger bond and minimizes the likelihood of drips or pooling. Always work in a well-ventilated area to mitigate exposure to fumes and consider using protective gear, such as gloves and masks, for safety.
Tips to Ensure a Strong Bond
- Prepare Surfaces Properly
Thorough preparation is crucial. Ensure both surfaces are clean, dry, and free of oils, dust, or debris. For non-porous materials, lightly roughen surfaces with sandpaper to enhance the adhesive’s grip.
- Apply Adhesive Evenly
Use the adhesive as directed, ensuring a uniform application to prevent weak spots. Avoid excessive adhesive, as this can cause pooling and reduce bond strength.
- Allow Proper Tacky Time
After applying the adhesive, wait the recommended amount of time for it to become tacky. This varies by product but typically ranges between 30 seconds and a few minutes. Tackiness ensures maximum bonding performance.
- Use Appropriate Pressure
Align the surfaces carefully and pressAn error occurred during generation. Please try again or contact support if it continues.
What Are the Two Common Methods for Gluing Polystyrene?

- Using Solvent-Based Adhesives
Solvent-based adhesives chemically dissolve the surface of the polystyrene, creating a strong fusion between the bonded parts. These adhesives are ideal for achieving a seamless finish but require careful handling due to their flammability and potential fumes.
- Using Hot Melt Glue or Epoxies
Hot melt glue and epoxy-based adhesives provide a quick and durable bond for polystyrene. While hot melt glue is suitable for lightweight applications, epoxy ensures greater structural integrity for heavier or load-bearing projects.
Method 1: Using PVA Adhesive
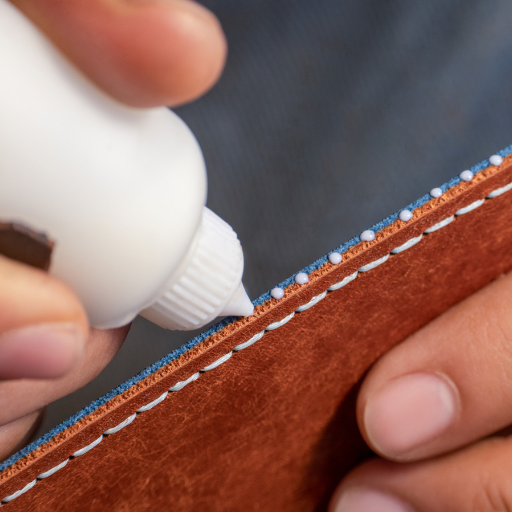
Polyvinyl acetate adhesive, widely known as white glue, works well when bonding polystyrene. Begin by cleaning both surfaces to be free from any dirt and contaminants. One of the surfaces should have a thin, uniform layer of PVA adhesive. For optimum adhesion of polystyrene surfaces, apply force and keep it constant manually or with clamps for a minimum of 30 minutes; while the adhesive will fully cure within 24 hours, ambient conditions may increase this. PVA glue yields strong non-waterproof bonds, however, the material should not be exposed to water since PVA adhesives are water-soluble.
Method 2: Applying Foam Board Adhesive
Foam board adhesive is made for joining polystyrene and similar foam material, ensuring a robust and moisture-proof seal. Before you begin, make sure the surfaces are dry and clean. Using a caulking gun or the most suitable applicator for the adhesive, apply it in an even fashion in rows, spaced apart, or in a continuous line. Now, firmly press the surfaces together to make sure the adhesive is spread equally and touches both surfaces. As it is with other adhesives, foam board adhesive has a set time which is quicker than most other types. Whereas some sets can take up to an hour to touch dry, foam board adhesive can be touch dry in 20-30 minutes, but isn’t fully cured for 24 hours barring the product and environmental conditions. In high moisture and heavy-duty conditions, this bond works exceptionally well. Remember to check the instructions of the manufacturer to get the best possible results.
How Does the Dry and Cure Process Work?

The process of drying refers to the first step in which the adhesive at the surface loses moisture and starts feeling sticky. In the case of foam board adhesives, this stage is reached in about 20-30 minutes, although it still depends on the product and external factors like temperature and humidity. Curing refers to the chemical processes that follow and lead to the solidification of the adhesive and bond formation. The adhesive is fully cured for so long as to achieve maximum bond strength for up to 24 hours. Always check the manufacturer’s recommendations for the most accurate drying and curing periods for the best results.
Understanding the Dry Time for Polystyrene Foam
Polystyrene foam adhesives tend to have a comparatively longer dry time, usually falling between 20 to 30 minutes. The timeframe mentioned previously is quite fuzzy and fluctuates with the types of adhesive, the conditions of the environment, and the surface area of application. Extreme temperatures and very high humidity can lengthen the timeframe whereas moderate humidity at temperatures between 60 degrees Fahrenheit and 80 degrees Fahrenheit tends to encourage faster drying. During this period, the adhesive can bond with the utmost surface adhesion available on a surface that is sticky. There should be no movement or load on the surface of the bond at this stage otherwise it could hamper the bond. Regardless, the manufacturer specifications and environmental guidelines should always be followed for most pull.
How to Ensure Proper Cure for Durable Results
The gaining cure of adhesives applied to polystyrene foam requires an orderly procedure and controlled environment. A stable zone of 24 to 72 hours usually does the job, but it differs concerning the adhesive type and manufacturer’s instructions. During the curing period, make sure that the bonded surfaces do not move as this will impose undue stress on the joint. Temperature and humidity greatly influence the curing process—between Dry bulb temperature of 60-80 Degrees Fahrenheit with moderate humidity is always favorable. Furthermore, too much or too little moisture can affect the rate of curing and bond strength. Dissipation also facilitates curing as it gets rid of solvent or moisture left in the adhesive. There are always instructions that must be followed, as all adhesives are different, their formulation will determine the procedure and timeline. Enhancing the performance of the bond improves the durability, stability, and strength of the connection.
What Expert Tips Can Improve Adhesion?

- Surface Preparation: Ensure surfaces are clean, dry, and free from contaminants such as dust, oil, or grease. Abrading the surface with fine sandpaper can increase texture, promoting stronger mechanical bonding.
- Adhesive Selection: Choose an adhesive formulated specifically for the materials being bonded. Refer to the manufacturer’s recommendations for compatibility and performance.
- Controlled Application: Apply the adhesive uniformly in the appropriate quantity—excess adhesive can weaken the bond by creating air pockets or uneven curing.
- Environmental Conditions: Maintain optimal temperature and humidity as specified by the adhesive’s technical data sheet (TDS). Extreme conditions can hinder curing and adhesion strength.
- Clamping and Alignment: Use clamps or weights to ensure consistent pressure and proper alignment during curing. Maintaining stability for the recommended curing time is critical.
- Curing Time and Method: Adhere to the prescribed curing time and method indicated by the adhesive manufacturer. Avoid disturbing the bond prematurely.
By adhering to these guidelines, adhesion performance can be significantly enhanced, ensuring stronger and more durable connections.
How to Bond Porous Surfaces Effectively
Bonding porous surfaces effectively requires a tailored approach to address the unique challenges posed by their absorbent nature. Below are the key steps to ensure optimal adhesion:
- Surface Preparation: Properly clean the porous material to remove dust, debris, or any contaminants. For certain applications, light sanding may help create a more uniform bonding surface. After surface preparation, ensure that the material is dry since moisture within porous surfaces can interfere with adhesive curing.
- Adhesive Selection: Use adhesives specifically designed for porous substrates, such as polyurethane, epoxy, or specialized PVA glues. These adhesives penetrate the pores and create a strong mechanical bond. Refer to the adhesive’s technical data sheet (TDS) for compatibility with the material being used.
- Primer Application: For improved adhesion, apply a primer designed for porous surfaces. Primers help to seal the pores and reduce excess absorption of the adhesive, ensuring better bonding strength. Ensure the primer is fully set before applying the adhesive.
- Application and Curing: Apply the adhesive uniformly, ensuring sufficient coverage without over-saturating the material. Clamping or applying consistent pressure is essential to prevent movement during curing. Adhere strictly to the curing time and environmental conditions recommended by the manufacturer to achieve optimal bond strength.
By following these methods, you can overcome common challenges when bonding porous surfaces, resulting in durable and reliable adhesion for both industrial and DIY applications.
Recognizing Suitability for Outdoor vs. Indoor Use
Deciding whether a material or product is for indoor or outdoor use requires an evaluation of its intended use, durability, and resistance to environmental factors. Materials suitable for outdoor use are exposed to the sun, humidity, precipitation, and heating or cooling temperatures. Some conditions are met by weather-proofed plastics, treated wood, and certain stainless steel and aluminum alloys. Indoors, untreated wood, some fabrics and delicate, non-coated electronic components are more prone to damage than outdoors.
Electronics indicators are rated with an IP (Ingress Protection) code which automatically guarantees that outdoor lights, for example, are resistant to water and dust penetration. Indoor lights do not have such markers because they are not exposed to aggressive environmental protection. Also, outdoor furniture is known to always include materials such as UV-stabilized ones for protection while outdoor furniture is more for comfort and with no aesthetics. Knowing the technical specifications and the nature of the products is important for their purpose and durability in a specific area.
References
Frequently Asked Questions (FAQ)
Q: What is the best way to glue styrofoam and polystyrene foam together?
A: The best way to glue styrofoam and polystyrene foam together is by using adhesives specifically designed for foam, such as white glue or construction adhesive. These products ensure the glue does not damage the foam and forms a strong bond.
Q: What products are commonly used for gluing polystyrene foam boards?
A: Common products used include white glue, super glue, and construction adhesive. These adhesives are designed to bond polystyrene foam boards and ensure a permanent bond.
Q: Can I use super glue on polystyrene foam?
A: Super glue can be used on polystyrene foam, but it’s essential to ensure the glue is suitable for foam and does not cause damage. Testing on a small area first is recommended.
Q: How do I ensure a strong bond when gluing polystyrene foam together?
A: To ensure a strong bond, apply the adhesive evenly across the surface and press the board into place firmly. It’s crucial to follow the product’s instructions for information on drying times and pressure application.
Q: Are there adhesives specifically designed for bonding large polystyrene foam boards?
A: Yes, there are adhesives specifically designed for bonding large polystyrene foam boards, such as construction adhesives. These adhesives cover the 4 best adhesives for ensuring durability and strength.
Q: How should I prepare the surface before applying glue to polystyrene foam?
A: Before applying glue, clean the surface with a damp cloth to remove any dust or debris. Using a sharp blade, trim any uneven edges to ensure a smooth bonding surface.
Q: Can polystyrene foam be glued to other materials like cardboard or fabric?
A: Yes, polystyrene foam can be glued to materials like cardboard or fabric using adhesives that form a strong bond and are compatible with both surfaces.
Q: What should I consider when choosing an adhesive for expanded polystyrene foam?
A: When choosing an adhesive for expanded polystyrene foam, consider the range of adhesives available, and ensure the product is designed for foam to avoid damage and achieve a strong bond.
Q: Is there a quick styrofoam repair method for small areas?
A: For quick styrofoam repair in small areas, use a fast-drying adhesive that provides a temporary bond until a more permanent solution can be applied.
Q: Are there any safety precautions when gluing polystyrene foam?
A: Safety precautions include working in a well-ventilated area, wearing gloves to avoid skin contact with adhesives, and following the DIY guide and product instructions for information on safe application.


