


Foam gluing can seem like an easy task, yet achieving a proper bond without gaps requires the right approach and materials. If you are doing an art project, making cushions, or repairing something at home, being able to glue foam correctly can save you time, energy, and irritation. This DIY guide will walk you through the entire process, step by step, providing tips, tools, and techniques to achieve a strong and perfect finish. By the time you finish this article, you will have the assurance and understanding to manage any foam-gluing project effortlessly. Now, let’s begin!
Choosing the Right Glue for Foam
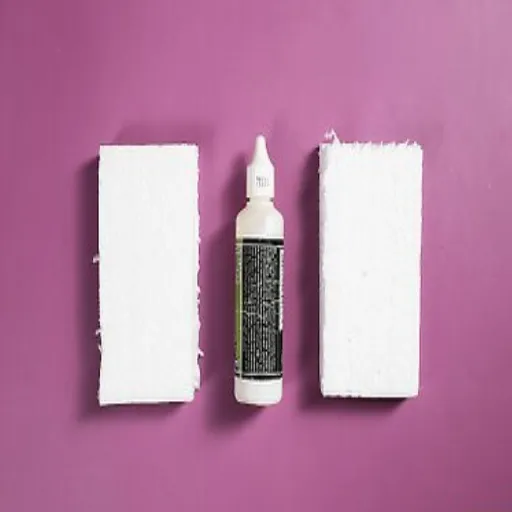
When it comes to adhesive, always pick foam glue that is made especially for foams. Products with labels like foam-safe or foam-compatible should be your choice to ensure they are safe for the material and won’t dissolve it. Among the usual options, we can find spray adhesives, contact cement, or special foam adhesives. The use of spray adhesives is recommended when dealing with large surfaces since the application is uniform and the bond is powerful. Contact cement is suitable for small applications and gives a firm hold when both sides are coated and pressed together. Always read the glue’s label to verify compatibility with your foam type.
Types of Adhesives for Foam
Choosing the most suitable adhesive for foam mainly depends on the type of foam and the specific application. For example, hot glue might work well for craft projects; however, it may not be the best choice in high-temperature areas since it can melt. Conversely, epoxy adhesives offer a strong and lasting bond but usually need mixing and longer curing times. Rubber-based adhesives are perfect for flexible foam applications since they can hold the foam while still allowing it to be flexible. Also, PSA tapes, which are pressure-sensitive adhesives, are a practical choice, especially for temporary bonds or light projects. It is always advisable to consider your project’s needs and use the application guidelines provided by the manufacturer to achieve the best results.
Factors to Consider When Selecting Glue
When choosing glue, it is essential to consider the materials being glued together, the conditions of adhesive usage, and the strength requirements of the bond. For example, some glues can withstand high temperatures while others would get damaged due to heat or moisture. Moreover, the bonding of the surfaces, whether they are porous or non-porous, is essential for the adhesion to be strong and last long. Customers should also consider the adhesive’s drying time and whether the application requires a permanent bond or a temporary, repositionable fix. By understanding these factors and checking the product specifications, users can make wise choices to get the adhesive features that match their particular project requirements.
Preparing the Foam Surfaces for Bonding
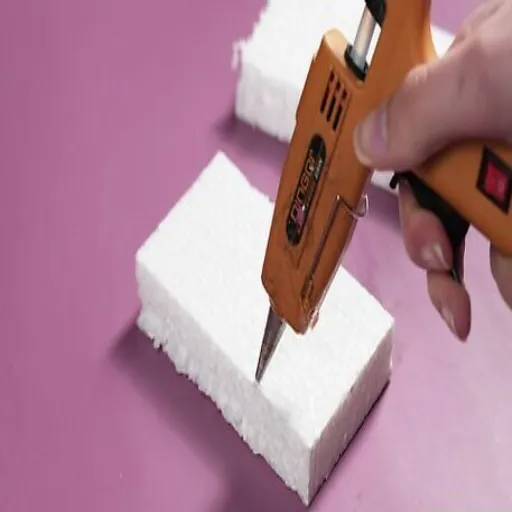
For best adhesion, start with clean and dry foam surfaces. Use a lint-free cloth and, if needed, a gentle cleaning solution to remove dust, grease, or dirt. Do not soak the foam, since too much water can affect the adhesive’s effectiveness. After that, look at the surfaces and make sure they are level and flawless; gently sanding the uneven spots can help make the bonding surface more effective. And finally, make sure the foam is correctly positioned for your application before you use the adhesive.
Cleaning and Prepping the Foam
One of the most asked questions is whether it’s possible to use any cleaning product to prepare the foam for glue application. Cleaning products come in many types, but the safest is a very mild cleaning solution that does not degrade or damage the foam material. Harsh chemicals like bleach or solvents should be totally avoided as they might alter the structure of the foam and, therefore, its performance. Using mild cleaning agents ensures that the integrity of the foam is not compromised, maintaining optimal adhesion and durability in the application.
Testing Fit Before Applying Glue
It is essential to check the fit of the materials before applying glue to ensure proper alignment and positioning. This measure prevents mistakes that can affect the final result of the project. Arrange the parts in their proper place as if using adhesive, but without sticking them together for a dry fit. Observe any gaps, overlaps, or misalignments and make the necessary adjustments. You can use clamps or tape to hold the parts together temporarily during this stage, which will provide you with a more precise test. By spending time on testing fit, you are increasing the possibility of a neat and professional outcome at the moment of glue application.
Step-by-Step Instructions for Gluing Foam
1. Prepare the Workspace
The first step is to create a workspace that is clean and well-ventilated. To protect your surfaces, it would be best to cover the area you are going to work on with a protective sheet or cardboard. After that, ensure that you have all the required tools and materials ready, like foam, adhesive, brush or roller, clamps, etc. Also, don’t forget to wear your safety equipment, which consists of gloves and a mask.
2. Clean the Foam Surfaces
The foam parts must be cleaned initially to remove dust, dirt, and other particles that might prevent the adhesive from sticking properly. Wiping the surfaces with a damp cloth or soft brush is a good way to clean them, but make sure you let them dry completely before proceeding to the next step.
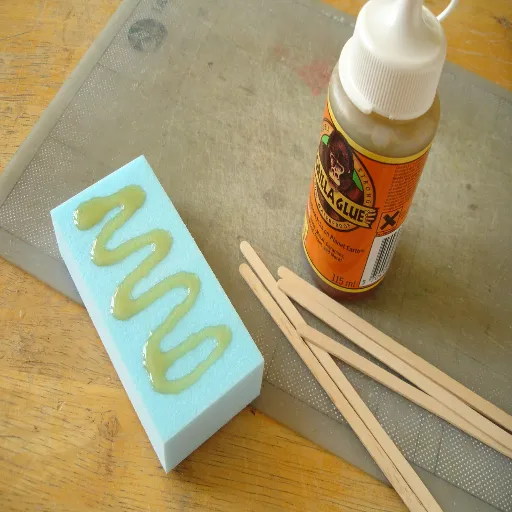
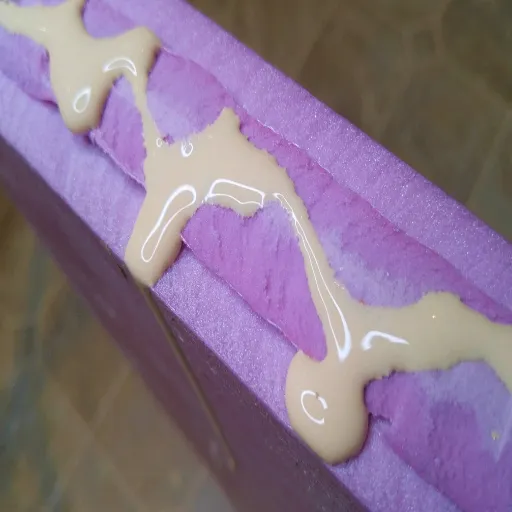
3. Apply Adhesive Evenly
The adhesive type will determine whether you will use a brush, roller, or spray to apply the glue evenly on the two surfaces that are to be joined. Take care not to use the adhesive in excess, as too much will cause the bond to be uneven or ooze out when pressed together.
4. Allow Adhesive to Cure
The manufacturer’s instructions for the adhesive used must be strictly adhered to regarding drying or curing time. The common practice is that most adhesives need a few minutes of air drying before the pieces are put together, as this makes the glue tacky and forms a stronger bond.
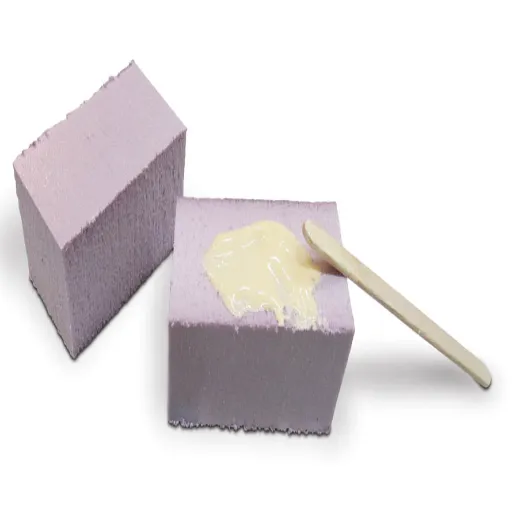
5. Join and Secure the Foam
Align the foam pieces carefully and press them together firmly. Next, hold the foam in place with clamps, weights, or even heavy objects until the adhesive is completely cured. This will create a strong bond and ensure that there are no gaps or movement during the drying process. Also, make sure to check regularly that the alignment is still correct.
Applying Adhesive Evenly
While applying glue evenly, both prep and technique are key to getting the best results. First, make sure the surfaces are ready for bonding by cleaning, drying, and removing dust and dirt. Any impurities can significantly reduce the adhesive’s holding power. For the application, depending on the type of glue and area, choose a compatible tool like a foam brush, roller, or a notched trowel. Apply the glue in thin and even layers from the middle to the outside until the whole surface is covered. It is best not to let the glue accumulate or apply too much, as both can cause uneven drying and, consequently, weak bonds. Consider those adhesives with controlled applicator tips for precise applications that dispense just the right amount during use. Always follow the adhesive manufacturer’s advice on application methods to achieve the best and most consistent adhesion.
Aligning the Two Pieces of Foam
It is essential to be accurate when bringing together the two foam parts to achieve a seamless connection and optimal structural strength. First, place one piece on top of the other very carefully, ensuring that both the edges and corners are aligned perfectly. Then, very gently press the surfaces of the foam together to make initial contact, and if necessary, adjust before applying firm pressure. If your pieces are too big, it might be a good idea to use a flat and hard surface or a ruler as a support to keep them straight. After getting the correct position, it is time to apply even pressure throughout the foam to facilitate proper adhesive contact and eliminate the possibility of any gaps. Always check the best practices applicable to your project and the type of foam being used for long-lasting results.
Ensuring a Strong Bond Between Foam Pieces
To establish a good connection between the foam pieces, first clean the surfaces to remove any dust, dirt, or oil that could weaken the bond. Next, get a top-notch adhesive meant for foam only and designed for bonding the particular material. Both surfaces should get a uniform coating of the glue, and then the surfaces should be let to become sticky according to the manufacturer’s directions. Together with firm pressure, the foam pieces should be placed and kept in that position till the bond is formed. For the best outcome, the humidity level should be low and the temperature should be just right for the adhesive to harden effectively.
Recommended Curing Time for Adhesives
The duration for which an adhesive remains liquid can vary a lot depending on the adhesive’s nature and the environmental factors. Achieving full strength usually takes 24 to 48 hours for most foam-compatible adhesives to cure. On the other hand, fast-acting adhesives can sometimes harden within a few minutes but may still take hours to heal fully. In addition, environmental factors such as humidity, temperature, and airflow can also have a significant impact on the curing process. Therefore, it is highly recommended to follow the manufacturer’s guidelines for the specific adhesive, particularly regarding curing times, to ensure the conditions are right for the bond to reach maximum durability.
Weight Application Techniques During Curing
The practice of applying weight during the curing process is crucial in securing an effective and strong bond in adhesive applications. The weight serves to keep the pressure uniform over the glued areas, thus preventing any gaps that might arise and letting the adhesive flow gradually and smoothly. The applied weight should be sufficient to cause contact without causing the adhesive to run out excessively or altering the shape of the materials being glued. For the best outcome, the weight should be spread out evenly using tools such as clamps, pressing plates, or heavy flat objects. It is also essential to change the pressure according to the thickness and the type of adhesive material. Always refer to the adhesive manufacturer’s instructions for specific guidelines on applying weight to ensure the bond achieves maximum strength and durability.
Avoiding Common Mistakes When Gluing Foam
❌ Using the Wrong Adhesive
Always choose an adhesive that is meant explicitly for foam materials. Some adhesives can either dissolve or fail to penetrate the foam, thus not creating a bond at all.
❌ Applying Too Much Adhesive
The use of excessive adhesive may result in sticky and unappealing products as well as weak unions. Use a thin and uniform layer to prevent too much ooze or uneven application.
❌ Skipping Surface Preparation
Apply glue only to clean and dry foam surfaces. The proper adhesion of glue can be compromised by dust, dirt, or moisture.
❌ Rushing the Bonding Process
Make sure to let the adhesive turn sticky (if necessary) before you push the foam parts together, then let the union cure for the time indicated by the manufacturer.
❌ Ignoring Ventilation Needs
Fumes from many adhesives may be harmful when they get into the lungs. Always make sure you are in a well-ventilated area or have protective gear when working with such cases.
Checking Compatibility of Glue with Foam
If you want to be sure that the glue you are using is safe for foam, you should know the chemicals in both the adhesive and the foam very well. Some glues, such as solvent-based ones, may react chemically with the foam, leading to either the foam’s complete dissolution or a reduction in its strength. Always seek adhesives suitable for foam and marked as compatible with your foam, whether it is polyurethane, polystyrene, or any other type. Also, if you want to check that the adhesive works well with the foam without causing any damage, you can do a small patch test. Always use the glue that the manufacturer recommends and consider where the glue will be applied, such as whether it will be subjected to heat, moisture, or stress, when selecting the most appropriate adhesive.
Working in a Safe, Well-Ventilated Area
Whenever I use adhesives, I make it a point to be in a secure and well-ventilated area to always prevent the inhalation of toxic fumes. I either open the windows or turn on the fans for better airflow, and also, if necessary, wear suitable protective equipment like gloves and a mask to protect my health.
Reference Sources
Here are three professional and authoritative reference sources that you can use to verify the correctness of your article on “how to glue two pieces of foam together.” These sources are academic and provide insights into adhesive applications and foam-related studies:
📚 Optimizing the Glue Joint of Aluminium Metallic Foams
This paper discusses the characteristics of glue joints between foam and solid materials, using scientific studies to examine adhesive performance.
Read the article here
📚 Glue and Glue Testing
An all-embracing volume dealing with glue manufacturing procedures, including the role of foam in adhesives and their applications.
Access the book here
📚 Comparison of Different Foaming Agents in Making Plywood Glue
The document compares different foaming agents in the production of glues, leading to a conclusion about the influence of the glue’s density and quality.
View the study here
Frequently Asked Questions (FAQs)
What kind of glue should I use to glue two pieces of foam together?
The best adhesive for gluing foam pieces together depends on the type of foam you are using. For upholstery foam, a high-quality spray glue such as 3M Super 77 is often recommended because it provides a strong bond without saturating the foam. If you’re working with closed-cell foam, an aerosol spray designed specifically for foam is ideal. White glue can also work for less demanding applications.
Can I use 3M Super 77 spray on polyurethane foam?
Yes, 3M Super 77 spray is formulated to bond polyurethane foam effectively. It’s a versatile adhesive that is easy to apply and dries quickly, making it a popular choice for various foam projects, including upholstery and crafting.
How long does it take for glue to become tacky when gluing foam?
When using spray glue or any adhesive, it usually takes just a few minutes for the glue to become tacky to the touch. For best results, allow the adhesive to sit for about 5 minutes before pressing the foam pieces together. This will ensure a stronger bond.
Is it possible to sew foam pieces together?
While you can sew foam pieces together, it’s not the most common method for bonding foam. Instead, using a strong adhesive is typically more effective, especially for upholstery projects like couch cushions or throw pillows. If you do choose to sew, ensure you use a heavy-duty needle and thread designed for thicker materials.
What is the best way to glue closed-cell foam?
For closed-cell foam, it’s best to use a spray adhesive designed explicitly for foam, such as 3M Super 77. This type of glue provides a strong bond and is easy to apply evenly across larger surfaces. Make sure to follow the manufacturer’s instructions for the best results.
Can I use a glue stick for bonding foam?
While a glue stick may work for lightweight foam crafts, it is not recommended for larger pieces or upholstery applications. For more durable bonding, consider using a spray adhesive or a brush-on glue formulated for foam to ensure a strong and lasting hold.
How do I apply spray glue to foam?
To apply spray glue, hold the can about 6-8 inches away from the foam surface. Spray an even coat over one or both pieces, depending on the instructions for the adhesive. Allow it to get tacky before pressing the pieces together, ensuring a secure bond. Use goggles to protect your eyes from overspray.
What should I do if the foam bond doesn’t hold?
If the foam bond doesn’t hold, check that you used the correct type of glue for your foam. You may need to reapply the adhesive or consider using a different kind of glue. Ensure that the surfaces are clean and free from dust or debris before reapplying the adhesive.
Can I use spray glue on acoustic foam?
Yes, spray glue can be used on acoustic foam, but it is essential to choose an adhesive that is designed explicitly for soundproofing materials. Ensure the spray glue is high-quality and suitable for the foam density to achieve optimal results.


