


When repairing plastic items, selecting the right adhesive can seem overwhelming. The number of products, which mostly claim to provide the strongest bond, available on the market makes it hard to decide which one really works. The case could be, for example, a cracked bumper, a broken refrigerator, or a piece of furniture that requires repair. The wrong epoxy for plastic could turn a quick, lasting fix into a frustrating disappointment. This guide is going to help you to see the light in the confusion. We will explain why epoxy glue is the best choice for plastic repairs, outline the essential factors to consider when selecting your product, and share tips to complete your repair smoothly and effectively. You will be ready with the correct information and self-assurance to handle any plastic repair project with great skill by the time you finish this article.
Introduction to Epoxy for Plastic
The epoxy glue is a potent bonding agent for plastic repairs because of its considerable adhesive strength, durability and wide use. It operates by forming a strong bond through a chemical reaction between two components—resin and hardener—when combined. Epoxy is ideally suited for plastic repairs as it is so resistant to water, heat and impact that it can be used indoors as well as outdoors. When selecting an epoxy, opt for those labeled “plastic” to ensure compatibility. Also, always adhere to the manufacturer’s guidelines regarding mixing, application and curing so that you can get top-notch results.
What is Epoxy and How Does it Work?
Epoxy is a very adaptable material for adhesives and coatings, produced by mixing a resin and a hardener. Mixing these two components triggers a chemical reaction that yields a strong, complex, and durable plastic-like substance. This method, commonly called curing, converts the liquid mixture into a solid form, giving it excellent resistance to water, heat, chemicals, and physical impacts. Epoxy adhesives are extensively utilized in various industries such as construction, automotive, electronics, and marine, because they can bond a broad range of materials including plastic, metal, wood, and glass.
That epoxy is becoming more popular due to its use in home repairs, art, and industrial applications. Epoxy resins are mainly chosen due to their top-notch properties such as the capacity to fill, the provision of structural strength, and the glossiness of the surface. If applied properly, the epoxy can not only prolong the life of materials but also the aesthetics of the surface. It is always essential to choose an epoxy formulation based on your application and to follow the provided instructions for preparation and curing times to achieve optimal performance.
Types of Epoxy Adhesives
The types of epoxy adhesives include one-component, two-component, UV cure, flexible, structural, and heat-resistant epoxies.
Benefits of Using Epoxy for Plastic
Strong Bond
The use of epoxy guarantees not only a strong joint but also the longevity and plasticity which are the main qualities of the structure, thus increasing its resistance to wear.
Versatility
Epoxy can bond various types of plastic, is easy to use for minor repairs around the house, and is well accepted in the industry.
Water Resistance
Even though the epoxy is not a waterproofing agent, it remains a perfect protector against moisture penetration and that is where the outdoor and waterproofing applications come into play.
Chemical Resistance
Its ruggedness is further enhanced by its resistance to a wide range of chemicals, including oils, solvents, and acids, making it a suitable choice for challenging environments.
Temperature Tolerance
Some epoxies can tolerate extremely high and low temperatures, making them useful even in the most extreme conditions.
Choosing the Best Epoxy for Plastic
When selecting the best epoxy for plastic, take into account the following significant points:
- Material Compatibility: It is a must to use the epoxy that is aimed at plastics offering the best bond.
- Curing Time: Choose the epoxy with a curing time that matches your project needs, whether quick-setting or with an extended working period.
- Strength Requirements: Use an epoxy with tensile or flexural strength that matches the purpose of the plastic item, whether for repair or otherwise.
- Environmental Factors: If the plastic will be subjected to harsh conditions, choose an epoxy that is water-, temperature-, and chemical-resistant.
- Transparency or Color: For aesthetic reasons, think about clear, transparent, or colored epoxy as needed.
After all, these parameters are considered, you can go ahead and get an epoxy that suits your plastic bonding or repair project.
Factors to Consider When Selecting Epoxy
-
⏱️ Curing Time
Determine the speed of the epoxy curing process, and see if it fits with your project timeline. In cases of urgent repairs, faster-curing epoxies may be more suitable, while slower-curing epoxies can facilitate more accurate adjustments.
-
🔧 Application Method
Think about the mixing and application of the epoxy, If it is easy, especially in the case of detailed tasks, as this can have an influence on the bond’s quality.
-
💪 Adhesion Strength
Do not let the epoxy be too strong; it may not adhere well to the particular plastic you are working with, as different plastics may require specialty formulations.
-
🔄 Flexibility vs. Rigidity
It must be established whether the epoxy forms a hard or a soft bond, depending on the need for plastic’s flexibility.
-
📅 Shelf Life
Check the epoxy’s shelf life to avoid using an outdated product that may impair performance. Always follow the epoxy’s storage instructions for the best results.
Evaluating Strength and Durability
A study of different epoxy adhesives for plastic applications would not be a simple matter of comparing their strengths and taking their durability at face value. At present, consumers seek epoxies that can withstand even the most extreme temperatures, as well as combinations of factors such as moisture and UV light, which can be referred to as long-term exposure. A superior epoxy should even in such harsh conditions, retain its bond strength thus guaranteeing a long-lasting performance.
On top of that, evaluating an adhesive’s ability to withstand mechanical stresses, such as tensile, shear, and impact forces, can provide the user with a clear indication of the product’s durability. Always make it a practice to consult product specifications and customer reviews to ensure you’re using the epoxy you’re considering and meeting your strength requirements for the specific plastic repair or assembly.
Comparison of Different Epoxy Formulations
When evaluating epoxy compositions, keep in mind their main characteristics and potential uses:
General-Purpose Epoxy
Universal adhesive, compatible with a variety of substrates namely plastics, metals, and woods. It has moderate strength, and its application could be limited to basic repairs or low-stress situations.
Structural Epoxy
This formulation type provides strong bonding and is suitable for load-bearing applications. It performs exceptionally well even under mechanical stress and is a preferred choice for industrial or heavy-duty repair work.
Flexible Epoxy
The product offers a trade-off between adhesion and flexibility, making it very useful for bonded materials that may undergo vibration or slight movement.
Clear Epoxy
The type is aesthetically pleasing and provides a transparent finish to the piece after curing; hence, it is frequently used for arts, crafts, or decorative purposes.
High-Temperature Epoxy
This epoxy is strong to endure the highest heat, which makes it a perfect fit for applications involving hot conditions like automotive or appliance repairs.
Choosing the appropriate formulation hinges on the project’s specific requirements, including strength, environmental conditions, and the materials to be joined. Always refer to the manufacturer’s instructions for optimum results.
Preparing for Application
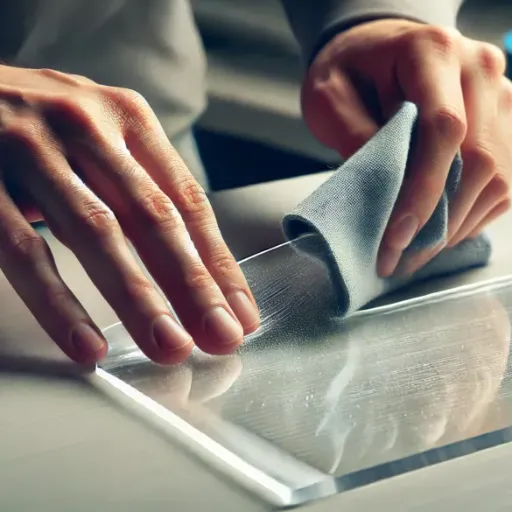
Before you apply epoxy to plastic, clean the surface thoroughly to remove contaminants, such as dirt and grease. Roughen up the surface a little with sandpaper or a sanding block to improve adhesion. Make sure to wipe the area with isopropyl alcohol to confirm that it is clean and dry before application. Choose an epoxy that is particularly designed for plastic bonding and, in turn, obey the manufacturer’s directions for mixing and applying the product. Keep the workspace well ventilated and ensure the temperature and humidity are within the recommended range for the epoxy to cure effectively.
Surface Preparation Techniques
Proper surface preparation is key to achieving strong, long-lasting adhesion. Cleaning the surface should be the first step to remove dirt, grease, and oils. You can use a degreaser or a soap-and-water mixture, then dry the area thoroughly. A fine-grit sandpaper should be used to sand the surface to be glued lightly; this roughens the surface, enhancing the adhesive’s effectiveness. The last step is to wipe the surface with a clean, lint-free cloth soaked in isopropyl alcohol to ensure it is not only clean but also free of any residues before applying any adhesive or coating.
✅ Tools and Materials Required
- ✓ Fine-grit sandpaper
- ✓ Degreaser or soap and water
- ✓ Lint-free cloth
- ✓ Isopropyl alcohol or similar solvent
- ✓ Cleaning tools (e.g., sponge, brush, or cloth)
- ✓ Protective gloves (optional)
⚠️ Safety Precautions When Using Epoxy
I ensure the workspace is well-ventilated to avoid inhaling any harmful fumes when using epoxy. To protect my skin and eyes, I use safety goggles and gloves. In addition, I take care not to let the epoxy come into contact with my skin and if that happens, I wash that area very carefully. I strictly adhere to the manufacturer’s guidelines and keep the supplies in a place that is not accessible to kids and pets.
Application Best Practices
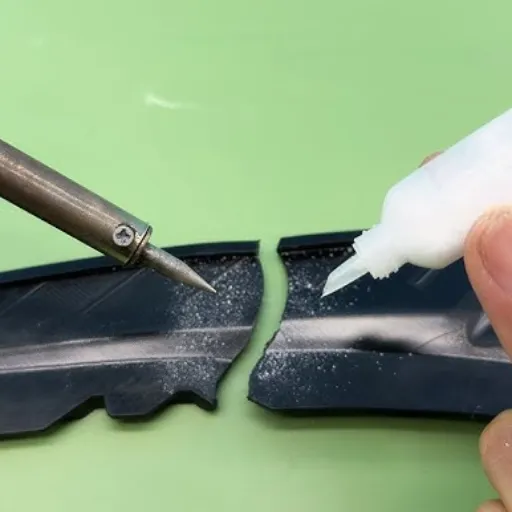
If you want to get the best result when applying epoxy to plastic, the first step is cleaning the plastic thoroughly to get rid of all dirt, oils and residues. Then, lightly sand the surface with fine sandpaper to add texture and improve adhesion to the epoxy. After that, the epoxy components should be mixed according to the manufacturer’s instructions, ensuring an even consistency. Using a brush or applicator, apply the epoxy evenly, but be quick, as it has a limited pot life. For bonding to be perfect, allow sufficient curing time in a disturbance- and moisture-free environment.
Step-by-Step Guide to Applying Epoxy Glue for Plastic
- 1
Prepare the SurfaceFirst, clean the plastic surface thoroughly to remove any dirt, oil, or other contaminants. If you use a cleaning agent, the agent must absolutely dry the surface afterwards.
- 2
Sand the SurfaceNext, using very high-grit sandpaper, smooth over the surface as little as possible to create a slightly rough surface, which, in turn, helps the epoxy stick better.
- 3
Mix the EpoxyFollow the production partner’s instructions to mix both substances, resin and hardener, in the proper proportions. Mixing well is required to get a uniform consistency.
- 4
Apply the EpoxySpread the mixed epoxy onto the prepared plastic surface using a brush or an applicator. Do it fast, for the epoxy is curing already fast just because of its limited pot life.
- 5
Join the PiecesIf you are gluing two pieces of plastic together, push the pieces down firmly into place after applying the epoxy, making sure there are no gaps and that everything is well aligned.
- 6
Secure the BondWhile the epoxy is setting, apply clamps or whatever means you prefer to keep the pieces together. This provides firm, even adhesion.
- 7
Allow for CuringAfter gluing the plastic, leave it in a stable, dry place undisturbed. It is essential to wait for the epoxy to cure completely; this usually takes quite a while. Movement or moisture should be avoided during this time.
- 8
Inspect the BondWhen the curing of the epoxy is completed, check the joint to determine if it is strong and durable which means the application was successful.
Using 2-Part Epoxy Effectively
To apply 2-part epoxy most efficiently, try these steps:
📖 Read the Instructions
Do not skip the manufacturer’s directions on the mixing ratios and curing times.
🧹 Prepare the Surface
Make the surfaces to be bonded clean and dry. Sand them a bit for better adhesion.
🔬 Mix the Epoxy Properly
Blend the resin and hardener according to the recommended proportions. Stir well until the mixture is uniform.
🖌️ Apply Evenly
Spread the epoxy with a tool such as a disposable spatula or brush over one or both surfaces.
⏳ Allow to Cure
Clamp the pieces together and put them in the recommended curing conditions for the specified time. Do not move or put any stress on the joint during curing.
Pro Tip: The proper application yields a strong, durable bond. Work in a well-ventilated area, and if necessary, use safety gear.
Curing Times and Conditions for Optimal Bonding
There can be significant differences in curing times, influenced primarily by the type of epoxy, environmental conditions, and the materials being bonded. In general, standard epoxies typically require 24 to 48 hours to achieve the strongest bond, whereas some quick-setting epoxies can be fully cured in just 5 minutes. The best conditions for bonding are usually at temperatures between 70-85°F (21-29°C) and low humidity, as high moisture can slow down the curing process.
Following the manufacturer’s curing recommendations is crucial because they are tailored to the epoxy’s specific properties. If the curing process is done in icy conditions, a heat source or a specialized cold-weather epoxy can be used to achieve the desired results. Always check product-specific information to confirm optimal performance.
⏰ Typical Curing Timeline
- Quick-Setting Epoxies: 5-15 minutes for initial set
- Standard Epoxies: 24-48 hours for full cure
- Optimal Temperature: 70-85°F (21-29°C)
- Humidity: Low to moderate levels preferred
Common Mistakes to Avoid
❌ Misapplication of Epoxy
The incorrect application of epoxy is primarily due to inadequate surface preparation. The surfaces must be cleaned appropriately so they are dry and free of substances such as oil, grease, or dust before the adhesion is applied. Another frequent mistake is mixing the resin and hardener in the wrong ratio, resulting in improper curing and a weak bond.
Besides, misapplying epoxy in poor environmental conditions, such as high humidity or extreme temperatures, may reduce its effectiveness. To steer clear of such problems, manufacturing instructions must be strictly adhered to and the conditions must be verified to fulfill the product’s requirements.
❌ Ignoring Cleaning and Preparation Steps
Working with epoxy without following proper cleaning and prep steps can result in serious problems, such as adhesion failure, uneven finishes, or even total project failure. Contaminated surfaces with grease, dust, or moisture are among the most searched problems by epoxy users, preventing the epoxy from bonding correctly.
Good cleaning and air-drying of the surface are critical for a strong, long-lasting bond. Moreover, the adhesion properties could be improved by light sanding and cleaning of the previously glossy areas. Ignoring these steps increases the likelihood of costly repairs or rework, reinforcing the necessity of careful preparation as the only way to succeed in the project.
❌ Overlooking Drying and Curing Times
Neglecting drying and curing times can significantly affect the performance and longevity of an epoxy project. Drying is the first stage, during which the surface becomes hard and no longer sticks to one’s fingers, but curing is the entire chemical process that eventually makes epoxy fully strong. Accelerating these processes might lead to weak bonds, shorter life, or partial hardening.
Always observe the manufacturer’s drying and curing times, and allow enough time for the epoxy to reach its full performance. Patience pays off with long-lasting and dependable results.
📚 Reference Sources
The following authoritative sources provide additional insights into epoxy resins and their applications:
- Reprocessable and Ultrathough Epoxy Thermosetting Plastic – A study on sustainable and durable epoxy thermosetting plastics, providing insights into their strength and reusability.
- Epoxy Resins – A comprehensive overview of epoxy resins, including their applications in plastic repairs and as barrier resins.
- A Critical Review: The Modification, Properties, and Applications of Epoxy Resins – A detailed review of epoxy resin properties and their dependence on resin composition, relevant for plastic repair applications.
- Recent Advances in Epoxy Resin, Natural Fiber-Reinforced Epoxy Composites and Their Applications – Discusses advancements in epoxy composites, including their strength and molding techniques.
- Patch-Test Reactions to Plastic and Glue Allergens – Explores the chemical properties and potential allergens of epoxy resins, helping to understand their composition and safety.
❓ Frequently Asked Questions (FAQs)
What is the strongest epoxy for plastic?
The strongest epoxy for plastic is probably a two-part epoxy that consists of a resin and a hardener which when combined, produce a strong bond. The epoxy products are mainly designed to provide high impact and tensile strength, and thus are used for plastic repair jobs.
How to choose the best epoxy for plastic repairs?
The best epoxy for plastic repairs depends on the type of plastic being used and the strength required for the repair. Go for a two-part epoxy that is made for the plastic you are using, for instance, ABS or PVC. Also, look for properties such as speedy curing time and strong adhesion which will result in a reliable repair.
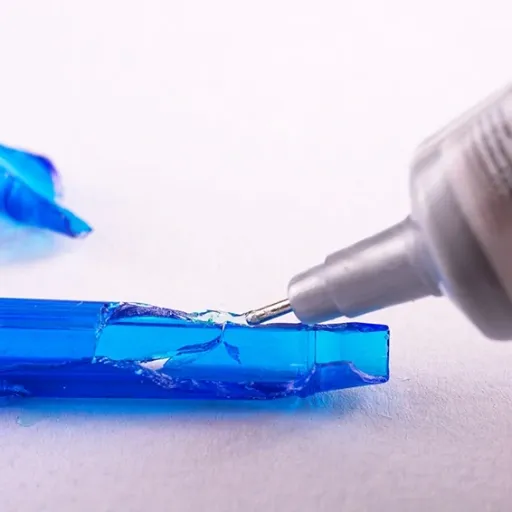
Can epoxy glue fix broken plastic?
Absolutely, epoxy glue is a good option to fix broken plastic. A solid bond created by using a super strong plastic epoxy glue is able to take up stress and strains. Nevertheless, the surfaces need to be cleaned thoroughly before epoxy application, as the strength of the adhesive bond between the broken plastic pieces is greatly affected by surface cleanliness.
What is the difference between epoxy and super glue for plastic?
Epoxy adhesive generally provides a stronger and more durable bond than super glue even though both are suitable for plastic repair. Super glue dries instantly and is ready for use, making it preferable for minor repairs. But, among the two-part epoxy adhesives, the tensile strength offered is higher than super-long-lasting in-depth repairs and hence the latter becomes the choice for smaller applications.
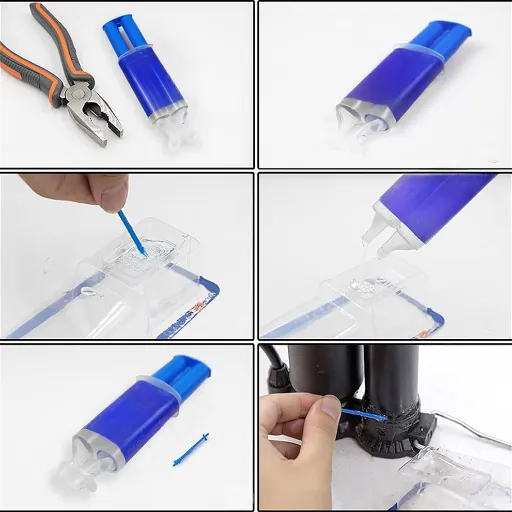
How does using epoxy for plastic compare to plastic welding?
Using epoxy for plastic repairs not only offers a simpler, cheaper, and faster option than plastic welding but also one that is more durable. Whereas plastic welding demands not only specialized equipment but also skilled personnel, epoxy can be precision-applied through a syringe allowing for no heating whatsoever. However, in some cases, especially with certain materials, the bonding of plastic welding could turn out to be more powerful – thus depending on the application.
What are the best practices for applying epoxy glue for plastic?
Epoxy glue application for plastic should be done on clean, dry surfaces. Mix the resin and hardener as directed by the producer, and then evenly spread the mixture on both surfaces. To unite the parts while the epoxy sets for bonding the strong way, use clamps or weights. Always check the product guidelines for the longest and most suitable curing times and conditions.


