


Resin 3D printing, on the other hand, does not provide you with highly complicated, engaging models only. Many a time, the need to put together various sections or to fix up a small crack arises to get to the final characteristic. This is precisely the scenario where one needs to select an effective adhesive. It is essential to recognize that not all adhesives are the same, and therefore, selecting the incorrect type can lead to poor adhesion, distortion, or even worse, breakage of the model. This paper aims to present the best types of adhesives suitable for use with resin 3D printing, what to look for when choosing an adhesive, and how to join two items together in the most effective way. It is hoped that this article will cater to beginners, experts in this field, or anyone else involved, and the perfection of that aspect of post-processing will further enhance the quality and endurance of the finished items.
The Importance of Choosing the Right Glue for Resin 3D Prints

The right adhesive should be chosen while working with resin 3D prints, as the main figures of rank have to withstand the applied loads for a long time. For instance, resins usually tend to be fragile and should be joined together in precision and strength, which is why special adhesives are used for such surfaces. Vitamin exhibits particular strength, mediately, with a small amount of effect, offering several permanent, strong bonds in a comparatively short period of time. Epoxy resins are most effective for more demanding uses with slightly different attributes, such as gap filling, especially for larger or more complex models. While choosing an adhesive, aspects like the size of the parts, the stress tolerance levels and environmental factors such as moisture and heat have to be taken into account for effective bonding. The proper use of the appropriate adhesive is expected to enhance even the practical use of the printouts by avoiding marks that would otherwise be evident in the body form.
Impact on Durability and Quality
The choice of adhesives for 3D Printed materials greatly contributes to the integrity of structures and the aesthetic appearance of the final assembly. Research indicates that high-strength adhesives, such as epoxy adhesives, exhibit greater tensile strength than other adhesives and are recommended for applications that require both load-bearing capacity and durability. For jigs and fixtures, or in elevated temperatures or humid conditions, it may be necessary to use adhesives that do not change their properties over time to prevent corrosion of the bonded area over a specified period. In addition to the mechanisms of glue application, such as accurate disbursement or even spreading of the glue over the area, can also be used to help mitigate the impact of environmental conditions on the adhesive. In many practical applications, the guarantees of quality and durability for the joint must be higher than those specified by the standards.
Common Challenges with Resin Bonding
Usually, the first challenge when resin bonding is involved is the compatibility of the surface treatment. In situations where the surface is not well degreased or the priming is inadequate, like exposure to and/or oxidation of any contaminants, the strength of the glue by which the adhesion occurs is significantly reduced. In addition, it is very difficult to achieve curing that is relatively even, especially if the targets are thick, multi-layer structures whose interior will not be penetrated by heat or UV in an even manner, hence creating weak areas or areas with mechanical properties that are uneven.
Another issue is related to finding an appropriate resin system for specific service conditions. Temperatures, humidity, and the degree of dissociation with certain chemicals can, in time, cause some resins to decompose or lose their adhesion properties. In practice, engineers are always challenged to keep this balance while meeting some mechanical performance such as tensile strength, elongation, and ductility. Lastly, placing a resin on various substrates makes compatibility even harder, especially some resins with particular combinations, which may have adverse chemical reactions or different thermal expansions amongst them. To overcome these difficulties, extensive testing is essential in addition to specialization in/adherence to advanced material and construction technologies.
Overview of Glue Types for Resin 3D Printing
|
Glue Type |
Key Characteristics |
Suitable Applications |
Considerations |
|---|---|---|---|
|
Cyanoacrylate Glue |
Quick bonding, high tensile strength |
Small part assembly, repairs |
Brittle, low flexibility |
|
Epoxy Resin Glue |
High durability, chemical resistance |
Bonding large components, structural parts |
Longer curing time, requires precise mixing |
|
UV Glue |
Cures under UV light, clear finish |
Transparent bonds, detailed parts |
Requires UV source, limited depth penetration |
|
Silicone Adhesive |
Flexible, excellent water and heat resistance |
Sealing and bonding watertight components |
Not suitable for high-load structures |
|
Polyurethane Glue |
Strong, expands when curing |
Bonding porous materials |
Requires tight clamping, longer curing time |
|
Hot Glue |
Quick setting, moderate strength |
Temporary bonds, lightweight components |
Melts under high temperatures |
|
Acrylic Adhesive |
High strength, good for clear materials |
Transparent parts, display models |
Requires precise application |
|
Double-Sided Tape |
Easy application, no curing time |
Temporary positioning, lightweight parts |
Limited load capacity |
Key Factors to Consider When Selecting Glue for Resin Prints
- Bond Strength
Look for a glue that guarantees there will be no loosening of any parts glued together. Use any of the epoxy resins or acrylic-type adhesives when in need of a strong bond that will not come off easily.
- Material Compatibility
Ensure that the strength of the adhesive matches well with the properties of the resins themselves. It may so happen that several glues may not stick well over adhesives depending upon the material type, so specific glues that may cause damage to the material should be avoided in their place.
- Application Precision
In the case of detailed resin prints, it is essential to select a glue with minimal flow so that the glue’s spread is confined to non-visible areas.
- Curing Time
Adapt the total curing time according to the project requirements. For instance, super glues are quickly curing adhesives, and work best in many cases; however, some engineers require a more stringent material that lasts longer, such as epoxies for would-be projects.
- Environmental Resistance
Bond Strength and Durability
Related topics such as durability and bond strengths, which are mainly based on the adhesive characteristics during the service life and external forces applied to the bonded system, are very important. In the post-modern era, there are sticky designs which are prepared to be very strong in tension, shearing, and peeling, posing a challenge to different sectors such as automotive and aircraft constructions. This paper, for example, demonstrates that epoxies have high compressive strength and can withstand continuous loading for an extended period. However, the polyurethane’s high resistance to impact tension and flexibility further enhances the adhesive’s ability to withstand the acids that cause it to grow. In addition to the properties of surface material in question, especially the strength of the bond, the way the bond is set up, or the condition within which the bond is supposed to operate, will determine how long the bond will last. Developments that have been made in adhesive technology have led to the manufacture of new adhesives that are resistant to fatigue and possess improved thermal stability hence untimely failure is not experienced even in high-performance applications.
Curing Time and Process
Bending and crosslinking of an adhesive are major stages that have a big influence on the quality and durability of an adhesive bond. In this case, curing is the process that changes the adhesive from its liquid or soft state to a cohesive, solid material and is influenced by the type of adhesive, temperature and humidity, among other factors. For most of the available epoxy adhesives for instance, it takes between 24 to 48 hours of exposure to room temperature for a full completion of the curing process, but in some instances such as when heat is used as a curing method, the process can occur within minutes as few as 10 to 30 minutes at about 150°C.
In general, the curing of the adhesive can be subdivided into three phases, namely induction, progression, and completion stages, whereby each is subject to the external environment of the application process. During the induction phase, polymer chains cross-link, and this is followed by the bond strength increasing during the progression stage until maximum strength. The last step is the completion of the bond, thus achieving the intended mechanical and thermal properties of the bond. With advanced adhesives used in trade, some newer formulations employ the use of catalysts or UV light exposure to fast-track the curing process or limit the curing process in specific applications. Mastery of the subject and appropriate manipulation of these factors is instrumental in obtaining desired literature on the use of adhesives in industry.
Compatibility with Resin Materials
Resin material compatibility is crucial in most industrial practices especially since it has a significant direct impact on the performance of the adhesive as well as the service life of the assembled system. Within the adhesive bonding field of study, different resins such as epoxy, polyester and polyurethanes are made with different molecular compositions and surface characteristics which affects in how well they bond with other agents. For example, epoxy is often chosen due to its high strength features and resistance properties which fit well in modern adhesive formulations. However, the surface energy has to be treated carefully by either cleaning an abrasion.
Comparison of the Best Glue Options for Resin 3D Prints

When it comes to choosing a resin 3D print adhesive, it is important to know how well it sticks, how troublesome the application procedure is if there is any, and whether it is deemed safe in BD. Some of the highly-ranked types include:
- Cyanoacrylate (Super Glue)
- Pros: Strong and fast-acting bond. Ideal for small or detailed parts.
- Cons: Limited flexibility and weaker performance under high strain.
- Epoxy Resin Adhesives
- Pros: Provides exceptional strength and durability. Works well for larger, load-bearing parts.
- Cons: Longer curing time and potential need for precise mixing.
- Polyurethane Adhesives
- Pros: Strong, flexible bonds resistant to water and heat.
- Cons: Can be more challenging to apply and requires careful handling due to moisture sensitivity.
- UV Resin Glue
- Pros: Perfect for resin-to-resin bonding. Cures quickly under UV light, creating seamless repairs.
- Cons: Requires a UV curing source for optimal results.
It is then logical to conclude that every bonding agent is most suited for a particular task, and the best choice depends solely upon the reason for, as well as the size and conditions within, which the item was printed. Cyanoacrylate is an all-purpose glue; on the other hand, epoxy adhesives are typically used for most heavy-duty conditions. Among glue in this group, UV resin is the only one used for almost invisible bonding of resin surfaces.
Top Glue Brands and Their Features
|
Brand Name |
Compatible Resin Types |
Key Features |
Application Environment |
Bond Strength |
Drying Time |
|---|---|---|---|---|---|
|
Loctite Epoxy |
Most resins |
High-strength, gap-filling adhesive |
Controlled, dry environments |
Very strong |
5-20 minutes |
|
Gorilla Epoxy |
Standard, UV, and ABS resins |
Water-resistant, impact-resistant bond |
Indoor and outdoor |
Durable |
5 minutes |
|
JB Weld ClearWeld |
Standard and flexible resins |
Transparent, multipurpose adhesive |
Temperature-sensitive areas |
Excellent |
5-6 minutes |
|
Starbond CA Glue |
Small, delicate resin parts |
Fast-curing cyanoacrylate adhesive |
Well-ventilated areas |
Moderate |
<1 minute |
|
3M Scotch-Weld |
Heat-resistant resin types |
Industrial-grade, heat-tolerant bonds |
Harsh temperature conditions |
High-performance |
Varies |
|
Bondic Liquid Plastic |
UV resin types |
Cures with UV light, precise control |
Low-light precision spaces |
Dependable |
Instant with UV |
Ideal Use Cases for Different Glues
Using resin 3D prints, practitioners may reach their optimal qualities and performance levels if they are aware of the most applicable scenarios for each bonding agent. When it comes to adhering small detailed parts, say a car, superglue is very good at its work, as it dries quickly and stays sticky on the smooth shiny surfaces. The only thing is, for instance, it may work in relatively small models or elements that do not suffer a load because it remains stiff and will likely crack due to the load.
This is where epoxy adhesives are the best solutions, especially when the basics are also in the use of more permanent connections and in ensuring that the so created joints are resistant to environmental factors such as moisture, heat or chemical action. Such as two-component epoxies, they are preferred for functional assemblies or mechanical components, because they create firmly joint structures once cured. This class of adhesive, again, exhibits greater bendability and elasticity against the effects of movement or vibration, and is therefore usable for items that will undergo such dynamic motion or cause vibrations.
We also do not overlook UV adhesives, and, in particular, when it is about fine detailing, such as plastics or turning and chipping, it is the best match. Usually, the role of adhesives in these three methods are in urgent situations where fast bonding and perfect transparency are required. Silicone adhesive is recommended for projects involving resins mainly because it can provide some degree of water protection and have less strength. Therefore, you will need to select the most suitable adhesive for your particular application, as this is the measure that will guarantee success in the use of adhesives when bonding resin.
Guide to Gluing Resin 3D Printed Parts
- Prepare the Surfaces
Make sure that the surfaces to be bonded are free of any oil, dust, or dirt in addition to being free from humidity and dry. Cleaning parts made of resin with isopropyl alcohol is effective and will not harm the material.
- Select the Appropriate Adhesive
Choose an adhesive that will suit the given task. Strong and clear adhesions can be achieved using cyanoacrylate (super glue) especially for fast curing reasons and ease of detection. For more compliant needs and moisture exposure, use of silicone adhesive can be made.
- Apply the Adhesive
Dispense enough of the adhesive onto one of the surfaces to be bonded. It is better to put an insignificant quantity; to avoid an extra amount, as glue might gush out and cause damage to the beautiful finishing.
- Join the Parts
Carefully place both parts face-on and press them down intensively. Keep the assembly at the right position for the time duration recommended by the manufacturer of the adhesive in order to get the ultimate bond.
- Cure the Adhesive
Allotted diminishing time will be based on the particular adhesive used. By the way, with super glue, this might be that it holds for several seconds, and with silicone adhesives, you might have to wait several hours or even more.
- Inspect the Bond
Surface Preparation Techniques
Properly preparing a substrate area is a very important step in order to avoid layer fracturing or separation when adhering 3D printed resin parts. It is recommended that the first step in the process include a surface clean-up to remove any remnants of any supporting structures, dust, oil, or dirt. Residual contamination is removed using isopropyl alcohol (IPA) at a concentration of not less than 91%, which is quite efficient without any side effects to the resin application. Once the surface is cleaned, the parts should be left to air dry, which is important as logically the presence of moisture will limit the bonding strength.
The next step involves the minor roughening of the surfaces, which greatly improves the adhesion ability. In other words, surface bonding technology using sanding involves a mechanical keying process between the adhesive agents and the surfaces to be glued, resulting in improved bond strength. Care must be taken to sand uniformly rather than over-sanding which can in turn change the dimensions of the components.
For improved adhesion in special applications, it is suggested that a resin primer or surface activator, which is appropriate for the adhesive being used, is coated. This is done to enhance the contact between the adhesive system and the substrate, when the part is placed using an adhesive. All in all, caution in regard to the onset of any structural contamination, whether through the preparation or bonding procedures, should be observed. These rather onerous steps of preparing the bond are central in ensuring the bond is formed and remains intact; every detail must be adhered to.
Application Methods for Optimal Bonding
The selection of the ideal application technique is crucial for maximizing bonding performance and heavily depends on the adhesive and the surface to be joined. Typically, for liquid adhesives, various methods such as brush application, spraying, or roller coating are used to be able to spread a controlled layer of the adhesive. Brush application is most suitable for intricate coatings, while spraying is very effective for large applications where even handing is required. Roller coating is ideal for application on smooth or slightly air-foil surfaces and assures a uniform thickness of adhesive layer all over the surface.
For structural adhesives, precise control and waste control is provided by using dispensing tools such as caulking guns or automatic extrusion systems. In the case of pressure-sensitive adhesives, it is necessary to apply steady pressure throughout the adhering process in order to activate the full strength of the adhesive. This can be done in various ways using rollers, laminators or manual hand presses, depending on the extent of the bonding.
Expert Tips for Achieving Seamless Results
- Ensure Surface Preparation
Before bonding adhesive, it is important to use alcohol or any solvent as a cleaning agent to enhance the bonding strength by removing any dust, grease or oil on the surface of the substrates.
- Select the Appropriate Adhesive
Select a bonding medium according to the ability of the mastic to peel off at a particular temperature within calcination, resistance to each phase of the constituents, and application load bias to maximize performance.
- Control Environmental Conditions
Controlled conditions are very advantageous when it comes to the application of adhesives. This is based on that temperature and relative humidity are sufficient in determining how fast the bond that has been made will become strong.
- Apply Adhesive Evenly
When administering a type of adhesive, more attention should be paid to its accessories, such as precise dispensers since sometimes it is not possible to apply the bonding material all over the surface or through its entire depth. Thus, the seal may not be strong enough.
- Verify Bonding Pressure
Apply consistent and adequate pressure during bonding to activate this adhesive and achieve reliable adhesion. Use some devices such as laminating equipment and clips to balance off the air.
- Allow Proper Curing Time
Preventing Air Bubbles During Application
It is always a concern during the bonding of adhesive or other such materials that there may be air entrapment, which is a very disturbing tendency. This is because there are certain steps that must be taken with utmost care and concern to minimize the chances of air pockets from being enclosed in the body of the adhesive once it is applied for its desired purpose. Air pockets, which can be simply understood to be bubbles have a key role in the bonding system in that when released it normally causes destruction. Air entrainment should be avoided during adhesive application by ensuring the target substrate is clean of dirt, oil, and other contaminants. There are good practices like the steady-state application process, where adhesive is applied continuously with no other motion. Special equipment, such as air bubble-removing rollers or automatic dispensers with negative pressure capabilities, also plays a crucial role in ensuring a bubble-free application. It is worth mentioning that proper flow of adhesive ameliorates of the issue of air in the bond as well. For advanced applications, methods such as vacuum bonding, also known as vacuum-assisted adhesive bonding, or degassing the adhesive prior to use, can significantly reduce air entrapment. By so doing, it is possible to always maintain a uniform standard of bond quality across body parts and ensure the goods possess elements that can withstand repeated use.
Maintenance of Glued Resin Models
While glued epoxy models may appeal to many, it is essential to remember that the presence of adhesive decreases the modulus. One major point is that under no circumstances should the models sit outside and be subjected to the changes in temperature and humidity, as resin can tend to expand, contract, or deteriorate. For any bonded joints, regular examination must be carried out to detect signs of adhesion decay, such as browning, cracking, or, more commonly, peeling. Once satisfied that further breaking down would not cause gross damage within the context of the decorative purpose of the overall goods, minor reforms can be reactivated with the use of a compatible adhesive. The areas in question must be cleaned and adequately prepared, which may entail their readhesion.
Reference Sources
-
3D Printing on Textiles–Overview of Research on Adhesion to Woven Fabrics
- Key Findings: This study explores the adhesive properties of 3D printed materials on woven fabrics, focusing on stereolithography (SLA) and PolyJet technologies. It highlights the influence of weave structures on adhesion.
- Methodology: The research examines simple and double-weave structures to determine their impact on adhesive performance.
-
- Key Findings: The study evaluates silicone adhesives (SIL-POXY™/1) for bonding SLA 3D printing materials but notes challenges in achieving satisfactory adhesion.
- Methodology: The research involves testing various adhesives in the context of hydraulic actuators for robotic applications.
-
Soldering of Electronics Components on 3D-Printed Conductive Substrates
- Key Findings: This paper discusses the use of conductive adhesives, which are composite materials with a non-conductive matrix, for bonding on 3D-printed substrates.
- Methodology: The study focuses on the functional phases within adhesives and their role in providing effective adhesion.
Frequently Asked Questions (FAQs)
Q: What is the best glue for resin 3D prints?
A: The best glue for resin 3D prints often depends on the specific requirements of your project. Super glue, also known as cyanoacrylate, is a popular choice due to its quick drying time and strong bond, making it ideal for holding parts together in a short amount of time. For larger or more intricate printed models, epoxy can be a better option as it cures slowly, allowing for adjustments and ensuring a durable bond. Additionally, using a UV resin adhesive can also be effective, particularly for precise applications where you can use a UV flashlight to cure the glue. Ultimately, the best glue for resin may also depend on the type of resin used in the printing process.
Q: How do I choose the right glue for my 3D printed parts?
A: Choosing the right glue for your 3D printed parts involves considering the materials involved and the intended use of the printed models. If you are working with plastic materials, plastic cement can provide a strong bond, while super glue works well for smaller repairs or quick fixes. For larger projects, look for a super strong epoxy or a glue gel that can fill gaps and hold multiple parts together effectively. Additionally, considering the drying time, ease of application, and the need for a smooth surface finish can help you make an informed decision. Always test the glue on a small section to ensure compatibility with your resin and the final look of your model.
Q: Can I use super glue for resin printing?
A: Yes, super glue can be used for resin printing, particularly for small repairs or when you need to quickly hold the parts together. It dries quickly and provides a strong bond between resin printed models. However, it’s important to note that while super glue works well, it may not be the best option for larger projects or applications requiring flexibility. For those situations, consider using epoxy or a UV resin adhesive, which can offer more strength and durability. Always ensure that the surfaces are clean and free from excess glue for the best results.
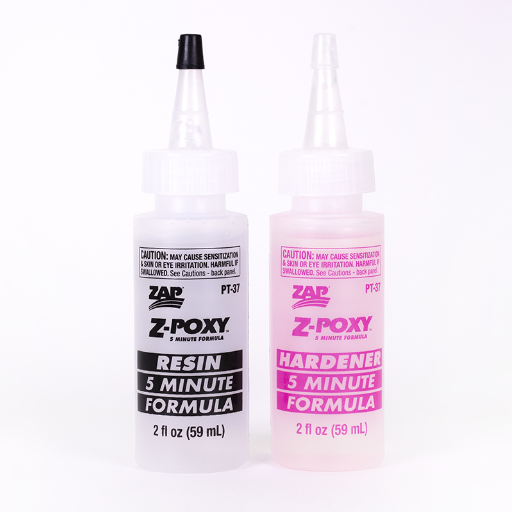
Q: What type of glue works well for repairing resin printed models?
A: For repairing resin printed models, epoxy is often the best type of glue to use due to its strong bonding capabilities and versatility. Epoxy allows you to fill in gaps and provides a durable connection that can withstand stress. Additionally, using a hardener with the epoxy can enhance its strength and durability. If you’re looking for a quicker repair, super glue can also be effective for small fixes, but keep in mind that it might not provide the same level of strength as epoxy. Always ensure that the surfaces are clean and consider applying a layer of glue evenly to achieve the best bond.
Q: How should I apply glue to my 3D printed parts?
A: When applying glue to your 3D printed parts, it’s important to ensure that the surfaces are clean and free from dust or grease. Start by applying a small amount of glue; a thin layer is often sufficient to create a strong bond. If using super glue, a drop or two can be enough, while epoxy may require mixing resin and hardener before application. Press the parts together firmly and hold them for a few seconds to allow the glue to set properly. If you’re using a glue gel, it can help to fill any gaps between the parts. Finally, be sure to remove any excess glue from the edges for a clean finish.


