


Selecting the proper glue for construction or repair involving leather and wood is crucial to ensuring a lasting bond. With projects like restoring an antique chair with leather upholstery or bespoke products, the need for a specific type glue arises to join these two materials. In this particular guide, you will get the best options available for bonding leather with wood, covering effective glue properties, application procedures, and advanced techniques. I will teach you, step by step, how to choose the right glue for your project, ensuring functionality and long-term reliability, so that by the end of this article, you will be well informed.
What’s the Best Glue for Leather to Wood?
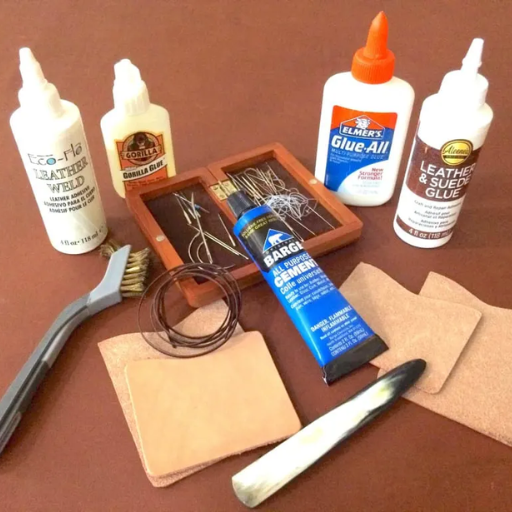
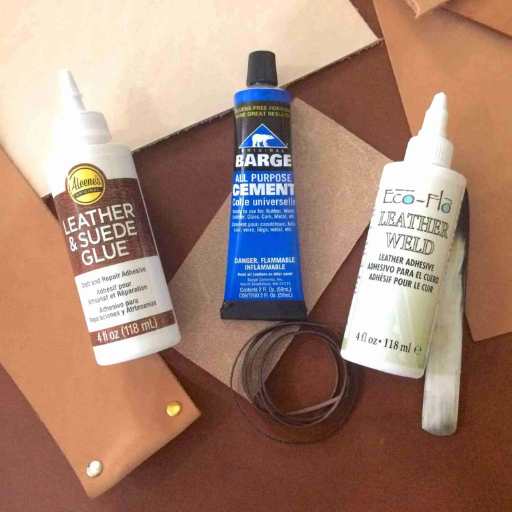
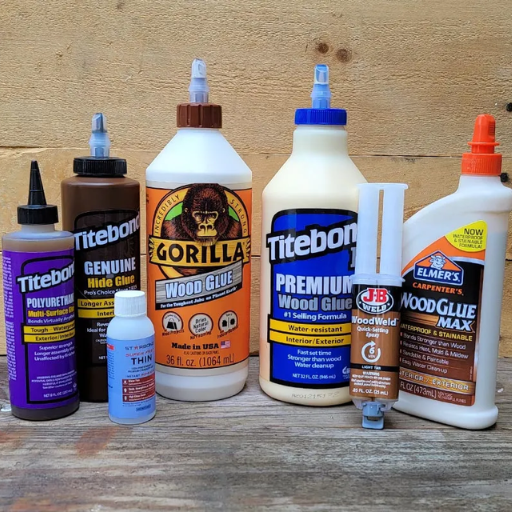
For the best results, a contact adhesive, whether solvent-based contact cement or a high flexible polyurethane glue, serves best for bonding leather to wood. Adhesives of this kind are made specifically to combine two different materials together while giving strength and flexibility. Popular choices like Barge All-Purpose Cement and Gorilla Glue offer strong bonds with excellent resistance to wear and tear. Cleaning and drying both surfaces thoroughly prior to application, as well as adhering to the recommended guidelines, will yield the best results.
Understanding Different Types of Adhesives
|
Adhesive Type |
Key Features |
Best For |
Limitations |
|---|---|---|---|
|
Epoxy |
Strong, durable, chemical-resistant |
Metal, plastic, wood bonding |
Requires precise mixing and curing time |
|
Cyanoacrylate |
Quick-setting, high strength |
Small repairs, non-porous surfaces |
Brittle, not heat-resistant |
|
Polyurethane |
Flexible, water-resistant, versatile |
Wood, foam, plastic, and metal |
Expands as it cures |
|
Silicone |
Waterproof, flexible, heat-resistant |
Glass, ceramics, sealing applications |
Longer curing time |
|
Contact Cement |
Instant bond, high shear strength |
Laminates, rubber, plastic |
Difficult repositioning after bonding |
|
Hot Melt Glue |
Fast-setting, convenient application |
Temporary fixes, crafts, porous surfaces |
Limited strength, not heat-resistant |
|
Acrylic |
UV-resistant, strong, high impact resistance |
Outdoor signs, display racks |
Requires proper surface preparation |
|
PVA Glue |
Safe, non-toxic, easy to use |
Paper, wood, cloth |
Not waterproof |
|
Spray Adhesive |
Uniform application, quick drying |
Paper, foam, fabrics |
Weak bond for heavy items |
|
Phenolic Resin Glue |
High durability, moisture and heat-resistant |
High-stress and marine applications |
Complex application process |
Is Super Glue Effective for Leather and Wood?
Due to super glue’s rapid curing and strong bond formation, it works well for both leather and wood under certain conditions. For leather, the super glue bond is nearly instantaneous because it interacts with the moisture in the material. This makes it ideal in situations needing precision and for small/fine repairs. Nonetheless, given the flexible nature of leather, super glue will not stand up to enduring significant bending or stretching over time.
With regards to wood, super glue works exceptionally well with small pieces, intricate carvings, or delicate precision repairs. It does not perform well on large pieces, or bendable wooden structures where a lot of shear strength is necessary because with time and stress, super glue becomes brittle and fragile. Super glue bonds best on smooth surfaces provided they are not excessively polished; light sanding improves contact and bond strength. To enhance bond strength on both wood and leather surfaces, cleaning, aligning, and contact including thorough preparatory work is vital.
Comparing Contact Adhesive and Wood Glue
|
Key Parameter |
Contact Adhesive |
Wood Glue |
|---|---|---|
|
Primary Use |
Bonding non-porous surfaces |
Joining wood and porous materials |
|
Application Method |
Direct application on both surfaces |
Applied to one surface |
|
Drying Time |
Dries within minutes |
Requires hours to cure |
|
Flexibility After Bonding |
Retains flexibility |
Hardens and stiffens |
|
Strength Under Stress |
Moderate shear and tensile strength |
High tensile and shear strength |
|
Ideal Surface Type |
Smooth, non-porous, or lightly sanded |
Porous wooden surfaces |
|
Heat Resistance |
Moderate |
Variable, depending on type |
|
Water Resistance |
Limited |
Waterproof varieties available |
|
Longevity |
May weaken over time |
Long-lasting with proper application |
|
Recommended Environment |
Indoor projects requiring speed |
Indoor and outdoor woodworking |
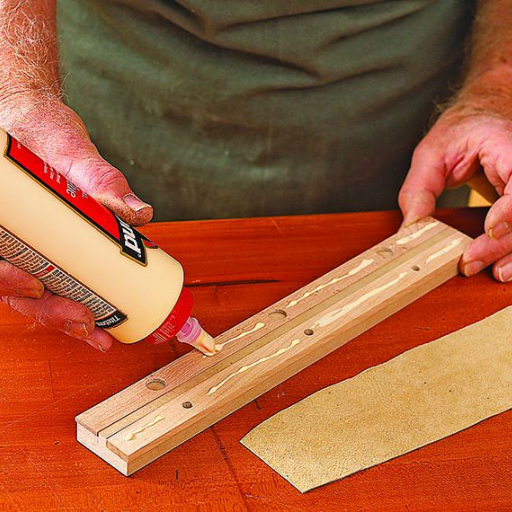
How to Properly Apply Glue for Leather to Wood?
- Prepare the Surfaces: Both leathers section and wood portion must be unsoiled, ungreased, and totally devoid of particulate matter as well as clean and dry. Also sand down the overly smooth wooden surface to enable traction for bonding.
- Choose the Right Glue: Utilize an appropriate glue for leather-to-wood application seams. We suggest using contact cement or a leather-specific glue for firm bonds.
- Apply the Adhesive: Take a suitable brush and apply an even thin film of glue on the wood and the leather surfaces to be bonded. Excessive application can lead to difficulty in cleaning excess glue which seeps out.
- Allow the Glue to Set: Follow the manufacturer’s guidelines for the necessary bond wait time. For contact cement, the recommended wait is drying to the tacky stage.
- Press Surfaces Firmly: Properly align the leather and wood before pressing them together. Both manual pressure and clamps or weighted objects should be used to maintain constant pressure until the glue has fully cured.
- Curing Time: Consult the instructions for the specific glue about the most suitable post-application cure times. Do not place any stress on the bond until it is fully cured for the best protection.
Achieving a strong and lasting bond between leather and wood requires all the steps above.
Preparing Surfaces for a Strong Bond
Adhesives joints will always require proper surface preparationso that the joints are durable and strong. Start with proper cleaning of both surfaces to remove contaminants such as dirt and grease as well as oils that fall under the category of weakening adhesion. Use an appropriate cleaning agent such as isopropyl alcohol on leather pieces and a damp cloth or mild detergent on wooden surfaces making sure these are dry before proceeding further.
As each material contains unique surface textures, it is important to examine both surfaces. Scuffs that adorn leather surfaces benefit from fine sandpaper scrapping as it helps their bonding ability with adhesives. Wood surfaces also require light sanding in order to remove finishing coats and any unlevel imperfections. After sandpapering, remember to remove dust with a clean dry cloth or compressed air.
Hygrometric factors like temperature and humidity also play a big role in adhesion. Always remember to work under controlled environmental factors like temperature and humidity. Moisture poses a great risk to the curing process of bonds. Thus, low moisture is preferred. Following these procedural steps increases the chances of a leathery bond to wood.
Common Mistakes to Avoid When Gluing
- Skipping Surface Preparation
One of the most errors to made is ignoring essential surface preparation. Failing to clean, sand, or dry surfaces thoroughly augments weak adhesion or bond failure. Contaminants like oil, dirt, or remnants of adhesives from prior bonds form barriers which impede effective bonding on a molecular level.
- Using the Wrong Adhesive
Another common error is selection of the wrong type of glue for the particular materials involved. Not all glues are universal and every kind of glue comes with its preconceived optimal material compatibility. For example, wood glue is optimized for porous surfaces like wood. Metal or glass will fail when glued to it. It is important to know the scope of application and formulation of the glue in question.
- Applying Too Much or Too Little Adhesive
Inadequate or incorrect application of an adhesive may result in damage to the constructed bond. Overuse of adhesive leads to prolonged curing times, excessive dripping, and produces a weak bond from spread. Paradoxically, underuse of adhesive results in insufficient coverage. In either case, the bond’s integrity is jeopardized, especially under load.
- Ignoring Environmental Conditions
The environmental conditions affect temperature and humidity directly. Attempting to glue within the unreasonable limits of the adhesive’s specifications often leads to curing troubles and premature bond failure. Always follow provided guidelines in order to achieve accurate results, within given conditions.
- Failing to Clamp Properly
Clamping achieves uniform pressure, which is essential for a lasting bond, particularly on uneven or porous surfaces. Without clamping, structure imbalance leads to weaker joints in an unbonded structure. Adequate time should be given for curing before the clamps are released.
Correcting the above oversights will give you the best results from adhesive and guarantee stronger and more dependable bonds for diverse projects.
Can You Repair Leather with Wood Glue?
No, wood glue cannot be used for repairing leather. Wood glue is useless for leather as it sticks onto porous materials like wood. For leather repairs one needs to use flexible glues with leather glues and contact cements that are meant for leather while keeping its pliability. Also, whatever joint needs fixing should have the designated adhesive for repairs, if not, the repair will not be reliable and end up failing.
When to Use Wood Glue for Leather Repairs
Wood glue is not leather’s go-to choice when it comes to using an adhesive. This statement is true, although there are some exceptional circumstances that would warrant its use. For situations in which wood complements leather or any other porous material, using this glue becomes feasible. A good example would be putting leather strips or panels onto wooden surfaces during furniture restoration or leather crafting. This form of application would work best when leather is used solely as a covering material, because leather that is stressed or flexed is likely to break.
It is important to remember that in such cases, the surface of leather which is to be glued must be treated in most cases. Preparation of the surface or light sanding may improve bonding with wood glue. The application of wood glue should be done in a controlled environment. Consider if adhesives more suited to leather may be used in conjunction to the primary glue to improve durability. For critical leather repairs or leather-to-leather joints, performance-focused leather-only bonds should be employed.
Best Practices for Repairing Leather and Wood
With items combining wood and leather, it is critical to determine the correct bond type to use for lasting strength and durability. It is often stated that these types of bonds should use materials with a broad range such as porous materials Polyurethane adhesives and contact cements. Thorough cleaning of leather from oil and dirt prior to gluing is key.
Clamping aids in the repair process as well. Even pressure over the bonded surfaces ensures that the adhesive cures thoroughly and forms a strong bond. Depending on the materials’ thickness and properties, clamping for 12 to 24 hours is most likely needed for ideal outcomes.
Also, any repairs to be made should be done within a controlled environment with no high humidity or extreme temperatures to avoid compromising adhesive properties. It is also favorable to use UV flexible adhesives for items that are under direct sunlight as it will improve their durability in the long run. Systematically, these approaches will strategically aid in preserving leather and wood while also providing a clean aesthetic.
What are the Advantages of Using Contact Adhesive?
Contact adhesive has its benefits when used in bonding applications. One of them is that it provides strong and instant adhesion, which makes it very useful for projects needing fast turnaround time. Additionally, this adhesive works well for wood, leather, metal, rubber, and plastic which broadens the capabilities industries can contact these materials for use. Moreover, the bond is made durable because contact adhesives withstand high temperatures and moisture. In terms of professional and DIY projects, this reliability makes it advantageous.
Benefits of Flexible Bonds in Leather Projects
Flexible bonds in leather projects prove to be very beneficial for making sophisticated and durable products. Given below are the detailed advantages of such applications that shed flexible bonds:
- Enhanced Durability
Flexible adhesives are capable of enduring changes in tension and stress that the leather goes through in its use. Such bonds are beneficial when compared to rigid ones as they help elongate the shelf life of the good by decreasing chances of separation or cracking.
- Improved Comfort and Flexibility
For products such as leather bags, shoes and even upholstery, flexibility is the most important factor. Flexible bonds ensure that the brand-new leather item remains comfortable while providing strength and ease of usage.
- Temperature Resistance
Leather goods are known to be exposed to harsh temperature differences. Flexible bonds are able to hold temperature ranging from -20°F to even 180°F (-29°C to 82°C) with no loss to the bond strength.
- Resistance to Mechanical Forces
Straps and belts made from leather undergo constant bending and strain. Flexible adhesives can take such strains while safeguarding the fixed surfaces from damage due to repeated mechanical pressure.
- Versatility Across Leather Types
Flexible adhesives work hand in hand with various finishes of leather such as full-grain, top-grain and even suede. Such adaptability guarantees reliability with differing leathers for consistent and dependable outcomes.
Both masters and industrial manufacturers may achieve better functionality, durability, and finishing of the product by using a flexible bond in conjunction with leather technology.
How to Use Contact Cement Effectively
In the case of using contact cement, the Steps SOP must be strictly followed for best results. First is the selection of contact cement which should be aligned with the chosen material for melting point compatibility. The surfaces that will be bonded must be prepared by first cleaning them from moisture, oil, dust, and debris. In this case, use sand to increase surface area to provide more grip.
Utilizing a brush, roller or applicator, apply a thin and even covering of contact cement on both surfaces. Wait 10-15 minutes for the contact cement to reach the tack stage before bonding pieces. Relative humidity and temperature may impact the duration of drying, so checking instructions from the producer might help. During use, sponsored limited contact cement use to prevent mechanical mismatch because of uneven bond strength.
Once the adhesive has been applied and it has suitably reached the tack level, the parts to be joined should be accurately aligned. Make sure to apply even pressure beginning from one edge progressing to the opposite edge to reduce air entrapment. Thorough contact across the bonded surfaces may be achieved by using a roller or press. Verify that the contact cement has no time delay because it immediately forms a permanent bond. Therefore, while repositioning, contact cement leaves no opportunity to relocate parts.
How to Choose the Proper Glue for Your Project?
When planning a project, picking glue requires careful consideration of the following:
- Material Compatibility – Check the label or specifications to the ensure bond materials to be used are wood, metal, plastic, or even fabric, and that the adhesive is made for these materials.
- Strength Requirements – For regular, medium strength bonds, select glue that provides suitable low strength to the bond. For stronger applications, use construction adhesives or epoxies.
- Cure Time – For quick assembly projects, prefer cyanoacrylate adhesives which dry rapidly.
- Environmental Factors – Take into consideration water exposure and heat, or chemicals. Some glues, such as polyurethane adhesives, are great for waterproof or weather-resistant applications.
- Application Method – For area coverage, use spray adhesives. For firm and accurate placement, opt for contact cement.
Use of glue incorrectly paired off with the project will result in a lower effective strength. Following the commands from the manufacturer, in terms of application, greatly improves effectiveness of the project. Proper handling and selection increases longevity.
Factors to Consider When Selecting an Adhesive
Every adhesive application has specific requirements that need to be analyzed in order to guarantee that reliable performance and durability is achieved. Below is a comprehensive list assessing each of these requirements:
- Substrate Compatibility
Adhesive selection for a particular application should be driven by chemistry and engineering factors such as material interface compatibility and pre-treatment protocols to enable required bonding. For instance, metals are ideally bonded using epoxies and glasses and ceramics using silicone adhesives. It is advisable to conduct substrate testing to confirm that adhesion strength guarantees project specifications.
- Load Requirements and Strength
Mind the joint’s expected sustained mechanical loading principles, for instance, axial, shear, or peel. For bonded structural members , high tensile load applications often employ rigid bonded joints which utilize equally strong adhesive mediums, like epoxy-acrylic based glues. Under ideal conditions, directional strengths of up to 35 Mpa or approximate 5000 psi can be attained.
- Environmental Resistance
Environmental exposure conditions such as extreme temperatures, moisture, chemicals, and UV radiation should be analyzed. For outdoor applications, silicones and polyurethanes are best suited as they withstand prolonged exposure to sunlight.
- Curing Time and Process
Project specifics dictate curing timelines. While some require steps like heat, pressure or set conditions to achieve proper alliance between materials, some do not. Epoxy cures invariably demand much longer times exceeding 24 hours while quick dry ones like super glue (syanoacrylate) only require seconds.
Taking all of these factors into consideration allows for the selection of an adhesive best suited to the technical and operational requirements of a given project, thereby improving its efficiency and longevity.
Where to Find the Best Glue for Your Needs
Reference Sources
-
Best Glue for Leather to Wood: This article discusses various adhesives like polyurethane, epoxy, and contact cement, detailing their properties, application methods, and suitability for bonding leather to wood.
-
How to Glue Leather to Wood: A practical guide from WOOD Magazine, focusing on using white or yellow wood glue for bonding leather to wood, with tips on testing and precautions.
-
Leather Glue SB: A product-focused article on a solvent-based glue designed for leather, highlighting its flexibility, quick setting time, and suitability for various leather types.
Frequently Asked Questions (FAQs)
Q: What is the best way to glue leather to wood?
A: The best way to glue leather to wood is to use a strong adhesive specifically formulated for such materials. Options like Weldwood contact cement or 3M 77 are often recommended for achieving a good bond.
Q: Can I use regular glue to attach a piece of leather to wood?
A: While you can use regular glue, it may not provide the strongest bond. It is advisable to use the best adhesive designed for leather and wood, such as contact cement, for optimal results.
Q: Does the glue for leather to wood dry clear?
A: Yes, many adhesives are designed for gluing leather to wood, like some types of contact cement, dry clear, making them ideal for projects where appearance matters.
Q: What is the best adhesive for attaching leather to wood?
A: The best adhesive for attaching leather to wood typically includes contact cement or spray adhesives like 3M 77, as they provide strong, durable bonds.
Q: Is double-sided tape a good option for gluing leather to wood?
A: Double-sided tape can be used for temporary attachments, but may not provide a strong or permanent bond. It is better suited for lighter applications rather than heavy-duty leather to wood projects.
Q: How do I prepare the surfaces before using glue on leather and wood?
A: Ensure both surfaces are clean and free of dust or oils. Lightly sanding the wood can help the adhesive adhere better, and you may want to slightly roughen the leather surface for improved bonding.
Q: Can I glue leather to leather using the same methods?
A: Yes, many of the adhesives suitable for glue leather to wood can also be used for leather to leather. However, ensure that the adhesive is compatible with both materials.
Q: How long does it take for the glue to cure when attaching leather to wood?
A: The curing time for adhesives varies depending on the type used. Contact cements typically need about 15-30 minutes to set and may take up to 24 hours to fully cure for a strong bond.
Q: What should I do if I need to remove the glue later?
A: If you need to remove the glue, consider using a solvent recommended for the specific adhesive you used. Always test a small area first to ensure it does not damage the leather or wood.


