


The adhesion of PLA to metal can seem complicated at times, but with the correct procedure and materials, it can be achieved effectively. If you are a DIY enthusiast, a maker experimenting with 3D printing projects, or a repair professional, knowing how to glue two different materials together for a strong, long-lasting result is crucial. This guide-lined version will take you through the tools, methods, and tips to help you securely glue PLA to Metal, after which you’ll feel confident about working on your project and making a strong bond that will last between the surfaces. Read on for the success secrets!
Choosing the Right Adhesive for PLA and Metal

When gluing PLA to metal, it is crucial to select the right adhesive to ensure a strong and acceptable bond is created. The best choices are:
Epoxy Adhesives
A two-part epoxy adhesive is the best choice because it provides strong bonding and is a very durable adhesive. Used with two different materials, suitable for PLA and metal, to bind and make a lasting bond.
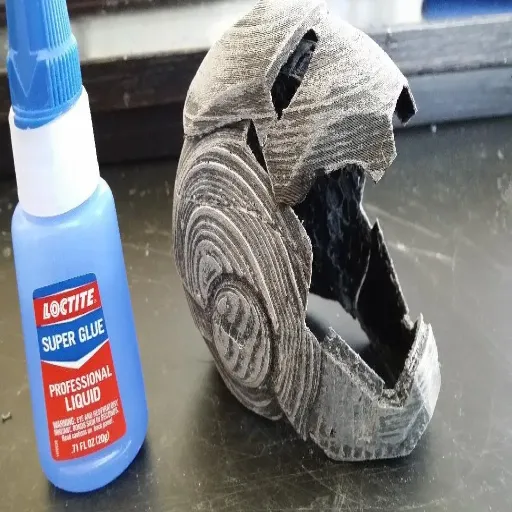
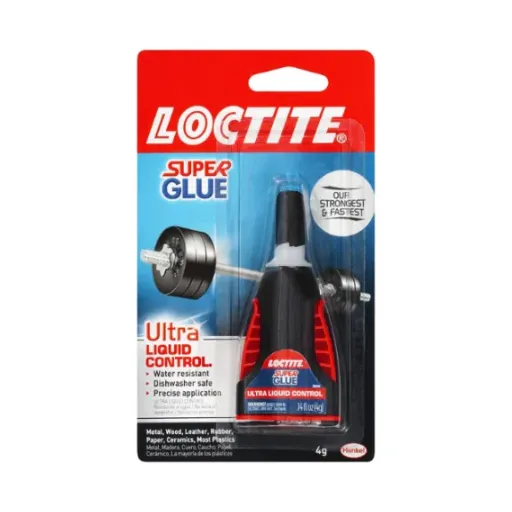
Cyanoacrylate (Super Glue)
For a simple fix, apply cyanoacrylate glue to achieve a strong bond between PLA and metal. But this glue may not be heavy-duty.
Polyurethane Adhesives
This glue is ideal for ensuring a strong bond with water resistance, making it a preferred choice for projects exposed to various conditions.
Factors to Consider when Selecting Glue
Glue selection to bond PLA to metal must consider the following:
- Strength and Durability: Consider the strength of the bond required for the particular project. For load-bearing applications, adhesives such as epoxy or polyurethane are appropriate due to their tensile strength.
- Temperature Resistance: Be aware of the adhesive’s abilities to resist temperature changes, especially if your project will be exposed to heat or direct sunlight.
- Curing Time: Adhesives vary in curing time, which can impact your project’s schedule. Fast curing can be handy where quick repairs are considered; slow curing might offer a better bond.
- Water Resistance: Should the final product be exposed to moisture or water, water-resistant or waterproof adhesives stand the best chance for survival.
- Ease of Application: Some adhesives can be dispensed from tubes or double syringes, making the application process more manageable.
Specialty Adhesives for Specific Applications
When selecting specialty adhesives for bonding PLA to metals, the key factor is considering the application. For instance, when high temperatures are applied to the bond, a high-temperature epoxy adhesive should be used, given its excellent thermal resistance and integrity, even under heat. Suppose flexibility is required, as in applications where parts are to be moving or vibration may be present. In that case, silicone-based adhesives are an excellent choice due to their high elasticity and durability. In cases where super-fast bonding is required, a practical solution is to use cyanoacrylate adhesives (super glue) designed specifically for plastics and metals. Always ensure that adhesives are compatible with both PLA and the specific metal in question for optimal bonding and durability.
Preparing Surfaces for Optimal Bonding
Proper surface preparation is essential for achieving a strong bond. Firstly, clean the surfaces to remove any dirt, grease, or dust. Use isopropyl alcohol or a mild detergent for cleaning. After cleaning, ensure the surfaces are dehydrated. To increase adhesion, if you have nice, smooth surfaces, you can lightly scuff them with fine-grit sandpaper—the fine scratches give the glue something to hold onto. However, be cautious: over-sanding can weaken the material. The adhesive manufacturer’s instructions should always be followed for the best results.
Cleaning Techniques for PLA and Metal Surfaces
PLA Surface Cleaning
When cleaning a PLA surface, the use of aggressive chemicals is to be avoided. A straightforward way is to use the damp cloth and sponge method with warm, soapy water to gently clean away dirt residue. Any of the heavier cleaning options would be isopropyl alcohol, but it must not be left in contact with the surface for too long to avoid weakening.
Metal Surface Cleaning
With metal surfaces, the type of metal governs the cleaning method. For non-corrosive metals, such as stainless steel, cleaning with a mild detergent and warm water, and wiping carefully with a soft cloth seems ideal to avoid scratches. Metals that are prone to corrosion should be thoroughly dried after washing, and a protective coating should be applied if available.
Important Note: Microfiber cloths are effective in preventing scratches on polished metal surfaces. Both PLA and metal ampules should always be cleaned in well-ventilated areas, ensuring that the tools and cleaning agents used are suitable for the material.
Importance of Sanding for Improved Adhesion
From the very beginning, it is essential to understand that sanding is the primary preparatory step for enhancing adhesion in any application, including painting, coating, or bonding. Sanding creates a surface texture that can support mechanical bonding between layers. Conversely, a smooth and glossy surface can hinder adhesion due to the minimum grip it offers, which eventually is a recipe for peeling or failure. The latest data from the search engine reveal that consistently sanded preparation leads to an increased lifespan of a finish or adhesive siding, due to the microscopic grooves shearing for optimal adhesion. This is particularly important for metals, plastics such as PLA, and wood surfaces, for a cleaner/professional result.
Step-by-Step Application Process for Gluing PLA to Metal
-
1
Clean the Surfaces: First, thoroughly clean the PLA and metal surfaces to remove dust, grease, and other residues. Using isopropyl alcohol is recommended. After cleaning, leave the surfaces to dry completely.
-
2
Sand the Surfaces: Gently sand both the PLA and the metal surface with fine sandpaper (for example, 220 grit), which gives a rough surface to increase bonding. Finally, dust off with a clean dry cloth.
-
3
Choose the Right Adhesive: A powerful adhesive that works on both PLA and metal is suitable here (such as two-part epoxy or super glue). Check the manufacturer’s instructions for the application method.
-
4
Apply the Adhesive: Apply a thin, even layer of glue to one of the surfaces. Do not put too much glue to prevent it from oozing out during bonding.
-
5
Join the Pieces: Bring the PLA and metal pieces together by applying firm pressure, ensuring they are perfectly aligned. Hold the pieces in place for the curing time specified by the adhesive.
-
6
Allow to Cure: Leave the pieces under the glue undisturbed for the full curing time as specified on the glue instructions for maximum bonding strength.
-
7
Test the Bond: After curing, gently test if the bond is firm. If weak, reinforce the weak areas by reapplying glue.
Cleaning and Sanding Surfaces Effectively
Proper cleaning and sanding of surfaces are crucial for obtaining a strong bond between PLA and metal or any other materials. Clean the surface by first wiping it down with a lint-free cloth and cleaning solution (such as isopropyl alcohol) that will remove grease, dust, or dirt. For heavier dirt, use a mild detergent with warm water and immediately dry the surface afterward.
When sanding, use a light touch on the surfaces; the adhesive adheres better to a finely porous surface. Use sandpaper with grits ranging from 220 to 400. Sanding is done evenly, primarily on surfaces where there will be direct contact between the adhesive and the surface. After sanding, clean the surface again to ensure that all dust from sanding is removed, allowing for a smooth adhesive application. These steps ensure that the materials bond well to one another, yielding lasting results.
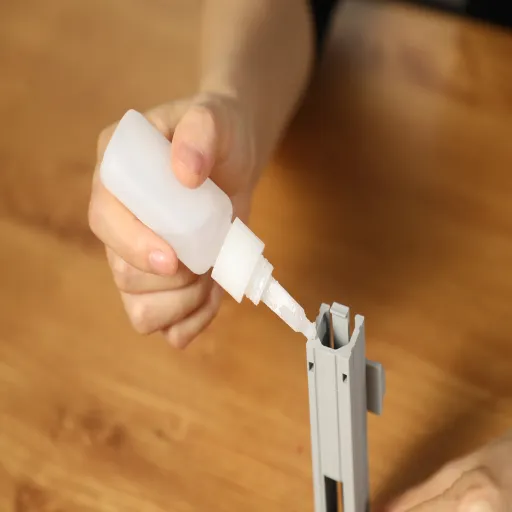
Applying Adhesive and Securing Surfaces
Adhesives should be applied according to the manufacturer’s instructions for optimal adhesion. The adhesive is spread evenly onto one or both prepared surfaces, depending on the type of adhesive being used, as it is being applied. The application can be made using a brush, an applicator, or even the nozzle of the adhesive bottle itself, spreading a layer that must cover every area that will come into contact with it. Once applied, the surfaces must be pressed firmly to form a strong bond. If so indicated by the adhesive, clamping, weighting, or some other form of pressure sustenance might be required until the adhesive finishes curing. Adequate time must be allowed for curing, as recommended by the manufacturer, because expediting the process will weaken the bond.
Troubleshooting Common Bonding Issues
Weak Bond
- Ensure that the surfaces are clean, dry, and free from dust, oil, or moisture.
- Ensure that you have used the correct adhesive for the materials in question.
- Apply sufficient pressure and follow the recommended cure time
Adhesive Not Curing
- Check the atmospheric temperature and humidity during application
- Ensure the two-part adhesive was mixed properly
Excess Adhesive Oozing
- Apply a proper amount of adhesive for coverage only
- Clean excess while wet using the recommended solvent
Surfaces Not Sticking
- Apply adhesive evenly on all surfaces
- Verify the adhesive is not expired
Weak Bonds: Causes and Solutions
Weak adhesive bonds can result from several causes, including surface conditions, the incorrect choice of adhesive, or inadequate curing. Suggested remedies follow some common reasons leading to weak bonds:
Adhesive Not Setting Properly
Several factors may be preventing the adhesive from setting. First, the bonding surfaces should be clean and dry, free from contaminants like oil, dust, or grease. Preparing the surface is a crucial step because any type of impurity can prevent the adhesive from forming a proper bond. Temperature and humidity conditions are other culprits that may affect the curing of the adhesive; ensure your working environment matches the recommended conditions for your product. Also, be sure to check your adhesive choice; if you have an unsuitable type applied to your materials or for the intended use, the worst result can occur. A correctly selected adhesive, specially chosen for your purpose, is essential. Lastly, an insufficiency of application thickness or uneven application results in improper setting. Follow all good practices in preparation, application, and curing to avoid such situations with the product.
Safety Tips for Working with Adhesives

⚠️ Essential Safety Guidelines
- Work in a Well-Ventilated Area – Ensure there is good airflow to prevent inhalation of any fumes, which may be harmful at times. Use a mask if necessary.
- Protect Your Skin and Eyes – Don gloves and goggles to avert adhesive contact, which can irritate or injure.
- Read and Follow Instructions – Always refer to the manufacturer’s safety instructions and use guidelines before commencing.
- Store Properly – Keep adhesives in their original containers, away from heat and the reach of children.
- Dispose of Safely – Empty containers and unused adhesives should be disposed of in accordance with local regulations to safeguard the environment.
- Avoid Open Flames – Many adhesives are flammable; keep sparks, heat, and open flames at a safe distance from the area.
Ensuring Proper Ventilation While Working
Proper ventilation is crucial while working with adhesives, paints, or materials that release fumes. A poorly ventilated space can lead to a harmful buildup of vapors, potentially causing dizziness or nausea. Prolonged inhalation also leads to long-term health effects. It is, therefore, advisable to keep the workspace well-ventilated by opening windows and doors whenever possible to ensure free circulation of air. Use fans to blow the fumes away from yourself and towards the openings; exhaust ventilation in enclosed areas may also be warranted. Recent studies have revealed an increased interest in portable air purifiers equipped with HEPA filters as a safe and effective solution for workspace ventilation. Considering all these safety issues will enable the creation of a more comfortable work environment.
Protective Gear: Safety Measures to Implement
The first key consideration when addressing workplace safety is selecting proper protective gear. Recent trends in search queries, such as “best safety gear for hazardous work” and “top PPE for chemical handling,” indicate increased interest in and demand for higher-level PPE intended for use in challenging environments. The leading safety equipment includes gloves made from materials resistant to the chemicals being used, safety glasses or face shields to protect the eyes from splashes, and respirators or masks for protection against airborne contamination. Many workers are exploring options in PPE that offer ergonomic benefits for improved comfort while working long hours. Selecting the proper safety gear reduces hazards and ensures a productive work environment.
Proper Adhesive Handling and Disposal
I do complete and follow instructions on the use of adhesives. Appropriate PPE is worn, be it gloves or goggles, to prevent any hazards. My approach to disposing of adhesive waste is to contain it in any case, thereby preventing hazards to persons or the environment, and then duly deposit it into appropriate disposal sites or facilities, as required by local regulations.
Reference Sources
Here are five scholarly sources of an authoritative nature about the gluing of PLA to metals:


