


Leather has been around for ages for durability purposes, but the best product is never truly immune to wear and tear. Be it a purse veiled with scratches, a crumpled jacket, or a cracked leather chair, finding the ideal repair can always seem to be problematic. Most people ask, “Can we use some day-to-day super glue for leather?” Is it really a quick fix and answer to any problem, or would gluing something only spell disaster for it? This article will explore whether or not super glue can be applied to leatherwork and weigh the pros and cons to help you decide how best to make your leather repair. Get ready to embark on a hands-on, step-by-step guide to keeping your leather goods mint!
Introduction to Gorilla Glue and Its Suitability for Leather Repairs

What is Gorilla Glue?
Gorilla Glue is a strong, versatile adhesive used for nearly all repair and bonding purposes. It is tough and holds fast onto materials ranging from wood, metal, ceramics, and some types of plastics. The glue sets upon coming into contact with water, ensuring that the bond once cured is long-lasting and strong.
Gorilla Glue is good enough for leather in some repairs. It penetrates the material and forms a seal tight enough to hold seams, patches, or other smaller fixes. Nonetheless, this glue tends to dry rigidly, which might damage the leather’s flexibility, especially if it is softer or more delicate.
💡 Important Note:
The surfaces being bonded should be free of dust or oils to obtain the best results with leather projects. Consider the type of leather and what the item is going to be used for, since a rigid bond would be unsuitable for an article like a bag, a belt, or shoes, which must be flexible. Always observe the instructions for use as given by the product to avoid damage and achieve a worthy repair.
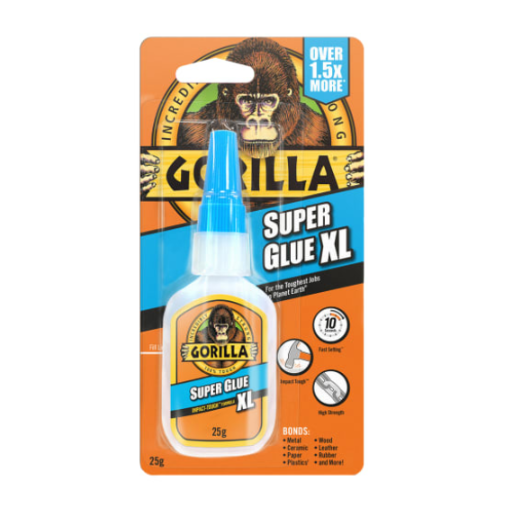
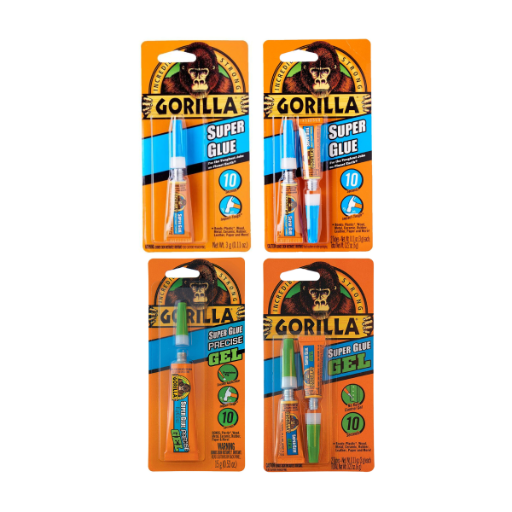
Types of Gorilla Glue: Focus on Gorilla Super Glue
Gorilla Super Glue is created for quick bonding and sturdiness-it’s great for putting things together-small broken items or any type of precise repair. Specifically from a working point of view, they will glue ceramic, plastic, wood, metal, and rubber. It sets within a few seconds without any need for clamping, thus handy for quick fixes at home.
This is probably one of the few fast-set adhesives that resist impacts. The bond formed by Gorilla Super Glue is fast and also heavy-duty capable of resisting wear-and-tear of everyday life. So, it can be used for fixing anything which is handled quite a lot, including home decorations or small tools. With that said, it should not be used for applications manifesting any sort of flexibility as the bond sets rigid after drying.
Application Process:
- Ensure the surfaces are free from dust and drying before applying
- Carry out the application of a small amount of glue on one surface
- Press the two pieces together and hold for a few seconds
- Let it cure for 24 hours to attain maximum strength
Why Use Gorilla Glue on Leather?
Given that Gorilla Glue has a very strong bonding power and is versatile with its application, it would make a good choice for leather. It forms a very strong and lasting bond to fix leather, be it bags, belts, or shoes. Furthermore, unlike some glues, it works on both smooth and textured leather surfaces, making it its repairs trustworthy in the long run.
Another plus-point of using this glue on leather is wear and tear resistance. Once set, the bond is strong enough to resist the ill treatment of daily use-bending, stretching, handling, and in fact, anything you throw at it. This attribute is especially beneficial for restoring leather goods that are often distressed through handling and movement.
Hence, the glue is easy to apply, nevertheless not requiring any specialized tools. Being fast-acting glue allows for quick repairs. Binding correctly with an adequate application and curing time yields results of good quality that maintain the appearance and function of the leather article. Strength, flexibility, and ease of application thus make this glue a trustworthy option to carry out any repair on insertions.
Proper Uses of Gorilla Glue on Leather Materials
When to Use Gorilla Glue on Leather
Gorilla glue has primary application on leather for repairs, reinforcement, or adhesion to several surfaces. It works excellently when small tears, edges, or separated pieces on leather articles such as bags, shoes, or furniture require attention. The glue, if properly applied will form a sturdy closure to regain usefulness, thus not being visible on the leather.
For best results, ensure that the surfaces of leather to be glued are wiped clean, dry, and remain free of dust or grease. This will help the glue stick firmly and give a long-lasting fix. Apply a thin and even layer of glue to one side and press the parts together. Allow sufficient time to set and cure, adhering to curing times for best results.
⚠️ Important:
For the small and non-structural repairs, this glue works best. For bigger pieces of damage or intricate leather work, an adhesive for leather and professional services may be appropriate. Always test on a hidden area, however, so that you confirm it is going to work with the material and prevent discoloration.
Best Practices for Applying Gorilla Glue
1. Preparation
Clean with denatured alcohol or common cleaner all parts that will need bonding; allow to dry, and avoid contamination with grease or other dirt. These measures will enable the strongest adhesive bond and decrease the chance of glue failure over time. Sanding usually improves adhesion for gluing certain materials, especially when it leaves a surface that is rougher for the glue to grip.
2. Application
Keep glue amounts even and appropriate. Excessive glue is a mess and leads to weaker bonds. The adhesive should be applied evenly on the area to be bonded but must not be over-saturated on any part as it will cause the glue to take longer to dry or may result in unsatisfactory results. For porous materials, moistening one surface very slightly with water before applying the adhesive may prove helpful for bonding.
3. Curing
Press and clamp the materials tightly during curing. The adhesive should always be taken through its respective period of curing for maximum bond strength. Handling or stressing the bond prior to complete curing weakens it. Correct usage also ensures that the glue works up to its potential, making cleanup easier and repair more reliable.
Limitations of Gorilla Glue on Leather
On leather, Gorilla Glue does not work too well because of how flexible and porous the material is. The leather might bend, stretch, or move during regular use, and all of these actions weaken bonds over time. Rubberized adhesives like Gorilla Glue will thus likely find it doubly difficult in finding a permanent connector-germ resistant against repeated movements-if the leather item must undergo regular use or stress.
Furthermore, the leather surface could be anything from smooth and glossy to coarse and textured. These features or lack thereof are what set the glue’s ability to penetrate an adhesive layer properly. Depending on the type of leather, it might be odious for the adhesive to grasp on, especially on smooth or treated leather, while in the case of porous or raw leather, the glue might be absorbed unevenly, thus causing poor bonding.
There are other challenges against the glue’s claim to stay effective on leather, one of them being moisture, heat, or some environmental conditions. Glue after curing becomes a really hard bond, and leather in the opposite way needs some kind of elasticity. Such a contradiction simply causes the bond to get damaged, or dissociate with time, so other adhesives that are specially formulated for leather would be better in most situations.
Step-by-Step Guide for Applying Gorilla Glue to Leather
Preparation Process: Cleaning and Prepping Leather
Step 1: Initial Cleaning
Use a soft damp cloth to wipe away dust and dirt or any other particles, from the leather. If the surface seems greasy or stained, use a cleaner meant for leather that deeply cleans without harming the leather. The leather should be completely dry before going on to glue application because any moisture would interfere with adhesive bonding.
Step 2: Surface Inspection
Look out for anything like cracks or rough patches or unevenness on the leather surface. Take finely graded sandpaper and lightly sand the troublesome zones till smooth, thereby improving adhesion. Be extra cautious not to spoil the texture or looks of the leather. After sanding, dust off any residue with a dry cloth to keep the surface clean and ready.
Step 3: Compatibility Test
Test the glue in some corner on the leather before applying it fully. This will check if the glue is compatible with the leather material, and you also get to see how it interacts with the surface. Proper preparation is the foundation for a secure and durable bond and must, therefore, be considered an essential step in gluing leather.
Application Techniques: How to Apply Gorilla Glue
- Apply the Glue: Adhering glue on leather surfaces is best done by applying a fine coat of adhesive on the surfaces evenly. A brush or applicator can be used for precise coverage; over-application is not advisable because excess glue will seep out when the surfaces are pressed together.
- Wait for Tackiness: Allow the glue to sit for a few moments to develop tackiness after application. This will aid strong adhesion when pressing materials together. Refer to the adhesive brand for instructions regarding the duration to wait.
- Press and Hold: When it is tacky, carefully align both pieces of leather and press them firmly. Maintain pressure on the glue for several minutes until a solid bond is formed; here, clamps or weights can provide a useful assist.
- Final Curing: Allow the glue to cure for the full amount of time recommended by the manufacturer. During the curing period, avoid stressing or moving the joint or it will reduce the strength of the bond.
Curing Times: How Long to Wait Before Use
Curing time for leather glue changes with the type of adhesive used and environmental conditions, especially temperature and humidity. Most leather glue requires a minimum period of 24 hours for full curing in ideal conditions. Since during this interval, the glue hardens and bonds properly to form a firm and lasting connection.
⏰ Timing Tips:
- Wait longer for heavier, thicker leather items or projects under stress
- Avoid cold and damp workspaces as they retard curing
- Follow manufacturer guidelines for specific curing times
- Be patient – proper curing ensures maximum bond strength
Tips for Achieving the Best Results
Ensuring a Clean Surface Before Application
The bonds of any adhesive are only as strong and lasting as the preparation of the surfaces. Now, this implies spotting some dirt and dust particles or just any contaminant on either surface before application of the adhesive. Such substances hinder adhesion acting as a barrier between the adhesive and the material, weakening the bond. This buildup can be wiped off by using a damp cloth or a mild cleaner, allowing the surface to dry thoroughly before continuing with the adhesive application.
If wax or grease is suspected, utilize a cleaning solvent to get rid of it. Rubbing alcohol would do the trick in many cases, applied just sparingly with a soft cloth while wiping in one practice rather than spreading residues about. Test for its effect on an inconspicuous area first, just to be sure it will not damage the material about to be glued. Keep this cleaning process in a well-ventilated environment to reduce intoxicating exposure.
Finally, inspect the surface-fine and smooth if there are irregularities-as such would keep the leather from bonding properly. Lightly sand any rough areas and clean again to remove any residue. Clean uniform preparation will ensure an improvement in the adhesive action and ultimately provide you with a sturdy, reliable bond for your leather works.
Importance of Working in a Well-Ventilated Area
🏥 Health Benefits
Proper ventilation disperses harmful fumes that can cause dizziness, headaches, or nausea. Prolonged inhalation can lead to serious health issues.
⚒️ Material Benefits
Airflow helps adhesives and finishes cure properly without interference from excessive chemical residues in closed air.
💼 Work Comfort
Clean air keeps the working environment fresh and odor-free, allowing better focus on your craft.
Using Clamps for a Secure Bond
When working with leather, clamps will keep the glued pieces solidly held and bonded until drying. Clamps exert pressure evenly over a surface, preventing any air pockets or weak spots in the glue that could hamper a proper connection. This solid connection is central to making items that last and have a professional look.
Clamping Procedure:
- Apply glue evenly on the surfaces to be joined
- Fit the pieces as precisely as possible (little chance to adjust once clamped)
- Clamp at regular intervals along the joined edges for even pressure distribution
- Tighten clamps well, but avoid excessive pressure that may warp leather
- Allow adequate drying time according to adhesive instructions
Potential Risks and Mistakes to Avoid

Common Mistakes When Using Gorilla Glue on Leather
❌ Mistake #1: Poor Surface Preparation
Leather surfaces are often oily or dirty or may have some exterior finishing that prevents a strong glue bond. Always clean the leather well and if required, sand it lightly to eliminate any coatings which might interfere with the adhesion. This step is of utmost importance if one wants to obtain its bond of strength and durability.
❌ Mistake #2: Incorrect Glue Application
An excess of glue usually seeps out of the bonded region, causing messy application and weakening the joint. While a lack of sufficient glue weakens the joint, resulting in the two pieces of leather coming off after some months. Always use the specified amount of glue as stated by the manufacturers in order to perfectly adhere.
❌ Mistake #3: Insufficient Curing Time
Most glues require some contact time given to be able to set and fully cure. Any interference with the setting of the glue before it gets to that full cure is interfering with the glue in providing strength for the bond. Therefore, let the glue dry and cure according to the given instructions to ensure a solid, permanent bond to the leather.
Overapplying Glue: Consequences and Solutions
| Problem | Consequence | Solution |
|---|---|---|
| Glue Leakage | Unsightly residue on leather surface | Apply thin, even coat with brush/applicator |
| Uneven Drying | Weaker bond formation | Use appropriate amount per manufacturer specs |
| Cleanup Issues | Difficult removal without surface damage | Remove excess immediately with damp cloth |
Testing on a Small Area First
Before applying adhesive to the entire surface, it would be best to test it on a small, seemingly unnoticeable area first. This step assures compatibility between the glue and material, averting any adverse reactions that could cause discoloration or weakening of the leather. Let the glue dry on the test area as stated by the manufacturers before you begin.
Testing Protocol:
- Choose an inconspicuous area for testing
- Apply small amount of glue as per instructions
- Wait for complete cure time before evaluation
- Check for adhesion and any material damage
- Proceed only if results are satisfactory
Frequently Asked Questions (FAQ)
❓ Can Gorilla Glue be used on leather?
Gorilla Glue can indeed work on leather, but one must remember that it expands as it dries. So the best idea is to apply a small amount on the work area, then hold the leather in place for it to cure.
❓ What glue is best for leather projects?
The best glue for leather really depends on the particular project. Gorilla Super Glue Gel and Gorilla Clear Grip are two great choices for strong, long-lasting bonds. Other options are leather cement and specialized adhesives for leather products.
❓ Would Gorilla Glue discolor the leather?
A lot of glue applied or glue oozing out from the joints can discolor the leather. So it is best to apply chicken-scratch amounts of glue and carry out a test on a hidden area first.
❓ How does Gorilla Glue compare with contact cement when it comes to leather?
In contrast with Gorilla Glue, which expands with drying, contact cement resists expansion to spread an extremely strong bond. Contact cement has the advantage in leather projects because it offers instant bonding on touching two pieces of leather.
❓ Can I hot glue leather?
Hot glue can be used on leather but it is not encouraged for projects involving a very strong, durable bond. For enduring repairs, Gorilla Glue or a dedicated leather adhesive would be much preferable.
❓ How does one use Gorilla Glue to bond leather?
Prior to glue, clean off any impurities from the surface of the leather. Pour a small amount of glue onto one surface, press the pieces of leather so that they adhere together, and hold it until set.
❓ Are there different types of glue for leather?
Yes, there are several leather glues such as PVA glue, cyanoacrylate glue, and Eco-flo leather weld adhesive. Choosing the right glue depends on your leather project and the materials in questions.
❓ Is Gorilla Wood Glue good for leather?
Since it is for wood surfaces, Gorilla Wood Glue is not recommended for leather! The glue may not have enough flexibility and bond strength needed for leather products.
❓ Can Gorilla Glue be used to repair a leather jacket?
It can be used for repairing a leather jacket; however, care should be taken during its application to prevent the glue’s expansion from damaging the leather. A leather adhesive specifically made for such repairs will surely give better results.
References
- Does Gorilla Glue Work on Leather? Yes, and Here’s How
This source explains how Gorilla Glue can be effective for emergency repairs on leather items like torn straps or loose seams. - What is the best glue to use on leather? – Reddit Leathercraft Community
A discussion on the best adhesives for leather, including cyanoacrylate glues and their suitability for quick repairs. - The Finest Glue Adhesives for Leather Repairs – LeatherNeo
Highlights Gorilla Glue as one of the best options for leather repair projects, along with other adhesives.


