


When it comes to crafting, especially when it involves the combination of several elements, there are always challenges that create unique problems, one of which is figuring out how to bond pieces of fabric to a piece of Styrofoam. Whether it is theatre props, custom home decor, or just some art project at school, it all requires the fabrication of two vastly different items. This is where the appropriate methods and materials in question become indispensable. This makes it easy to understand this helpful narrative of the materials available, the application process’s stages, in addition to the top tips to gain excellent results. Importantly, after going through this writing, you will be equipped with the knowledge of how to successfully position a fabric-covered on a styrofoam. This is so that a professional-looking finish can be achieved on all mistakes or substrates.
What Type of Adhesive Works Best for Fabric and Styrofoam?
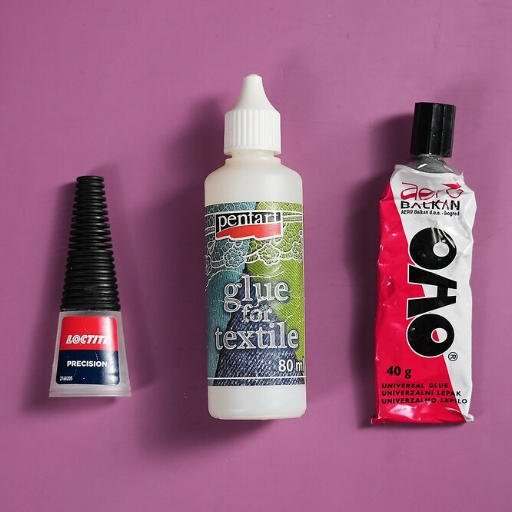
The most appropriate adhesive for bonding fabric and Styrofoam is a low temperature or foam compatible hot glue. Lower hot glue is most effective for this application because it adheres quickly without melting the Styrofoam. For more extensive projects or those that call for higher elasticity criteria, fabric and foam-compatible spraying adhesive works better. A spray adhesive with no harsh solvents use it; Styrofoam should not encounter harsh solvents as they interact negatively with its components. Do not coat all the assembly area at right angles; instead, conduct a compatibility test between both materials before sticking them.
Understanding Different Types of Glue for Foam
|
Type of Glue |
Key Features |
Compatibility |
Notes |
|---|---|---|---|
|
Hot Glue |
Quick bonding, dries fast |
Styrofoam, foam sheets |
Use low-temperature to prevent melting. |
|
Spray Adhesive |
Even application, strong hold |
Fabric, foam |
Solvent-free formulations recommended. |
|
Contact Cement |
Durable, flexible adhesion |
Upholstery foam, rubber |
Apply to both surfaces for best results. |
|
Silicone Adhesive |
Waterproof, flexible |
Foam, plastics |
Ideal for outdoor foam projects. |
|
Polyurethane Glue |
Expands for strong bond |
Rigid foam, wood |
Requires clamping during curing. |
|
Strong, permanent bond |
Foam, metal, plastic |
Works well for dense foam types. |
|
|
Foam-Safe Cyanoacrylate |
Fast drying, secure adhesion |
Polystyrene, fragile foam |
Avoid excessive application. |
|
Latex-Based Adhesive |
Non-toxic, dries clear |
Craft foam, soft foam |
Suitable for decorative projects. |
|
Double-Sided Tape |
Temporary, mess-free solution |
Light foam, felt |
Best for lightweight foam materials. |
Exploring Gorilla Glue and Spray Adhesive Options
Gorilla Glue has attracted a lot of people because of its elasticity and power as a glue, especially in bonding two pieces of foam. And true to the above, the bond that Gorilla Glue creates incorporates a polyurethane core that seeks to handle moisture corrosion while at the same time providing the mechanical strength for bonding. Gorilla Glue is most suitable for uses where it would be used outside, as apart from external factors, it is also proven, due to the element, to be waterproof. The main disadvantage of this product is the requirement for a small application of the glue and application of the necessary pressure of the materials during setting, so that there is no over-expansion and misalignment.
On the other hand, spray adhesives are highly convenient and also enable consistent application, which is very practical for large-scale or complex productions. Additionally, many contemporary spray adhesives claim to work well with foam materials and provide a permanent bond as they do not turn to sticky without bubble formations. Typically, such adhesives possess fast drying properties such that full cure time could be as short as between 24 to 48 hours for some formulations. Stick to this rule when selecting spray adhesives and choose only those that are branded as safely compatible with foam and fabric for best results.
Both Gorilla Glue and spray adhesives need the surfaces to which they will be bonded to be prepared properly. It is essential to get rid of any debris, filth, and ensure that both the foam and the base material are free of dust, grease, and other residues, which would compromise the bond. In addition, compliance with the right operational procedures, for instance, ensuring proper ventilation for the application process since there are some adhesives that contain VOCs that are known for emitting a variety of these gas emissions that may be harmful when breathed in, in unremitting areas is a must.
How to Properly Prepare Surfaces Before Gluing?
- Clean the Surfaces Thoroughly
Wipe clean of any dust, dirt, oil or debris using a clean cloth and an appropriate cleaner (for instance, non-porous surfaces, rub with alcohol). Such surface makes the adhesive attach directly to the material you choose without filling the gap.
- Dry the Materials Completely
It is also important to make sure both surfaces are completely dry before application since the presence of water may affect the process of bonding.
- Sand if Necessary
For smoother sections, polish the spot with fine sandpaper to create grooves for the adhesive to stick. Wipe with a wet, clean cloth to eliminate any debris caused by the previous step of sanding and dust.
- Check for Compatibility
Make sure that you understand the types of adhesives which are available to you and the surfaces that you will be joining, as some materials require specific adhesives.
- Test Fit
Line up the other components properly so as to avoid subsequent corrections on the assembly after the application of the adhesive.
Choosing the Right Fabric for a Strong Bond
The choice of material is one such factor that plays quite a significant role when it comes to achieving a bond that lasts. Fabrics that have good adhesion in general are those with relatively tight woven threads, such as cotton, polyester, or even nylon textures, because of their consistency level in the surface type. Silk or starched fabrics, on the contrary, have poor adhesion and thus require special glues in order for the bond to hold. In special cases, take into consideration the fabric’s weight since, for instance, lightweight fabrics may not be held strongly on materials such as Styrofoam. On the other hand, if the fabric is heavy, additional methods of reinforcement or stronger adhesives would have to be used. Hence, ascertain the material’s particular use, that is, whether it will be used in any adverse conditions, or it should contain, to what extent, it should support the structure or flexibility of the fabric, to illustrate the best results.
Tips for Stretching and Wrinkling Fabric
- Preconditioning the Fabric
Fabric usually has to be prepared to avoid being damaged through undesired stretching or wrinkling before being put into use. This involves washing and drying the material as per the prescribed washing procedure so that the shrinkage that occurs to the material is controlled. The message goes on to discuss that, for example, cotton fabrics have the inherent property to shrink about 5% of the clothing after washing, hence the need to ensure that this is done before the fabric is introduced to the surface.
- Controlling Tension
When pulling in or hoisting fabric for installation and presentation purposes, pull all parts of the fabric evenly. Irregular pulling might lead to unwanted creases or signs of deformation. Delicate fabrics, like silk or chiffon, may require the use of clamps or stretching equipment that applies moderate pressure. For instance, polyester satin fabric, when strained asymmetrically, wrinkles 20% more than under symmetrical stress with respect to the thread.
- Using Stabilizing Frames
Insert stabilization frames or hoops when working with lightweight or stretchable materials in order to keep the desired shape. As an example, an embroidery hoop is or a plain wooden frame helps in maintaining the desired amount of tension while making an embroidery or other crafting works.
- Humidifying for Wrinkle Reduction
Light wrinkles that are present on light fabric can frequently be removed by adjusting the humidity of the environment. Provide moisture to the fabric by using a garment steamer or an iron equipped with steam capability, which can warm the fabric up to body temperature for the wrinkles to go away. In the case where synthetic fabrics are subject to such treatment, one must ascertain that the correct temperature is maintained in order not to burn or spoil the material in any way.
- Applying Heat and Pressure Properly
For pressing out the most stubborn wrinkles, heating the fabric in combination with applying a bit of force usually works. Place the pressing cloth over the fabric because direct application of heat can burn or change the colors of certain garments. As an example, polyester requires a heating level of 149°C in order to respond well to ironing.
What is the Best Method to Attach Fabric to Styrofoam?
The best way to fix fabric on a piece of Styrofoam is by using a cool temperature glue gun or a spray adhesive that specifically targets foam-safe applications. Both of them cover the convex structure well, effectively forming a bond without damaging the styrofoam. To make sure your application looks good and holds fast:
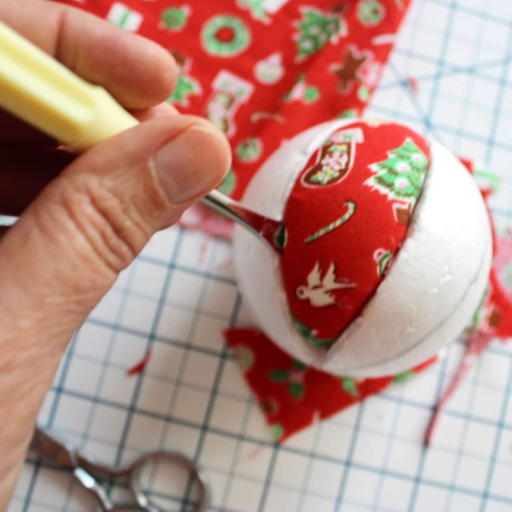
- Prepare the Styrofoam: For a better bond, clean the surface so that it is free of dirt and other particles.
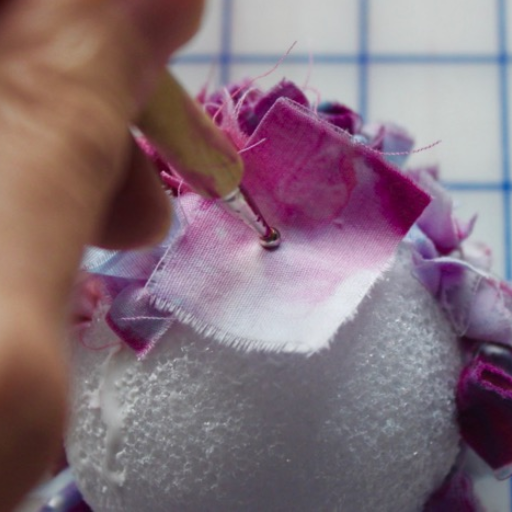
- Apply Adhesive: Apply a light and smooth coat of adhesive, either by spreading a thin even layer of glue or spraying glue according to manufacturer’s instructions. If a hot glue gun is used, extra precautions should be taken to avoid transmitting heat, as this may cause the Styrofoam to melt.
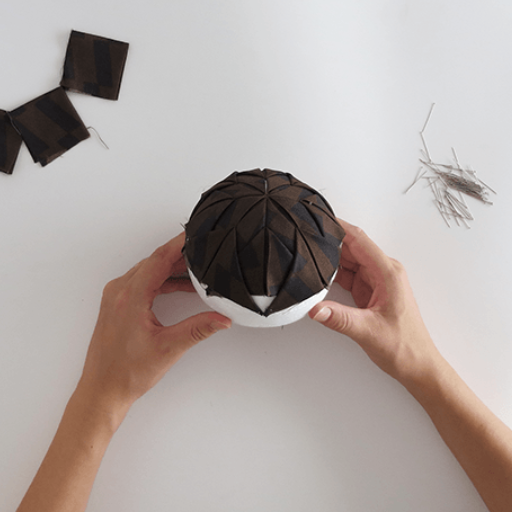
- Press the Fabric: Place one side of the fabric on top of the adhesive on the Styrofoam and smooth it away from you to prevent wrinkles.
Let the glue rest until it is completely dry or until the manufacturer gives a recommended time for the best quality.
Applying Spray Glue Evenly for Maximum Adhesion
When it comes to making permanent bonds with the help of a spray glue, it requires improvement in the spraying techniques to obtain a nice finish with longer durability. First, pick up a spraying glue can, give it a good shake for 1 to 2 minutes as directed within the application guideline of the manufacturer to make the basic components of the adhesive mix. The can should be maintained 6 to 8 inches away from the designated surface, and a steady sweeping action should be employed when spraying the glue to facilitate the application of a uniform film. Avoid the habit of remaining at one spot, to avoid applying too much, as this may leak and drip down, and the bond may not set firmly.
Follow a system of how thin the coats will be seen, so that rather than it taking up all the spraying and globbing procedure, then place the coat till dry. In case of bonding two materials, apply adhesive on the interior surfaces of the two substrates and let it be gummy (as indicated by the product’s drying time instruction) before joining them together. Tack time must be observed, which enables the adhesive to reach its maximum strength. It is essential to work in a well-ventilated area during the application of the aerosol adhesive because it contains volatile organic compounds (VOCs) as a solvent. When the bond is structured as in this example, one may attach other materials and undertake other actions guided by the described prescriptions to achieve a convenient and effective bond with the element.
Hand Sewing for Additional Security
Using hand stitching can also provide an appropriate, if not suitable, solution to the situation where durability and precision are essential, but the adhesives may not be enough. This method is usually used when working with fabric or sub-working leather, as adhesive or even more traditional fastening would be problematic under the particular circumstances. There may be specific techniques like backstitching, whip stitching, and ladder stitching that may be utilized based on materials and the intended outcome. For example, backstitching is preferred because it is powerful, meaning it involves creating successive stitches over the stitches that have earlier been made to distribute the applied tensions evenly in the loop.
When it comes to choosing a line to use, the key criterion that matters is the tensile strength of the line, for a start, then elastic ability and material composition may be taken into account as well. For example, it will be pertinent to make use of a polyester thread, considering especially that it is not degradable and therefore is resistant to environmental conditions; whilst the use of a nylon thread for intense stress on objects is quite common. The use of needles is rather dependent on the kind of material to be worked on- for instance, sharps needles, which are slim and strong, are preferred when working on densely woven materials, while leather needles, which have their tips made of metallic triangles, are good when working on heavy fabrics. These techniques dictate the way people choose the fabrics one works with, restricting them to bad fabrics, making from bad fabrics, one works with poor cloth on poor material that cannot last long together.
How to Ensure Long-Lasting Bonds Between Fabric and Foam?
Maintaining a connection between the fabric and the foam is most simple by picking the right glue to be used with the materials first. Spray adhesives that are meant for the bonding of upholstery or fabric and foam are useful since they provide a strong yet flexible bond to the materials. It is also important to ensure both surfaces are dry, clean and free of any impurities before applying the adhesives in order to enhance adhesion. Using the adhesive on both foam and fabric surfaces, a rubbing layer should be applied and allowed to stand before assembling the materials. A light tension should be provided to make the bond and proceed with the curing period as needed, based on the guidelines of the adhesive used. Alling during processes ito which the adhesive s being app t also miy four e od the bond to change over time.
Techniques to Dry and Cure the Adhesive Properly
In order to bond fabric and foam properly, the adhesive must be dried and cured properly. This is achieved by setting up a facility in which the room temperature is within the range provided on the adhesive based on the manufacturer as varying temperatures could impair the curing process. Appropriate ventilation helps the solvent-based adhesive to evaporate slowly without any engagement with the or cured adhesive to frost creation. Some kind of heated protection, such as an oven or infrared heater, may be used to speed up the drying of certain adhesives, although caution should be taken so as not to heat too much and thus weaken the bond. Likewise, control of humidity is important in that very high humidity may slow the curing process or affect the properties of the adhesive. In case of large-scale works, one can use industrial ovens or specialized curing systems characterized by consistent temperature and consistent airflow. By employing these methods, one can generally achieve reasonable adhesive performance. Always consult the product’s technical datasheet to know the exact curing time as well as the environmental conditions for which the maximum adhesive performance can be achieved.
Using Contact Cement for a Permanent Bond
The successful bonding with contact adhesive needs consistent, cautious application steps. Predominantly, unsoiled, moisture-free, and the removal of substances that can deter the adhesion process, such as dust, oil, or grease, should be observed. Roughening or cleaning of the surface can sometimes be necessary in order to increase the topographical attractiveness of the surface, thus the adhesion strength as well. Once thoroughly cleaned and prepared by sanding, apply an even coat of contact adhesive in the necessary areas with either a brush or roller, taking care not to overapply as it tends to pool. This is only to be avoided since if there is any pooling of the adhesive over the surface, there is a chance that the adhesive will not bond or the drying process will be very slow.
After coating the surfaces with cement, leave the adhesive to dry until it becomes tacky to touch, typically between 15 and 20 minutes; however, this time can vary depending on the environmental temperature and humidity. A bond made using aerosol adhesive will feature unfathomable strength, but is contingent upon the correct positioning of the mating surfaces, as the glue sticks instantly. In such cases, either use a tool such as a roller or adhesive pad, or a clamping device to apply pressure evenly across the joint in order to allow the bond to set properly and enhance strength the product needs to be left in place without and changes within a minimum of a 24 hours time frame.
Indeed, contact adhesive works best with dense materials, including but not limited to plastic laminates, metals, and rubber materials. Still, to avoid re-bonding problems and possible service failure caused by harsh environmental conditions, please check the adhesive’s temperature as well as its adhesion to shear specifications, which would vary from one product form to another, but a general assumption that the product might start with -40°F and end in 200°F is safe. Determining the compatibility of specific materials and conditions should also entail going through the well-known lengthy manufacturer’s guide.
What Common Mistakes Should Be Avoided When Gluing?
- Resize Training Surfaces Cleaning – Sometimes, adhesion of trained surfaces may be hindered due to the lack of cleaning or drying. Clean the surface from all dust, oil, liquid moisture, or any other impurities before applying any adhesive.
- Mismatch of Adhesive – Adhesives come in different forms and some of them may not work for every material or application. Do a detailed review to ensure the efficacy of the product.
- Adhesives Coating – This applies mostly to self-adhesives layer by layer. A redundant application may color seal bonds or mess up the whole structure whereas, a deficit application may result in an ineffective one. The application should, however, be adequate for the coating that is within the recommendations of the manufacturer.
- Wrong Environments for Airing the UV Coating – They are usually based on the thermal, time, or humidity conditions for the bonding of materials. Not attending to this effect could potentially weaken the material bond.
- Negligence of a Safety Procedure – Using no protective measures or even clean rooms can be dangerous for one’s health and for work quality.
Avoid committing these mistakes so as to effect strong and long-lasting adhesive joints. Always refer to the technical data on the adhesive for the best results.
Why You Should Not Use Super Glue on Styrofoam
Ironically, superglue, or cyanoacrylate adhesive often, is not usually recommended for use on Styrofoam, because it has a very limited stretch, and the substrate will not adhere well. When superglue is used on Styrofoam, it causes chemical reactions and melts some portion of the foam, so that it collapses or becomes deformed without any potential rigidity. Styrofoam is pretty delicate as the nature of its surface is susceptible to damage, and as already mentioned, superglue doesn’t help, but instead makes the surface uneven and destroyed.
Also, this problem is very complex while dealing with super glue and Styrofoam because Styrofoam has a particulate structure, therefore the application of super glue Thereis rather limited, may be however that is the reason, it isn’t a strong adhesive with the Styrofoam, thus it cannot form a strong joint over time. Given this, instead of general adhesives, experts recommend the use of those that are fabricated specially for Styrofoam such as the polyurethanes or the odourless foam-safe adhesives which guarantee an effective outcome and even enhance cohesion of the material without much alteration.
Learning How to Handle Wrinkles in Fabric
Reference Sources
1. Experimentation on Reuse of Waste Styrofoam as an Adhesive Material (2023): This study explored dissolving Styrofoam waste in solvents like toluene, turpentine, and methyl acetate to create adhesives. Toluene-based solutions showed superior adhesion, particularly to wood, outperforming commercial resin adhesives.
2. Development of Waste Polystyrene (Styrofoam) Adhesive as Matrix in Composite Applications (2023): This study developed an adhesive from waste Styrofoam for use in composite materials. The adhesive demonstrated optimal viscosity and pH levels, improving curing rates and tensile strength.
Frequently Asked Questions (FAQs)
Q: What is the best way to glue fabric to Styrofoam?
A: The best way to glue fabric to Styrofoam is by using a glue that is specifically designed for foam, such as tacky glue or fabric glue. Hot melt glue also works well for this purpose.
Q: Can I use hot glue to bond fabric to Styrofoam?
A: Yes, you can use hot glue to bond fabric to Styrofoam. Just make sure to apply it carefully, as hot glue can melt some types of Styrofoam if applied too hot.
Q: What types of glue should I never use on Styrofoam?
A: You should never use adhesives that contain solvents, including certain craft glues and adhesives that can dissolve Styrofoam. Avoid products like 3M spray adhesive that may contain toxic fumes.
Q: Is fabric first or Styrofoam first when applying glue?
A: It is generally best to apply the glue to the Styrofoam first and then press the fabric onto it. This ensures a strong bond and prevents the glue from soaking into the fabric.
Q: How do I cover the foam before applying fabric?
A: To cover the foam before applying fabric, you can use a layer of water-based adhesive or tacky glue to create a barrier. This will help the fabric adhere better and prevent any toxic fumes from the glue.
Q: What is the tensile strength of hot melt adhesives when bonding fabric to Styrofoam?
A: Hot melt adhesives typically have good tensile strength and can create a strong bond between fabric and Styrofoam. However, it’s essential to let it dry completely for the best results.
Q: Can I use PVA glue for fabric on Styrofoam?
A: PVA glue can be used for fabric on Styrofoam, but it is not the most effective option. It is better to use hot melt glue or fabric glue for a stronger bond.
Q: What are the risks of using toxic adhesives on Styrofoam?
A: Using toxic adhesives can release harmful fumes that are dangerous to inhale. It is crucial to use adhesives that are safe for indoor use and do not contain toxic solvents.
Q: How long should I let the adhesive dry when gluing fabric to Styrofoam?
A: You should let the adhesive dry according to the manufacturer’s instructions, but generally, allowing it to dry for at least 24 hours will ensure a secure bond.


