


Whenever you decide to couple leather and wood in any project or work that involves repairs of furniture or crafting, the adhesive you use becomes what determines the success. These are two entirely different materials that come with very distinct forms, weights, and water resistivity, among other issues that make finding the perfect adhesive for this bond very daunting. With soo many types of glues one can easily come across in the market, knowing the distinctions and figuring out the most effective one to suit your work can save you a lot of time, as well as effort and avoid wastage of resources. This manual is actually devoted to exploring the best bond-enhancing glues for leather onto wood glues, how to come up with a purchase decision, and cheating approaches to ensure long-term expert results. Some Information cannot be ignored because one will either have been doing the usurps for long or a greenhorn in it and this is the project at hand which you are conversant with. With this report, you are sure of helping you attain the degree of proficiency needed to accomplish the task at hand.
What is the Best Adhesive to Glue Leather to Wood?
In the same way, gluing leather to wood requires a contact adhesive or a specialized adhesive for leather. For instance, Barge All Purpose Cement is a contact cement that is able to bond material together as well as move and guard a surface, even on complementary surfaces over unprepared leather and wood. Additionally, lighteners that are mostly crafted for leather applications can do the trick in certain cases when a certain type and quality of finish is required. It is essential that after preparing both surfaces, whatever sealant is used, must be totally dry, and instructions as to the time period since that will probably help.
Understanding Different Types of Glue for Leather
|
Type of Glue |
Key Features |
Suitable Surfaces |
Drying Time |
Strength Level |
Notes |
|---|---|---|---|---|---|
|
Contact Cement |
Flexible, strong bond |
Porous, non-porous |
15-20 minutes |
High |
Ensure proper alignment |
|
Leather Weld |
Durable, clean finish |
Leather-specific surfaces |
3-5 minutes initial set |
Very High |
Ideal for leather projects |
|
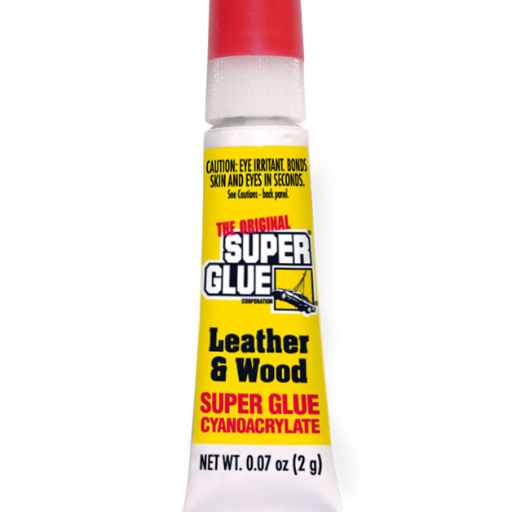
Super Glue (Cyanoacrylate) |
Quick-setting, clear finish |
Small repairs, tight areas |
10-30 seconds |
Medium |
Avoid excess application |
|
PVA Glue |
Water-based, non-toxic |
Porous materials |
20-60 minutes |
Low to Medium |
Not water-resistant |
|
Epoxy Resin |
Extremely strong, heat resistant |
Mixed materials |
5-60 minutes |
Very High |
Requires mixing before use |
|
Polyurethane Glue |
Expands, offers waterproof seal |
Varied surfaces |
1-4 hours |
High |
Clamp for proper drying |
|
Flexible, washable |
Leather, fabric |
3-5 minutes tacky |
Medium |
Best for flexible bonds |
Comparing Wood Glue and Leather Adhesives
|
Criterion |
Wood Glue |
Leather Adhesives |
|---|---|---|
|
Primary Usage |
Bonding wooden surfaces |
Bonding leather and fabrics |
|
Drying Time |
20-60 minutes |
3-5 minutes tacky |
|
Strength After Curing |
High |
Medium |
|
Flexibility |
Rigid bond |
Flexible bond |
|
Water Resistance |
Low |
Medium to high |
|
Application Method |
Direct application |
Direct application |
|
Surface Preparation |
Clean, dry surface needed |
May require light abrasion |
|
Heat Resistance |
Moderate |
Limited |
|
Ease of Use |
Easy to use |
Easy to use |
|
Best Use Case |
Joinery, carpentry projects |
Leather repairs, clothing fixes |
Factors to Consider When Choosing Glue
- Material Compatibility
Specifically check if the glue is designed for the materials involved in the task, as that is mandatory. For example, wood glue such as PVA is suitable for wood that is porous but contains air bubbles; contact cement and leather glues tend to be better in areas where bonding is required for flexible materials.
- Bond Strength
Next on the todo list is getting the bond strength that suits the intended activity. High-strength adhesives are mandatory for specific usage scenarios, such as the weaving of leather straps, high-heeled joints and so intricate designs which require a lot of weight to be placed within them. Adhesive manufacturers often provide tensile strength values in pounds per square inch that can be used to help in the selection process.
- Flexibility
Oftentimes, materials such as leather that involve movement or are subject to bending, necessitate the use of an adhesive that does not dry hard in order to prevent crack formation along the bond. Regardless of the thickness of the leather, it will break.
- Curing Time
As the strength of a bond is dependent on the pressure applied for that bond to form; it is crucial that, the time taken for the adhesive to cure is involved in the planning of your activities. Instant adhesives, like CA glue, are great when you are in a hurry, while long-setting strength epoxies are more effective on complicated assemblies that would require careful adjustments.
- Resistance to Environmental Conditions
They must also be selected according to the kind of environmental conditions which the products will be subjected to, for instance, moisture, heat of operation, or eligibility for outdoor activities, and subjected to UV light. For example, strong glues with the characteristic of being able to repel water are polyurethane glues and are most effective with projects that get a lot of water, and hence are said to be resistant to water, while heat-resistant epoxies work better when there is a need for bonding in high-temperature conditions.
These concepts should guide the decision-making process in order to choose an adhesive that is appropriate for the target project thus promoting proper utilization and long term effectiveness.
How to Properly Attach Leather to a Wood Part?
- Prepare the Surfaces: Scrub both of the surfaces including the leather and the wood surfaces before applying the adhesive to remove dirt, grease, or dust. Use a damp piece of cloth to scrub the surfaces also ensure that the surfaces are dry before applying the adhesive.
- Roughen the Leather Backing: Use fine-grit sandpaper on the back of the leather and lightly rough it up for better bonding. Make sure not to over-abrade the leather and mess it up.
- Choose the Right Adhesive: It is advised to use of contact cement glue for this as it is really good in bonding of the two materials; leather and wood. Make sure the glue will bind the materials and adhere to the instructionsof the particular manufacturer.
- Apply Adhesive: Put the glue to all surfaces including the ones of the leather and the wood with an even layer. Apply the glue by giving it seconds or for 10-15 minutes to allow it to dry as required by the glue.
- Bond the Leather to the Wood: Carefully set the piece of leather in position with the piece of wood and press them together. After this it is recommended to pat down the area with a roller or fingers in order to exclude air bubbles and assure full contact.
- Clamp or Weight (Optional): In the event that one needs to achieve a more solid join, use C-Clamps, or lay a heavy and flat item on top of the leather and the wood as the glue dries. Follow the steps written in the glue’s manual for the durations it is prescribed before unwanted disturbances can be done to the bond.
With these helpful tips, it is effortless to bond wood and leather together for a very long period.
Preparing the Surface for a Strong Bond
Satisfactory surface prep is essential to establish a solid and permanent bond between such materials as leather and wood. It is highly important at the outset to ensure that both surfaces are devoid of dirt, moisture – which likewise entails removing of fats – or any other factors that may affect the interlayer bond, such as relative, et cetera, etcetera. In order to clean the surfaces, it is best to use a damp microfiber cloth with a degreaser or 91% isopropyl alcohol so that the conditioned surfaces dry out and are ready for further steps. For the wooden substrate, it would be recommended to fill in material depressions with such tools as fine-grit sandpaper; grade 12 sandpaper, for instance, would be a great choice as it allows for a rather rough texture, thus enhancing adhesion. Equally, for leather, the abraded back can be made to have rougher/roughen free fibers, without the use of an abrader.
Avoid touching the areas that were sanded after with your naked hands, so any possible oils are brought out on the edges, which may result in weak bonding. For improved results, select the most suitable glue for the project and make sure to carry out all the lovely steps in the description about pre- and post-application protocols, etc., etc. And impact of preparation on almost-treatment bond is extremely high apart from that. It is unlikely that such a joint will fail in the long term.
Using a Precision Applicator for Best Results
Applying adhesives, particularly when used in projects that need exactitude and control, usually necessitates the use of an applicator, and this is the precision applicator. These applicators make it possible to put adhesives exactly where they should and in the quantity they need, which reduces wastage and mess associated with spillovers. Such precision limits the possibility of seeking an uneven bond. When employing an applicator, ensure that the size of the nozzle is correct, depending on the size of the surface to be treated. To maximize results, avoid any abrupt hand movements and apply the adhesive methodically, in a continuous line or a desired pattern as per the maker’s software. Precision applicators are very appropriate for such situations, as they are more suitable for areas that are hard to reach or have intricate nooks, where the use of conventional application techniques is not possible. Always clean the applicator and store it properly in order to avoid any malfunction when it is required in the future.
Can Super Glue Be Used for Leather and Wood?
Advantages of Using Super Glue for Leather Repairs
- Strong Adhesion
The unique property of the Super-Glue adhesive, when it comes to bonding leather that surpasses other varieties, is in fast polymerization process. The bond formed upon application dries up quickly and it can be used for regular purposes withstanding some minimal wear and tear. Tests conducted with samples of different bonds made using ready-made cyanoacrylate adhesives, like the superglues, readily adhere to conditions of about 4,000 psi in the lab tests.
- Quick Bonding Time
Another rewarding feature of super glues is how quickly they cur. A lot of super glues achieve a strength rating of 10-30 seconds, further minimizing to a large extent inevitable down-time involved in repair processes compared to the competitor products which demand extended curing periods.
- Precision Application
The selection of super glues narrows down further depending on what method of application or adhesive gun one decides to use, considering whether one has nozzles or precision tips where the glue can be dispensed to the tiniest possible places, especially in the case of repairing leather. This cuts out waste to the minimum level and ensures that no more adhesive than is required for any particular purpose traces into certain areas, trying to be bonded, and this gives a neat and professional appearance to the surface to be bonded.
- Compatibility with Various Leather Types
All leather goods, including real, synthetic, and vinyl leather can support super glue. The connective abilities of these features enhance its efficacy during the repair of foot wears, bags, pouches, car seat covers, and any coverings.
- Cost-Effective Solution
By comparison to most leather glues, super glue is readily available and more achievable, making it, the economics, not a reason to consider as far as rendering such small-scale, disposable services.
Because of fast adherence, its characteristics, and ability to be kept in unfavorable conditions, this type of adhesive, super glue, is efficient in solving certain problems of leather work without the need to consider the size of the damage. Test an unstained thin slice of the leather with the glue to test for any loss in elasticity before gluing a very visible portion, in case the fabric colors.
Limitations of Super Glue for Wood Applications
- Porosity of Wood
Wood is typically very thirsty, which means super glue might not get a good surface-to-surface contact. The adhesive will seep into the wood pores as opposed to forming surface-level bond and the ultimate result is less bonding strength.
- Flexibility Requirements
Movement or warping is common on wooden buildings or any other timber structures as they are rigid by nature. Since super glue is a very rigid and stiff compound, the bond would not be able to absorb any movement within the joint and any slight movement would rather cause the bond to break or separate.
- Limited Gap-Filling Properties
Normal bonds are not fitted for all joints, as such joints usually have very slight gaps. Especially, in cases where joints have uneven surfacing and appeal to contact uncomplicated joints i.e. wood to wood joints, other glues have been engineered to such a purpose; PVA adhesive or epoxy despite its messy application is more suitable to be used. It may also be a tall order for super glue to work if the corner to be bonded is not smooth enough.
- Weak Resistance to Shear Forces
Super glue joints tend to break in situations where the object is subjected to some kind of shear stress and wooden structures are more likely to experience this when in use or put under stress. In applications where loads are very high, specialized adhesives for bonding wood are preferred, mainly because they are built to withstand such loads.
- Sensitivity to Moisture
What is the Cure Time for Leather to Wood Adhesives?
The curing time of leather to wood glues largely depends on the grade of the glue used. It may be asserted using such glues that most conventional leather-to-wood adhesives can be handled for about 15-30 minutes in the first instance. Additional curing time could range up to 24 hours and sometimes 72 hours. It should be mentioned that curing always depends on the adhesive which was utilized, as well as factors like climate, temperature, and characteristics of the original adhesive. Precise curing periods are usually mentioned in the manufacturer’s manual to ensure that the bond is of high bond strength.
Understanding Cure Times for Different Adhesives
The evaporation of solvents from acrylic adhesives and drying up of water adhesives before the latter brand’s recommended working time is completed, half the curing will have been completed. That is, the final chemical bonds will have been established within that time. These fixed processes of drying at room temperature usually apply to all types of adhesives. Epoxy adhesives, for example, are known to require 24 to 48 hours before they can reach full hardening; hybrid adhesives can accomplish the goal in less than a minute. Due to the presence of moisture, polyurethane adhesives require almost 24 hours for gluing, but with humidity present, the curing temperature increases.
Therefore, while the curing time of cyanoacrylate adhesives (which are often termed as super glues) can attach surfaces within seconds, their full cure strength can be attained within up to 24 hours. Secondly, the effect of temperature should also be taken into account because there are certain adhesives designed to work best within the range of 70°F to 85°F; any deviation out of this range, however, either speeds up or slows down the curing process of the adhesive, depending on the type of adhesive. It is important to understand the formulation of the particular adhesive type as well as the conditions in which these adhesives will become structural so that they remain in service for a substantial period.
How to Ensure Proper Bonding During Cure Time
For proper bonding during the curing time, there are several factors that must be observed very well and controlled. First, surface priming is of great significance; it is necessary that any oil, grease or dust present on it are cleaned with the help of appropriate cleaning agents. Also, adhesive application should be of the right thickness and uniform as not to create any weak points within the joint. The relative humidity is important to consider, particularly when using moisture-curing adhesives, because there should be sufficient water content to facilitate the curing reaction. Applying consistent pressure by employing clamps or fixtures amplifies the bond as this reduces the chances of the joint moving during the curing operation. Finally, monitoring ambient temperature ensures the adhesive remains within its operational range, as suboptimal temperatures can hinder polymerization or increase curing time. Adhering to these guidelines will significantly bolster bond strength, longevity, and performance.
How to Repair Leather Furniture with Wood Glue?
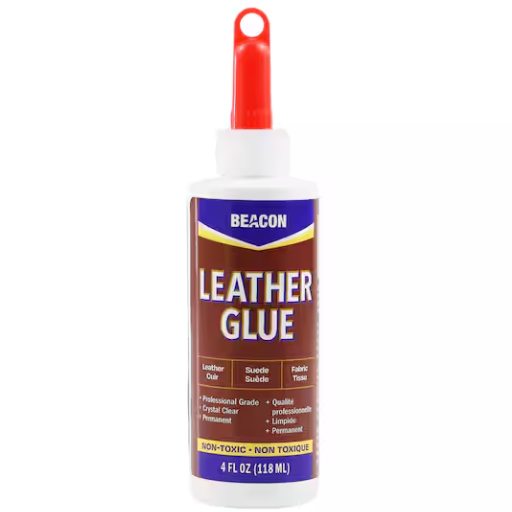
Restoring a leather couch using wood glue is not the typical technique as wood glue is ideal on fibrous on porous material such as wood and not the smooth non-porous leather surface. Instead a specified product such as a strong leather adhesive or a leather repair kit may be of help. These provide adhesion properties that are suitable for repairing leather, they are also very resilient.
If you still wish to try the minor glueing with wood glue, remember to go through the following steps:
- Clean the Surface: Clean the damaged portion with a damp cloth to get rid of dirt and the natural oil. Wipe until wet and let it dry completely.
- Apply the Glue: Apply a small amount of wood glue on the part which needs to be bond. Do not over apply as an excess of it may overflow and get solidified.
- Apply Pressure: Properly match the edges that have been separated or damaged and clamp them tightly.
- Clamp or Weight: Put a waxed paper on top of the repaired area to avoid sticking then clamp or put a weight on the repair to hold it in place.
- Leave for Complete Curing: It is imperative that the glue repair is left untouched for at least twenty-four hours.
The use of wood glue may bear cracks or other damage in the long run owing to the rigid nature of wood glue. For best results, the adhesive choice should match the material that needs to be repaired.
Identifying Common Issues with Leather Furniture
Furniture upholstered with leather stands out as a good investment considering its physical characteristics and for its luxurious touch. Such attributes of contemporary furniture notwithstanding, there are obstacles mainly to do with the construction materials. An evident known issue is that cracks and buckles develop, which is usually attributed to a lack of proper conditioning, especially in very dry climates. Leather’s natural oils that have a time lapse will dry up making the material stiff and prone to damage. Exposure to excessive sunlight, moisture, unclean surfaces, and improper cleansers can lead to maximum loss of the original color. Further, there are marks from ink, food, or any other foreign object on the leather which can go deep, hence making it difficult to remove the stains without help from a professional. Basic measures, like routine cleaning of leather furniture with recommended cleansers and other methods such as leather conditioners, help control, if not all, of the above problems and maintain the furniture in a good state for a long period.
Choosing the Right Glue for Furniture Repairs
Reference Sources
-
How To Glue Leather to Wood: This article suggests that white or yellow wood glue works well for bonding raw leather to wood.
-
Gluing leather to wood: It mentions that various glues can work, but neoprene-based contact cements like Barge or Weldwood are ideal for a flexible bond.
-
Glue for leather to wood: How to achieve flawless results: Recommends LePage Super Glue Ultra Gel Control for smaller jobs and quick repairs.
-
Attaching leather to wood: Suggests Titebond III for unfinished wood and contact cement for leather requiring multiple coats.
Frequently Asked Questions (FAQs)
Q: What is the best glue for leather to wood?
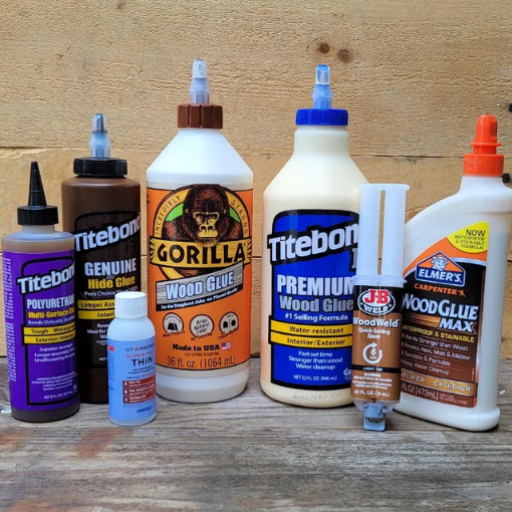
A: The best glue for leather to wood typically includes options like Titebond and Gorilla Glue, which are known for their strong adhesion and durability. For a flexible bond, consider using a contact adhesive.
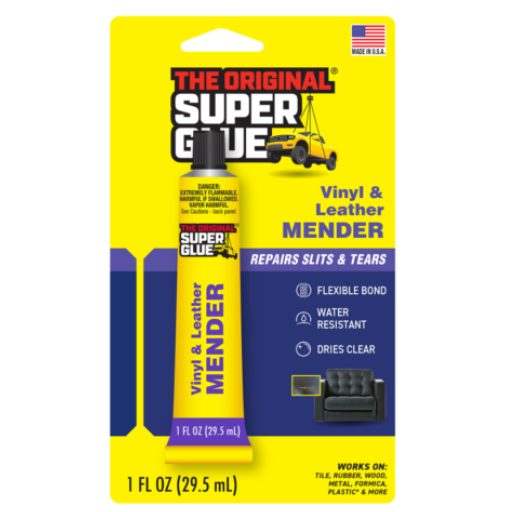
Q: Can I use superglue for bonding leather to wood?
A: While superglue can work for small projects, it may not provide the flexibility needed for leather. For better results, opt for a high-strength adhesive specifically designed for leather to wood applications.
Q: What is the best way to glue leather to wood?
A: The best way to glue leather to wood is to apply an even coat of adhesive for leather, such as Titebond or a contact adhesive, to both surfaces. Allow it to become tacky before pressing them together for a strong bond.
Q: Does Gorilla Glue dry clear?
A: Yes, Gorilla Glue dries clear, making it a great option for projects where aesthetics matter, such as attaching leather to wood in handbags or decorative items.
Q: Is contact adhesive suitable for leather to wood projects?
A: Yes, contact adhesive is suitable for leather to wood projects as it provides a flexible bond and is particularly effective for non-porous substrates. Ensure to apply it in a well-ventilated area.
Q: Can I use a spray adhesive for leather to wood?
A: Yes, spray adhesive can be an effective option for bonding leather to wood. Products like 3M 77 offer a strong bond and are easy to apply, especially for larger surfaces.
Q: How long does it take for the glue to set when bonding leather to wood?
A: The setting time varies by product, but typically, most adhesives like Titebond and Gorilla Glue will require a few hours to set fully. Check the manufacturer’s instructions for specific drying times.
Q: What type of glue is best for heavy-duty leather to wood applications?
A: For heavy-duty applications, a high-strength adhesive like Titebond III or a heavy-duty contact adhesive is recommended. These adhesives provide a robust bond that can withstand stress and movement.
Q: Can I use rubber cement for gluing leather to wood?
A: While rubber cement can work for temporary bonds, it is not recommended for permanent applications as it lacks the strength needed for a durable bond between leather and wood.
Q: How do I clean up excess glue after bonding leather to wood?
A: To clean up excess glue, use a damp cloth to wipe it away while it’s still wet. For dried glue, you may need to carefully scrape it off with a knife or use an adhesive remover, ensuring not to damage the leather or wood.


