


Imparting a glue between leathers is always a nightmare. Sometimes it is the repair of a beloved leather item, other times an unusual project, and still at other moments an upholstery job. The right glue needs to be picked in order to make a strong bond that lasts long through wear and tear. But with many options out there, selecting one of the best adhesives for leather work becomes daunting. This guide will give you a simple look at the process and will arm you with all useful information needed to enable you to choose wisely. From the kind of glues that can be used to bond leather to how to get the bond looking professional, every single step will be covered. So whether you are a professional or an enthusiast, this paper will give you sufficient knowledge to go into any leather work with confidence.
Types of Glue for Leather
Overview of Leather Adhesives
One of the principal issues in leathercrafting is to ensure the choice of the right adhesive for a durable and professional finish. There are adhesives of different types for different applications, materials, and conditions. Detailed information about specific types and properties of adhesives can assist in deciding what kind to use for any specific leather project. Here are some adhesives for leather and their applications:
Contact Cement
It is one of the most common adhesives in leatherwork because of its strong, permanent bond. The adhesive is applied to both surfaces, and it is allowed to dry to a tack before the surfaces are joined. The adhesive makes a flexible and highly durable bond with leather materials suitable for shoes, belts, or upholstery. Please note that contact cement fumes can be quite severe. Therefore, ensure proper ventilation.
Superglue (Cyanoacrylate Adhesive)
Cyanoacrylate glue works fast and is best for tiny fixes or fine-detail leather work. It makes a strong, rigid bond but has no flexibility and therefore is not suitable for items that bend or flex a lot. Many crafters use it for quick fixes or attaching embellishments onto leather goods.
Polyurethane Glue
Polyurethane glue, such as Gorilla Glue, is versatile and bonds well to many materials, including leather. It needs moisture in the air to activate and expands while drying, so it should be applied carefully. This glue is very well suited to higher-strength requirements like outdoor leather gear.
Rubber Cement
Rubber cement provides a flexible bond that allows the materials to move and bend without jeopardizing the adhesion- temporary in most applications so that a final glass solution can be adjusted. It is ideal for the assembly of leather patterns or prototypes.
⚠️ Important Note: When you understand the individual glues and their uses, you will be able to sue for each situation the kind of bonding agent that you require. Whether it is a very delicate leather wallet or a pair of heavily worn boots, good glue will see through its application for a very long time. Do take note: work in a ventilated area always, and do follow the manufacturer’s instructions.
Best Glue for Leather: A Thorough Review
To get the correct glue for leather, the choice is highly dependent on the sort of leather project being undertaken and the peculiar requirement of the application. Generally, the ideal adhesive for leather stands for a strong, flexible bond, while remaining durable over time, and also works with both natural and synthetic leather. It should be able to resist day-to-day wear and tear.
Hence, fine fast-drying glue is recommended for small leather work where precision and a clean finish are essential. Such adhesives are excellent for wallets, straps, and other minor repairs as they allow hardly any drying time and maintenance of the aesthetic appearance of the leather. Flexibility on these programs is vital so that the leather pieces can be moved without cracking or separating from bonding.
This glue works well for heavy applications and glueing furniture and shoes: it acts with respect to heavy stress and exposure to moisture. Surface preparation, including thorough cleaning of leather, is an important step for every application to ensure maximum bond strength. If these pointers are applied, you will be able to make an informed decision of which glue is best suited to your leather work.
Comparing Different Types of Leather Glue
When choosing leather glue, understanding the strengths, weaknesses, and ideal use cases for each type can help significantly in selecting the right adhesive for your projects. Below is a detailed comparison of the most commonly used leather glues:
| Glue Type | Dry Time | Bond Strength | Best Uses |
|---|---|---|---|
| Contact Cement | 15-20 minutes | High | Shoes, handbags, high-stress projects |
| Polyurethane-Based | 1-2 hours initial, 24 hours full cure | Exceptional | Outdoor footwear, moisture-exposed items |
| Super Glue | Seconds | Moderate | Quick fixes, decorative components |
| Leather Cement (Water-Based) | 5-10 minutes tack, 12-24 hours cure | High flexibility, medium durability | Craft projects, bookbinding |
| Epoxy | 5-10 minutes set, 24 hours cure | Extremely durable | Mixed materials, heavy-duty repairs |
1. Contact Cement
Properties: Contact cement is renowned for its strong, permanent bond. It works effectively on different types of leather and other materials, including wood and rubber.
Best Uses: Ideal for shoes, handbags, or projects involving high levels of stress or wear.
Application Tip: Both surfaces should be coated evenly and allowed to dry slightly until tacky before bonding.
Data:
- Dry Time: Approximately 15-20 minutes before bonding.
- Bond Strength: High, lasting under consistent pressure and heat exposure.
2. Polyurethane-Based Glue
Properties: Offers excellent bond strength, water resistance, and flexibility upon curing. It is suitable for outdoor use and high-moisture environments.
Best Uses: Perfect for items exposed to moisture, such as outdoor footwear or leather gear.
Application Tip: Requires clamping for at least 1-2 hours for optimal bonding.
Data:
- Dry Time: 1-2 hours for initial bond, full curing in 24 hours.
- Resistance Level: Exceptional water and temperature resistance.
3. Super Glue (Cyanoacrylate)
Properties: Provides an instant bond and works well for small repairs. However, it lacks flexibility, which can make it brittle over time on frequently used leather objects.
Best Uses: Quick fixes or bonding decorative leather components.
Application Tip: Apply sparingly to avoid stiffening the leather.
Data:
- Dry Time: Bonds within seconds.
- Durability: Moderate, best for light-duty applications.
4. Leather Cement (Water-Based)
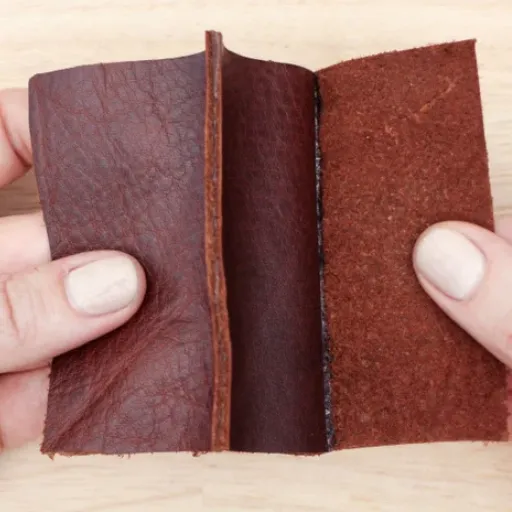
Properties: Specifically designed for leather, it provides a flexible and resilient bond. It is safe to use, low in odor, and perfect for stitching support or layering leather panels.
Best Uses: Ideal for craft projects, bookbinding, and other applications requiring edge-to-edge bonding.
Application Tip: Spread in thin layers evenly and allow a short drying period before pressing surfaces together.
Data:
- Dry Time: 5-10 minutes for initial tack, full curing in 12-24 hours.
- Bond Strength: High flexibility with medium durability under stress.
5. Epoxy
Properties: Epoxy provides a very strong and long-lasting bond, especially when bonding leather to other materials, such as metal or plastic.
Best Uses: Works well for mixed-material applications or heavy-duty repairs.
Application Tip: Requires precise mixing of resin and hardener, followed by careful application to both surfaces.
Data:
- Dry Time: 5-10 minutes for initial set, full curing in 24 hours.
- Bond Strength: Extremely durable but somewhat inflexible.
How to Choose the Best Glue for Leather
Factors to Consider When Selecting Adhesives
Several important factors should guide your decision regarding the best adhesive for leather:
- Type of Leather: Different adhesives might be needed for bonding various types of leather, such as genuine leather, suede, or synthetic leather, so as not to cause damage to the very material they intend to bond.
- Flexibility Requirements: Since leather articles need to flex, the selected glue should provide a strong bond but not hinder this movement, thereby avoiding cracking or peeling.
- Bonding Material: Consider the surfaces to be bonded, in particular if bonding leather to non-leather materials such as plastic, metal, or textiles. A few adhesives are engineered for such mixed-material applications.
- Application Method: These could widely differ. Spray adhesives may be considered excellent for large areas, yet liquid glues or gels are mostly suitable for fine or not-so-large areas.
- Drying Time: Depending on what your project requires, you may either need fast-gluing for a quick fix or slower curing and stronger bonding.
- Water Resistance: For those items exposed to wet situations or outdoors, look for an adhesive that will guard against water.
- Durability and Strength: Think about an adhesive’s load strength and how well it stands against continual wear and tear, especially for high-use or heavy-duty projects.
Looking at these factors will help you in choosing an adhesive for your particular leather project that will give you a professional finish that will last through time.
Common Mistakes in Choosing Glue for Leather
❌ Overlooking Compatibility with Leather
A more regular error consists in selecting a glue unsuitable for leather. Many adhesives are of general purpose and either do not bond well with leather or might damage it in the long run. Check always whether the glue is meant for leather materials.
❌ Ignoring Flexibility Requirements
Leather being a flexible substance, the use of glue hardening to the extent of being rigid would bring about cracking or separation of the bond on the leather over time. Rigid bonding does not conform to the movement and flexibility of leather in items subjected to frequent use such as bags or shoes. Select the glue that, retains some flexibility after curing.
❌ Not Considering the Strength of the Bond
If one chooses not to investigate the loads relevant to a project, notable failures may occur. Adhesives that are light-duty may work for minor fixes, but heavy leather projects, such as furniture or belts, call for an adhesive that is fiercer and durable. Ask if the glue being chosen can bear the level of stress the leather item will experience.
✓ Best Practice: Avoiding such mistakes will give you a stronger bond that lasts longer and will maintain the quality and durability of your leather projects. Always make sure to assess your requirements and match those requirements to the properties of the adhesive.
Recommendations for Specific Leather Projects
👛 Wallets and Small Accessories
For thin projects such as wallets, coin purses, or small accessories, use a flexible glue that will not become brittle with use. Choose a glue meant for thin leather so that the edges of the piece will remain clean and maintain the aesthetics of the item. Ensure the adhesive dries clear and does not stiffen the leather more than required.
👔 Belts and Straps
The gluing of belts, straps, or any other leather subjected to stress and tension requires a glue meant for heavy-duty applications, providing a strong durable bond that will last long through constant bending and pulling away. Apart from gluing, you can also stitch around the glued areas to give your project extra strength and durability.
🛋️ Furniture and Upholstery
In large-scale furniture or upholstery projects involving leather, one should opt for a high-strength adhesive that bonds leather to wood, foam, or some other material. Such adhesives must be accurately applied and must be allowed to dry sufficiently for their great binding strength to be realized. And don’t forget: throughout time, the glue must be flexible; otherwise, its rigidity will cast under stress or weight with cracks. Since some adhesives are strong in odor, make sure to have good ventilation.
Step-by-Step Guide to Gluing Leather
Preparing the Leather Pieces
Step 1: Cleaning Leather
Before applying the adhesive, make sure all leather pieces are entirely clean, with no dust, dirt, or grease on them. With a damp cloth or leather cleaner, gently wipe the surface. Let the leather dry completely, as any moisture can affect the ability of the bond to set properly.
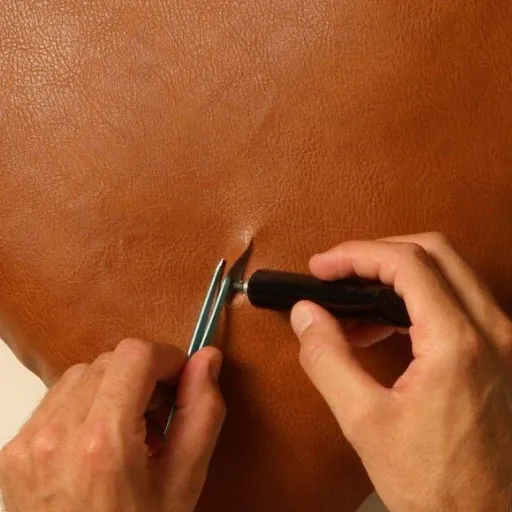
Step 2: Roughening the Surface
To promote better adhesion, gently sand the leather area to be glued. Using a very fine grit paper will give a very slight texture to the surface so that it allows the adhesive to stick better. Don’t sand too much as it will ruin the leather.
Step 3: Test-Fitting the Pieces
Before applying adhesive, line up the pieces and check that the fit of the leather is exactly as intended. A fair amount of accuracy will thus be achived in this step and one may avoid making a whole lot of mistakes while bonding. Changes made at this point could end up saving a great many hours and frustration later.
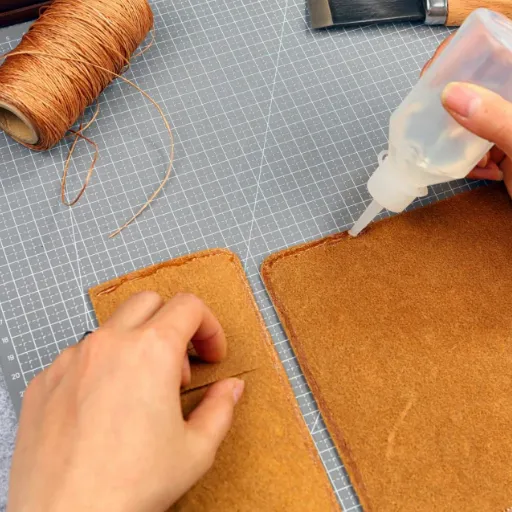
Applying the Glue: Techniques and Tips
When working with glue and leather, the application of glue to leather needs careful attention to the method, because it is essential to get a good bond with the glue. Start by making sure the two surfaces you are about to bond together are clean and dry: A little dust, grease, or moisture may weaken the adhesive’s effect. If in doubt, wipe with a clean cloth and let it dry. Use a thin coating of fine glue. Thin glue will give uniform coverage, which is necessary for a strong bond.
Once adhesive is applied, allow it to become tacky according to manufacturer’s instructions. This step is crucial, because any deviation in drying time shortens bond strength. Once the adhesive has returned to the tacky stage, align the pieces of leather carefully together, pressing firmly. Firm pressure will dislodge air bubbles if there are any and will help the adhesive to bind evenly. Hold the pieces together while curing with clamps or weights if possible. Follow curing times; any premature handling or stressing of the bond shortens strength.
Working in a well-ventilated area, do not overapply glue since it’ll hasten the messy-looking seam or weak bond to form in the work. If any glue seeps out, wipe it off immediately with a damp cloth to avoid a leather stain. Always pilot your life by donning wrist-length gloves and working upon any surface that you care not to damage. These will impart you with knowledge to make bonds that will last practically forever.
Times for Drying and Curing of Leather Adhesives
The drying and curing times of a leather adhesive are contingent on the type of adhesive used and the finishing temperatures and humidity of the environment. Typically, a leather adhesive will require anything between 15 and 30 minutes to dry sufficiently for handling. Nonetheless, one should always follow any precautions given by the manufacturer to create a suitable bond.
Curing, on the other hand, takes more time, within 24 to 48 hours. During this time, it develops full strength and can sustain durability. Hence, adequate curing time is necessar,y especially when it is intended for any item that will be under stress or in constant use since premature handling will serve to weaken the bond and, thereby, the repair or project quality may be compromised.
For best results, do your work in a controlled atmosphere because of the reason that any dust can arrive on the surface can render it less finish-ready of our adhesive. Being with the materials being glued, keep all conditions of drying and curing closely tracked to build that very strong and fine long-lasting bondin,g while some damage to the leather item can be prevented.
Advanced Tips for Gluing Leather
Repairing Leather with Adhesives
Repairing leather with adhesives requires patience, precision, and correct techniques to bind together and provide an everlasting bond. One must always clean the leather surface before attempting to bond things together with any adhesive. The presence of dirt, oil, or an extraneous layer can prevent the adhesive from bonding with the original material. Thus, a suitable cleaning agent that will not harm the leather surface and a damp cloth should be used to clean the area first.
Once the leather surface is clean and dry, proper application of the glue is done to both surfaces that are to be bonded. It is very important that the glue be spread evenly and that it not be clumpy or patchy. In addition to applying the glue according to the instructions on the package, you should also respect the drying time recommended on the package. After gluing, the leather parts are pressed together, and clamps or weights should be applied to keep them in place while the adhesive hardens.
Once the recommended curing time has passed, examination of the repair should be made to ascertain whether it is seamless and holds properly. Apply any leather conditioner if needed to keep the area protected and top appearance maintained. Proper post-repair care must serve as the key for leather durability alongside a refined look for years to come. Achieving a professional intent with minimal effort is possible by following these steps.
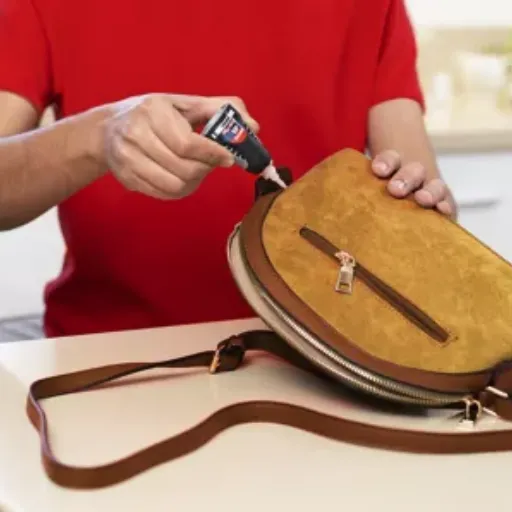
Using Leather Glue for Different Projects
Leather glue is very versatile for many projects, having been known to offer durability and ease of use. In one instance, it is used to fix torn leather articles, like furniture, shoes, or bags. Apply an even and thin layer of glue on the surfaces to be joined, then press firmly together with small tears and cracks-being sealed thus effectively. This strengthens the leather at the point of damage and thereby prolongs the life of the leather article with little effort.
Another common application involves the craft industry. Wallets, belts, or perhaps decorative leather pieces-the glue holds their components securely together without the mess of stitching. Being able to concentrate on precise alignment and design instead of wrestling with stitched bonds is an extreme boon for any craftsman. Alignment and application must be faultless to obtain a work-like result in this regard.
Another field for using leather glue involves irregular uses of DIY home decor, such as in the restoration of leather-bound books and custom upholstery. The adhesive nature of the glue guarantees a bonding with durability, and it maintains the aesthetic appeal of the material. The surface preparation should entail cleaning of the leather and almost always light sanding, if needed, to guarantee either better adhesion or more polished finish, or both.
Maintaining and Caring for Glued Leather Items
On proper maintenance and care depend the extension of the lifetime of glued leather items. First, always store leather items in a cool, dry place, away from direct sunlight and humidity, because these are environmental factors able to degrade the adhesive bond over time. Additionally, put avoidance against exposing leather to extreme temperatures, as these conditions degrade the material or glue prematurely.
Cleaning glued leather items entails wiping dirt and stains with a soft, damp cloth. Never soak the leather, apply harsh chemicals to the material, or even worse, use unsuitable substances that will certainly destroy the glue. For a deeper cleaning process, just use a little bit of special leather cleaner that has to be applied carefully. Always conduct a test on a small inconspicuous area of the glued leather item to verify that the cleaning products pose no threat of disintegration to the glue or adverse effect on the leather material itself.
Sometimes, inspections also come in handy in the maintenance of glued leather goods. Check for signs of adhesive failure, such as separation at the seams or peeling edges, and address issues promptly. If repairs are needed, clean the area thoroughly and apply a fresh layer of leather glue, following the original preparation and application steps. Good care will keep glued leather items solidly intact, look fairly pleasant, and functional throughout the years.
Key Takeaways on Gluing Leather
Summary of Best Practices
When it comes to gluing, preparation is essential in ensuring the strength and longevity of bonding. Begin by cleaning the leather surfaces for the removal of dirt deposits or oil residues that might deter adhesion. Next, use fine emery paper or any other abrasive medium to give the surface a slight rough finish, which provides phenomenal contact between the meg-adhering agents and the leather surface. This step will lead to the efficient use of glue by making its application a smooth process.
Selecting the right glue is also of utmost importance. Use a premium leather glue, one designed to provide flexibility and durability. Such adhesives become the actual strength when bonds are stressed or undergo frequent use. The glue should be spread evenly over both surfaces, not just some patches that go into adhesion. Over-application will result in uneven finishing and degrade the look.
Lastly but importantly, proper curing is vital to get a firm bond. Now, once the glued surfaces have been pressed tightly, one needs to allow for the drying times recommended by the manufacturer of the glue. Clamping or at least weighing the joints during drying maintains the even pressure needed for a fluorine-free, tight, perfect bond. Adhering to the recommendations above will result in well-made leather goods with durability, retaining their functionality and appearance over time.
Final Thoughts on Choosing the Right Glue
A proper glue choice becomes imperative in your project to maintain a solid, lasting bond. When selecting your adhesive, take care to check on the type of materials with which you are working. Different glues work on sole surfaces: leather, wood, plastic, or metal. Water-based adhesives tend to work fine on porous surfaces, whereas solvent-based glues work best for non-porous or mixed materials. Matching the glue to the materials is the first requirement for professional results.
The other important component to consider is the durability-flexibility factor of the bond. If the item will regularly move or be under stress, then a glue that forms a flexible joint instead of a rigid bond must be picked; otherwise, the bond will crack and weaken eventually. Consider the environment in which the surface to be bonded will endure, such as temperature, moisture, or chemicals, and thus select an adhesive that can resist these agents for increased life.
Finally, stick to the application instructions provided by the glue manufacturer-great clues are found in preparation, drying time, and pressure needed for perfect adhesion. Preparation of surfaces, application of glue perfectly over the targeted surface, and waiting for enough drying/curing time guarantee that your result will be based on durability and good tracking. While considering all these factors, you will no doubt arrive at the glue that best fits your project’s considerations.
Encouragement to Experiment with Leather Adhesives
Working with different types of adhesives is the best way to tailor the process to a specific project. Leather is a very versatile material. Therefore, it requires glues that work well with its texture and flexibility. By trying out several glue types like contact cement, rubber cement, or water-based adhesives, you will discover which one works best with the working conditions of your particular project. Also, consider the variety of leather, environmental conditions, and the type of bond you are trying to produce.
Working with a smaller test piece first is wise before committing to larger applications. Through this experiment, one will observe how the adhesive behaves with the material, including its strength, drying time, and finish. This preventive testing can save one from making costly or irreversible mistakes later on in the process. Keep record of your observations to refine your technique and feel confident about the adhesive you choose.
The glue needs to be chosen wisely, but the right preparation and technique are equally important for a good bond. Ensure the surfaces to be glued are clean and dust-free, align them correctly before application, follow the drying instructions closely, and avoid working on the bond before it has fully cured for best results. With care in your experiments and careful craftsmanship, you will improve your skills and produce leatherwork-worthy results.
Frequently Asked Questions (FAQ)
Q: What glue is the best glue for leather?
A: In glueing leather, which glue you need depends on your project. Barge cement is a favorite glue because it is strong yet flexible. Neoprene glue is nice for soft leather. You may even use an all-purpose glue provided the glue comes labeled for leather use.
Q: How do I prepare leather surfaces before gluing?
A: To glue leather effectively, start by preparing the surfaces. Use sandpaper to lightly scuff the flesh side of the leather, which helps the adhesive adhere better. Clean the surfaces thoroughly to remove any dirt or oils.
Q: Can I use white glue on leather?
A: Generally speaking, white glue is not recommended for leather work, but it could be used for some very light duties. If a stronger bond is needed, the better glue would be Barge or neoprene glue.
Q: Should glue be applied on both surfaces?
A: Applying glue on both the leather surfaces is a practice the gluer should adopt for better adherence, as this would provide the glue with an opportunity to develop a strong bond between the leather surfaces they want to adhere.
Q: How long is leather glue supposed to dry for?
A: The drying time depends on which glue is being used. Barge cement, for instance, needs about 30 minutes to set; however, depending on the environmental conditions, the curing time can be longer than that. Always consider manufacturer’s instructions as a reference for drying time.
Q: Can wood glue be used in leather projects?
A: These may not provide the necessary flexibility and strength that is mainly required from leather items; thus, wood glue is not recommended for leather projects. Use adhesives especially made for leather, like neoprene or Barge cement.
Q: What should I do to protect my hands when gluing leather?
A: When working with adhesives, protect your hands. Wear gloves to keep the glue from coming into contact with your skin; strong solvents such as Barge cement can irritate the skin if mishandled. These solvents are also substances that require careful handling.
Q: How do I repair a leather jacket by using glue?
A: Before gluing a leather jacket, clean the surfaces to be repaired. Then apply a thin layer of glue appropriate for leather on both surfaces. Hold together firmly and allow complete drying of the leather as instructed by the glue.
Q: What is meant by the grain side of leather?
A: The grain side is the outer surface of the leather that has the natural texture and pattern of the hide. Usually, for gluing leather, the flesh side is glued together, but knowing the grain side helps choose the right glue and technique.
References
-
Reddit Leathercraft Community: What is the best glue to use on leather? – Discusses popular adhesives like Eco Flo Leather Weld and Fiebing’s Leathercraft Cement.
-
YouTube Guide: Gluing Leather – Tips & Tricks – A step-by-step video tutorial on gluing leather with tools and examples.
-
Steel Horse Leather Blog: Gluing Leather: The Basics You Need To Know – Offers practical advice on applying glue for strong bonds.
-
International Leather Club: The Best Leather Glue Adhesives & When to Use Them – Highlights top adhesives like Tandy Leather Eco-Flo Leather Weld.
-
Tandy Leather Blog: Tandy Skills: Bonding Leather Tutorial – Explains various bonding methods, including water-based adhesives and cements.


