


Resin, a raw material, is used in several creative apothecary items such as drip candles, jewelry, or intricately designed home decor, alongside construction and other industrial work. Gluing smooth resin pieces of art works together is very tedious and challenging to deal with owing to their non-porous surfaces, adjacent pieces needing to be held or glued together firmly, and moving/stationary parts needing to be not only stuck together in a fixed position but glued with a strong adhesive. Imagine doing delicate polymer sculpting as a hobby versus being professionally employed to do precision assembly. Along with the right glue, prepping surfaces, achieving a seamless bond, and picking the adhesive resin surface art requires the proper ways and tools to be tackled, which will then make the crafter and recollection with resin bonding projects simple. Your confidence will be boosted in dealing with art after reading this very article and absorbing its contents all the while aiming to solve the puzzles of resin adhesion.
What is the Best Glue to Glue Resin?
The most effective glue that resumes the bonding of resin is epoxy adhesive and can glue anything ranging from metals, glass, wooden surfaces, or even other resins. Designed with a specific goal in mind, epoxy realizes tight bonds within and even between resin surfaces along with resisting damage from vapors, heat, chemicals, and other solvents long time off aging surfaces making epoxy such an attractive option. For super glue, or cyanoacrylate glue as it’s known, smaller repairs and crafting are its strong points, although it may not be as durable as epoxy. Ensure the adhesive is designated for resin application to achieve the best results.
Understanding the Right Adhesive for Resin
As with any material, there is a specific adhesive for resin. The project will define its requirements, whether it will be strength, flexibility, environmental resistance and the like. Notably, epoxy adhesives are accepted to be the best option when it comes to bonding resins due to their structural strength which is remarkable. It consists of a resin and a hardener that undergoes a chemical reaction upon mixing and forms a strong, enduring bond. In addition, epoxy’s reliability for outdoor usage is second to none because it can endure UV exposed humid environments, and extreme temperatures while retaining bond strength.
For the less demanding tasks of quick fixes and small crafts, cyanoacrylate glue is the go-to. It’s extremely fast when setting and provides a strong initial bond, but it isn’t as dependable over lengthy periods of time, especially when subjected to environmental factors. They also become brittle with age, which is problematic for flexible or stressed applications needing durability.
Polyurethane adhesives are another specialized option that would be ideal for projects supporting porous materials or surfaces with moisture due to their excellent waterproofing capabilities and flexibility. As with other adhesives, the ion of polyurethanes also requires a compatibility check with the type of resin being used from a synthetic polymer mixture. Also check the performance in regards to curing time, bond strength, and resistance to the environmental conditions of the project.
Super Glue vs. Epoxy: Which to Choose?
When it comes to putting together super glue vs epoxy, adhesive properties must be thoroughly understood. The strong adhesion and ease of use makes super glue popular among all users as it bonds instantly and sets without a hassle. It is best suied for precise fixes that involve very small parts of non-porous materials, such as glass, metal, and ceramics. Despite its simplicity in use, it cannot stand poor resistance to high temperatures and environmental stresses.
Products Used for Gluing Resin Together
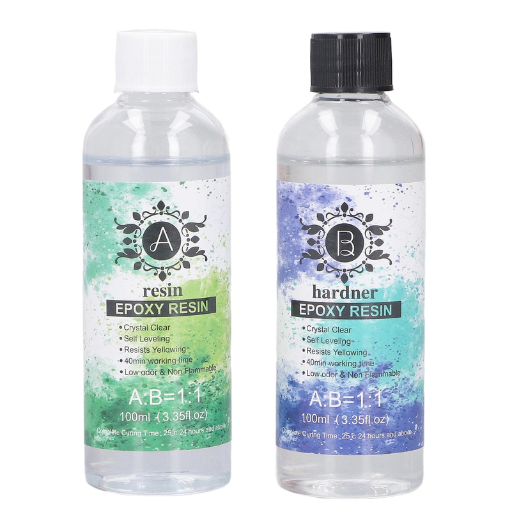
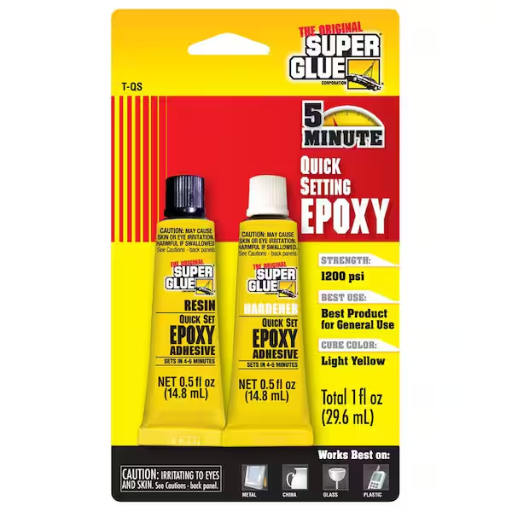
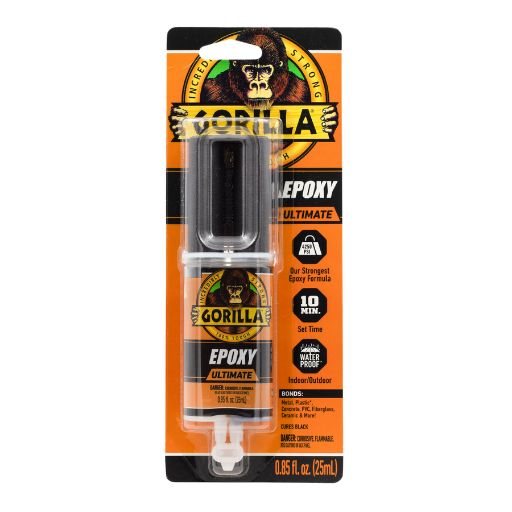
When using resin, fastening it using the right type of adhesive will guarantee a reliable bond. Among the most effective options available are good quality epoxy adhesives specially made to stick on resin surfaces. Loctite Epoxy Plastic Bonder and Devcon 2-Ton Epoxy are exceptional to chemically reinforced stainless steel which is subject to stress and mechanical pressure for prolonged periods of time. For applications that need high speed curing, Gorilla Epoxy is a dependable option because it delivers in minutes.
Another group of adhesives that is commonly used for bonding resins is cyanoacrylate glues, otherwise known as super glues. Smaller repairs and more delicate applications are suited for Starbond Super Glue, as the brand offers good-quality products. However, super glue is brittle and best suited for low-stress environments.
For more specific applications with flexible or rubberized resin, urethane-based adhesives such as 3M Scotch-Weld Urethane Adhesive DP620NS are far more elastic and have greater adhesive strength. Manufacturer instructions must be strictly followed for powerful results. This is especially true for the delicate balance of resin composition and curing conditions.
How to Glue Resin Prints Effectively?
- Ensure Proper Cleaning
Before any gluing is done to your resin prints, remember to clean the surfaces well. Getting rid of dust, oils, and uncured resin is easy with Isopropyl alcohol (IPA) at a concentration of 90% or above. IPA in this concentration evaporates on its own. Make sure to wait until all the bombs surfaces are dry before proceeding. Leaving any residues will weaken adhesion.
- Select the Appropriate Adhesive
Make sure to choose an adhesive that fits with resin materials. Most experts in the field recommend epoxy adhesives due to their strength and durability for resin prints which are structural or load bearing. If the pieces you adhered together are clear or translucent, then use UV curable adhesive, as it makes invisible bond UV light when cured properly and provides clear adhesives.
- Sand and Roughen the Bonding Surfaces
For bonded surfaces, light sanding is preferred. This can be accomplished with 220 to 400 grit sandpaper. With this method, the surface area, and the mechanical grip of the adhesive increases. To prevent contamination, any sanding dust must be removed using IPA.
- Apply Adhesive Evenly
Across the bonding surfaces, the adhesive must be applied uniformly with a precision nozzle or an applicator. When bonding is applied, it’s imperative to take care not to exceed a particular threshold since too much can lead to uneven bonding, or residue. A controlled UV adhesive layer has to be applied to retain the ability for the light to penetrate sufficiently for optimal exposure.
- Align and Clamp the Pieces
Standard operating procedures must be adhered to when assembling the parts to ensure effective alignment. To maintain smooth alignment and uniform pressure during curing, use clamps, rubber bands, or custom jigs. Proper clamping practices guarantee no movement occurs during adhesive drying providing perfect surfaces for bonding.
- Cure According to Adhesive Specifications
Allow the bond to cure as per the manufacturer’s recommendations. In the case of epoxy adhesives, full strength is attained after several hours. UV adhesives cure in seconds to minutes, but the full extent depends on the light’s intensity and wavelength.
- Conduct a Strength Check Post-Curing
Conduct a cohesive strength examination after all parts have fully set. Check the bond by gently manipulating the assembly to determine if there is movement. For applications with defined motion envelopes bearing precision tolerances, this step is vital.
- Finish and Polish
Sanding is required to any unwanted adhesives or seams that exceed the defined smooth finish. As an aesthetic touch, a layer of clear resin or polish can be evenly applied to enhance the surface of the print outside layer enhancing the overall appearance.
When these steps are performed in succession, the result will be dependable, lasting bonds in separated rigid sections of resin prints all the while upholding professional standards of level precision, structural stability, and clean edges.
Preparing Surfaces for a Strong Bond
For your reasons, don’t forget that the surface preparation is critical for ensuring the ease of working with resin prints. In this case, start with thorough cleaning and remove anything that can interfere with adhesion like dust, grease, or residual resin. IPA is useful for cleaning resin surfaces because it gets rid of the contaminants and is Isopropyl alcohol(IPA) very useful as well. After surfaces are cleaned, some micro-textures by sanding will be very helpful. Using fine-grit sandpaper to sand the bonding areas will work great, especially if you use 220-400 grit sandpaper. In addition, clean the surfaces again with IPA post sanding to get rid of any residue from sand blasters.
All surfaces should be thoroughly dry before any adhesive is placed on top for better and effective bond separation. Any contaminated moisture or uncured resin can greatly affect the adhesion and curing processes. An additional consideration is where clear or translucent resin is being bonded, UV curable adhesives may be used but check for compatibility with the resin type. Correctly preparing surfaces contributes to efficiently engineered bonds to withstand high forces and compromising conditions when dealing with intricate or load bearing parts.
Common Mistakes to Avoid When Gluing Resin
- Insufficient Surface Cleaning
One of the most frequent errors is neglecting proper cleaning of the surfaces to be bonded. Even domestic traces of dust, oil, or grease will limit adhesion. Remove all residue with isopropyl alcohol or other degreasers before proceeding with the rest of the steps.
- Over-application of Adhesive
An excessive amount of adhesive does not increase the bond and may result uneven curing, excess squeeze-out, or reduced structural integrity. Use the right amount of adhesive as advised by the manufacturer for best results.
- Failure to Test Compatibility
Not all adhesives are compatible with each resin due to the differing chemical compositions of resin types. Not assessing small samples for compatibility poses a risk of unattractive discoloration, partial bonding, or damaging the surface of the resin.
- Skipping Surface Roughening
For smooth resin surfaces, failing to roughen or sand the surface is a common oversight. A light abrasion, such as using fine-grit sandpaper, increases adhesion through the creation of micro-porosities and lends more grip for increased effectiveness.
- Ignoring Curing Times and Conditions
Overly stressing or neglecting the surrounding air temperature and humidity when curing can hinder an adhesive’s performance. The workspace where the adhesive is applied should always be conditioned to suit the environment required alongside the adhesive’s curing time.
Working with resins, knowing and avoiding these highlighted errors makes it achievable to ensure maintenance of a strong professional quality bond.
How to Fill Gaps When Gluing Resin Together?
Gaps in resin models can achieved with careful and precise steps to ensure a flawless finish. Follow these steps:
- Prepare the Surface: Ensure the model’s surfaces are cleaned off from any dirt or grease. This includes thoroughly washing the pieces and ensuring all oil, grease, and other residue that may schnook upon the adhesive is scrubbed off and is no longer present.
- Choose the Right Filler: Picking an epoxy putty or two part resin fragments is highly suggested seeing as they have high bonding culmination with resin and garner a durable finish afterwards.
- Apply the Filler: Preparation of putty should only be done as stated onto the packet, and the fragments shoould include the resin.
- Smooth the Filler: Sculpturing tools can be put in good use, as well as fingers, specifically the dipped in water ones.
- Allow to Cure: Follow the terms used during the filler period and heed the words from the manufacturer’s instructions.
- Sand and Finish: In essence, slow and light strokes whilst using fine-grained sandpaper after the cured state is obtained lead to an unmatched finesse on the surface of paint or other desired detailed enhancements.
Ensuring the appropriate filler is selected makes all the difference in the world as well as strongly enhances the semblance of the finalized figurine.
Using Epoxy Gel for Filling Gaps
Due to its robust adhesive qualities and outstanding durability, epoxy gel is utilized widely for gap modeling and repair work. As with all procedures, the initial step is surface prep; in this case there is extra cleaning needed to eliminate dust, grease, and loose particles. This step is critical to proper adhesion and preventing contaminants from damaging the bond. In most cases epoxy gel consists of two parts: a resin and hardener that require precise proportions to be mixed per the manufacturer’s directives. An adequate blend is critical considering that a wrong ratio will impede the curing phase and repair strength.
Using a putty knife, mix the epoxy gel and begin application to specific locations while scrapping the knife on multiple areas to ensure mixture attachment and use pressing until filled perfectly. Due to its thick non-sagging nature, epoxy gel is ideal with vertical and high placements where liquid adhesives can’t reach effectively. The gel can be easily manipulated to cure under less extensive sanding while still correcting final positioning. This type of epoxy is known for extra working time depending on temperature and product formulation enabling flexible application before sticking.
Like any other material, curing times can change from a couple of hours to a single day for full hardness based on weather-related issues like temperature or humidity. With a complete cure, epoxy gel forms a very tough, abrasion resistant surface which is capable of sanding, painting or further alteration as desired. It is ideal for high-stress applications or humid areas due to exceptional tensile strength, long-lasting results, and waterproof capabilities.
Techniques for Smoothing Surfaces Together
Working with epoxy and other similar materials requires achieving a smooth and seamless surface. To start, surfaces should be cleaned, dried, and checked for oil, dust, and debris that may limit adhesion on epoxy application. Lightly sanding the surface with a fine sandpaper 180-220 grit enhances texture which promotes interlocking and bonding.
After mixing, spread the epoxy with a notched trowel or flat applicator to achieve an even application throughout the surface area. To fix air bubbles that may ruin the surface finish, employ a small flame like that of a propane torch or gradually heat gun at a safe distance to stave off scorching. Right after application, check for gaps using clamps, weights and other tools to appropriately secure the position during curing.
Additional leveling can be performed after curing with wet sanding and other techniques. Wet the surface to decrease dust while alongside friction using sandpaper lower than 400 grit. Polish the surface afterward for splendid shine. When performed accurately, paying attention along all the instructions along with the required elements specifications, these techniques can provide professional and lasting results.
How to Bond Resin Parts Together?

As with any bonding task, clean resin parts thoroughly first to avoid dust and grease on the surface. Adherence will best with isopropyl alcohol as a solvent. Use 220 grit’s sandpaper to roughen the surface to improve adhesion. Apply epoxy resin or cyanoacrylate glue for resin materials, with the main application area spanning part boundaries evenly. Clap or tape both sides to avoid movement, checking adhesion and alignment. Complete the bond by waiting fully for rest of the epoxy’s curing time as stated by manufacturer with proper conditions. Bond reliability primarily relies on how well the joint surfaces were prepared and the right adhesive used.
Choosing the Right Glue for Resin Parts
Choosing the proper adhesive for binding resin parts requires that one understands the material properties alongside the functionalities of the adhesive. For example, epoxy adhesives are preferred because of their unique strength and compatibility with a myriad of resins. Moreover, they form strong chemical bonds and considerable adhesive bond separation weathering resistance to moisture, heat, impact, and other environmental factors. Cyanoacrylate adhesives, also known as super glue, work well for small repairs or tasks that need to be done quickly. These types of adhesives set very quickly and are advantageous for use on non-porous surfaces, although they can be inflexible under stress. For some other particular purposes, UV- curing adhesives allow control of when to bond and only set when ultraviolet light is present. The grade and type of resin used, as well as the expected load and the environment, are very important in choosing the glue if optimal performance and longevity is needed. The characteristics of adhesives are best captured in the product specification. Application guidelines also help ensure that the characteristics of the adhesive meet the project’s objectives.
Techniques for Aligning and Holding Pieces Together
Components must be properly-aligned and securely held during the bonding process for the structure to be valid and enduring. One of the recommended strategies is the use of clamping devices, for example, bar clamps or spring clamps, since they exert equal clamping force to the wholly bonded area. For small and complex designs, adjustable jigs or positioning fixtures are strongly suggested because they hold alignment during curing and allow for variable alignment. Furthermore, vacuum or suction devices are very frequently used in the industry, particularly for flat or light materials, because of their holding and precision capabilities. Other new products include laser clamps, which provide exact positioning with micrometer precision for high-tolerance work. No matter what the method, adhesive bonds can only be relied on when pressure and position verification is provided prior to curing.
Reference Sources
-
The effect of resin bonding on long-term success of high-strength ceramics
This study explores the impact of resin bonding on the durability and success of high-strength ceramics. It emphasizes the benefits of composite resins and self-adhesive resins for enhanced outcomes. -
The clinical performance of adhesives
This research evaluates the performance of adhesive resins, comparing different formulations and their clinical applications over extended periods. -
Durability of bonds and clinical success of adhesive restorations
Focused on resin-dentin bond strength, this study examines the longevity of adhesive interfaces and their clinical implications.
Frequently Asked Questions (FAQs)
Q: How can I learn how to glue resin together with epoxy?
A: To learn how to glue resin together with epoxy, you should start by gathering the appropriate materials, including epoxy glue, a mixing container, and tools for application. Follow the manufacturer’s instructions for mixing and applying the epoxy to bond the resin pieces together effectively.
Q: What is the best way to glue resin pieces together?
A: The best way to glue resin pieces together is to use epoxy glue, as it provides a strong bond and is suitable for various surfaces. Ensure that the surfaces are clean and dry before applying the glue for optimal adhesion.
Q: Can I use super glue to bond resin pieces together?
A: Yes, you can use super glue, specifically gel superglue, to bond resin pieces together. However, for larger pieces or when filling gaps, epoxy glue is often recommended for a more durable bond.
Q: What glue should I use on resin models?
A: The best glue to use on resin models is epoxy glue due to its strong bond and ability to fill gaps. Alternatively, loctite super glue or gel superglue can also be effective for smaller or intricate parts.
Q: Is it possible to glue two pieces of resin together without epoxy?
A: While it is possible to glue two pieces of resin together using superglue or plastic glue, epoxy is generally preferred for its superior strength and durability in bonding resin materials.
Q: What should I avoid when gluing resin pieces together?
A: You should avoid using water-based glues or any adhesives that may not be compatible with resin, as they can weaken the bond. Additionally, don’t use super glue on uneven surfaces, as it may not adhere properly.
Q: How do I handle uneven surfaces when gluing resin?
A: When gluing uneven surfaces, consider using a gap-filling epoxy glue that can accommodate the irregularities and provide a strong bond. Ensure that the surfaces are as clean as possible to improve adhesion.
Q: Can I use modeling putty to fill gaps in resin before gluing?
A: Yes, modeling putty can be used to fill gaps in resin parts before gluing them together. This can help create a smoother surface for the epoxy or superglue to bond effectively.


