


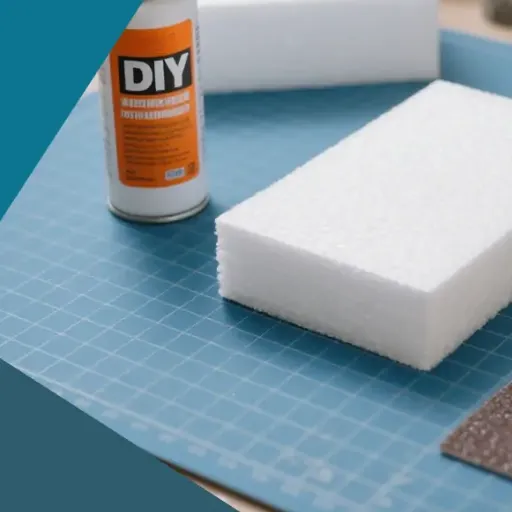
Properly gluing foam and Styrofoam for crafts, DIY works, or repairs will ensure a clean, sturdy, and professional effect. Still, given the various types of adhesives available, a wrong application may result in nasty failures, material damages, or poor bonds. This guide sets out to de-mystify the process of gluing by walking you through the best adhesives for foam and Styrofoam, their appropriate uses, and how to get the best possible bonds. Be it a school project, creating decorative pieces, or intricate designs, this article will lead you to the right choice for a successful finished product. Keep reading; it is about to get very rewarding with those adhesives that make all the difference between a flimsy hold and a flawless finish!
Introduction to Gluing Styrofoam
The Challenges in Understanding Styrofoam
Though ever so lightweight, the application of glue on Styrofoam creates a unique situation. This porous structure may make it difficult to apply adhesion, as many of the adhesives have their own difficulty sticking to the surface of Styrofoam. The material is also susceptible to attack from chemicals found in glues that would, in their effect, melt or warp the Styrofoam.
Another point to consider is the delicate structure of the Styrofoam. It can be crushed, broken, or degraded by way of excess pressure or improper adhesion usage. This frailty calls for a careful approach to handle and in turn employ adhesives that will not cause harm to Styrofoam.
For the best remedy, keep in mind that these adhesives meant for porous and soft substances can ensure that the bond sets both strong and long without compromising the integrity of Styrofoam. Getting to understand what makes the material challenging opens up more conscious decisions leading to good results for any kind of work both basic and complex.
The Importance of Choosing the Right Adhesive
Selecting the correct adhesive is crucial to ensure the durability and effectiveness of the project involving Styrofoam material. Not all adhesives work well with Styrofoam because its chemical nature might get altered by certain types of solvents. Using an inappropriate adhesive weakens the structure of the material and causes either poor bonding or permanent damage to the material.
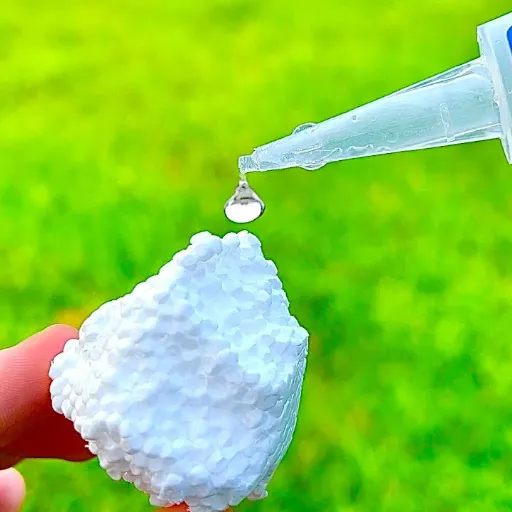
💡 Pro Tip: Water-based adhesives or solvent-free types of glues are usually considered safest for Styrofoam since they carry the least risk of chemical interaction. Testing a small spot of glue on an inconspicuous area before proceeding with full application works as a further check for compatibility.
Choosing adhesives wisely promotes not only the success of your projects but also a greater appreciation of the fragile nature of Styrofoam. Sticking to the safe and effective choice will lead you to professional results and keep the material safe, increasing its useful life. Follow the directions for use that come with the adhesive to bond materials successfully.
Overview of Common Uses for Glued Styrofoam
Due to its light weight, insulative, and multipurpose properties, glued Styrofoam finds numerous applications. It is employed most commonly for craft and art projects. Less formal applications may run from a school project to some décor items or complex models, wherein pieces of Styrofoam are glued together in forming complex shapes and structures. It is rather easy to create good working conditions for any artist to cut, shape, and all secure whereby they wish.
- 🎨Craft and Art Projects: School projects, décor items, and complex models
- 📦Packing and Shipping: Creating protective barriers for fragile items during transit
- 🏠Building Insulation: Commercial and residential markets for walls, ceilings, and floors
The other major use of the material is insulation in building constructions for the commercial and residential markets. Panels of glued Styrofoam can be well bonded to cover surfaces like walls, ceilings, or floors to improve heat retention or to secure from entry of cold air. Thanks to moisture resistance of this insulation, it has high insulation properties, making it a very critical material in energy conservation building design. These practical facilities give a clear view of the extensive and important applications of glued Styrofoam in various fields and undertakings.
Types of Adhesives for Styrofoam

Spray Adhesives: Pros and Cons
For convenience in glueing styrofoam, spray adhesives are used due to their ease of application and quickness in setting. One of the main advantages of spray adhesives comes from their ability to coat a surface with a uniform thin layer, ensuring uniform bonding over larger sets of surfaces. They dry quickly, which decreases the time taken up by the project. So they produce a strong-yet-flexible register and are good for situations where Styrofoam needs to attach firmly to paper, cardboard, or fabric.
✅ Advantages
- Easy and quick application
- Uniform thin coating
- Fast drying time
- Strong yet flexible bond
- Good for large surface areas
❌ Disadvantages
- Release noxious fumes
- Require good ventilation
- Some types can dissolve Styrofoam
- Need protective precautions
Despite these, the use of spray adhesives is encouraged because of the nature of the application. If followed with due diligence, one should be able to get very strong adhesion properties for domestic and industrial applications. For best results, ensure that both surfaces are clean and dry. These precautions will truly enhance the working of spray adhesives and minimize their shortcomings.
Hot Glue Vs. Cold Glue – Which Glue is Superior?
In cases where you have to weigh your two choices, factors such as the materials being used, required bond strength, and environmental conditions come into play. Hot glue fixes provide temporary bonds, while cold glue is used for long-term holding. Therefore, the glue you want to use depends on your project and how you want it to turn out.
Specialty Adhesives for Polystyrene Foam
Polystyrene foams are well known for packaging, insulation, and crafting, requiring adhesives that would hold them securely without ruining the substance. In terms of selecting the type of glue for the foam, one has to be sure that the glue is compatible with the light and porous structure of the foam because most glues can either melt or cause damage to the surface.
Recommended Specialty Adhesives:
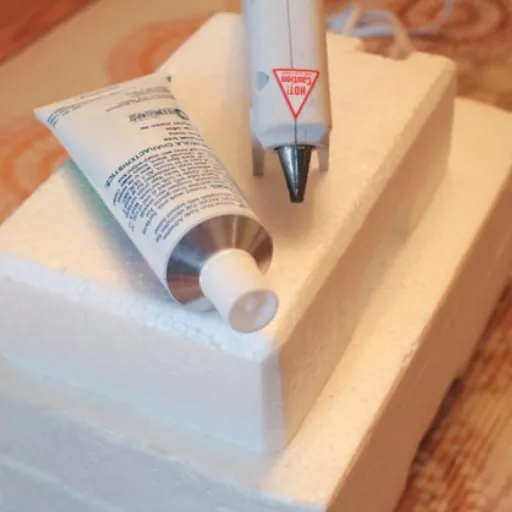
- Hot Glue: Best for short-term applications with careful temperature control
- Spray Glues: Ideal for larger surface areas with thin, even coating
- Solvent-Free Adhesives: Specifically formulated for polystyrene, providing permanent bonding
For more permanent bonding, it is best to use solvent-free adhesives, specifically formulated for polystyrene. They give a solid grip without compromising thick foam integrity. Always test the adhesive on a small area to ensure it is compatible with the foam, and adhere to the manufacturer’s instructions for best results.
Step-by-Step Guide to Gluing Styrofoam Together
Preparing the Styrofoam Surfaces
For a strong bond between pieces of Styrofoam, it is very important to prepare the surfaces properly before putting on any adhesive. Start by gently wiping with a soft cloth or brushing away dust and debris from the surfaces to prevent the interference of adhesives from sticking well. Make sure the Styrofoam is dry, as moisture could weaken the bond.
🔧 Surface Preparation Steps:
- Clean surfaces with a soft cloth to remove dust and debris
- Ensure Styrofoam is completely dry
- Lightly roughen surface with fine sandpaper for better adhesion
- Apply minimal pressure to avoid bruising the material
- Wipe off all dust with a clean, dry cloth
- Test-fit pieces before applying adhesive
Before setting the glue, try to incorporate the styrofoam pieces together to check that they fit well; mark any positions that may help in placing during the gluing. Preparing the surfaces will not only help in making the bond stronger but will also create an easy application with a lasting result when the materials are joined together. When working with materials, always follow safe practices.
Applying the Adhesive Correctly
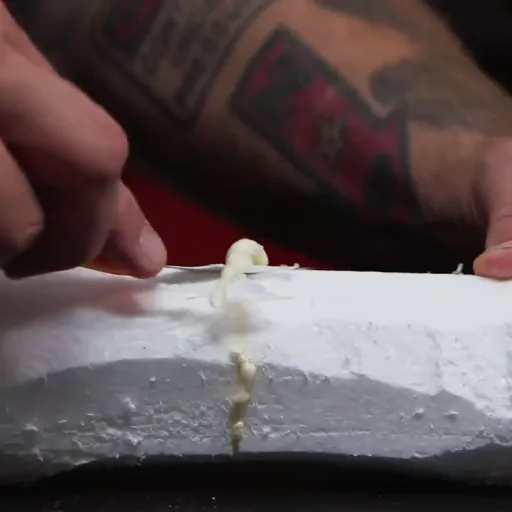
Begin by making sure the surfaces you are going to bond are prepared and cleaned as mentioned in the previous section. It is very crucial that you properly prepare the surfaces in order to have a very secure and durable bond. Once this step is complete, an even application of the adhesive should be made on one side of the material. Some adhesives, however, may need to be applied on both surfaces; thus it is always best to follow the usage instructions that come with your adhesive.
Once the adhesive has been applied, carefully align the materials as per the markings or checks made while preparing the materials. Press the pieces firmly and evenly, ensuring no gaps or air bubbles form between their surfaces. This makes the contact better and ensures stronger adhesion. If clamping is needed, clamp them as directed by the specified curing or drying time of your adhesive.
After this, the adhesive gets a chance to cure thoroughly. Depending on your adhesive, setting and curing times may be minutes to hours, so always check the specific instructions. During this time, do not allow movement or stress to compromise the joined materials, or the bond strength may suffer. After curing, inspect the join for sufficiency in strength and with regard to your project’s requirements.
Securing the Bond: Clamping Techniques
Clamping proves to be a very important process to yield strong and dependable adhesion when working with adhesives. Clamping primarily refers to locking the materials securely in place while the adhesive sets or cures. The pressure must never be excessive to allow the adhesive to adhere to the surfaces evenly while ensuring no gaps form between them, which could cause the adhesive to fail over time.
Small Projects
- Manual hand clamps
- Simple weights
- Rubber bands
- Spring clamps
Large Projects
- Specialized clamps
- Distributed weight systems
- Pneumatic clamps
- Custom jigs
Last but not least, the clamps should remain on for the entire curing time stated by the manufacturer. Removing the clamps prematurely can jeopardize the bond before it gains proper setting, thus anchoring it during this time from shifting. Following these steps will certainly guarantee the longevity of the project.
Practical Tips for Successful Bonding
Thin Adhesive Layers
This is perhaps the most important technique to guarantee adhesion with strength and durability. Thin, uniform adhesive layers allow maximum contact of the substance forming the bond with the surfaces to be joined. Uniform curing is promoted and the areas that might become weaker with time, such as the ones where air bubbles are entrapped, are diminished. Therefore, very thin adhesive layers are preferred, which do not provide excess adhesive that requires cleaning after setting.
💡 Remember: Less is more when it comes to adhesive application. A thin, even layer outperforms thick, uneven coverage every time!
Use a suitable applicator, such as a brush or spreader, to assure a thin level of adhesive when this operation is performed. Clean, dry, and make sure that the surface is free of any kind of oils or debris; apply a drop of adhesive to the surface and spread it out thinly and evenly; press the surfaces firmly during bonding to maintain consistent contact so that adhesive will spread evenly over the joint surface.
Finally, always follow manufacturer’s instructions with respect to application techniques and curing times; too much adhesive, however, may cause uneven bonding and cause a lengthy curing time. Thin layers will keep your workflow neat and clean, eventually improving the reliability of your finishes with a professional touch, making your project sturdy and lasting.
Application Ventilation Concerns
It is of utmost importance that proper ventilation exist during adhesive application both to prevent hazards and to obtain quality results. Most adhesives emit fumes that pose hazards to health when inhaled, in that they can cause irritation, dizziness, and, in cases of lingering exposure, serious ailments. Proper ventilation in a workplace prevents fume build-up, allowing one to work safely and effectively.
⚠️ Safety Measures for Proper Ventilation:
- Work outdoors or in well-ventilated areas whenever possible
- Open windows and doors for cross-ventilation
- Use exhaust fans to remove fumes from work area
- Wear chemical vapor-rated masks or respirators in confined spaces
- Take frequent breaks in fresh air
- Never work in completely enclosed spaces
Lastly, the manufacturer’s directions regarding any specific ventilation needs should be taken into consideration. Certain adhesives may require special precautions to be considered, like working under a fume hood or limiting usage to commercial environments only. Proper observance of these instructions and prioritization of worksite ventilation assures not only safety but also synergizes with the adhesion work for better and more reliable results.
Reinforcing Joints for Durability
Combine proper material selection with application techniques when reinforcing joints for durability. First, select adhesives or bonding agents that are specifically meant for use with the materials in question, whether wood, metal, or plastic. Choose those with high tensile strength that will not withstand environmental factors such as moisture, temperature changes, and UV exposure. The proper adhesive guarantees that the bond will remain intact for a very long time.
Preparation is an important step in reinforcing joints. Clean all surfaces with grit, grease, or other potential contaminants that can sabotage the bond. For very smooth surfaces especially slippery ones, sanding can also be helpful by providing an adhesive texture. After the whole preparation is complete, apply the adhesive following the adhesive manufacturer’s instructions evenly; make sure the surface is properly aligned before letting the glue cure, as misalignment lowers the strength of the joint.
🔨 Additional Reinforcement Methods:
- Mechanical Fasteners: Screws, nails, or clamps for added strength
- Structural Support: Brackets or gussets at stress points
- Edge Reinforcement: Extra attention to corners and high-stress areas
- Multi-layer Bonding: Multiple thin layers instead of one thick layer
For increased durability, mechanical methods can be used to reinforce the joint in addition to the adhesives. Screws, nails, or clamps will all add mechanical strength and help prevent any joint movement with time. Reinforce corners, edges, and high-stress points with brackets or gussets for more structural strength. An amalgamation of these forms of reinforcement will provide superior durability and longevity to the joints in a myriad of applications.
Conclusion and Key Takeaways
Summary of Best Practices for Gluing Styrofoam
🎯 Essential Best Practices
- Choose the Right Adhesive: Use foam-safe, solvent-free, or water-based glues
- Surface Preparation: Clean, dry, and lightly sand surfaces for optimal bonding
- Test First: Always test adhesive compatibility on a small, inconspicuous area
- Apply Thin Layers: Even, thin application prevents longer curing times and weak spots
- Proper Clamping: Use appropriate pressure without damaging the material
- Allow Full Curing: Follow manufacturer’s recommended drying times
There lies the secret for an additional strong and durable bond: the preparation. Fit or assemble the Styrofoam first; check for gaps or misalignments before applying any glue. If needed, edge sanding of Styrofoam pieces might be considered to make mated surfaces smoother. Apply glue thinly and evenly; an excessive application of glue means a longer curing time and may compromise bonding. Make sure to allow sufficient drying or curing time for adhesive as recommended by the selling manufacturer to warrant full strength.
If one wants to plan reinforcement debug, fix it away from the application for structure and security; use mechanical clamps to hold pieces together while the glue is curing. Further security can be provided by using brackets or gussets at stress points. If these steps are followed, the end result ought to be a strong bond appropriate for any number of uses-from arts and crafts to construction.
Additional Tips for Long-lasting Results
Consider these steps for ensuring long-lasting results. First, prepare everything correctly. Clean surfaces, rivers, and dust; oils can interfere with the adhesion. Light sanding acts as an excellent last step for optimal results, especially with smooth or nonporous materials.
Temperature and humidity conditions are the biggest factors affecting good adhesive performance. Apply the adhesive in a controlled environment with temperature and moisture within the range recommended. Extreme conditions would cause curing to be at best weak or incomplete when curing and ineffective in making a useable bond with time.
Be patient while the adhesive cures in the last stage of the process. During curing, any kind of movement or stress applied to the objects being bonded might weaken the bond if handled too soon. Following these tips will make for bonding results that withstand the test of time in various applications.
Inspiring Project Ideas Using Glued Styrofoam
🏗️ Architectural Models
Create lightweight prototypes and detailed architectural representations for students, architects, and hobbyists.
🎨 Decorative Arts
Design wall arts, sculptures, and themed centerpieces for events with personalized touches.
📦 Practical Storage
Build custom coolers, organizers, and storage solutions tailored to specific needs.
Lastly, joined pieces of Styrofoam can be molded into practical tools such as incooled storage boxes or DIY organizers. By way of example, a custom cooler can be constructed by layering Styrofoam panels and then gluing them in such a way as to resist any applied force. Considered from a crafting, functional, or rather creative standpoint, the world is your oyster when you develop a few ideas with glued Styrofoam.
Frequently Asked Questions (FAQ)
❓ What is the best way to glue two pieces of styrofoam together?
The best way to glue styrofoam is by using foam board glue or a construction adhesive formulated for foams. This will create a strong bond without melting the styrofoam. Another option is to use hot glue or super glue, but make sure that the glue is safe for styrofoam.
❓ Can I use white glue to bond styrofoam and polystyrene?
Yes, one can use white glue to bond styrofoam and polystyrene, but the drying time might be longer than usual for such glue. If an immediate bond is necessary, it is best to go for something heavier-duty, such as an epoxy or contact adhesive.
❓ How do I know how to glue styrofoam without damaging it?
To know how to glue styrofoam without damaging it, the adhesive has to be foam safe, such as 3M Super 77 spray adhesive or Loctite. Always work in a well-ventilated area and follow all instructions so as not to cause melting or damage.
❓ Is hot glue a good option for gluing two pieces of styrofoam together?
Hot glue can glue two pieces of styrofoam well, but it is to be cautioned against the use of hot glue at hot if it could melt the styrofoam. It is always better to use low-temp setting with least heating exposure.
❓ What type of adhesive works best for bonding large surfaces of styrofoam?
For bonding large surfaces of styrofoam, a foam board adhesive or a construction adhesive designed for foam is best. These adhesives provide a strong bond and are easy to apply with a caulking gun for larger areas.
❓ Can I use super glue to glue styrofoam and polystyrene foam together?
Super glue can bond styrofoam and polystyrene foam; however, it is not always best, as it may create a brittle bond. For a flexible and durable bond, consider foam-safe adhesives instead.
❓ How long does it take for glue to dry when bonding two pieces of styrofoam?
Glue drying time when bonding two pieces of styrofoam changes with adhesive type. Hot glue rubberizes almost instantly, while conventional adhesives require a longer time, around 24 hours, to reach full cure. Always refer to the manufacturer’s guidelines concerning drying times.
❓ What should I do if the glue is not bonding well?
Assuming glue is not bonding well, first make sure it is suitable for foam surfaces. Then ensure that the surfaces of the objects are clean-with no dust and oily residues. More glue can be used if necessary. Or try stronger alternatives, like epoxy or foam board adhesive.
References
- How to glue Styrofoam: Tips for Styrofoam and polystyrene – Loctite – A guide on using adhesives like Loctite Spray Adhesive Multi-Purpose for Styrofoam.
- How to glue large Styrofoam panels together – Reddit – A discussion on using contact cement or epoxy for gluing Styrofoam without melting it.
- How to Glue Styrofoam for Your Next Project – WikiHow – Step-by-step instructions for gluing Styrofoam, including tips for different shapes and adhesives.
- Glue that does not melt Styrofoam? – Reddit – Recommendations for adhesives like 3M Super 77 spray adhesive, PVA glue, and epoxy.
- How to glue/attach foam so it’s sturdy – Reddit – Tips on using Barge contact cement for strong and durable Styrofoam bonds.


